

Recently military institutions and veteran organisations have been marking a landmark in world history, the 75th anniversary of the Battle of El Alamein, as usual there has been much fanfare to celebrate this in the United Kingdom – it’s a definitive battle which for the first time gave the British and Commonwealth a glimmer of hope – this battle was to the British and Commonwealth forces what the Battle of Kursk was to the Russians. It’s a big deal.
South Africa played a key role in the Battle of El Alamein, in fact it was a battle on which much South African life was sacrificed on the crucible of war, after the fall of Tobruk South African honour was at stake and this battle went a long way to redeem it. However, as usual, there was a low-key reaction in South Africa marking this anniversary – it was very much contained to the odd South African Legion of military veterans branch and MOTH shell-hole to remember it.

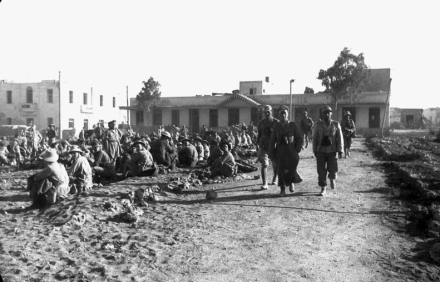
Original colour photo taken of a South African position in the North African theatre of operations in 1942 – note the bleak and hard landscape
To the older generation in South Africa, terms such as the ‘Knightsbridge Box’, the ‘Desert Fox’, the ‘Cauldron’ and the ‘Gazala Gallop’ were common knowledge, as were these words by General Montgomery “General Pienaar, tell your South African Division they have done well”, in fact these words were a sensation at the time and seen as a national redemption. But they are now lost completely to the new generation of South Africans.
So, lets give a little recognition to South African sacrifice in this tide turning battle, understand why it is so important and understand why this understated signal sent from General Bernard Montgomery to General Dan Pienaar meant so very much to the generation which came before us.
Prelude to The Battle of El Alamein
For the South Africans the 2nd battle of El Alamein needs to be looked in context of these events – The Battle of Sidi Rezegh, the Battle of Gazala, the Surrender of Tobruk and the 1st Battle of El Alamein.
The Battle of Sidi Rezegh; (see Sidi Rezegh – South African blood helps turn the tide in North Africa), in November 1941 saw the 1st South African Division’s 5th Brigade fight themselves down, literally to the last man in an outstanding degree of bravery, their sacrifice – to lessen the impact of Rommel’s drive and help save the day for the British to fight another day.
For the 1st South African Division this outstanding action in the field was added to by The Battle of Gazala; By March 1942 the 1st South African Division was deployed along the Gazala line (they made up the Northern sector). The Gazala line was to the west of Tobruk, the task of defending Tobruk was also left up the South Africans, this time the 2nd South African Infantry Division under General Klopper.
Energised and re-armed General Erwin Rommel – the ‘Desert Fox’, advanced on Egypt (and Tobruk) in May 1942, their mission was to take the Suez Canal and cut Britain from her vast empire (and resources) in the Middle East, India and the Far East.

General Erwin Rommel (centre) with his staff
Rommel’s armoured advance with at least 10,000 vehicles hit the Allied’s ‘Gazala line’ and then headed south, to make a long sweeping right-hook around the southern end of the line. They swept past the British 7th Armoured Division in the south and headed back north behind the Gazala line. The Allied forces reeled and re-deployed catching up with Rommel’s forces in an area known as “The Cauldron” situated between Bir Hakeim and Tobruk. Three days of armoured fighting ensued in the area of ‘the Cauldron’ and Rommel applied pressure in ‘the Cauldron’ ultimately destroying the Allied defenders.
Rommel’s Axis forces then continued to push east to Egypt and forced the British Guards Brigade to withdraw from the Knightsbridge Box on the Gazala Line back to the Tobruk perimeter. Now on the back-foot, on the 14th June, the British command authorised the withdraw of all units from the Gazala line, and thus began the ‘Gazala Gallop,’ a very hasty retreat.
The Gazala Gallop; The 1st South African Division was ordered by British Command to withdraw along the coastal road back towards Tobruk. They withdrew to series of defensive boxes and actions at Williams Post, Best Post, “Point 187,” Commonwealth Keep and then Acroma. The 21st and 15th Panzer attacks forced the 1st SA Division to fight a rearguard action and to withdraw through each of the respective boxes. Chased by Rommel’s tanks and driving east, the 1st South African division was now spread out between the original Gazala defences and Tobruk trying to make their way east.
By 15 June 1942, the British and Commonwealth forces had started the ‘Gazala Gallop’ in earnest (sarcastically referred because of the rapid nature of the retreat) and withdrew to a new defensive line – set up further east on the Egyptian border at an insignificant railway siding called El Alamein. This was to be the ‘Last Stand’ by the British and Commonwealth Forces, behind El Alamein lay Rommel’s prize – Egypt. However this left Tobruk, and the 2nd South African Division defending it isolated and highly vulnerable to Rommel’s advance.
The Fall of Tobruk; It should have come as no surprise that the South African 2nd Division defending Tobruk would eventually be overtaken by Rommel’s rapid advance, the defences were in a poor state when the South Africans were tasked with defending it and they were ‘on their own’ without air support given the rapid withdrawal of British and Commonwealth forces from the Gazala line. But this did not stop searing criticism from the British Command and especially Churchill who would go on to refer as South Africa’s capitulation at Tobruk as a ‘disgrace’ and his ‘lowest moment’ in the war. See “Defeat is one thing; Disgrace is another!” South Africa’s biggest capitulation of arms – Tobruk
General Erwin Rommel inspects South African and British POW after the fall of Tobruk
In a nutshell, Tobruk was the largest loss of arms in South African military history, Rommel ‘bagged’ 32,000 British and South African defenders, using a Axis force half the size of the defenders’ force and he took just one day to do it. The Fall of Tobruk opened Rommel to the Suez and therefore left Britain’s war and her entire empire in the balance. It also left the proud South African military command and fighting reputation in absolute shreds.
It would now be up to South Africa’s remaining division, the 1st SA Division, to recover South Africa’s pride – the opportunity would come in the Battle of El Alamein.
The 1st Battle of El Alamein
Having arrived back from the Gazala Line, the 1st South African division spent two weeks improving their defences at El Alamein in what was known as the “Alamein Box”.
The Battle of El Alamein would be fought over a simple railway siding on the Egyptian border, in the middle of ‘nowhere’. But it was more than a railway siding, it was the gateway to the Axis forces invasion of Egypt and of significant strategic importance, a loss at El Alamein for the British and Commonwealth forces would mean the loss of what Churchill referred to as the ‘second front’ – in effect it would have been the end of the British and commonwealth forces in the war – the outcome and future of the war (with future American involvement) would have looked very different should El Alamein have been lost – a lot depended on winning it.

A rare wartime original colour photo of El Alamein railway station, taken October1942. It looks somewhat dilapidated now.
For Hitler the invasion of Russia, now in full swing was more important, and the action in North Africa for the German ‘Afrika Korps’ had been to appease and assist their key ally – Italy and Mussolini’s African colonial ambitions and conquests. Although of lessor importance the North African campaign drew key resources, equipment – planes, tanks and personnel as well as critical leadership away from the Russian campaign to deal with an ambition to take Egypt and the Suez Canal, knock Britain out the war completely and support Italy’s ambitions. It was to a degree the ‘second front’ Hitler had wanted to avoid.
General Auchenlik – the British Commander of the 8th Army at the time then issued an order instructing all surplus personnel to be sent back to the Egyptian Delta for rest, re-supply and training, a moved which greatly displeased General Dan Pienaar.

General Dan Pienaar
The 1st South African Division, under General Dan Pienaar had been deployed with two brigades of infantry, each accompanied by a battery of artillery to protect the areas west and south of the El Alamein defensive box. Auchinlecks order effectively meant that Pienaar could only hold the box with one under-strength brigade.
It did not take long for Rommel to advance on the El Alamein ‘Box’, At 06:05am on the 30 June 1942 Axis transports were seen advancing to within 2,000 yards of the South African 3rd Brigade positions and they were engaged with machine and anti-tank gun fire by British units.
The South Africans were soon in the fight alongside their British and Commonwealth counter-parts and the Rand Light Infantry drove off German towed artillery, whilst the South African Air Force bombed Rommel’s supply columns. An hour later, by 07:30am the Germans had been halted and were pinned down by the South Africans, determined to avenge Gazala and the surrender of Tobruk.
For three days, 30 June to 3 July Brigadier Bobby Palmer’s 3 SA Brigade Group courageously and successfully halted the Afrika Korps’ continuous attacks on the parts of the El-Alamein Box held by the South Africans. He held a line some 10 km long with only 1 000 infantrymen.
Counter-attacks by the South Africans found them stretched into untenable positions and the British command resolved to remove the South Africans to the rear to rest them citing they had been under too much combat stress and should they capitulate, as had been the case with the 2nd SA Div at Tobruk, it would be a political nightmare. Both South African Divisions in the war would have been captured and it would surely spell the end of South Africa’s war effort and the Smuts government.
The intension was to replace them with an Australian division, however General Pienaar would have none of it, he famously stated to an American war correspondent “Here I stop, I’ve retreated far enough, whether we hold the damn thing or not!”
Mussolini had flown to a nearby enemy held airfield so as not to miss out on a triumphal Roman entry into Cairo. He had not anticipated a very defiant thin line of red-tabbed Springboks and other British and Commonwealth soldiers literally stopping him in his tracks.
The Axis advance had been stopped all along the Allied line of defence at El Alamein by the 27th July and a stalemate ensued giving the British time to make changes and prepare to go on the counter-attack, this was to be the upcoming decisive battle – the 2nd Battle of El Alamein.
A Change in British Command
Outraged by the conduct of the war in the Middle East, especially the loss on the Gazala line, the surrender of the Tobruk and the hasty ‘Gallop’ retreat, Churchill headed off to Egypt in August 1942 to make some sweeping changes to British Command. When adding the surrender of Singapore to the mix just previously to Tobruk, it was clear to Churchill that the British Empire needed to be saved and his direct intervention in command inevitable.
South Africa played a role in advising Churchill on changes to be made to Command and the entire strategy of the war going forward, in August 1942 General Smuts was requested to meet Churchill in Cairo, here they decided on a new war strategy.

Winston Churchill with Jan Smuts at the British Embassy in Cairo, 5 August 1942.
On the 5th August 1942, Winston Churchill even paid a surprise and informal visit to the South African Division. He remarked: ‘It is a long time since I was in South Africa.’ to a group of South Africans and one of the men humorously replied: ‘Yes Sir, you were in the bag then, weren’t you?’ (referring to Winston Churchill’s time spent as a Prisoner of War during the 2nd Anglo Boer War courtesy of the Boers).
General Auchenlik and his Eighth Army staff, were all given the boot (a little unfairly as Auchenlik had stabilised the Allied position after the First Battle of El Alamein). Churchill’s preferred replacement was initially not General Bernard Montgomery, he was Churchill’s second choice, General William Gott was appointed to head up the 8th Army. Unfortunately General Gott was killed in action on 7 August 1942 when his aircraft was shot down.
General Montgomery was duly appointed to lead the 8th Army, and a decisive and very popular decision that proved to be (despite a terse relationship between Montgomery and Churchill – and notwithstanding that the two of them were polar opposite in character).
The 2nd Battle of El Alamein
General ‘Monty’ Montgomery then set about on a massive troop and equipment build-up and extensive training and moral boosting speeches had the British forces ready. He knew the first part of the offensive would require breaching a massive German/Italian mine-field which separated the two forces, he also knew that the headlong offensive was 1st World War in thinking, only with the use of an incredible amount of armour – as such ‘attrition’ (a battle of casualties by numbers) would play a major factor and Monty needed a vast force to overcome it.

South African engineers training with mine detection equipment in North Africa. British and Commonwealth forces trained intensively in minefield clearance in preparation for the Second Battle of El Alamein.
In the interim South African engineers and sappers set themselves up training for the very large and very important mine clearing job to come.
Operation Lightfoot – Break-in

Start Line Deployments for the 2nd Battle of El Alamein
The 1st South African Division played a spearhead role on the opening of the 2nd Battle of El Alamein. It had to breach the German minefield which had been sown with more than half a million mines – with a dab of military humour this part of the 2nd Battle of El Alamein was called ‘Operation Lightfoot’. South African sappers were to play a significant role opening up the minefield to allow the Allied and South African forces to push through.
General Montgomery’s basic idea was that the Australians and Highlanders were to force a northern corridor through the Axis (German/Italian) minefields while the New Zealanders and South Africans were to do the same in the southern sector.
The 1st Infantry Division (South Africa), was tasked to attack on a two-brigade front to secure the southern end of Mieiriya Ridge. The Indian 4th and Northumbrian 50th Divisions were deployed to their south and to the north was the 2nd New Zealand Division.

A 25-pdr gun firing during the British night artillery barrage which opened Second Battle of El Alamein, 23 October 1942.
The South Africans were to attack towards the south-west with 2nd SA Infantry Brigade (under the command of Brig. W.H.E. Poole) on the right and the 3rd SA Infantry Brigade (under the Command of Brig. R. Palmer) on the left. The 1st SA Infantry Brigade was deployed further south and was responsible for creating an anti-tank screen to protect the left flank of the South African attack.
Operation Lightfoot started at 2140 on 23rd October 1942 with a five-hour artillery barrage fire plan, the start of which signified H-Hour for the infantry assault. General Pienaar had deployed each of the lead brigades, with on battalion leading for the first phase to the “red line” – after a pause of an hour and a quarter, the two trailing battalions would pass though to the final objective on Miteiriya Ridge.

Lucas Majozi DCM
The South African 1st and 2nd Field Force Brigades (FFB), as soon after the battle began, became pinned down in the German Axis forces minefield by intense German machine gun and artillery fire. The South African infantrymen suffered very severe casualties.
Throughout the night of 23 October, the stretcher-bearers worked under heavy enemy fire, tending to the wounded and evacuating them from the battlefield. Amongst these Black Native Military Corps (NMC) non-combatant medics rescuing their White combatant counterparts was Lucas Majozi who went on to win a DCM for gallantry. See “With bullets in his body he returned … into a veritable hell of machine gun fire”; Lucas Majozi DCM
By 08:00, the following morning on 24th October the South African objective, Miteiriya Ridge was finally secured, after a very long night of fighting and a very high rate of attrition by way of casualties.
The South African sacrifice in taking Miteiriya Ridge, spurred General Montgomery to send his now famous congratulatory signal on the 24th October 1942 to General Dan Pienaar acknowledging that the 1 SA Division had met all its objectives set for the Battle of Alamein.
Crumbling Operations
By the 25th October the Battle of El Alamein moved into the ‘crumbling actions/operations’ phase. British Command on the 26th October ordered the South African 1st Division to “side-step” north and occupy the area initially held by the New Zealand Division and the 9th Armoured Brigade.
The South Africans were now stretched on a wider front, between the Australians and 51st Division in the north and the Indian 4th Division on Ruweisat Ridge, with 5th SA Brigade on the right, 3rd SA Brigade on its left and 1st SA Brigade being pulled back as the divisional reserve.

El Alamein 1942: British infantry advances through the dust and smoke of the battle.
All in by the evening of 26 October (as from the H-Hour on the 23rd), the South Africans had suffered 600 casualties (the British had 2000 casualties as well as 1,000 Australians and 1000 New Zealanders).
Operation Supercharge – Break Out
By the 2nd November 1942, contrary to Hitler’s instructions – Rommel had started to withdraw. The final plan to destroy the Axis forces, code-named “Supercharge” was put into action. The 1st SA Division played no role in this phase of the operation – but the South African armoured cars attached to XXX Corps were actively involved in the attempted destruction and subsequent pursuit.
On the 4 November, after repeated attempts at breaking through the Axis lines – Lt-Col Reeves-Moore lead the South African armoured cars into the rear of the Axis positions, “….the eager children of any mechanized pursuit… scampered at dawn into the open desert beyond the mines and trenches and guns, to make their exuberant mischief amid the disintegrating enemy”.
They soon started causing the havoc for which they had been intended – A Sqn capturing two German 88 mm guns, two 105 mm guns, two 110mm guns, a Breda portee, six trucks and 130 prisoners; while B Sqn captured five trucks, a staff car, one 105 mm and one 150 mm gun and 100 prisoners within a matter of hours.

A German Panzer III tank crewman surrenders to an advancing Allied soldier during the Battle of El Alamein, 1942
While the South African armoured cars were dashing west, the remaining elements of 1st South African Division had moved further north and over the previous two nights had relieved the 51st Highland Division 51st Highland Division. During the night of 3/4 November, the last unit to move into its new position was the 1st Cape Town Highlanders who moved during a major artillery barrage in support of an attack by the 5th Indian Infantry Brigade. The regiment awoke on the 4th November to silence and the absence of gunfire, save for the sound of Allied vehicles advancing west in pursuit of the retreating enemy.
For the 1st South African Division, the war in North Africa had ended.
The loss of General Dan Pienaar
 The Division returned to South Africa and General Pienaar and eleven other officers boarded a South African Air Force (SAAF) Lockheed Lodestar on 17 December to fly the final command structure back to South Africa.
The SAAF aircraft stopped to re-fuel at Kisumu on the shores of Lake Victoria. It was reputed that General Pienaar was in a hurry to get going and this may have pushed the pilot into taking risks, on takeoff on 19 December, the aircraft plunged into the lake, killing all on board.
With that came the sad ending of the very popular General Dan Pienaar, he was described in an obituary in the Chicago Tribune as being acknowledged by all military authorities as “one of the best fighting leaders the British have found in this war”.
The End of the Beginning
After the 1st South African Infantry Division’s job was done in North Africa it was disbanded and the 6th South African Armoured Division was formed to continue with South Africa’s World War 2 contribution. The British Command, still relatively unhappy with the Tobruk incident initially wanted to side-line the 6th South African Armoured Division and allocated it just to go to Palestine – in what was really a side-show – for the rest of the war.

- Memorial to South Africans at El Alamein Commonwealth Cemetery
At this point it is actually Churchill who comes around to bat for the South Africans, despite his anger and lambasting of the South Africa military establishment as a ‘disgrace’ over Tobruk, it is Churchill (influenced by Jan Smuts) who insisted that the South African 6th Armoured Division join the main thrust of the war in Italy and not sit it out in Palestine.
The 6th South African Armoured Division then went on to serve in Italy with great gallantry and distinction – taking with it the recovered country pride so hard for by the 1st South African Division at Tobruk, to an even higher accolade.
The Battle of El Alamein plays such a significant in the outcome of World War 2, Winston Churchill once remarked; “before Alamein, we never had a victory – after Alamein we never had a defeat” and more famously that Alamein marked the ‘end of the beginning‘ of World War 2.
In Conclusion
That South Africa played such a critical part in this pivot moment of history is often overlooked, it’s not something most South Africans are even aware of and it really is something which needs to be redressed by the time the centenary of this battle comes around. Hopefully by this time it’s not confined to a couple of South African Legion branches and few MOTH shell-holes dotted around South Africa to remember it.
Lest we forget this Battle and path of sacrifice taken by some of the finest South Africans we have ever known, people to whom we as a nation owe a massive debt of gratitude. Also, it really is not for politicians to remember the war dead, it really isn’t their job and given the nature of politics to ask them to do so is to dishonour both the sacrifice and the dead. Let’s face it, the African National Congress (ANC) government are not up for it nor are they the proper people to do it in the first place (and to be honest nor were the old National Party government the right people either).
It is up to the veterans fraternity and each and every person that has served in a South African military uniform to carry this flame of remembrance on behalf of those who have come before them – as is the generally accepted practice in the UK, USA, Canada, Australia and New Zealand. When we as South Africans veterans snap out of our collective apathy and get that part together, sharing in our most honoured history and stand in a unified cause in our thousands, only then will we get our remembrance occasions aligned and honour these men and women properly.

Written and Researched by Peter Dickens. Extracts and references taken from The Military History Journal, Vol 9 No 2 – December 1992 ‘GENERAL PIENAAR, TELL YOUR SOUTH AFRICAN DIVISION THEY HAVE DONE WELL’ – General Montgomery; 24 October 1942. By A B Theunissen. Other references include The Imperial War Museum (with photo copyrights were shown), Wikipedia and a Biography of Jan Christian Smuts (1870-1950) By Beat Lenel.

My late uncle SSB 6th Div. Lt.Col. C E G. Papa Brits DSO & Bar was a well Loved soldier, when he died in 1963 buried Full Military Honours in Voortrekkerhoogte .
LikeLike
Informative report! May I ask if anyone is able to direct me to any information on the Rhodesian troops involved in WW2? Both my Grandfathers fought in North Africa, Italy and Burma. I would appreciate any leads. Thanks, Basil
LikeLike
Hi Basil, try this Rhodesian Military forum and ask the question https://www.facebook.com/groups/Rhomil/about/
LikeLike
My grandfather was in this battle. I have many of his photographs of the troops, terrain and mess area. There even was a Christmas menu of the officers and one for the troops.
LikeLike
My father was a member of the Cape Indian and Malay Corps and Served in the 8th Army during this desert campaign. He was trained and did land mine detection during this time. If you would be so kind to look thru your old photos to see if you have any photo’s of the Coloured soldiers that fought during these campaigns? I know they were not given arms and acted in auxiliary roles as drivers, cooks etc, but there were also those that were trained as Gunners.
Regards, Llewellyn Floris , son of Lance Corporal Fred (Ferdinand) Floris, 8th Army, Cape Indian and Malay Corps. He served from 1941 and was demobilised in 1945.
LikeLike
Pingback: “With bullets in his body he returned … into a veritable hell of machine gun fire”; Lucas Majozi DCM | The Observation Post
Pingback: ‘Severely wounded, he single-handedly attacked a machine gun nest and an anti-tank gun’; Quentin Smythe VC | The Observation Post
Pingback: Tainted “Military Heroes” vs. Real Military Heroes | The Observation Post
Pingback: Rommel’s aide-de-camp was a South African | The Observation Post
Pingback: ‘Carry On’ the South African Army – the story of Sid James | The Observation Post
As a child in the ‘50’s, I loved family get-togethers where we children would sit on the floor (seen and not heard) while my Uncle Norman Wareham would recall his exploits ‘Up North’ (as he described it) in the SSB with tales of tank battles, unexpected confrontations with German tanks and of Papa Brits. My Mum, Evelyn Lewis (Wareham) was a nurse on the Hospital Trains that transported the wounded from these battlefields when the Hospital ships arrived in Durban, to hospitals inland. She also told us about the sabotage committed by the Ossewa Brandwag on these trains and the suffering it caused the wounded. I now live in Canada and feel sad seeing the parades and Remembrance services held here, that are greatly supported by the general public, and I realize how much our South African men and women who fought in WWII, were given such little recognition by the Nationalist Government, though my Mum always put it down to the fact that many of them had been Nazi sympathizers. Thanks for the information you are sharing to draw attention to the pride South African’s should feel for the men and women who sacrificed so much to fight the scourge of the Nazi onslaught.
LikeLike