Boer War by the numbers!

The path to the South African War (1899-1902) i.e. Boer War 2 is often misunderstood – so let’s look at the actual military numbers and the mission creep. Very often on Boer War social media appreciation sites you hear this old myth “the British intended to invade the Boer Republics and built up their forces on the borders to do so”. This build-up of British invasion forces then prompts the Boers to make “a pre-emptive strike” to “take up forward defensive positions” on British territory. The Boers didn’t start the war see! They merely forestalled the inevitable warmonger, none other than the greedy British – get it?

Problem is “I don’t get it”, my training as an Economic Historian will always lead me to look at the statistics and the ‘cold facts’ to make comparisons and conclusions, my training as a military officer will also always lead me to the science of military doctrine in analysing military history, and not a ‘mainstream’ historian’s interpretation of it. As to above assertions on invasion body troop strengths and pre-emptive strikes, let me be upfront – it’s all bunk, a complete myth and it not supported by the historical facts of the day, nor is it supported by military doctrine (then and now) and the cold hard facts – the statistics, ratios and numbers certainly don’t support it . This is again where ‘economic history’ starts to rip ‘political’ history apart, the numbers – the hard facts (measurable and accurate) start to talk and the political bollocks start to walk, and here’s how.

Looking at the numbers

So, here the numbers to the start of the Boer War on the 11th October 1899 when the Boers invade sovereign British territories:

31st July 1899 – Total British Forces in the Cape Colony, Natal, Rhodesia, and Bechuanaland (Botswana) and Protectorates = Total 8,803 men.
1st August 1899 to 11th October 1899, additional British Forces arrive = Total 6,500 men

Total British Forces in the field as at 11th October 1899 = 15,300 men

27th September 1899 – Transvaal Mobilises Forces = 26,871 men
3rd October 1899 – Free State mobilisers Forces = 21,345 men

Total Boer Forces in the field as at 11th October 1899 = 48,216 men.

The Boer forces at the commencement of hostilities when they declare war against Britain are heavily in their favour = Boer Forces outnumber the British 3 to 1.

“On the high seas” as at the 11th October 1899 are an additional 7,418 British Troops on their way to South Africa – called up to bolster an inadequate British force strength in the event of war.

Even with their arrival at the end of October 1899 (after the war has been declared) bringing the British number up to 22,708 – British Forces are still woefully inadequate, and the invading Boer Forces still outnumber them 2 to 1.

There are numerous quotes and historic references which prove the British had no intention of ‘invading’ the Boer Republics, these always result in a slinging match whilst Boer romantics profess to intelligence reports as proof positive of a plan of attack. Like any military with a military academy and a war office, a scenario plan was devised by the British, its called ‘The War Office Plan’ and it was developed in 1886 – it outlines that should the British invade the ZAR, a full Army Corps (invasion force) would assemble at Colesberg and invade the underbelly of the OFS on their way to the ZAR, avoiding mountainous defences completely and just move up the spine of South Africa over flat and easy terrain (more or less the route of the N1 today).

In reality the British made no actual invasion plans, scenario ‘top draw’ plan yes, actual plans a ‘campaign plan’ with start lines showing troop strengths, regiments and units, timelines and objectives – no, that plan doesn’t exist – an entire Parliamentary commission and Royal inquest was made in 1902 after the war ended, and they established that “no plan for campaign ever existed for operations in South Africa” (that they meant an actual operational plan), but you can put all that aside and let’s just look at the numbers.

There is simply no way, that the British intended to ‘invade’ with a force of only 22,700 troops – going up against a 40,000 strong invading Republican Boer army – just no way. Anyone whose served in the military and understands military doctrines knows, you need twice the numbers of the opponent, at least 2:1 (ideally more) before commencing with an invasion. That means Britain would have needed at least 80,000 troops (in excess of an Army Corps) in theatre before it posed any threat as an ‘invasion’ Force. It had nowhere near those numbers, and nor did it intend to have those numbers. In truth – the Boer Army, who had twice the numbers of the British Army, posed far more of an ‘invasion’ threat – and that’s exactly what they did.

Also, so you can see how the ‘numbers’ and the ‘actual’ history correlate – Lord Milner writes to Her Majesty’s government and states that Kruger is unmovable on issues pertaining the Franchise, he warns them that the ZAR is gearing for an invasion of the British Colonies with the call-up of troops and purchase of munitions, and the purchase of state of the art rifles and artillery pieces – one million Mauser rounds alone arrive in Port Elizabeth as early as the 8th July (ordered around April 1899) destined for the Republics (well before the ‘impasse’ between Milner and Kruger).

He implores the British to send a sizeable force – a full “Army Corps” – of about 35,000 troops to bolster the small garrison forces in South Africa, warning them invasion of British colonies is inevitable. 

The British War Office in London respond to Milner, they maintain that the ZAR was simply not bold enough to invade British sovereign territory, and on the remote chance that should an invasion take place, it would be a “farmers army” and could be held back by professional soldiers. 

The war office also does not want to provoke a flammable situation by sending a full Army Corps. So, they bolster the garrison forces with only 6,500 men, including colonial ‘citizen force’ units mustered from the local populations – and an additional 7,400 men “on their way” from India – the doctrine again is that even though they are outnumbered  they should be able to ‘hold the line’ long enough for an expeditionary ‘Army Corps’ to arrive. The war office estimates a ‘Army Corps’ will take four months to muster and would require a £1 million investment upfront – so not necessary unless there is an absolute and proven military threat.

The eve of war

By the end of September and the beginning of October 1899, Boer forces are amassing primarily at Laing’s neck on the Natal border and the ultimatum agreed by the Boers on the 27th September indicates that war is inevitable, presented by the 7th October 1899 to the British (4 days before they invade sovereign British territories), last minute attempts by Afrikaner Bondsmen in the Cape to get Kruger to “step-down” from his position fail, so too do last minute attempts by members of his own Raad and by his young appointed negotiator Jan Smuts in his final negotiations with Greene, even Steyn in the OFS is urged to get the ZAR to ‘step down’  – whilst all urging the ZAR to “step-down” – Kruger’s unbending demand that the 5 year ‘uitlander’ franchise would only come if the British tore up the 1884 London Convention completely and withdraw all her Suzerainty rights to the region, rights which have been in place since 1877 – this is now deemed a ‘step too far’ as it substantially compromised British paramountcy in the region. Kruger’s position remaining unchanged from the beginning of negotiations in June 1899 in Bloemfontein to the end – only with a cat and mouse game promising limited reforms and then withdrawing them in-between (more on this in an Observation Post called “for suzerainty sakes” as most people don’t understand the real Casus Belli of the war).

Kruger is superstitious, paranoid and impatient and doesn’t even wait for the presentation of the ultimatum to the British or the ultimatum’s deadline – he sees tiny troop movements of small garrison forces as the prelude of an invasion, albeit the British are by no means capitalised for such an invasion – they have not even called up their Army Corps at this point. But Kruger is on the warpath. On the same day the ultimatum is drafted – 27th September 1899 – D Day minus 14 days – Kruger telegraphed to Steyn: 

“English troops already at Dundee and Biggarsberg, and will probably take up all the best positions unless we act at once. Executive Council unanimous that commando order should be issued to-day. We beg you will also call out your burghers. As war is unavoidable we must act at once, and strongly. The longer we wait the more innocent blood will be shed through our delay. We don’t intend to have Chamberlain’s note, with your amendments re Convention, telegraphed to you till burghers are at or near borders, and till you have been informed that the English Government has acted contrary to last part thereof. “We are justified in crossing border. Plan of campaign follows.”

27th September 1899 – D Day minus 14 days – Kruger telegraphed to Steyn again (same day again):

Burghers will be in position in our territory near Laing’s Nek on Friday morning 5 a.m. All other burghers being called up to follow as soon as possible. Kock leaves with two cannons tomorrow evening, also big guns for Laing’s Nek. Will Free State then also be in position? Volksraad meets seven this evening. Can you reply by then? Plan campaign follows.” 

On the 29th September 1899 – D Day minus 12 days – Kruger telegraph to Steyn: 

“Our burghers going to hold positions on border to prevent enemy getting hold of them. You still seem to think of peace, but I consider it impossible. I am strongly of opinion that your people ought also to go to border to take positions. You think Chamberlain is leading us into a trap, but if we wait longer our cause may be hopelessly lost and that would be our trap.
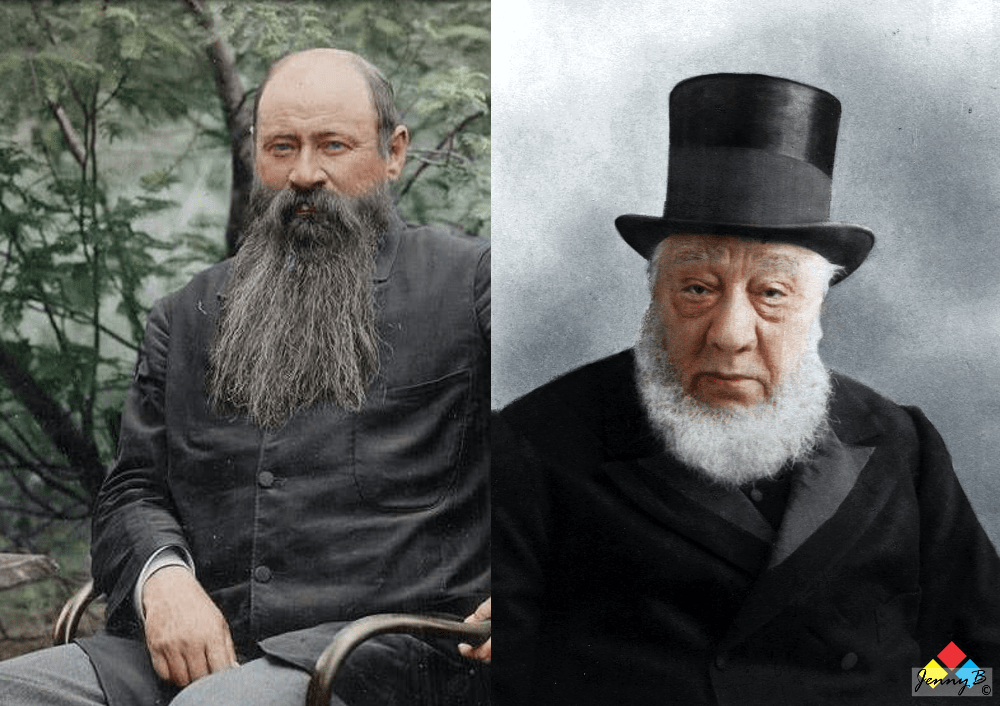
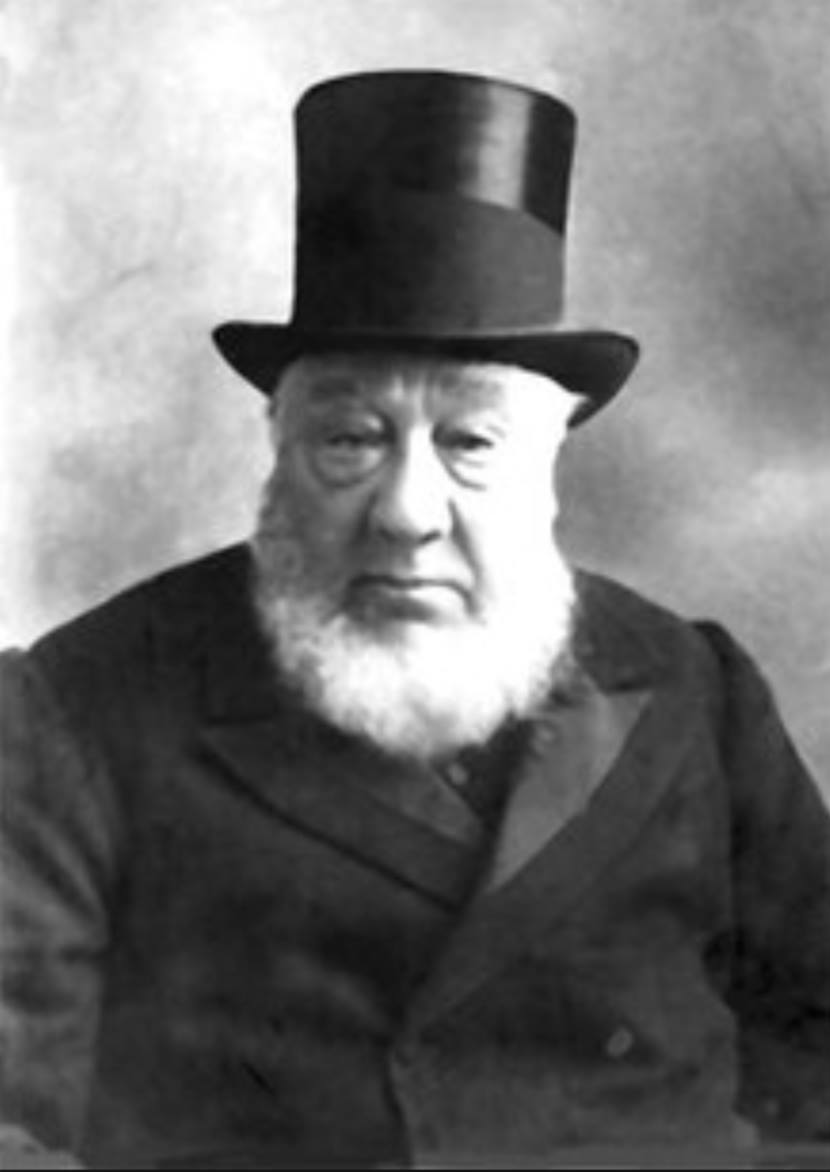
President Steyn (left) and President Kruger (right) colour by Tinus le Roux and Jenny B.

In the final minute, with war inevitable and Boers amassing on the border to invade – the British Parliament approves the request to raise the ‘Army Corps’ as a deterrent against Boer aggression and they only start calling up their reserves from the 7th October 1899 – the Boers are already mobilised and its 4 days before the Boers invade. It’s too late, this force would only be arriving in critical mass in the South African theatre by mid January 1900. 

In the end, both ends of the British argument are 100% correct. Milner is 100% correct, the ZAR is a significant destabiliser in the area with territorial ambitions over Swaziland – which they annex, Rhodesia (the Adendorff trek and the Matabeleland concession) and Zululand for access to a Natal based seaport at St Lucia. President Steyn in the OFS also has territorial ambitions over Griqualand and the diamond fields in the Cape Colony.

Afrikaner Bondsmen and their supporters, men like Smuts, Botha, Hofmeyr and Reitz are all promoting the idea of a unitary Afrikaner Republic stretching from the Zambezi to the Cape. Both Boer preachers and politicians are all talking war and the removal of British influence from the entire region altogether (and Milner makes specific note of this). The two Republics are tooling up for war and the ZAR is commissioning and building massive defensive forts and buying advanced state of the art German and French siege guns. Vast stores of smokeless ammunition is been landed, and 40,000 brand new state of the art German Mauser rifles have landed – enough to arm nearly every Boer with not just one but two rifles. President Steyn has signed President Kruger’s long awaited “aggression pact” between the OFS and the ZAR on the 22nd March 1897 which locks the OFS into war even if the ZAR feels “threatened”. Simply put, the ‘winds of war are blowing’.

The purpose for going to war can best be read in the final statements made by the main protagonists. 

Francis Reitz, now acting as the ZAR’s state secretary after sending the final Boer ultimatum, concludes his speech on the eve of war with the following:

“…. from Slagter’s Nek to Laing’s Nek, from the Pretoria Convention to the Bloemfontein Conference, they have ever been the treaty-breakers and robbers. The diamond fields of Kimberley and the beautiful land of Natal were robbed from us, and now they want the goldfields of the Witwatersrand … Brother AfrikanersI The day is at hand on which great deeds are expected of us – War has broken out ! What is it to be ? A wasted and enslaved South Africa or – a Free, United South Africa?”

So, for Francis Reitz accuses the British of breaching the spirit of Transvaal’s Suzerainty, accuses them of stealing Natal and Griqualand and a threat to Boer paramountcy in the region – calling for a ‘United South Africa’ (I.e. the Afrikaner Bond’s ‘Zambezi to the Cape under a Boer hegemony’ objective).

The desire of the Boers and the desire of the British that South Africa fall under their respective paramountcy and hegemony is a clash of interests between Boer Imperial and British imperial desires on territorial expansion and control – and this is the conclusion reached by just about every Boer War historian worth his salt as the basic underlying cause of the war, it’s the Casus Belli. 

This paramountcy and desire for regional control by Boer and Brit respectively is most adequately wrapped up by Jan Smuts’ final word on the matter, when on the eve of war writes:

The aim of the war is to establish “a United South Africa, of one of the great empires (rijken) of the world… an Afrikaans republic in South Africa stretching from Table Bay to the Zambesi”.

On the British front, Joseph Chamberlain concludes his speech to Parliament on the eve of war with the following:

“… we are at war now because the oligarchy at Pretoria … has persistently pursued, from the very day of the signing of the Convention of 1881 down to now, a policy which tended to the evasion of its obligations; a policy by which it has broken its promises; by which it has placed, gradually, but surely, British subjects in the Transvaal in a position of distinct inferiority; by which it has conspired against and undermined the suzerainty, the paramountcy which belongs to Great Britain.” 

So – for Chamberlain, the spirit and agreement of the Transvaal’s Suzerainty (its status as a vassal state as prescribed by the Pretoria and London conventions) has been breached – a breach of treaty – and in so a threat to British paramountcy in the region.

The British War Office is also 100% right, they’ve matched the ‘risk’ perfectly, in terms of military doctrine they augment their forces just enough to prevent total calamity, and its seen upfront in the invasions when these small bordering garrison forces – of professional officers and men, completely outnumbered in Ladysmith, Kimberley, Kuruman and Mafeking make quick work of the invading Boers and stop them in their tracks – on the 14th October 1899 the Boer attack on Mafeking is effectively driven off, and on the 20th October the British forces in Natal are successful at the Battle of Talana Hill and the next day on the 21st October they are successful again at the Battle of Elandslaagte . 

On the 25th October the second Boer assault on Mafeking is driven off and on the 9th November, the Boer assault on Ladysmith is effectively driven off (albeit with heavy losses), the Boers then opt to put the town to siege. The siege of Kimberley starts in earnest on the 4th November with the British defenders firmly dug in, the Boers opt to shelling the town from a safe distance in the hope they capitulate. On the 13th November the Boer attack on Kuruman is successfully driven off and the Boers opt to put it that town to siege in addition. 

The Pre-emptive strike and forward defences myth 

As to a “pre-emptive strike” and “invading for the purposes setting up forward defensives” argument to forestall an inevitable British invasion so often found on Boer war appreciation sites – this is possibly the most stupid assertion and myth generated around Boer War 2 … ever, and for the following reasons:
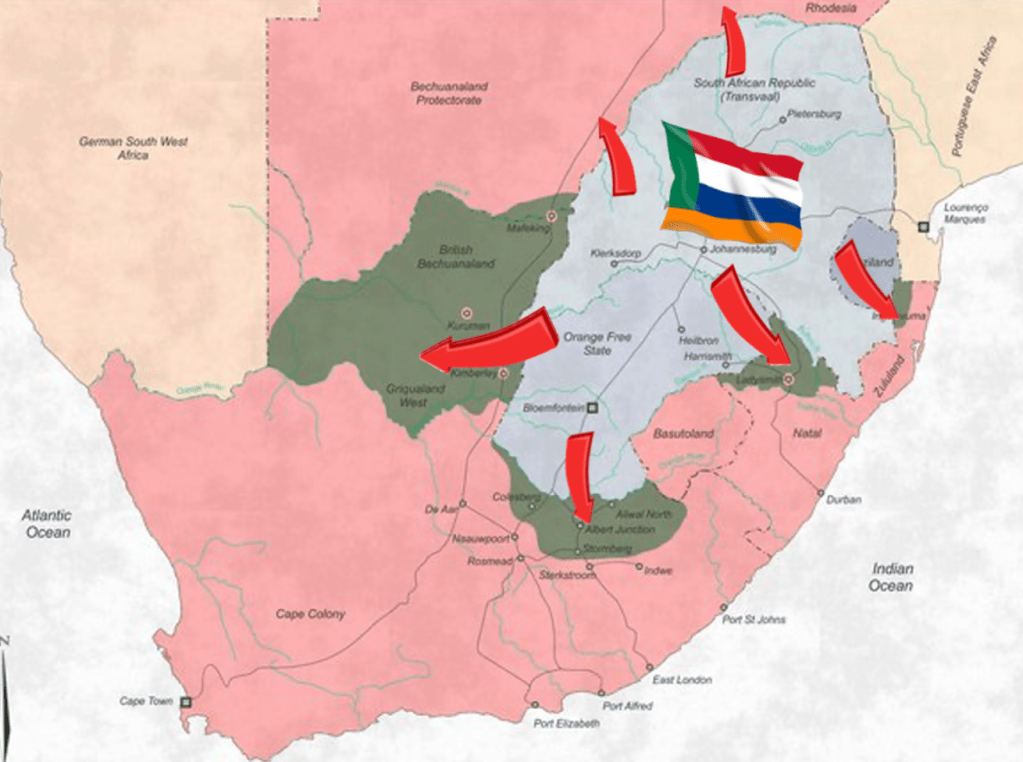
Upfront, a ‘pre-emptive strike’ is not the plan, never is the plan. These modern-day Boer Romantics ‘couch commanders’ conveniently ignore people like the ZAR commander in chief, Piet Joubert – who states:

“The master plan was to advance rapidly on Cape Town, Port Elizabeth, East London and Durban”

Jan Smuts in his memoirs of the war refers to his direct planning to take the Port of Natal (Durban) in a rapid advance – a “Blitzkreig’ strategy.

In fact, Jan Smuts is the only man with a plan. His plan is outlined, supposedly whilst he was sick in bed. It was presented to the ZAR raad (council) in a secret session and unanimously adopted. It’s a very specific plan, it is summed up by Smuts himself who said the plan was to invade Natal from Laing’s Neck and he does on;

“The republics must get the better of the English troops from the start … by taking the offensive and doing it before the British force in SA is markedly strengthened …. the capture of Natal by a Boer force together with the cutting of the railway between the Cape Colony and Rhodesia … will cause a shaking of the Empire”.

The idea of cutting the railway line between the Cape and Rhodesia is to create an uprising of Afrikaner support in the Cape Colony for the Boer Republic cause, Smuts in his account is very reliant on this happening, he’s an ex-Cape Afrikaner Bondsman, the Afrikaners in the Cape are the majority population – the idea of taking the Cape Colony would fail if they do not rise in support. Smuts’ objective through these actions – in Natal and the Cape Colony – is to “shake up” the paramountcy and in so force better terms with the British with a peace settlement early on … not to get into a protracted and costly war, and to do all this before any sort of “army force” or “expeditionary force” can be raised in the UK – an early concept of “shock and awe” and “blitzkrieg” is Smuts’ basic military plan. Smuts’ plan is also an early form of “manoeuvre” warfare – using the Clausewitzian concept (developed after the Napoleonic wars) – using superior and simultaneous advances along “exterior” lines (a concentration in space) on an enemy using “interior” lines (a concentration of time) of communication and supply. Smuts would also apply this later when he is tasked with forming the Union Defence Force in 1910.

Smuts’ offensive plan also does not propose laying anything to siege, surrounding and laying either Ladysmith, Kimberley or Mafeking is avoided entirely, he is far more concerned with speed and a quick win before Britain can reinforce anything – especially Natal and Durban which Smuts targets his ‘seat of war’. The rapid seizing of Durban whilst its relatively lightly defended is important to Smuts, without seizing it the British will be able to reinforce and counter-attack – so the taking of Durban will either make or break the plan.
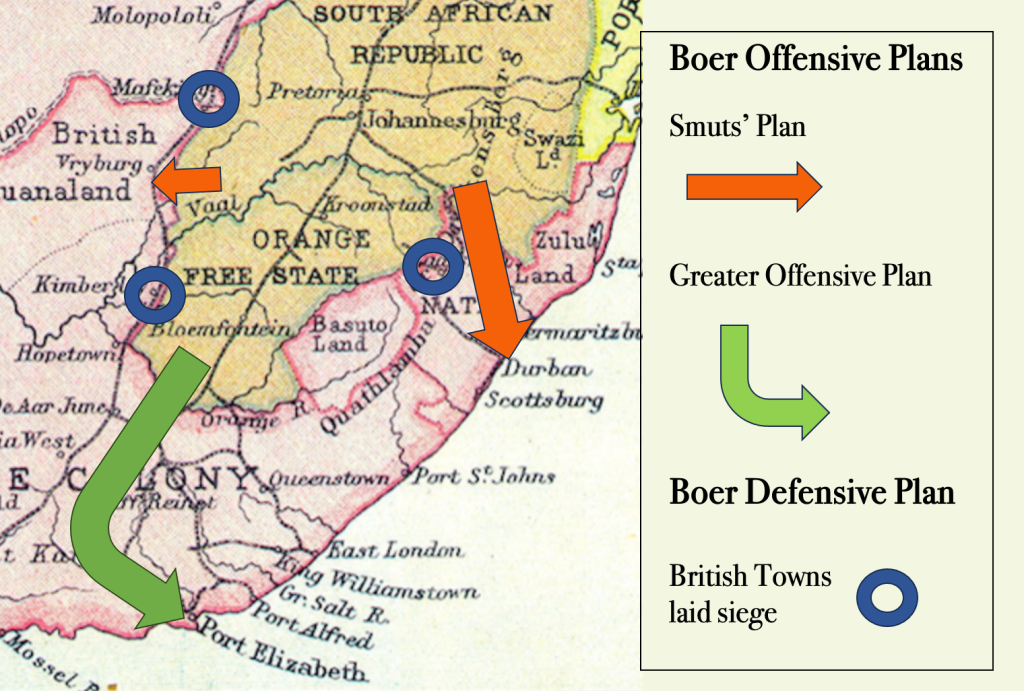
Reference: General Jan Smuts and his First World War in Africa – D. Katz

So, here’s the Boer Republics’ offensive plan – in includes Smuts’ initial offensive plan and then a greater offensive offensive advance to Port Elizabeth so as to build on a Cape Afrikaner uprising and rebellion. At the start of hostilities on the 11th October 1899, according to Jan Smuts himself, the ZAR Commandant-General Piet Joubert merely had Smuts’ broad outline of the offensive plan in his hand, he had not given it any further thought – “no comprehensive war planning” had been done on how the strategic plan would be met by any planning on a tactical level or even on the operational level (contingency planning).

On launching the offensive, only then does the Boer leadership give thought to how they inited to meet Smuts’ strategic plan on a tactical level and operational level. They draw on inspiration from the first Anglo-Boer War, the Transvaal War of 1880 to 1881 i.e. Boer War 1, this war called for laying British garrisons around Pretoria to siege and then concentrating on using the natural mountain defences around Laing’s Neck on the ZAR/Natal border which squeezed the British ‘relief column’ making their way to relive the sieges onto a single road through the mountain defences – focusing them onto Majuba where the Boers enjoyed an outstanding victory. This reasoning had worked in 1881, no reason why it would not work in 1899.

So, as a defensive strategy to augment the offensive strategy, General Piet Joubert and the Boer leadership decide on laying siege to Kimberley, Mafeking (in the Northern Cape) and Ladysmith (in Natal) – their thinking is this would split the British forces who would then be focussed on relieving these border towns and their relief columns would have to follow singular roads and railway lines to get there, easy pickings for the Boers as they had done to them at Majuba – thereby weakening the British forces further and giving the Boer’s offensive strategy in Natal all the chance of success.

Important Note, as to military doctrine as follows;

“assuming a defensive posture does not win wars and a offensive strategy is essential for winning a war, defensive stances are a temporary measure allowing for an advantage to develop, which will eventually result in offensive action to secure combat success.”

Dr. D Katz’ ‘Jan Smuts and his First World War

Jan Smuts at this point is disillusioned with the Boer leadership’s planning, he feels this offensive and defensive plan is far too complicated and questions whether the Boers are capable of launching a plan of this magnitude. He even goes as far as calling General Piet Joubert “passé” and “hopelessly incompetent”.

The Boers however, initially follow exactly “the plan” in what they do. They advance from Laing’s Neck down the centre spine of Natal heading to Durban as planned, as they push into Natal the Boer Commanders telegram Kruger to say the “Vierkleur” would be soon flying over Durban. The ZAR Chief Justice Gegorowski boasted;

“the war will be over in a fortnight. We shall take Kimberley and Mafeking, and give the English such a beating in Natal that they will sue for peace”.

The general rally call amount the Boer soldiery is that will be “eating fish” in Durban, General Louis Botha convinced he will also be “eating bananas” in Durban. They also initially follow Smuts’ offensive plan in the Orange Free State, cutting the Cape Colony and Rhodesia railway line in the first action of the war at Kraaipan on the 12th October 1899.

Their mistake, they are too cautious and instead of using their much-promoted advantage – mobility, they err on a cautious and slow advance. The plan, as Smuts predicted is overcomplicated, and in so far as intending to split the British forces between the Northern Cape and Natal, the decision to put Kimberley and Mafeking to siege in addition to the offensive plan as a defensive plan also splits the Boer forces and weakens their offensive capability, from a ‘Blitzkreig’ (lightning mobility war) perspective they are unable to put their maximum effort behind their ‘schwerpunkt’ (heavy, focus – or centre point) which is the rapid invasion of Natal and the taking of Durban. The Boers also compromise their mobility and resources in Natal when they start to lay Ladysmith to siege instead of rapidly advancing to Durban.

In following “the plan” – the ‘high water marks’ of the invasions i.e., where they ultimately land up. In the Natal invasion it’s just 60 kilometres north of Pietermaritzburg – Botha stops at Mooi River, this invasion has no reference to the “defence plan” whatsoever (in fact it’s the opposite), and the Boers do not take up very effective “defensive positions” to stop any sort of mythical British invasion – the positions they take up are far worse than the positions they were in before they invaded. Any military person will tell you that Rivers and Mountain Ranges make for the most formidable defences – and in the case of the Boer Republics – the Orange River, Vaal River and Drakensberg are perfect defences – no need to invade anyone, investing in these border defences would have been the logical military doctrine, and far more effective as to a “defensive strategy” without initiating a war and the risk that involves. 

Look at it from the perspective of military doctrine, the Boer “start line” is Volksrust on the border near Laing’s Neck – a most formidable defence position on the border of Natal and the “gateway” to both the ZAR and Natal, home to Majuba mountain and Laing’s neck, where the British were so soundly beaten by the Boers in 1881 – it’s a proven natural defence and one which the British could not breach just 18 years earlier.

As to continuing a deep advance (remember the offensive plan is to invade), after they are confronted by the British in the field at Talana outside Dundee on the 20th October 1899 (D Day plus 8) – the Boers are initially defeated in two pitched battles, the Boers are held up losing advantage daily. After winning the battle at Nicolson’s Neck the Boers manage to advance another 70 kilometres to Ladysmith reaching it on the 2nd November (D Day plus 24 days) – now they are now 190 kilometres into their advance from their start line on the border and nearly a month into their invasion campaign. 

So, if your strategy is only one of defence – why leave such a formidable defence and find something else? Then as to the so called amassed “British threat on the border” – the invasion force overall Commander, General Piet Joubert is joined by General de Kock from the OFS and General Erasmus and they advance from their start line for nearly 120 kilometres deep into Natal territory before they meet any significant British forces or resistance whatsoever – the British are nowhere near the “border” and “poised” to invade anything. The British have rather inadvisably split their forces between Dundee and Ladysmith. Extending military supply lines and logistics support for 120 kilometres in 1899 using wagons and horses to initiate a “pre-emptive” strike aimed at the British in Dundee is pure Hollywood, wishful thinking, it has nothing to do with military doctrine or sound military planning – or even the Boer’s plan for what it is. 

The Boer invasion of Natal as mapped.

General Louis Botha then extends the advance from Ladysmith all the way to Mooi River on the 22nd November 1899 – 100 Km away from Ladysmith and 60 km from Pietermaritzburg and now a staggering 290 km from their start line. That’s the length of the “supply” line for the Boers – their “high water” mark. No military commander in his right mind sets up a “defensive position” with a near 300 km long supply line running through enemy territory intended to support ‘defences’ – no military commander in 1899 advances near 300 km on horseback for a pre-emptive strike either – air warfare has not been invented yet and even by today’s standards a ground force invasion 300 km into enemy territory is never considered by any commander as a mere “strike” – pre-emptive or otherwise. 

The Boer high-water mark is only obtained by the 22nd November – D Day plus 43 days – now having been significantly compromised on mobility and speed. Both HMS Terrible and HMS Powerful had arrived in Durban port by the 6th November 1899, either one of these two Battle Cruisers had more fire power on board than the entire Boer invading armies combined – a Battle Cruiser defending a port from mounted infantryman on horseback is no match. The Royal Navy is Britain’s senior service and it has at its disposal the very best of all their resources and commanders, defending their ports is what the Royal Navy does best, they are very good at it.

HMS Terrible (Left) and HMS Powerful (Right)

The Boer invasion falters, it fails because they had lost their only significant advantage – mobility, aggression and speed gives way to cautiousness, they chose resource draining static warfare instead – sieges and invest into them instead, losing valuable days and sacrificing their “Blitzkreig” offensive plan altogether. 

With Botha’s objective of “eating bananas in Durban” now completely dashed, General Botha has no choice but to do what countless military commanders before and after him have done when an invasion fails – and beat a retreat, creating what are known in the military as “defensive “boxes” as you go along, the idea is to slow the enemy’s counter attack down until you can “join” with more friendly forces and consolidate – which he initially successfully does just north of the high water mark at Willow Grange on 23rd November 1899 and then further north at his next “box” at Colenso on 15th December 1899. He finally settles further north on the Tugela heights as his next defensive box, having now retreated for 80 Km, however he loses this pivotal battle and his final defensive box to the British on the 27th February 1900 (to see a defensive box retreat in action in a more recent war involving South African Commanders – see “Gazala Gallop” in WW2).

On the western front, the Boers are able to invade the arid and sparsely populated northern Cape meeting no real resistance from any British forces – as none are stationed there in any numbers – the Boers end their high water mark at the border with German South West Africa – this has more to do with the strategic imperative of opening up a sea route and port access via Walvis Bay and linking up with a “friendly state” for the purposes of supply than it does with any offensive or defensive plan offered by the Boer command. It certainly has nothing to do with a ‘pre-emptive’ strike.

On other lesser known fronts

If there is any semblance of logic in invading the Cape and Natal colonies for the purposes of establishing forward defences only, there is absolutely no logic in the Boer invasions of Rhodesia (Zimbabwe) and Bechuanaland (Botswana) to suggest invading for purposes of defending – or even a ‘pre-emptive’ strike – the tiny nominal British Police forces in both these countries are no invasion threat whatsoever, and all the invasion of the Bechuanaland Kingdom does is bring the Tswana into the war as a belligerent all on their own, and the Tswana in their own right decimate the invading Boer Kommando and its laager at Derdepoort on the 25th November 1899. The small BSAP (British South African Police) base consisting of 450 British soldiers at Tuli in Rhodesia is however sufficiently professional to stop the 2,000 strong Boer Commando (now with a 1 to 4 advantage over the British) which had forged itself over the Limpopo River into Rhodesia at Rhodes Drift and other points. On the 2nd November 1899 the BSAP successfully halt them at Bryce’s Store and then repulse the invasion, although border incidents and Boer incursions into Rhodesia continue for some time – well into the Guerrilla phase.
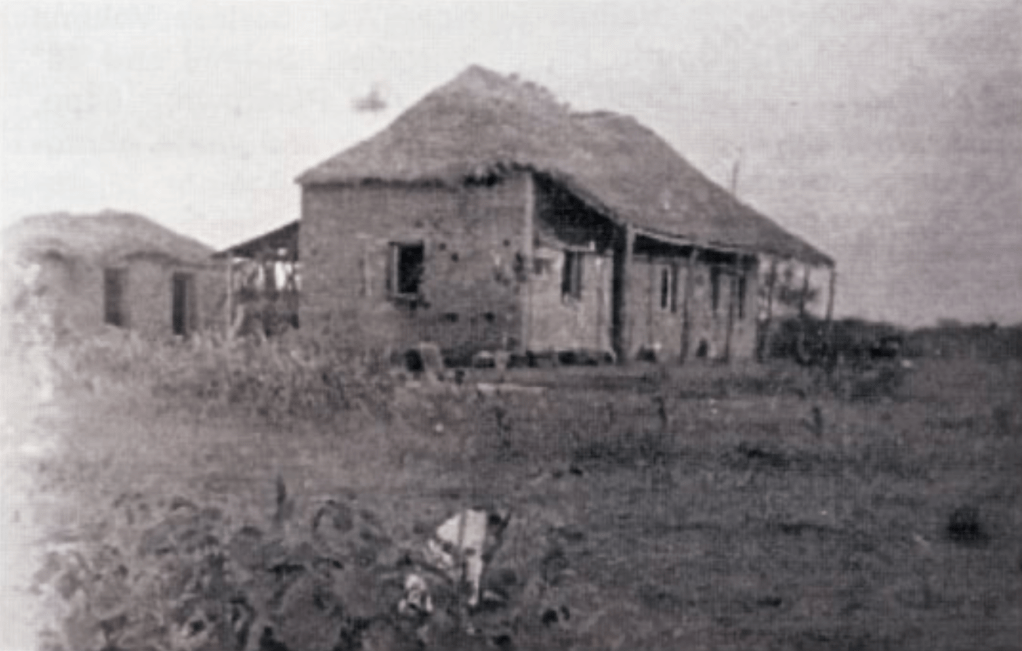
Bryce’s Store in Rhodesia showing combat damage

What Defences?

Also, nobody has been able to point where these so called ‘invasion for the purpose of defensive positions’ are, there is no investment in resources or materials for effective defences, the Boer trenching system at the Modder River at the beginning of the war in November 1899 are proven ineffective.

The defensive earthworks that make up the trench line at defence cluster centre at Magtersfontein is merely a shallow trench converted from a natural ‘donga’ at the base of the koppie range (refer Dr. Garth Bennyworth’s groundbreaking work on this trench-line) – the British frontal attack on this trench-line is successfully repelled by the Boers on 11th December 1899 (Cronje’s only real tactical ‘victory’), but after regrouping and reinforcing the British are able to by-pass these defences completely in a highly mobile flanking manoeuvre.

No large defence fortifications are really invested in by the Boers in either Natal or the Cape Colony, and any idea of fortifying the Republics borders are in fact neglected in the drive to invade the British colonies instead. 

It is only from the beginning of the new year in 1900, that the British have been able to muster anywhere near enough troops to land in Cape Town, that they are now matched 1:1 to the Boer army, and it is on these equal footings that the British counterattack, breakout and relieve of all the major sieges. From January 1900 to July 1900 they rout the Republican armies from their colonies, relieve their sieges and in two significant manoeuvres – the Battle of Paardeberg on the 27th February 1900 and Brandwater Basin (Surrender Hill) on 30th July 1900 they break the Republican forces critical mass to fight a conventional war – Brandwater and Paardeberg alone result in the capturing 8,300 men and the Boer Army is now simply just no longer matched to the British on a 1:1 ratio, it’s now in an inadequate position – with more British troops streaming in.

The 500,000 myth

Often on Boer war sites, and even on simple things like wiki we see this statement “it took 500,000 British to defeat 20,000 Boers” – the much-touted ratio in this type of media is that the Boers were outnumbered 25 to 1, at a staggering disadvantage, but these plucky Boers held the mighty British empire at bay. Now that’s a figure designed to paint the Boer fighter as some sort of super-man and the British military as bumbling, monolithic and ineffective. But the truth is far from this and this figure is completely erroneous designed to drive Afrikaner nationalist political rhetoric – it has nothing to do with actual numbers on the ground. 

Now, here’s the truth – at no point in Boer war 2 were there ever 500,000 British troops in South Africa as boots on the ground at any one point in time – in total, over the course of the war the British called up 550,000 men – that bit is true, yes. HOWEVER the British rotated their Regiments in and out of South Africa on ‘tours of duty’ – never really sending a full regiment into the operational theatre at once, retaining many at home and in their other colonies around the world. The “high water mark” i.e., the maximum number of British Troops in South Africa at any one point in time is 230,000 men. Even pro-Boer chronologies like that of Pieter Cloete’s Boer War facts and figures reluctantly has to admit this fact. 

This high-water mark of 230,000 (including African Auxiliaries) is only peaked briefly during the Guerrilla Phase of the war – and at least 50,000 of these troops are being used to man the rather extensive blockhouse defence system stretching from the top to bottom and side to side across the whole of South Africa (as referenced by Simon C. Green in his Blockhouses of the Boer War) – over thousands of kilometers. On average during the Guerrilla Phase of the war – September 1900 to April 1902, the British enjoy 190,000 troops on the ground.

But let’s stick to the high-water marks for a proper account – the high water for the Boer forces, total Boer War – including 6,000 burghers who add onto the original ZAR and OFS Commando call-up, the statutory Boer forces, foreign volunteers and Cape Rebels is 87,365 men (possibly higher if we add African auxiliaries and rear echelon support). That means a realistic ratio between Brit and Boer at the high-water mark is a 3:1 ratio – total Imperial forces versus total republican forces. It’s a far cry from the emotionally and erroneously touted figure of 25:1.

If we want to account Boer War 2 properly and view it with balance, it would be correct and very true to say at the beginning of the war the Boers outnumber the Brits 3:1 – as the war progresses there is a juxtaposing of numbers… and by the end of war the Brits account 190,000 troops in country, Boers account 24,300 left in the field and 47,300 POW in the bag (factoring out the ‘Hensoppers’ and ‘joiners’) = 71,600 or a 3:1 ratio – Brits outnumber Boers, a reversal of the ratio the Boers enjoyed at the start of the war.
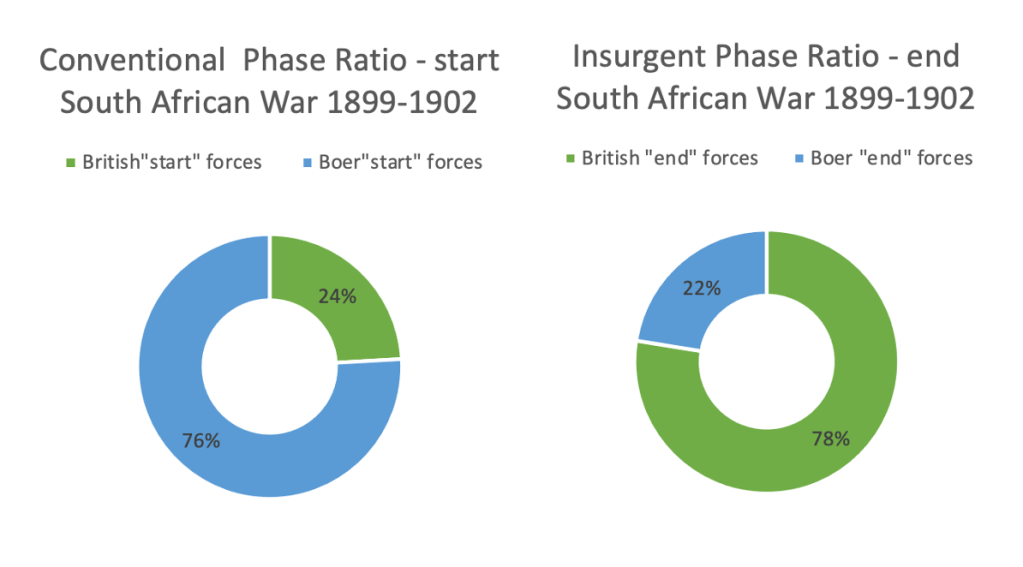
In terms of military doctrine, the above estimation is about right – to invade the British territory the Boers need a 3 to 1 advantage to be successful and to counter attack and hold the Boer territory the British need to be at a 3 to 1 advantage – and even by Guerrilla Warfare standards and the doctrine used to fight one, this number is very low. Consider the following:

American Brigadier-General Nelson Miles was put in charge of hunting down Geronimo and his followers in April 1886. Miles commanded 5,600 troops deemed necessary to find and destroy Geronimo and his 24 warriors. In Malaya in 1950 it took 200,000 British, Australian and allied troops to defeat 5,000 Communist guerrillas. In Ireland over the 30-year course of ‘the troubles’ a total of 300,000 British troops were used to contain 10,000 IRA guerrillas. Closer to home, so the arm chair Boer war generals get this – over the course of the Angolan Border War (1966-1988) and the ‘Struggle’ (1960-1994) the SADF would call up 650,000 conscripts and then hold them in reserve – MK and other non-statutory force ‘guerrillas’ at their high water mark in 1990 only have 40,000. 

The modern-day theoretical ratio of counter-insurgency forces to guerrillas needed to defeat an insurgent/guerrilla campaign is 10:1. In 2007, the US Department of Defence produced a document entitled Handbook on Counter Insurgency which quotes this as the rule-of-thumb ratio for all such operations – and that is even with the advent of modern technology in warfare fighting mere insurgents or guerrillas. Little wonder that General David Petraeus needed 180,000 coalition force troops (the same size as the full invasion force) on the ground in 2007 just to deal with the Iraqi guerrilla “surge” spearheaded by an insignificant but determined bunch of suicide bombers.

Boer bashing and other myths 

Military doctrine and planning – to anyone whose served as officer in a military, is made up of three levels – the Strategic level, the Tactical level and the Operational level (when the metal starts flying around and the rubber hits the road). Military Generals and Commanders are judged by how they relate these three components – Strategic, Tactical and Operational. German Forces during WW2 are outstanding at the Operational level, completely dazzling the enemy concentrating overwhelming firepower at the “schwerpunkt” – the ‘heavy or focal’ point. They are equally outstanding at the tactical level, consider the masterful work of Field Marshal Rommel in North Africa. But they fail at the Strategic level by overextending their resources and pandering to wayward political ideologies and ambitions – and that loses them the war.

In reality, and it’s not trying to be nasty or ‘Boer bashing’ in any way shape or form. The Boers at the ground level are a committed, determined, resourceful and extremely brave bunch. They are scarifying much and like the Japanese in WW2 have a deeply ingrained cultural sense of honour. 

But their commanders fail these brave men on all three key aspects of warfare. At an Operational level they are been asked to use a Commando system of mounted infantrymen – good for quelling poorly armed native rebellions – but absolutely hopeless when confronting a modern professional military force with modern weaponry using both combined arms and joint arms in which they are very well versed – and it quickly shows when the British are able to repel the invasions and stall them long enough to get reinforcements in whilst completely outnumbered. The British ORBATS (Order of Battle) are also far superior in just about every key engagement fought – that’s a fact.

It is often noted in all the Battle ORBATS – even the ones that mark the beginning of the war in the conventional phase, that the Boers are always “on the back-foot” always “outnumbered” almost always fighting against the odds – even for battles they win. However, this is again a function of poor leadership – at the beginning of the war the Boers outnumber the British significantly, but they don’t make use of the advantage – instead of driving their forces to their “schwerpunkt” and the “crucible” (Natal) – focusing on their plan and leveraging their only real advantage – mobility, they choose instead to divide their forces and sacrifice their mobility completely. Inexplicably they commit unusually large numbers of these highly mobile combatants and all their resources to siege warfare (static warfare) and not to defeating the enemy in the field (also a key military blunder) – high numbers of Boers sitting around and simply shelling three British towns from afar – safely out of range, and other than Ladysmith, making no real attempt to ‘take’ the town – and in doing this they allow the British to pour in all the reinforcements they need to counter-attack.
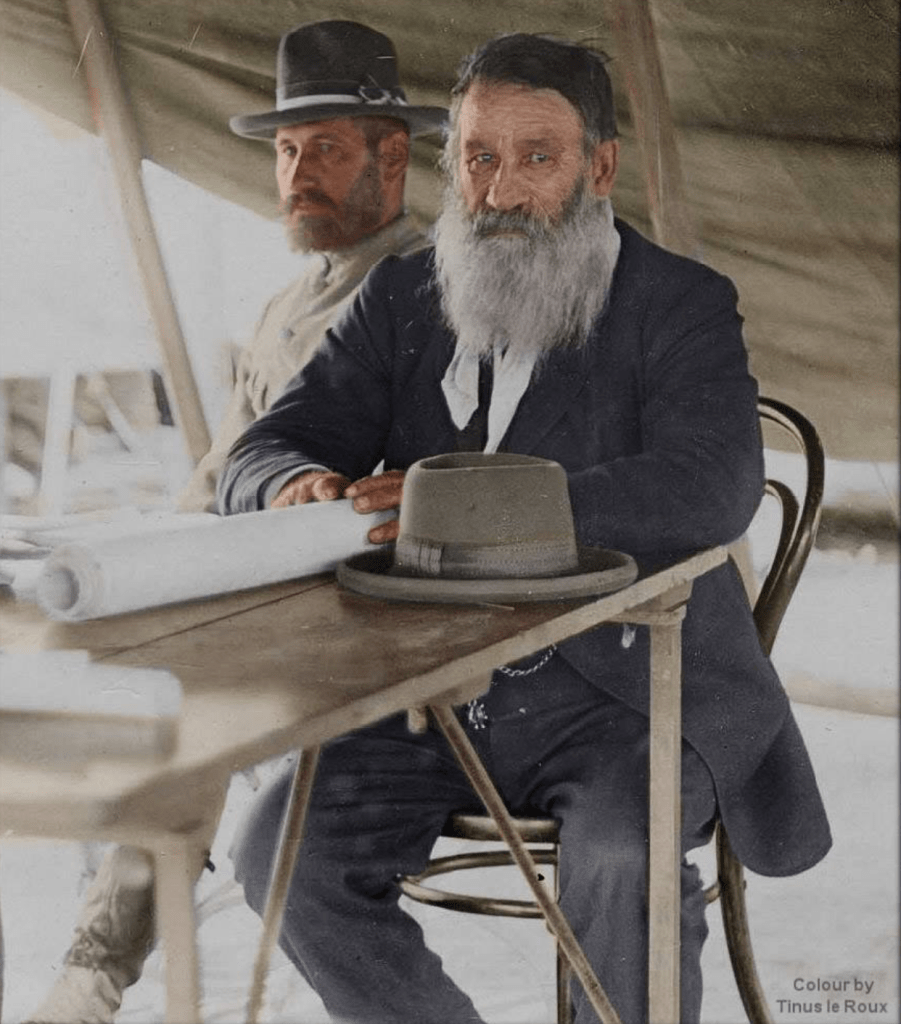
General Joubert – colour by Tinus le Roux

On a tactical level, General Joubert – tasked with the invasion of Natal fails on nearly every level, he fails to take tactical advantage of his “mobility” and fails to “take the fight to the enemy”, he fails to prevent the British forces at Dundee from “linking up” with their forces in Ladysmith (a key military blunder), and he fails to take Ladysmith when the opportunity is presented to him on a plate choosing a divine sense of providence instead (another key military blunder). By the time General Botha takes over the advantage is lost, and Buller is able to ultimately dislodge Botha at Tugela Heights with the innovative use of pontoons and manoeuvre and relive Ladysmith.

General Cronje, on a tactical level on the other front in the Cape also fails on every level, he fails in his initial defences, fails to move from his static defences in time, sacrificing mobility again and is outflanked and outmanoeuvred by a more “mobile” General French, Cronje then, for reasons known only to himself fails to link up with General de Wet and presents himself as a sitting duck to the British – the result is the 1st significant capitulation of Boer forces at Paardeberg on the 27th Feb 1900. 

General Cronje – colour by Jenny B

General Christiaan de Wet also fares no better. De Wet’s attack on Wepener is strategically un-sound, committing resources to worthless target and he’s repeatedly beaten back by a gutsy small garrison force. His plan to defend the indefensible at the ‘Brandwater Basin’ is flawed and he too presents his forces as sitting ducks in a ‘pocket’ surrounded on all sides – and then he leaves his command post on the “first train out of Dodge” as the British close in on him and leaves his squabbling subordinates and troops to fight it out instead, the result is a complete breakdown of his command and the 2nd. significant capitulation of Boer forces at Surrender Hill on the 30th July 1900.

This surrender marks the start of the Boer’s loss of the war (it’s the beginning of the end), they are unable to recover it and the surrender marks the end of the Conventional War and chalks it up as a British Victory. Often put up on a pedestal as a “volksheld” (people’s hero) unfortunately General Christiaan de Wet has the stigma of losing the Boer war for the Boer nation – it happened under his watch and his Command – literally. Militarily speaking he’s directly to blame – and he fares no better leading a doomed, inadequately armed, inadequately supported, strategically flawed, and failed Boer Revolt in 1914.

De Wet’s invasion of the Cape Colony in the guerrilla phase is also a disaster as he signals his intentions up-front to the British and over commits a slow and large wagon train which the British chew up and then they expel de Wet from the Cape with a semblance of his invasion force left over and the loss of most of his transports. Tactically de Wet is brilliant, evading his ‘hunt’ and labelled ‘The Boer Pimpernel’ - romanticised somewhat, especially his tactical victory using barefoot burghers to sneak up on the British at Groenkop. However truth be told, on both an operational and strategic level, as a commander he fails, even his victory at Sanna’s Post is somewhat flawed as an ‘own goal’.
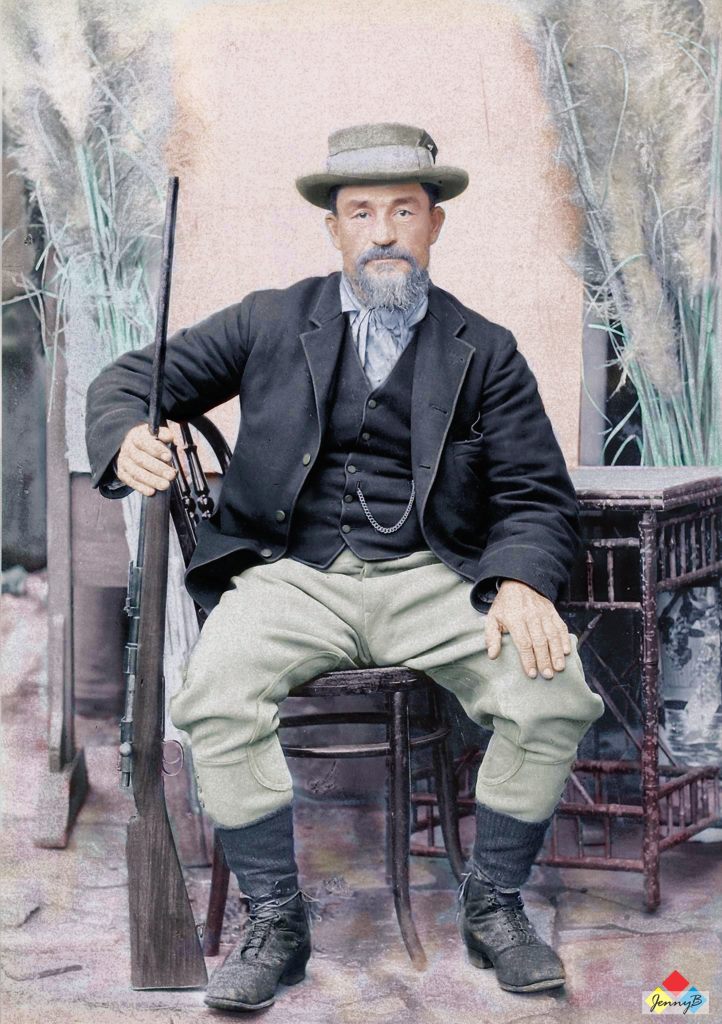
General de Wet – Colour by Jenny B

On a strategic level, as we have seen Smuts’ strategic plan adopted by the Boer Forces is thrown out the window almost from the get-go. They start with it, but simply do not follow through with it at all, invading three British colonies and two British protectorates, splitting focus and forces – completely misreading and unable to raise the critical “Cape Rebellion” and completely sacrificing the Blitskreig concept by working to all their weaknesses and not any of their strengths. Smuts’ “Clausewitzian concept” goes out the window too – in the Conventional War phase, the Boers sacrifice their superior and simultaneous advances along “exterior” lines (a concentration in space) and revert to only using “interior” lines (a concentration of time) for communication and supply. 

In terms of strategy, on a political front, Kruger’s decision to strike out, by any type of military action you care to mention, against the world’s single biggest superpower, one whose Navy is bigger than the French, German and American Navy’s combined, at the very height of its Imperial power, is fundamentally flawed – plucky and very brave, yes – but strategically myopic and very unsound. 

The best the Boers can do from here out is a ‘hit and run’ guerrilla campaign in the hopes of wearing the British resolve down to avoid “unconditional surrender” and get better peace terms (which eventually happens). The ‘Bittereinder’ guerrilla campaign is not fought with any romantic idea of actually “winning’ the war”, the Bittereinder Generals – Smuts, Botha and de la Rey are under no illusions, they also see the resolve of their women to endure the farm clearances and concentration camps as their duty in winning a better peace – they never, during or after the war, turn to victimhood, its denies them their pride and their sacrifices. The victimhood argument is a latter day ‘politics of pain’ concept taken up by latter day “pure” Afrikaner nationalists, nearly all of whom sat out the war or were too young at the time.

Even the decision to strategically engage Guerrilla War is unsound given the extreme sacrifice of lives and livelihoods required to run this type of campaign, literally breaking the back of the Boer nation – the folly of this thinking is something even General Botha realises, and he sues for peace before his entire nation is crushed – as in his own words there will be literally nothing left to fight for. 

This is not the failure of the Boer soldier – this is the complete failure of the Boer Command. As military historians we have to look at the ‘score card’ in an objective and disparaging way – pointing out “critical failures” in doctrine it is – “boer bashing” it is not. 

The Score Card

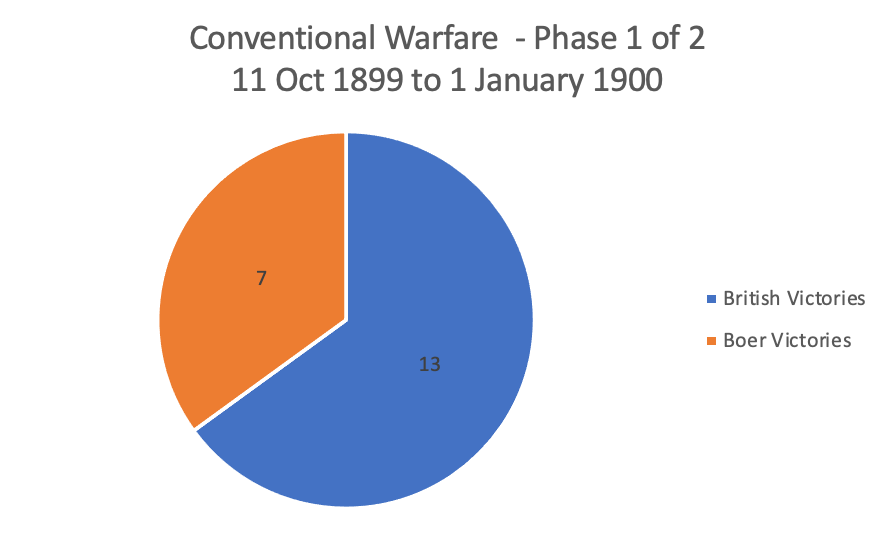
To look at the Boer war by way of its score card we need to divide it into three broad sections – the Conventional War – Phase 1, when the Boers have the advantage, the Conventional War – Phase 2 when the British have the advantage and then The Guerrilla War (Insurgency) phase – which needs to be separate as the edicts of war change completely.

In all, for the duration of the war there are 170 significant actions fought between the Boers and the British (including their allied Black armies like the Tswana and the Swazi), these include significant pitched conventional battles, relief or success of all sieges, successful or repelled attacks and counter-attacks during all phases on strong-points (blockhouses, bases, forts) and trains, and the taking of key cities by way of military objective – Bloemfontein, Kroonstad, Johannesburg and Pretoria.
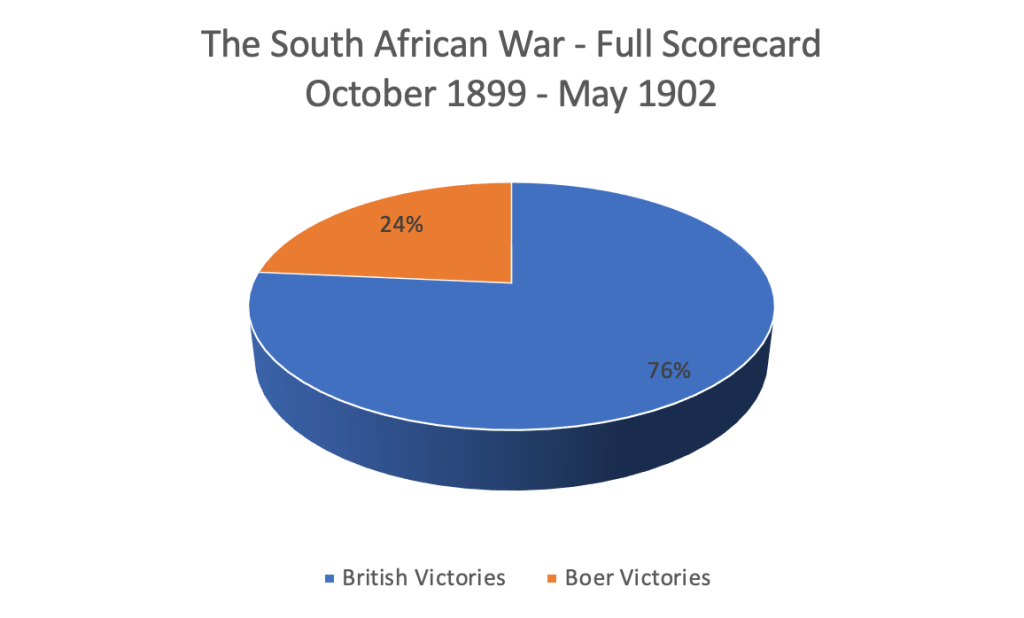
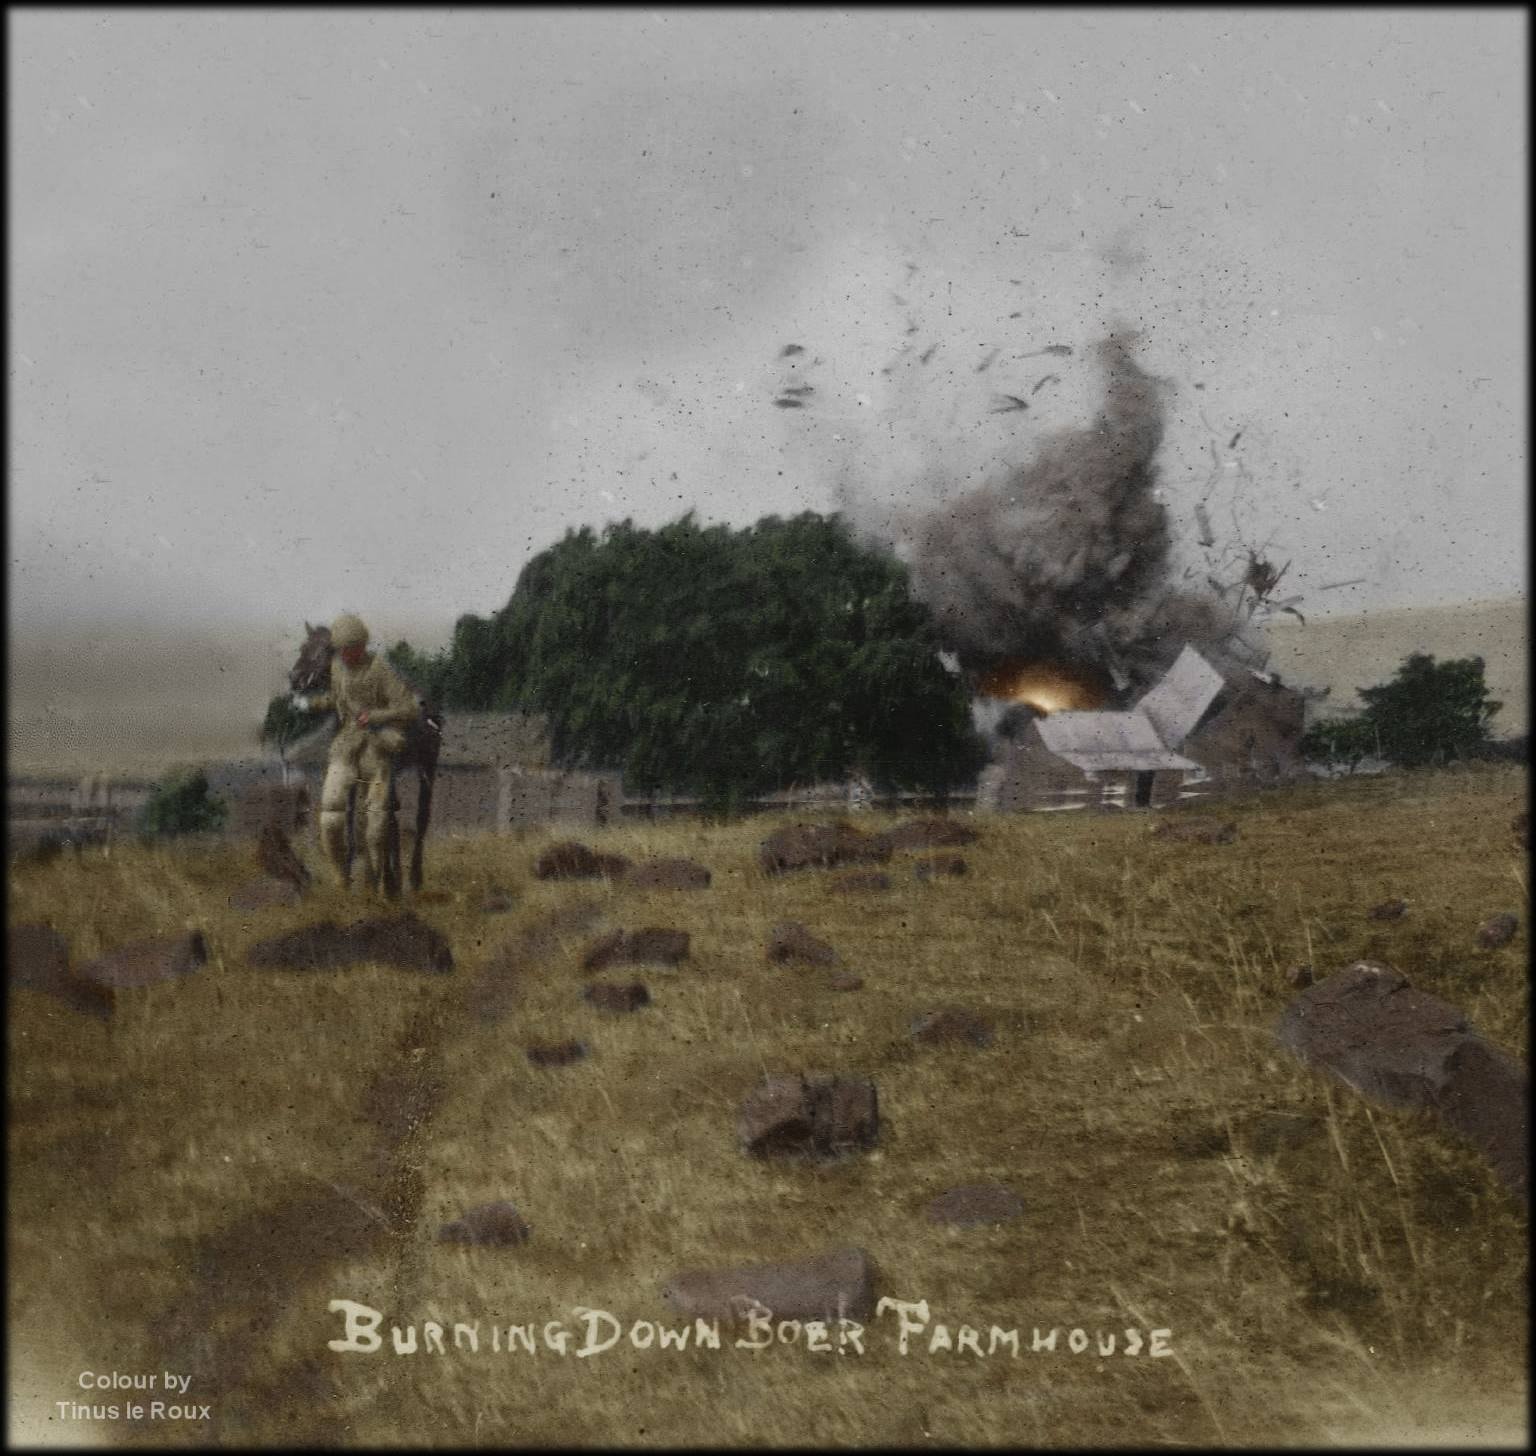
Not factored is the general carnage of destroying property – by either British or Boer actions – the Boer actions of burning down ‘British’, ‘hensopper’ and ‘joiner’ farms, ransacking and looting towns (Dundee etc.), destroying mission stations and blowing up railway track are excluded – so too is the carnage caused by the British burning down ‘bittereinder’ farms, destroying livestock and blowing up buildings. Trying to even factor this would be impossible. 

From the 11th October to 1st January 1900, the Boer forces have a numeric advantage, however the British battle order stemming and repulsing attacks on besieged towns is very good considering their disadvantage, so too the initial advance to relieve Kimberley  – during this period 21 actions are fought – the Brits win 14 and the Boers win 7.

From 1st January to July 1900, the numeric components start to balance, however on a Operational and Tactical level conducting conventional combined arms – the advantage swings significantly to the British. All the major sieges are relieved, the Boers invasions are turned and they are ejected from the British colonies. The hunt into the Orange Free State decimates the fighting capability of the Boers and forces the surrender of their conventional fighting capability. During this phase 49 actions are fought – the Brits win 44 and the Boers win just 5.

Overall, for the ‘Conventional’ war phase, the balance is overwhelming in favour of the British – British win 58 and the Boers win 12. In terms of timing, the British victory in the Conventional Phase is swift – from October to July – a mere 10 months, they have reversed an invasion, captured two separate countries, taken both Boer Republic’s capital cities, taken the Boer’s economic hub, isolated both countries and starved them of external aid. Broken the critical mass of the enemy to fight conventionally, taken nearly every major gun and artillery piece, and occupied all the enemy’s fortifications and defences. By any military standards that is good Command – Strategic, Tactical and Operational.

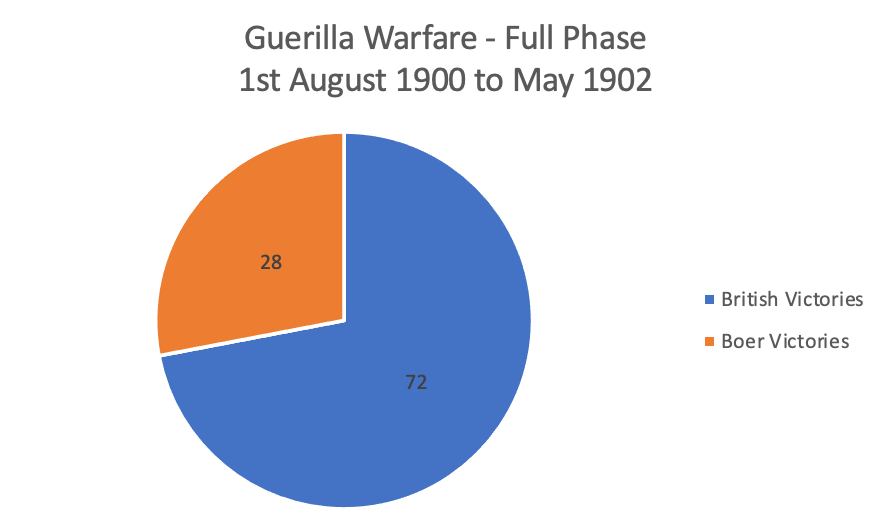
The Guerrilla phase is completely different, there are no significant pitched battles, battles resemble skirmishes, sieges are small towns remotely accessed and the focus switches to destroying supply lines (Boer and Brit) and ‘Commando’ hunts. It’s a “slow burner” in other words not much happens for months on end for the hundreds of thousands of troops in the theatre of operations, truly a case of “war is 99% boredom and 1% terror”. From August 1900 to May 1902 – the duration of this phase – 22 months, 100 significant actions are fought that would classify a ‘clash of arms’. It works out to only about 4.5 direct classes between Boer forces and British forces per month. 

The scorecard is also in favour of the British – the Brits win 72 and the Boers win 28. To read this correctly we also need to understand that the Boer strategy in this phase is not to beat or capture British troops (they can’t keep them), generally the strategy is to harass the British, inflict some damage, retreat and fight another day. On a ratio of Brit to Boer “wins” the ratio is 2:1 – the Boers are remarkably successful at insurgency warfare, and they generally evade the ‘hunts’. The Boers do well at the tactical and operational levels and attain their objectives of wearing down British resolve and elevate their monetary and human costs of waging war – but it comes as a massive cost to the Boer lives and livelihood at the strategic level. 

For the British, they win at the strategic level, the objective of starving the Guerrillas of their supply – food, ammunition, transport, weaponry, shelter and human resources, not to get into the moral or ethics of this, this is strategy used to win just about every Guerrilla war ever fought, by Britain or anyone else – it was the focus of the Vietnam War, the South African “Border War” and even most recently the Afghanistan War. On a tactical level their ‘Counter Insurgency” measures – now known as COIN – are very successful, so much so the Boer War’s Guerrilla Warfare phase is the shortest fought Guerrilla War in modern military history.

That said, as Professor Abel Esterhuyse rightly pointed out to the Observation Post – by 1902, the Boers emerge as the masters of ‘Insurgency Warfare’ and the British emerge as the masters of ‘Counter Insurgency Warfare’ (COIN) – lessons that are still referenced at Westpoint Military Academy to this day. This mastery would also define the ‘South African’ way of fighting war, when Jan Smuts is tasked with amalgamating the Boer Commandos and the old British colonial regiments to form the South African Union Defence Force (UDF) in 1910.

Thus, the UDF was built along the lines of using effective combined arms with high degrees of mobility to deal with both conventional warfare (as is the requirement of any statutory force) in the event a Colonial Power in Africa (e.g. Portugal or Germany) invades the Union and any domestic insurgencies (initially ‘internal’ threats are defined as potential Black African uprisings) and the UDF COIN doctrine is been developed to counter-act it along with a ‘Seek and Destroy’ ethos.

Smuts is happy to cherry pick, basically he’s happy to bring all that’s great and good about the British culture of warfare – their discipline and drill (sorely lacking in the Boer army), their uniforms and rank structures (sorely lacking in the Boer army) and their very effective use of combined arms warfare and joint arms warfare (also sorely lacking in the Boer army) and combine it with the Boer culture of warfare – the use of mobility, and applying high rates of survivability thinking to tactics of assault and defence (both of which are sorely lacking in the British army). 

Smuts will build into the UDF the doctrine of highly mobile ‘combined arms’ – mainly the effective use of mounted infantry, armour and artillery (and other ‘arms’) all acting in unison and speed. Finally, he’s able to implement the doctrine of “manoeuvre” using the Clausewitzian concept. Under General Jan Smuts the UDF was shaped into a very effective fighting force, one that is far ahead of the old Boer Republics strategic and tactical constructs and doctrine. This will have far reaching consequences as this South African ‘philosophy’ of warfare would be effectively applied from the 1st World War (1914-1918), to the 2nd World War (1939-1945) to the ‘Border War (1966-1989) and its still used by the SANDF to this very day.

Casualties

The number of casualties in the Boer War needs a whole new Observation Post, as here we look at the very sensitive subject of civilian casualties – Boer, but also British and Black – the number is extreme – about 50,000 and still rising given new research – nearly all of it the result of disease – Measles and Typhoid mainly. The Measles epidemic, which swept the ‘Black’ and ‘White’ Concentration Camps and the besieged British citizens – killed nearly 40% of all the civilians succumbing to disease – measles as a ‘children’s disease’ especially taking its toll on Boer children. Not just civilians, the biggest killer of British soldiery was Typhoid and not the Boer’s bullets, nearly two thirds of all British casualties are the result of disease – young fit men who are dropping like flies from the same diseases sweeping the concentration camps and British towns under siege. Typhoid alone affects 57,684 British soldiers – killing 8,225 of them.

This is a highly sensitive and misunderstood aspect of the war – it requires a full analysis on the disease bell-curves and medical science to fully properly understand the causes and effects, and actions taken or neglected  – look out for a future Observation Post in draft called “The Boer War’s biggest killer” where we will deep dive this subject and these statistics – because if there is one “winner” of this war’s butchers bill it’s not the British or the Boers – it’s an indiscriminate cocktail of micro-organisms.

We also need to look at the Killed in Action (KIA) and Died of Wounds (DOW) and survivability ratios between Republican and Imperial forces, as the KIA/DOW figure for the Brits is around 8,000 and the KIA/DOW figure for the Boers is around 4,000 – this implies the Boers were better soldiers – for every 1 Boer killed in combat 2 Brits are killed in combat (2:1 ratio) – this leads to the myths of the Boers been “better marksman” than the British or the Boers had better command and operational prowess – the British according to these myths were then “Lions led by Donkeys”.

However truth be told is on the survivability given the respective troop size and different doctrine, if you were a British soldier in South Africa in a combat role, your chance of surviving combat without been KIA or DOW was 98% – there was a 2% chance a Boer bullet would kill you – which is pretty good survivability by British doctrine which was “Hidebound by Tradition” with costly frontal attacks and bayonet charges and antiquated cavalry and lancer charges.

If you were a Boer combatant, given your overall troop size and strength, you had a 93% chance of combat survival and a 7% chance of been KIA or DOW from a British bullet. Which is not very good given Boer doctrine actually focussed on high degrees of survivability, choosing to break engagements, reconcile and fight another day (mobility and manoeuvre) – rather than stand and be bayonetted, cleaved and then impaled from a costly British frontal assault of infantry, cavalry and lancers – none of which appealed to the Boer way of fighting and doctrine for mounted infantrymen.
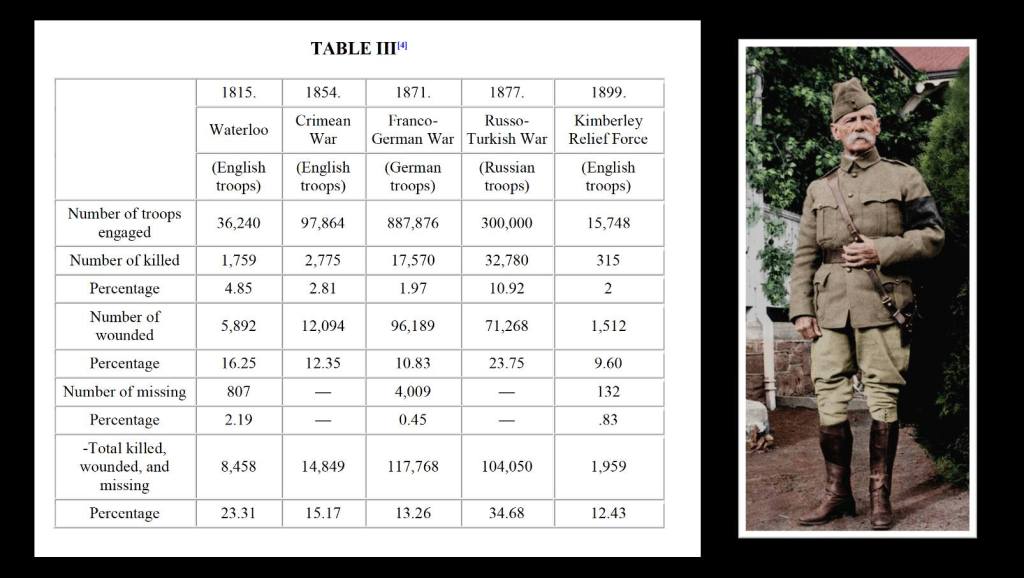
Bottom line – on casualties – statistically speaking the British command in the Boer War actually was pretty good given the improvements over time in doctrine from Waterloo to the Crimean War (see chart above), the Boer command on controlling casualties and survivability on the other hand was much poorer. One thing the British are NOT are “bad shots” and their Commanders are certainly NOT “Donkeys”. Simply put, if you were British you had a better chance of surviving combat, the point where the metal is flying around, than if you were a Boer.

In Conclusion 

Numbers speak more to truths than anything else, and the truth is the numbers support the idea that the Boers invaded the British colonies whilst they were numerically inferior and the Boers numerically superior, for the purposes of changing the regional balance between Boer and Brit and establishing a unitary state under “Afrikaner” influence – and not only does the republican planning and objectives point to this, their military strategy, doctrine and statements of intent supports it – and it is statistically proven. 

The idea that the British were building up an invasion force on the borders is complete Hollywood and panders to the ‘politically inspired’ sabre waving in the “ultimatum” delivered by the Boers and not to the reality on the ground at all. The idea that the Boers invaded British colonies for the purposes of forward defences or as some sort of pre-emptive strike is also completely unsupported by what actually happens, the actual plans and this assertion is woefully unsupported by military doctrine – entirely debunked by the science of military history.

Also, the idea that the Boer command and doctrine is somehow better than that of the British is completely statistically unproven, in fact the opposite is true, the ‘numbers’ point in favour of the British – so too does an analysis of the three aspects of effective command – on the Strategic level, the Tactical level and the Operational level.


Written, researched by Peter Dickens

With thanks to Tinus Le Roux and Jenny Bosch for the use of colourised images.

Related Work

Boer War 3 – The Maritz Revolt Boer War 3 and beyond!

The Black Concentration Camps of the Boer War The ‘BLACK’ Concentration Camps of the Boer War

The intended Boer invasion of Rhodesia The planned Boer invasion of Rhodesia

The Jameson Raid ‘Hurry Up’ and prove it!

References:

“Rights and wrongs of the Transvaal war” by Edward t. Cook. Publication date 1901

Leopold Charles Maurice Stennett Amery “The Second Boer War – The Times History of the War in South Africa 1899-1902” – Volumes 1 to 7.

Military History Journal, Vol 6 No 3 – June 1984. The Medical Aspect of the Anglo-Boer War, 1899-1902 Part II by Professor J.C. de Villiers, MD FRCS.

The Anglo-Boer war: A chronology. By Cloete, Pieter G

The Battle of Magersfontein – Victory and Defeat on the South African Veld, 10-12 December 1899. Published 2023. By Dr. Garth Bennyworth.

Dr David Brock Katz; ‘General Jan Smuts and his First World War in Africa 1914 -1917’

Dr Evert Kleynhans and Dr David Brock Katz; ’20 Battles – searching for a South African Way of War 1913 – 2013’.

Anglo-Boer War Blockhouses – a Field Guide by Simon C. Green, fact checking and correspondence – 2023.

The Boer War: By Thomas Pakenham – re-published version, 1st October 1991.

Correspondence and interviews with Dr. Garth Bennyworth, Boer War historian – Sol Plaatjies University, Kimberley – 2023.

Interviews with Dr. David Broc Katz, University of Stellenbosch, South African Military Academy – Military historian – focus on Jan Smuts and fact checking Boer and British military doctrine – 2023.

Correspondence on fact checking British doctrine with Chris Ash, BSc FRGS FRHistS, Boer War historian, Fellow of the Royal Historical Society and Fellow of the Royal Geographical Society for The Boer War Atlas – 2023.

History of the war in South Africa 1899-1902. By Maj. General Sir Frederick Maurice and staff. Volumes 1 to 4, published 1906 

Whose land is it anyway?

It’s a thorny issue in South Africa, the taking of farm land without compensation.  However the Anglo-Boer Wars (both of them) and even the Voortrekker Zulu War carry with them some interesting history and it asks the question ‘whose land is it anyway’ One significant and conveniently overlooked answer lies in the grounding history and cause of the South African War 1899-1902 (also known as the 2nd Anglo-Boer War).

This answer makes the case for the giving of annexed land by the Transvaal and Orange Free State Republics (The Boers) back to the black indigenous peoples of South Africa who existed in those two republics prior to The South African War, and it ALSO makes a case which reinforces the ‘white’ Boer ownership of vast tracks of land in the two old Boer Republics annexed by the British during The South African War.

To many South Africans the chief cause of the Second Anglo-Boer War is completely misunderstood, it is shrouded by a National Party narrative and bias caused by the fierce sense of Afrikaner Nationalism created by this party’s ideology.   Dismiss for a minute the whole Nationalist idea that all the land was ’empty’ or bartered and traded for fairly during the Great Trek. Also, dismiss for a minute also the whole idea that the 2nd Anglo-Anglo Boer war was all only about ‘gold’ and ‘diamonds’ and British greed for it. Finally, dismiss the idea that the Boer concentration camps of The South African War were systematic ‘extermination’ camps designed to rid the British world of the Boer nation in its entirety (Nazi style).  All of these Nationalist fuelled ideas are either falsehoods or at best only half-truths.  When putting these into correct context and in the ‘inconvenient’ truth that the case for ‘who owns the land’ is found.

Let’s start with the real underpinning reason for the 2nd Anglo-Boer war (The South African War), which is the 1st Anglo-Boer War (The Transvaal War).  Like World War 2 is World War 1, Part 2, so too a key underpinning cause of  the 2nd Anglo-Boer War was the 1st Anglo-Boer War.   In effect ‘Boer War’ 2 is ‘Boer War 1’; Part 2.

1st Anglo-Boer War

The 1st Anglo-Boer War (Transvaal War) is an enigma to most South Africans, barely understood even today, the events and outrages of the 2nd Anglo-Boer War completely cloud it out, and it’s an inconvenient war to look at as it throws up these thorny truths which don’t suit the political narrative:

  • The Transvaal Republic was at one stage a British Colony BEFORE the 2nd Anglo- Boer War
  • The Transvaal Republic ‘raad’ handed their Republic, with all its wealth and their state coffers (tax), their flag and their independence to the British in April 1877 – willingly and WITHOUT one single protest or shot fired.
  • ‘Native Land’ and ‘Protection’ were also a central reason why the Transvaal Boer Republic INVITED the British to colonise their Republic.

In 1876 the tiny Boer population of the ‘Transvaal’  people was under threat from a much bigger population of warring African tribes in the Transvaal Republic and on the Republic’s borders (remember this was before the discovery of gold in 1886 and before the future ZAR Republic was rich in arms and munitions).

The reason why the Transvaal Boers were under threat is that they were annexing tribal land by force and demanding tax from various tribal groups for the land (and forcing labour) on land they were allowed to occupy. This had stirred up the Pedi, led by Sekhukune I and resulted in a war in 1876 which is recorded as a Boer defeat.  To the East the very powerful Zulu kingdom was also making claims on ‘Transvaal’ territory.

This ‘Black African’ uprising was one the Boers could not cope with alone.  So the Boers INVITED the British to Colonise their Republic and protect them.

The Black Africans in the Transvaal Republic felt they had a case too, and they too called on the British to help them from what they saw as Transvaal Republic aggression, land grabbing and subjection.  They also INVITED the British to protect them.

All good then, invited by EVERYONE in the Transvaal Republic the British moved into the Transvaal on the 12th April 1877 to settle the peace, annexed it as British Colony,  with no resistance they took down the ZAR ‘Vier-Kleur’ and hoisted the Union Flag (Jack) over Pretoria and erected a British government.  In doing so the ex-Boer Republic also handed   over the money, tax would now be collected by the British – all tax, the taxes on mining and the taxes on land.

In addition, to protect the ex-Boer capital they built forts around Pretoria (Johannesburg did not really exist as a complete mining city and some of these forts in Pretoria are still there as an inconvenient reminder of this history). For their efforts, the British got to expand their territory in Africa (more land for them) suiting their expansionist Imperialism agenda right down to the ground, everyone happy right?

But not for long, the British had crushed the Zulu threat in 1879 (Anglo-Zulu War), with the threat gone, it did not take long before the British policies on Black African land rights and their policies of taxation of Boer land became an issue with the resident Boer population.  It all came to a head with the Boers when the British confiscated one Boer’s wagon in lieu of his backdated tax, which he refused to pay.  This brought them into direct conflict with a Boer Commando drafted to help the farmer and simply put the Boers now wanted their old Republic back and the British OUT.  This then kicked off the 1st Anglo-Boer War, the ‘Transvaal War’ in November 1880.

image

The Siege of Rustenburg, 1st Anglo-Boer War

So what was the issue really – it can’t just be one wagon?  We have to ask ‘whose land is it anyway’ and ‘who really needed it protected from who’?  The Boer case lies in two events in history which occurred more or less at the same time, the ‘Great Trek’ and the ‘Mfecane’.

The turbulent early 1800’s

Its complicated history, but in a nutshell in the early 1800’s are the key, specifically the period 1819 to 1838 – this was the epicentre of events in South Africa which were to shape the problem we have in South Africa today, especially as to ‘freedoms and land’.

It all started in one part of the country on the 1st December 1834 when the British took the bold decision to ban slavery in the Cape Colony and in addition gave franchise (the ‘vote’) and property ownership rights to all its inhabitants – Black and White (Setter, Coloured and Indigenous) on an equal footing.  This did not sit well with the  mainly Dutch (with a blend of French and German) farmers many of which found themselves in an intolerable situation as ex-slave owners and they chose, just a short 6 months later, in June 1834, to up-sticks and leave the British colony and their endless meddling in their social structures, beliefs and social spheres.  At the same time taking with them into South Africa’s hinterland their ideologies of racial servitude, ideologies which would underpin the future Boer Republics which they formed.  They would also form a new nation an ‘Afrikaner’ one, with an Afrikaans language both named after their ‘land’ in ‘Africa’ – essentially a ‘White African Tribe’.

31487269_2130655337163453_5957646760985928386_n

The Great Trek – artists impression

Around the same time, in another part of the country Shaka Zulu and the Zulu nation  was born.  In 1819 Shaka Zulu managed to unite, through force and war, a number of small tribes into a newly established ‘Zulu nation’.   Like the Boer ‘Afrikaners’ their nation did not exist as a ‘Zulu’ one prior to the early 1800’s.

The 1st ‘depopulation’ of land

So when and how did these northern ‘Black African Tribes’ establish themselves in South Africa? The answer lies in the Mfecane (meaning ‘the crushing’), also known by the Sesotho name Difaqane (scattering, forced dispersal or forced migration).  This great  displacement of Black tribal people took place between 1815 and about 1840.

30806362_2130615857167401_5549917167853742007_o

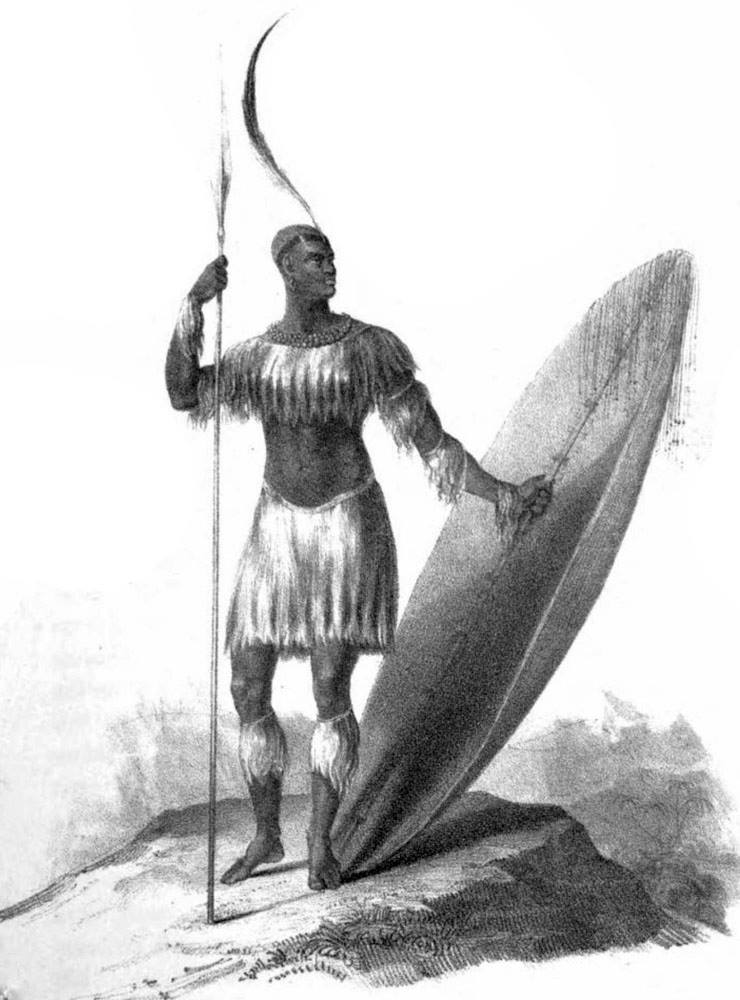
King Shaka – artists impression

As King Shaka created a very militaristic Zulu Kingdom (situated in the territory between the Tugela River and Pongola River) his forces expanded outwards in a wave, subjecting or simply annihilating all other peoples.  This expansionism also became the prelude to  the Mfecane, which spread from this Zulu epicentre. The forced movement of peoples caused many displaced tribes to wage war on those in other territories, leading to widespread warfare and death as well as the consolidation of various tribes.  Notably, it brought up the Matabele actions who dominated in what was the ‘Transvaal’ when Mzilikazi, a king of the Matabele, who between 1826 to 1836 ordered widespread killings and reorganised his territory to establish the new Ndebele order. The death toll is estimated between 1 to 2 million people (it cannot be satisfactory determined), however the result can, as simply put was massive swaths of land in the region became depopulated, either entirely or partially.

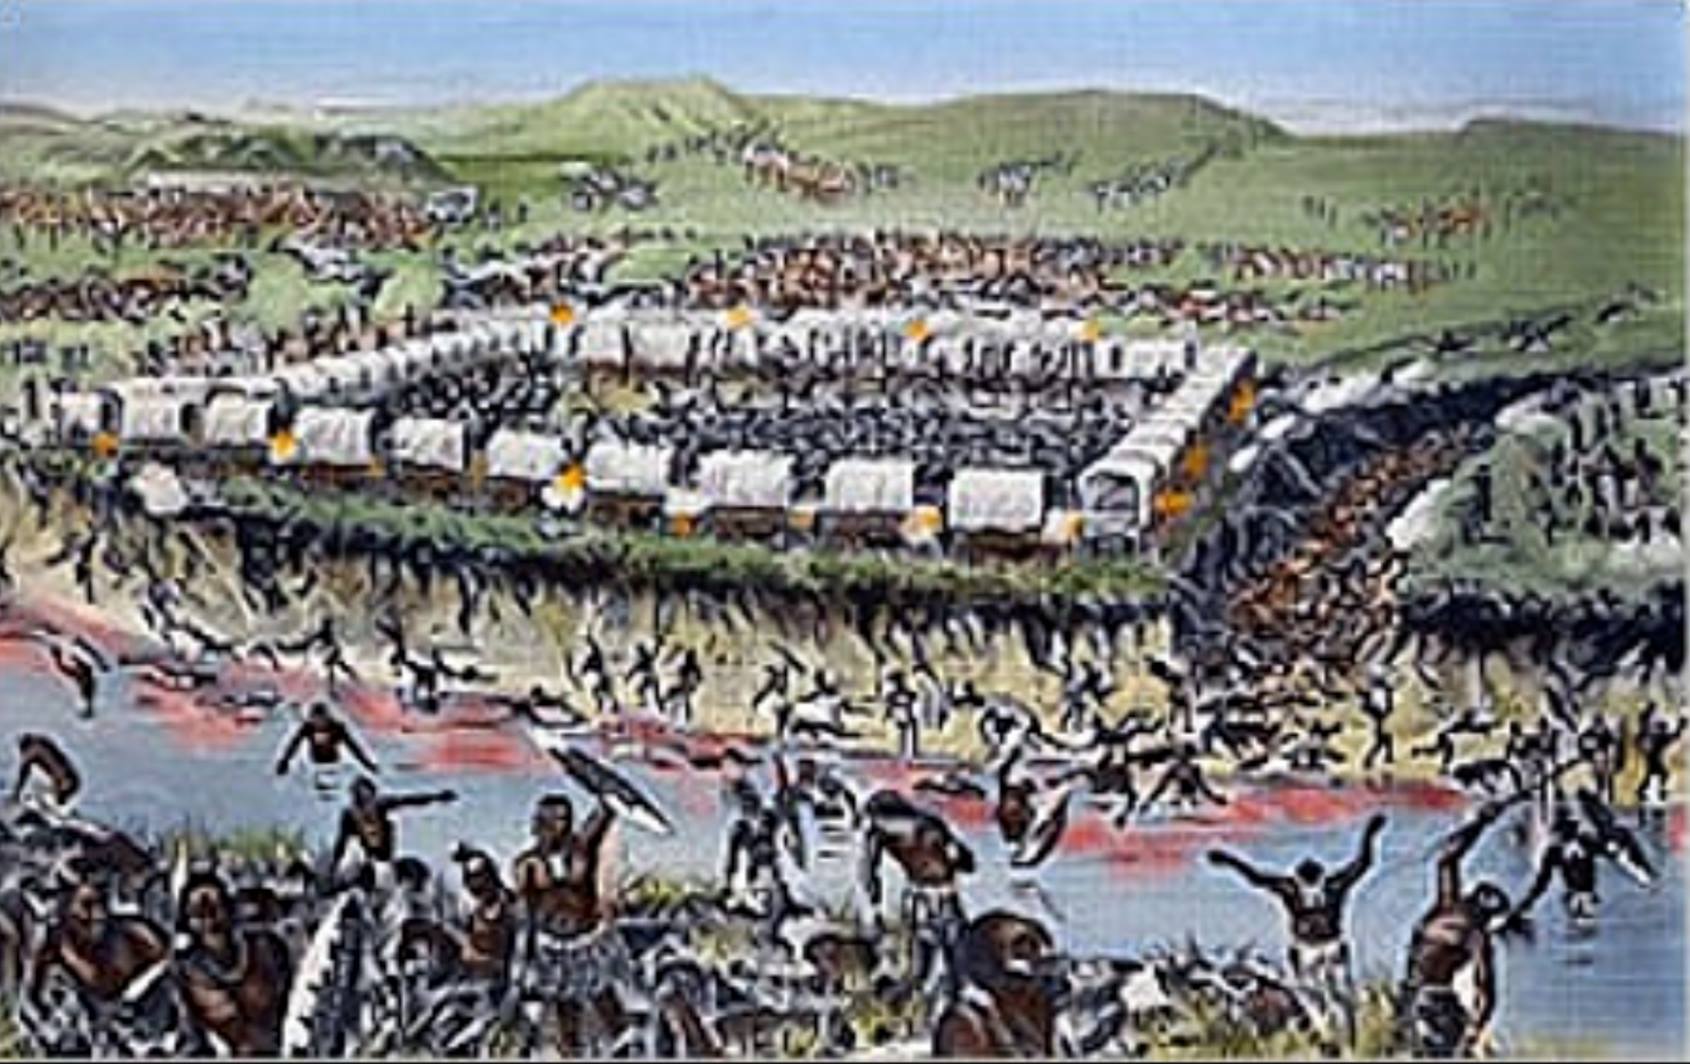
Now, enter the trekking ‘white tribe’ Afrikaner Boers, who in 1836 whilst all this is taking place arrive in the same place as the Mfecane, and to survive as nation and not be ethnically cleansed  themselves in addition to the other tribes, the Boers take on by force this warring Matabele nation and then they take on the warring Zulu nation by force of arms, the cumulation was the Battle of Blood River on the 16th December 1838.

30171590_2130613020501018_7878437854953059926_o

Artists impression of the Battle of Blood River – artist unknown

The Battle of Blood River is significant, not just for the Boers, but for all future Black South Africans who are not of Zulu or Matabele ethnic origin.  In effect the Boers, by decimating the Matabele army and then the Zulu army put a temporary end to their respective fighting capabilities and therefore put an end to the Mfecane, they ended what is South Africa’s first and only mass genocide and ethnic cleansing.  It’s an ironic twist but the very existence of any of these ‘Black’ South Africans in South Africa today (other than the aforementioned Matabele and Zulu), and the very fact they are even identified as tribes and exist as nations, is largely thanks to the Afrikaner Voortrekkers – the ‘white tribe’ Boer nation.  They literally owe them their lives and nationhood.

Now, as to the old ‘half truth’ the land was ’empty’ or ‘traded fairly’ so the Boers could occupy it.  In part there is truth, some of the land had been depopulated by the Mfecane also many tribes welcomed the Voortrekkers giving them parcels of land in trade and in grateful thanks for their ‘protection’ against been slaughtered by Matabele or Zulu armies. All good right – fair is fair?  Not so, it’s only partly true.  There’s a more sinister side to the formation of the two Boer Republics, not all the land was fairly settled, the two Boer Republics also embarked on expansionism to establish borders and forced various tribal Africans from some of their land at the same time as annexing land belonging to various chiefdoms and putting it under Boer ownership.

1820 Settlers 

To be fair the Boers, the British in the early 1800’s were also securing and expanding their own borders and territory (land) and endeavoured to repel the southward migration of the Xhoza tribe, driven very much by the Mfecane up north.  This issue came to a head around Grahamstown, on what was known as the ‘Border’.

fig-8-4

British 1820 Settlers arriving in South Africa

In the UK, the end of  the napoleonic wars at the Battle of Waterloo 18 June 1815 posed a problem, they had massive unemployment, especially soldiers who were no longer needed and rising debt from fighting the wars.   They solved this by offering citizens, who were to become the ‘1820 Settlers’, their own land, and it was land which they needed reconciled on the ‘Border’ of the Cape Colony.  After a number of small wars were fought with indigenous tribes settling the ‘border’ issue – the British then went about reconciling the land under deed, some farm land was even given under deed to Black African farmers, but others remained controversial and it still is.

The even more turbulent late 1800’s

Now, fast forward to the Anglo-Zulu War of 1879 and a year later to the 1st Anglo-Boer War of 1880.  The African chiefdoms in the North and West Transvaal have recovered from the Mfecane, and have been armed in part by missionaries and traders trading rifles.  Whilst at the same time the Zulu Chiefdom bordering the ‘Natal Colony’ settled by the British and the newly minted British ‘Transvaal Colony’ also now settled by the British, is again back up to fighting strength.  ‘Land’ becomes the central problem again (the Zulu’s were really not that interested in gold).

31543425_2130621920500128_6212394080895866691_n

President Thomas Burgers

Consider for the underpinning tensions leading up to the 1st Anglo-Boer War  (The Transvaal War) in 1880.  The British annexed the Transvaal in 1877 at the invitation of the out-going ‘Boer’ Transvaal President, Thomas Burgers.  President Burgers laid squarely the blame for bringing the British to the Transvaal at the future President, Paul Kruger and his cabal.  His  blame and anger is expressed with this most extraordinary outburst and it is most illuminating:

“I would rather be a policeman under a strong government than a President of such a State. It is you—you members of the Raad and the Boers—who have ruined the country, who have sold your independence for a drink. You have ill-treated the natives, you have shot them down, you have sold them into slavery, and now you have to pay the penalty.”

The missionary, Rev John Mackenzie, gives us another example. Here is how Mackenzie described the motives behind the First Boer War: 

“The Transvaal rising (1st Anglo Boer War) was not dictated, as was believed in England, by a (Boer) love of freedom and preference for a (Boer) republic rather than a limited monarchy (Great Britain). It was inspired by men who were planning a policy which would banish the English language and English influence from South Africa. Their action was a blow directly dealt against freedom, progress, and union of Europeans in South Africa.”

30822238_2130622417166745_8255877245435884884_o

Paul Kruger

After Kruger et al regained control of the Transvaal, another missionary, the Rev John Moffat, was tasked with giving the news to some of the black tribal leaders who would again be abandoned to their tender mercies: 

“for the most part there was the silence of despair. One gentle old man, Mokhatle, a man of great influence, used the language of resignation, ‘When I was a child, the Matabele came, they swept over us like the wind and we bowed before them like the long white grass on the plains. They left us and we stood upright again. The Boers came and we bowed ourselves under them in like manner. The British came and we rose upright, our hearts lived within us and we said: Now we are the children of the Great Lady. And now that is past and we must lie flat again under the wind—who knows what are the ways of God?’”

The thoughts of a few more African leaders are equally illuminating:

In response to the endless violent expansion of the pre-annexation Transvaal into their territory, Montsioa Toane, Chief of the Barolong, requested that Great Britain take his people under imperial protection. In a letter addressed to ‘His Excellency Her Britannic Majesty’s High Commissioner, Sir P. Wodehouse, KCB’, the chief requested “refuge under your protecting wings from the injustice of the Transvaal Republic, whose government have lately, by proclamation, included our country within the possessions of the said Republic”.
He went on to explain: “…without the least provocation on our side, though the Boers have from time to time murdered some of my people and enslaved several Balala villages, the Transvaal Republic deprives us, by said proclamation, of our land and our liberty, against which we would protest in the strongest terms, and entreat your Excellency, as Her Britannic Majesty’s High Commissioner, to protect us.”

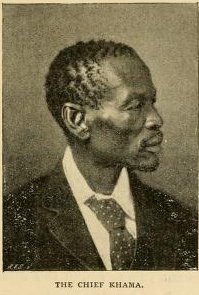
Chief-khama-IIIIn 1876, King Khama, Chief of the Bamangwato people from northern Bechuanaland, joined the appeal: 
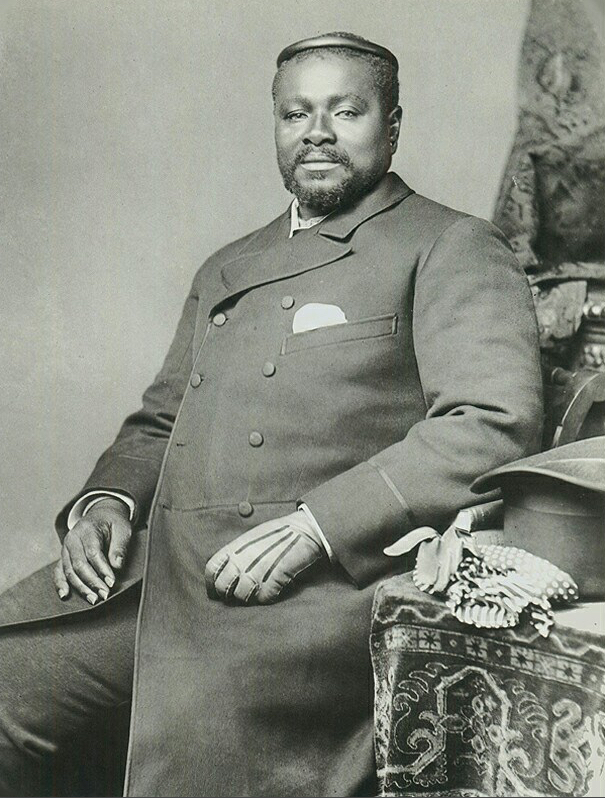
“I write to you, Sir Henry, in order that your queen may preserve for me my country, it being in her hands. The Boers are coming into it, and I do not like them. Their actions are cruel among us black people. We are like money, they sell us and our children. I ask Her Majesty to defend me, as she defends all her people. There are three things which distress me very much: war, selling people, and drink. All these things I shall find in the Boers, and it is these things which destroy people to make an end of them in the country. The custom of the Boers has always been to cause people to be sold, and to-day they are still selling people.”

8e21cb58c3a6c0e4296505afee709889

King Cetshwayo

Even King Cetawayo of the Zulu laid the blame for the tensions which led to the Anglo-Zulu War of 1879 against the British squarely at the feet of the Transvaal Boers, now this is ironic from the leaders of Zulu themselves, he said: 

“This war (the Zulu War) was forced on me and the Zulus. We never desired to fight the English. The Boers were the real cause of that war. They were continually worrying the Zulus about their land and threatening to invade the country if we did not give them land, and this forced us to get our forces ready to resist, and consequently the land became disturbed, and the Natal people mistakenly believed we were preparing against them.”

250px-John_X_Merriman_-_Cape_Prime_Minister

John X Merriman

Just prior to the 1st Anglo-Boer and the British annexation of the ‘Transvaal Colony’, in 1885, the liberal Cape politician, John X. Merriman described Kruger’s newly independent, and ever-expanding, republic as follows: “The policy of the Transvaal was to push out bands of freebooters, and to get them in quarrels with the natives. They wished to push their border over the land westwards, and realize the dream of President Pretorius, which was that the Transvaal should stretch from the Indian Ocean to the Atlantic. The result was robbery, rapine and murder.”

30419962_2130626770499643_2719702072784891833_o

Dr Abraham Kuyper

The ZAR ‘Transvaal’ Republic’s main-cheerleader in Europe, Dr Kuyper, commented enthusiastically on the racial policies of the Republic: “The English prided themselves on protecting the imaginary rights of the natives… The Boers are not sentimentalists, but are eminently practical. They recognized that these Hottentots and Basutos were an inferior race.”

Majuba

Things came to a head in the 1st Anglo-Boer War at The Battle of Majuba Hill (near Volksrust, South Africa) on 27 February 1881.  This was the main and decisive battle of the 1st Anglo-Boer War (Transvaal War). It was a resounding victory for the Boers and the battle is considered to have been one of the most humiliating defeats of British arms in history.

30821223_2130612847167702_4007037161243377805_o

It sent the British back over their border to Natal, but it also resulted in a very uneasy ‘peace’ as to the British ‘Transvaal Colony’.  In the aftermath of the war the South African Republic (Transvaal) regained its independence. The Pretoria Convention (1881)  and the London Convention (1884) laid down the terms of the peace agreement.  In terms of land the Pretoria agreement settled the Transvaal’s borders and re-established an independent Boer Republic again, but it still had to have its foreign relations and policies regarding black people approved by the British government.  The new version of the Boer Transvaal Republic was also not allowed by the British to expand towards the West (and link with the Atlantic Ocean).

These policies meant that the Transvaal was still under British suzerainty or influence. In 1884 the London Convention was signed. The Transvaal was given a new Western border and adopted the name of the South African Republic (ZAR). Even then, the ZAR still had to get permission from the British government for any treaty entered into with any other country other than the Orange Free State.

An ‘uneasy’ peace

The Boers saw this as a way for the British government to interfere in Transvaal affairs and this led to tension between Britain and ZAR. This increased steadily until the outbreak of the 2nd Anglo-Boer War in 1899, especially with the on-set of gold mining. which saw tens of thousands of British miners settle in the Transvaal.  Gold mining was done under concession from Kruger’s government.  Kruger took the position that his people, the Boers, were farmers and not miners, so he gave British mining concerns a mandate to mine and pay the ZAR government a hefty tax for the privilege. Initially mining in the Transvaal was an all British affair – from the mining concerns, to the infrastructure (rail and buildings) and even right down to the labour.  Again ‘land’ had been conceded by the Boer Republic to British miners and companies.  As inconvenient truths go, they already ‘owned’ the gold at the onset of the 2nd Boer War and had no reason to ‘steal’ it.

The unsettling problem for the British and the Boers was a demographic and representation one, there were more Britons on the reef than Boers.  These British citizens were denied political representation and citizenship qualification periods became an issue (Kruger realised if he allowed citizenships after 5 years residency he would lose his state).

Also the Boer State was crushing political protest on the reef in a jack-booted and heavy-handed manner using their Police, known as ZARP. Things came to a head with a privateer raid (supported privately by Rhodes) called the Jameson Raid in 1895 which was planned in the billiards room of the Rand Club in Johannesburg (and not by British Parliament in Whitehall as is incorrectly assumed – in fact to British politicians the whole affair came as uncomfortable surprise).  The Raid, financed by the mine owners and not the British government, was intended to trigger a simmering civil revolt on the reef. The revolt was crushed by the Boers.

A1S7_1_20170618730957404

Jamesons Last Stand The Battle Of Doornkop 1896.

This unrest and uneasy peace established after the 1st Anglo Boer War all came to a another head when negotiations on citizenship and political representation of the Transvaal Britons broke down.  To settle the dispute the Boers declared war on Britain and invaded the British colonies late 1899 – in effect they wanted a swift victory whilst British forces were weak and unsupported by any substantial expeditionary force – as they did at Majuba and weaken the British negotiation hand, re-set the table so to speak.

It backfired. The mandate given to the Boers to re-establish their ‘British Transvaal Colony’ as an independent Boer Republic lasted barely 15 years after the London Convention peace agreement which properly ended the 1st Anglo-Boer War and finally established the ZAR territorial borders.

To the British, there was an ‘old’ score to settle with the Transvaal Boers, and it had nothing to do with ‘gold’ and everything to do with territory – ‘land’.  It is best summed up by Churchill who reflected on the 1st Anglo-Boer War as “a disgraceful, cowardly peace” – and now they wanted their Colony back.

Mjuba

Graffiti scrawled by both sides in a house recaptured by the British in the 2nd Anglo Boer War. The Boer graffiti reads: ‘Don’t forget Majuba, Boys’. British graffiti reads: ‘No fear, Boere, no fear’.

1st Anglo-Boer War – Part 2, the 2nd Anglo-Boer War

Now, as ‘Boer War’ 2 is the logical expansion of ‘Boer War’ 1, consider that these tensions over land and the whole of the Transvaal had by the late 1800’s escalated somewhat.  In the intervening period between ‘Anglo-Boer War’ 1 and ‘Anglo-Boer War’ 2,  gold was discovered in the Transvaal, and in addition to this the local Black tribes flourished, with no more large wars to fight and no Mfecane and aided by the introduction of medicine by missionaries, this mounting black population of the Transvaal added to the hundreds of thousands of mainly British immigrant mine workers now settled in the Transvaal.

Now, with a ‘old score’ to settle over the Transvaal territory, along with a simmering revolt of miners over their rights to the land, the Boer declaration of war against the British, provided a ‘Casus Belli’ to the British to again wage war them again, and so began the 2nd Anglo-Boer War (1899 to 1902). To give perspective of how long the ZAR lasted, from the time the British Union ‘Jack’ was taken down over Pretoria to the time it was put up again took a mere 16 years.

The 2nd ‘depopulation’ of land

Back to the issue of land.  During the 2nd Anglo-Boer war the British, after winning the ‘conventional’ war phase were forced into a second and more bitter phase,  guerrilla war with disposed Boer governments now ‘in the field’ and running their Republics from the veldt, a moving and endlessly fraught war where Boer forces relied on their communities and families for supply to keep the fighting.

Lord Kitchener in an attempt to bring the war to rest adopted a policy depriving the Boer forces of supply, and so began a policy of ‘concentration camps’.  This can be better described as ‘forced removal’ from land and the placing of citizens in ‘deportation camps’, it involved rounding up of both White and Black civilians in demarcated conflict zones and effectively ‘depopulating’ the land and moving all the people to isolated camps.  The policy which resulted in the deaths of tens of thousands and people deprived of their land leaves a deep scar on many South Africans, and not just the white Afrikaners, the black South Africans caught up are equally traumatised.

28699287_1608270105876259_4601684936069398143_o

So, now we have an interesting dilemma for the current citizens of South Africa who own vast tracks of land in the Republic, the inconvenient truth is that not only was it ‘depopulated’ by the Zulu Kingdom in the early 1800’s, it was depopulated again by the United Kingdom – eighty or so years later.

The international case

Now here is where the issue of land ownership gets interesting, and funnily it is in line with the issues now surrounding the Palestinian question and Israel (and best illustrated by this case as it surrounds ‘land’ ownership and war).  Many people are not familiar with the underlying problem of land under occupation in Israel.  In international law an occupying force can do anything within limitations on the land it occupies as long as a state of war exists.  This has become a thorny issue with the Palestinians who, like the Boers, were deposed of their land by war – land which the British sold to Palestinians under title-deed whist Palestine was a British protectorate (those pesky British again), and this land is now under private title deed is owned by Palestinians and occupied by Israelis – and it makes up massive portions of modern Israel.

1_244173_1_9

If given back to the legal owners it will most certainly unseat Israel as a state and put millions of dollars invested in land at risk.  The only way Israel can hold onto the land legally is to be in a constant state of war with the Palestinians (not really the other way round – see annual Palestinian protests when the bring the house keys and title deeds to their land to the fore – which over the border are now occupied by Israeli families or developed into multi-million dollar property estates and shopping malls).

How does this odd bit of International law apply to South Africa’s farmers. Simply put they were deposed of their land during the 2nd Anglo-Boer war, it came under British control under the edicts of war.  Unlike the Palestinians the Boers were allowed to return to the land, land on which families were decimated and could not be re-settled was re-allocated by the British and the Union governments after the war, the last ‘legal’ owner of this land expropriated during the war were in fact the British.    In the subsequent years after The South African War, as a colony of Britain and then under British administration and dominion as a Union, the country went about formalising land title and ownership from the old Boer Republics and concluding war repatriation and re-settlement.

Palestine-kids-key-ap-img

Palestine ‘Keys’ and ‘Deeds’ protest symbolised by their old keys to their houses in Israel

So, in our modern day, if this land is now taken away without compensation, the Israeli/Palestinian dilemma and the annual ‘keys’ protest rears it head, where the ‘British’ issue is now again at the forefront of title deeds and like the Palestinians, the dispossessed modern Boer family will want to turn to Britain for an answer, adding to the many dispossessed Zimbabwean white farmers with a similar case.  That would be a nasty surprise for the modern British Foreign Secretary.

Here’s another interesting question over South African land located in the Centre and Northern  provinces and the two seismic events that depopulated much of it, not to mention the British sale of land in the Cape, especially in contested ‘Border’ region which they purposely ‘settled’.

Would a claim now for restitution or compensation for land ‘re-appropriated without compensation’ be laid at the feet of the Zulu King or at the feet of the British Queen?

In Conclusion

All very complicated this land reformation business, now an almost impossible job to simply unbundle through declarations of ‘mine – you stole it’ and simply grabbing it.  A case example here is the land grabbing which recently took place in Midrand and Hermanus, this land has nothing to do with the disputed historical African territories unseated by the expansion and creation of the old Transvaal, Orange Free State, Natal and Cape Colony borders, and the people occupying it are not all the proper ancestors anyway.  This is a political grab using a very bent interpretation of history.

There is value in identity of having a ‘homeland’, but whose people are we referring to when we say ‘our people’, the ‘homeland of the Afrikaner nation is also Africa. By all means look at the land taken by force of arms from various Chiefdoms as their tribal land borders and were they stood after the Mfecane, and the resultant occupation by Zulu, Matabele, Brit and Boer alike and not the land ‘sold’ to the Boers or the British for that matter for trade or protection.   Present the historical evidence showing which families and grouping were unseated by force of occupation and how this ‘stolen’ land was then put under plough by the occupiers.  There’s not much to go by in the way of arable and profitable ‘land’ here, but lets challenge it properly.

Generally the historically contested farm land is nowhere near the bulk of multi-million rand privately owned title-deed farms – so really of no political value.  Unless you provide the argument that all land was occupied by whites, and this is not historically true at all.  In which case everybody who has a white skin can have his property simply taken away – now we are into a ludicrous argument, and one used to incite racial disharmony and hatred.

Urban land, depopulated by Apartheid policy only really accounts to small areas located near Johannesburg and Cape Town city centrals,  Land, which now, because it worth literally millions of Rand, is under contention, the reason for the slow progress is that multiple families are making claims to the land, families which actually own it and families which rented it.  District 6 is a prime example, it really is a political quagmire as its now vastly profit driven and less about the ‘home’ it once offered.  Also in reality it cannot be settled by huge numbers of the ‘people’ offered by the EFF – they want the nice well run profitable farm land which is under title-deed and owned for decades by private individuals (who are not Black) – whether it’s under real historic contention or not, so it’s entirely wrong of Cyril Ramaposa to cite District 6 in his SONA address as a key underpinning social cause of the ANC’s entire land without compensation drive.

The biggest dilemma facing the proposed amendment to the Constitution is that in reality the land everyone in the ANC and EFF wants and is highly productive – and its land which has not only been depopulated once, its been depopulated twice and resettled twice over after the end of the Mfcane and 2nd Anglo-Boer War respectively.

The lands negotiated with and allocated to the Zulu kingdom are even a more thornier question and we might want to ask is the Zulu kingdom is going to pay for land depopulated by their expansionism and militarism, so too can the same question be asked of the Matabele.  There another human trait here, one that will not go away once this particular monkey is out the cage, it’s called greed, and it’s an intrinsic human condition the ANC has been indulging itself in, time and again.  Here is where the Zulu have drawn the line when Mangosuthu Buthelezi rightly accused the ANC and EFF of ‘playing with fire’.

The simple truth is this.  ‘Land’ ownership in South Africa has been defined by war and armed ‘struggle’, and not just war between ‘Blacks and Whites’, war between ‘Blacks and Blacks’ and even war between ‘Whites and Whites’.  The burning question is, will it be defined again by another ‘war’  – another armed ‘struggle’?

Related articles and Links

Concentration Camps; To fully reconcile The Boer War is to fully understand the ‘BLACK’ Concentration Camps

Concentration Camps; I’m not pro Boer, I’m British, this isn’t OUR way!

Majuba; Boers; ‘Don’t forget Majuba, boys’. Brits; ‘No fear, Boere, no fear’.

Winston Churchill; Churchill’s epic ‘Boy’s Own’ Adventure in South Africa

Kruger and Victoria; Kruger “blunders” and declares war on the world’s Superpower!


Written and researched by Peter Dickens.  References from Wikipedia, the South African History Association on-line, quotes gleaned from ‘getting to the source’ by Chris Ash. Colourised 2nd-Anglo Boer War photograph copyright Tinus Le Roux.

How South Africa forged Winston Churchill

Winston Churchill’s ‘Great Escape’ from Boer captivity during the ‘South African War’ (1899 to 1902) – is the stuff of a ‘Boy’s Own’ adventure book. Boy’s Own was a Victorian period magazine featuring great fictional adventures and deeds of Empire.

Boys_Own_Magazine_Feb_1855Because Churchill’s exploits in the South African War were marketed as a grand adventure, it vaulted this failing politician into the annuals of British heroism and resuscitated his career in a manner that can only be described as ‘stellar’.
It was this escape from a POW holding pen in Pretoria during the South African War that set up and ultimately forged Churchill into the juggernaut politician and statesman he was to become, without it Great Britain may never have had its great wartime leader and ‘saviour’ during World War 2 and by the same token the disaster at Gallipoli during World War 1 may even have never taken place.

So, let’s have a look at why South Africa is the epicentre of Churchill’s revived career and why by association this country gave the world a man who in 2002 was voted as the ‘Greatest Briton of all time’ placing him at the top of the most influential people in British history.

Let’s also examine why a lot of people would frankly have been very happy if the Boers had shot and killed him on the fateful day he was caught in Natal (an outcome which very nearly happened).  On the way we’ll also unravel some truths and myths.

Churchill’s South African ‘Adventure’

Young Churchill

Known as ‘Copperknob’ a colourised young Churchill at Harrow

To say Winston Churchill was an ambitious young man would be a classic example of English understatement. By the age of 25, the freckled-faced redhead had already written three books, run unsuccessfully for Parliament and participated in four wars on three continents. He was even nicknamed “Pushful, the Younger” because of his ambition, Churchill hungered for fame and glory unwavering in his belief that he would one day become Prime Minister. “I have faith in my star that I am intended to do something in the world,” he wrote to his mother.  Unknown to him at this stage his ‘star’ was to align and bring him fame in South Africa.

Winston Churchill initially took part in the South African War as a ‘war correspondent’ for The Morning Post.  Some war correspondents (like Churchill) tended to be retired commissioned officers with military experience attached to British Regiments or Formations, their reporting was intended to toe the military line.

Churchill as a war correspondent was generally disliked by the British upper officer class, they found him highly critical of their strategy, tactics and actions, they also found him impertinent, arrogant and nothing more than a meddling glory monger.  His ‘upper class elite’ and ‘political class’ heritage presented him as a double-edged sword to any Regiment or Division’s officer elite and they had no choice, simply put they had to just put up with him.

True to form, Churchill’s activities in South Africa literally read like a ‘Boys Own’ Adventure Novel. Within two days of the Boer Republics declaring war on Great Britain on 11th October 1899, Britain started to mobilise their forces at home, in the Cape Colony and Natal their forces were relatively small frontier garrison forces supplemented by citizen force members (which they began to muster anticipating the coming hostilities), and they were hopelessly under-strength.

18056649_10155221467369476_6950152090307411838_nIt a ‘myth’ that Britain had built up large forces to invade the Boer Republics before the start of the war.  The ‘truth’ is they were relatively unprepared and much weaker than the well equipped Boer forces – ‘Black November’ illustrates this perfectly.  The Boers had banked on a swift victory whilst Britain was weak, hence their ultimatum was followed immediately with a surprise Boer invasion of the British colonies – Natal and the Cape Colony.
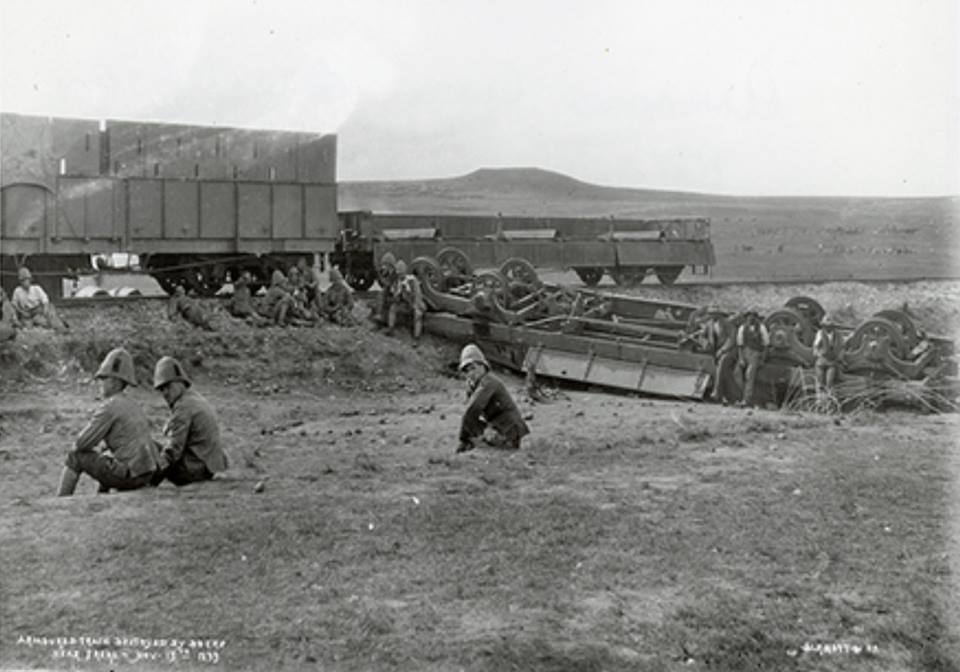
The British decided to initially send General Sir Redvers Henry Buller and a small contingent of officers, a detachment of troops and a gaggle of journalists off to South Africa on a fact-finding mission to gauge troop strength ahead of sending any major expeditionary force requirements, they left on the Dunottar Castle on 14th October 1899.

Churchill had planned to publish his magnum opus in October 1899, “but when the middle of October came, we all had other things to think about”. He said, “the Boer ultimatum had not ticked out on the tape machines for an hour” and he was on his way to the Cape Colony, appointed as the principal War Correspondent of the Morning Post. He was to be paid £250 per month for four months (£ 1000 was a small fortune at the time), all expenses paid and he retained the copyright on his articles.

Churchill was first in with Buller’s fact-finding mission anticipating his big ‘scoop’.  Sailing with great haste and at high-speed, Churchill called the voyage with Buller as “a nasty, rough passage” and wrote his mother that he had been “grievously sick.” The passage aside, in typical form Churchill even took his valet with him and a vast liquor cabinet that included 18 bottles of Scotch Whiskey also went in tow.

churchill to the cape

Illustration of General Sir Redvers Buller on the Dunottar Castle, steaming at haste to Cape Town departing Britain on 14 Oct 1899

In those days before radio, they were completely cut off from the world while at sea. Approaching the Cape, a passing ship held up a blackboard on which was written: BOERS DEFEATED, THREE BATTLES, PENN SYMONS KILLED. A staff officer ventured to address Buller. “It looks as if it will all be over, sir.” Buller only said,“I dare say there will be enough left to give us a fight outside Pretoria.”

Churchill arrived with Buller in Cape Town on 31 Oct 1899, by this stage the siege of the British frontier town of Ladysmith was well underway, and the initial message of Boer ‘defeat’ was very incorrect.  Churchill could not believe his good fortune and endeavoured to be become the first British journalist to get to Ladysmith – against all odds – ahead of Buller’s fact-finding mission and way ahead of any sizeable expeditionary force (which only was to start landing in Cape Town from 10 November 1899).  In effect he was going to be the first to ‘ascertain’ the situation for the very apprehensive Britons back home, not Buller.

Churchill immediately teamed up with journalistic colleague John B. Atkins of the Manchester Guardian to go to the front at Ladysmith before any other journalists could do so.

They took a 700-mile undefended train ride up north to the Cape Colony’s frontier near Port Elizabeth, then they boarded a small steamer bound for Durban and promptly sailed into the teeth of a violent Indian Ocean storm. After several harrowing days in very high seas, the pair arrived at Durban.  This ‘adventure’ had started to play out in an extraordinary way.

Capture 

Still determined to get to see the Boer forces’ siege of Ladysmith ahead of any advancing forces, Churchill and Atkins made another dangerous train ride of 60 miles to within hearing range of the artillery fire from the Boer guns on Ladysmith. Churchill, still keen on getting closer to the action accompanied a scouting expedition on an armoured train.

The train was ambushed by the Boers and on 15 November 1899 using field artillery and heavy rifle fire, whilst trying to manoeuvre out of fire, the front truck hit an obstruction which was placed by the Boers on the track and it was tossed from the tracks. The Boers then opened up on the stalled train with field guns and rifle fire from a vantage position. With the front truck overturned, the engine and rear trucks remained on the tracks, still coupled to them.

Churchills train

The wrecked part of the armoured train Churchill was travelling in

As shells roared around him and bullets pinged the sides of the armoured train, Churchill’s instincts as a trained military officer took over from his ‘journalist’ side, possibly even more in self-preservation. Acting like a decorated commander, Churchill braved the line of fire for more than an hour as he directed the soldiers to free the train. He also instructed the train driver, a civilian, who was injured and hiding to return to his post (he lied and convinced him that odds are it was not possible to get wounded twice in one day).  He became involved in un-coupling the section of the train which was not completely de-railed, the idea was to use this part of the train still on the tracks as a shield for the soldiers as they retreated to safety.

Churchill

Colourised image of Churchill next to the ambushed train – taken later in the war. Colourised by Tinus Le Roux

After some 70 minutes of action the Boers swept down the hillside, Churchill by this time had become separated from the part of the train on the tracks as it retreated. A number of men were taken prisoner, but a large section of the train, now loaded with men, had escaped.

Churchill made for cover to try to escape and found himself alone in a gully near the track. A Boer rode up and seated on his horse raised his rifle to bear at a range of 40 yards. Churchill went for a Mauser pistol he was carrying in his belt but it wasn’t there, whilst clearing the train he had taken it off and left it on the train, it was now safely making its way back without him and Churchill was unarmed.  So, as myths go Churchill was not simply an ‘unarmed’ journalist and as other myths go he also did not fire the pistol during the attack, but he certainly had every intension of shooting the Boer horseman (at his own admission).

In a flat dilemma, Churchill considered his idol – Napoleon who said, “When one is alone and unarmed, a surrender may be pardoned.”  So he obeyed the Boer to surrender and walked out.  Whilst walking into captivity next to the Boer horseman Churchill suddenly realised he had two magazine clips on his person for the Mauser Pistol, which were loaded with ‘soft-nosed’ ammunition. Figuring this may get him into a lot of trouble (soft-nose ammunition makes a bigger striking wound than hard-nosed ammunition and was generally not thought of Kindly by soldiers – it still isn’t), he realised he had to get rid of them fast.

Churchill silently got rid of one magazine, whilst trying to dispose of the second the Boer caught him in the act and said in English, ‘What have you got there?’.  Quick thinking, Churchill gave a whopping lie and replied, “What is it?’ I picked it up”.  The Boer took the pistol magazine and threw it away.

With that Churchill went into captivity, protesting that he was just a civilian war correspondent and therefore not subject to a Prisoner of War status and should be released immediately.  The Boers would have none of it, they had captured a ‘great prize’ who had not behaved under fire in characteristically ‘civilian’ manner.

Passing Majuba 

Whilst his POW train passed Majuba hill on its way to Pretoria Churchill had time to think.  Majuba was the site of the British defeat in the 1st Anglo-Boer War (1880 to 1881) twenty years earlier, to understand the deep causes of The South African War (2nd Anglo-Boer War), we need to understand the 1st Anglo-Boer War (like the 2nd World War is World War 1 Part 2, so too the case with the two Anglo-Boer Wars).

As inconvenient truths go the Transvaal was annexed by the British in 1881 at the invitation of the Boers to save them from an African revolt, the Boers did not take to British administration, especially as to how they dealt with the Black African’s claims and taxes and so kicked them out, this cumulated in the Battle at Majuba – and all this happened long before Gold was discovered in the Transvaal – think about that.

Mjuba

Graffiti scrawled by both sides in a house recaptured by the British in the 2nd Anglo Boer War. The Boer graffiti reads: ‘Don’t forget Majuba, Boys’. British graffiti reads: ‘No fear, Boere, no fear’. Imperial War Museum image

This act of defeat and subsequent ceasefire agreement from the battle at Majuba was described by Churchill as “a disgraceful, cowardly peace” as he pondered it whilst passing Majuba hill in his POW train going into captivity.  The general sentiment at the time amongst the British was that the South African War i.e. 2nd Anglo-Boer War (1899 to 1902) was going to settle the disgrace and tentative ‘ceasefire’ of the 1st Anglo-Boer War (1880 to 1881) once and for all.

How history twists 

In one of the most ironic twists in history, after The South African War (1899 to 1902), when Boer Generals visited England to ask for some loan or assistance on behalf of their devastated country, Churchill was introduced at a private luncheon to their leader, General Louis Botha.  Churchill began with his story of his capture, Botha replied ‘Don’t you recognise me? I was that man. It was I who took you prisoner. I, myself,’

Churchill highly respected and valued Louis Botha after the war, he found the Union of South Africa’s first Prime Minister as “an acquaintance formed in strange circumstances and upon an almost unbelievable introduction ripened into a friendship which I greatly valued. I saw in this grand, rugged figure, the Father of his country, the wise and profound statesman, the farmer-warrior, the crafty hunter of the wilderness, the deep, sure man of solitude”.

In another strange twist of history, Kmdt Dolf De la Rey was in command of forces attacking the train is also credited with capturing Churchill (amongst others), much later on De la Rey in 1950’s, as an ageing Boer veteran of The South African War, joined Sailor Malan in his Torch protests against the National Party, such is the rich tapestry of Afrikaners against Apartheid.

Prisoner of War

Although the Boers allowed prisoners-of-war to purchase newspapers, cigarettes and beer, the future British Prime Minister despised his imprisonment “more than I have ever hated any other period in my whole life”. What frustrated Churchill even more than the loss of control was the possibility that he was missing out on further opportunities for glory. “I had only cut myself out of the whole of this exciting war with all its boundless possibilities of adventure and advancement,” he lamented.

Winston Churchill POW

Group of British Prisoners of War, with Churchill on the right. Imperial War Museum image

So, he decided to do something about it and escape, and the ramification of doing so would have massive historical consequence.  Here Winston Churchill himself sums up the randomness and sheer ‘luck’ this would all bring him.

“I was to escape, and by escaping was to gain a public reputation or notoriety which made me well-known henceforward among my countrymen, and made me acceptable as a candidate in a great many constituencies. I was also put in the position to earn the money which for many years assured my independence and the means of entering Parliament. Whereas if I had gone back on the engine, though I should perhaps have been praised and petted, I might well have been knocked on the head at Colenso a month later, as were several of my associates on Sir Redvers Buller’s Staff”.

Churchill’s ‘Great Escape’

In December 1899 Churchill’s plan to escape took shape.  He was held in a prison dedicated to British officers, it was a State Model school in central Pretoria converted to hold Prisoners of War.

He wrote.“The State Model Schools stood in the midst  of a quadrangle, surrounded on two sides by an iron grille and on two by a corrugated-iron fence about ten feet high, these boundaries offered little obstacle to anyone who possessed the activity of youth, but the fact that they were guarded on the inside by sentries, fifty yards apart, armed with rifle and revolver, made them a well-nigh insuperable barrier” he then adds “No walls are so hard to pierce as living walls”.

In cohorts with two officers, Captain Haldane and Lieutenant Brockie (who was in fact a Sergeant Major who passed himself off as a Lieutenant in order to get better quarters).  They had noticed a ‘blank spot’ in the movements of Boer guards behind the latrines.  After a first attempt at escape was aborted, they had another go the next day.  Churchill was to go first followed by the other two.

churchill

Churchill’s departing note

On the night of his escape, December 12, 1899 Churchill even had the gumption and cheek to leave a ‘Dear John’ departing note on his pillow thanking the Boer Republic for its hospitality, it read in part:

 “… I wish in leaving you thus hastily and unceremoniously to once more place on record my appreciation of the kindness which has been shown me and the other prisoners by you, the Commandant and Dr Gunning and my admiration of the chivalrous and humane character of the Republican forces.”

‘Churchill entered the small circular lavatory, waited some time monitoring the guards from the lavatory, he waited until the guards had turned their backs and this was his moment, he hesitated twice and then went for it, he scaled the wall and jumped, initially snagging himself on the ornamental metal spikes on top of the wall.

Once free he hid himself in a nearby shrub in the adjacent garden and waited for his partners, who did not arrive, he lay here for an hour with great impatience.  He overheard them speaking in Latin gibberish and mentioning his name, he risked a cough and they told him the game was up on the guard movements and they were not able to join him.

So, there he was, he considered going back and instead undertook to press on with his escape.  The escape was very poorly planned, he had only figured out how to get out of the prison, no real further thought had been given other than to head east. Churchill the ‘fugitive’ had no map, no compass, no intimate local knowledge, no ability to speak the local languages and just “four slabs of melting chocolate and a crumbling biscuit” in his pocket for food.  The compass and food had been with his colleagues, but he still possessed a seemingly superhuman level of self-belief that he could safely navigate the 300-mile journey through enemy territory.

On the ‘run’

Contrary to many myths, Churchill did not scarper out of Pretoria as a running fugitive only to ‘forge the mighty Apies’ river to freedom (that was all media hype).  In fact, he casually walked out of Pretoria.  He figured so as not to draw attention to himself he would just amble along in the middle of the road, in full view, humming a tune, pretending to be just a regular ‘Burgher’ on his way home.  He would later joke with Jan Smuts that there was a good chance he just walked straight past him.

Without ‘forging’ any river, he eventually found himself strolling along looking for a railway line, he figured he would follow the easterly tracks, the idea was to get to neutral Portuguese East Africa (now Mozambique).  When he reached the eastern suburbs of Pretoria he sat down on a small bridge and for a little while contemplated as to how his ‘adventure’ was now panning out.

He resolved to turn South and eventually he struck a railway heading in an easterly direction, following it, all the while reasoning with himself that he would jump aboard a train and hide.  A coal train passed and he jumped aboard hiding amongst the sacks, and promptly went to sleep.  He awoke hungry and thirsty and needed sustenance, and to get a bearing (he was not sure the coal train had in fact run east) so he disembarked by jumping off.

His next effort to find another train proved entire futile, hungry, tired and thirsty he marched on with increasing hopelessness. By now he was desperate, that night he spotted a fire, thought it a Black African hamlet and hoped to fall on their tender mercy.  On approaching the fire, it turned out to be a railway siding and he overheard Dutch-Afrikaans been spoken.  But desperate and miserable he then resolved to ‘give up the game’ and approach a nearby house.  Chuck it all in, whatever comes, he hoped against hope there would be a sympathetic owner to his plight.

Winstons Wanted Poster

Churchill’s ‘Wanted’ Poster

Meanwhile back in Pretoria and in the United Kingdom, news of his escape broke.  The British public and media shifted into a mode that can only be described as ecstatic, news stories broke on the ‘bravery’ of Winston Churchill giving the Boers the old ‘Agincourt salute’!

Good old stiff upper lip resistance stuff – in a sea of negative news on the heavy British battle losses over November and December this made for the only media ‘great news’ and positive propaganda for a public desperately keen on anything good coming from the war to date – and all thanks to only one man – Winston Churchill. The Zuid-Afrikaansche Republiek (The South African Republic) , also known as the ‘Transvaal’ Republic (abbreviated ‘ZAR’), went on the man-hunt and immediately put a bounty on Churchill’s head – £25 for the return of Churchill ‘Dead or Alive’.

The Transvaal Police (ZARP) circulated a telegram after Churchill escaped from prison and it gives a very accurate description of Churchill demeanour, it is also very telling of the saga unfolding for Churchill.  It read:

“Englishman 25 years old about 5 foot 8 inches tall medium build walks with a slight stoop. Pale features. Reddish-brown hair almost invisible small moustache. Speaks through his nose and cannot pronounce the letter S. Had last a brown suit on and cannot speak one word of Dutch.”

Throwing the dice 

Churchill, now in sheer desperation, cautiously approached the house and knocked on the door.  His odds were really 50/50 and he knew it, to dispel another myth, The South African War was not a clean-cut affair between the British and Afrikaners facing each other.

The South African Republic (ZAR) was rammed full of tens of thousands of mainly British mine workers and managers, who also worked the mining support infrastructure – like rail (they were the cause Britain cited as the Casus Belli for war in the first place), there were more Britons living along the Transvaal gold reef’s towns in the Republic than Boers.  Equally there were more Afrikaners with British Cape Colony citizenship in the Cape Colony than Britons.

At the beginning of the war, English and Afrikaners with citizenships on either side of the fence, if caught siding with one or other cause were generally executed for treason by either the British or Boers – this kept most of them at bay and non-hostile one way or the other. Also, there were many Afrikaners living in the two Boer Republics and most in the Cape Colony who were in fact sympathetic to the British cause, as there were also many English ZAR citizens sympathetic with the Boer cause.  The next phase of Churchill’s ‘adventure’ illustrates this perfectly.

On knocking on the door, a light came on and a man asked in Dutch-Afrikaans “Wie is daar (Whose there)”. Winston went into shock, the game was up, so he immediately lied and said; “I want help; I have had an accident”. The door opened, and the man said in English this time “What do you want?” Not sure of the status of things Winston carried on lying and said; “I am a burgher, I have had an accident. I was going to join my commando at Komati Poort. I have fallen off the train. We were skylarking. I have been unconscious for hours. I think I have dislocated my shoulder”.  He had in all honestly no clue what to say next.

The stranger regarded Winston intently and ushered him in pointing to a room with one hand whilst holding a revolver in the other.  Winston Churchill half expected to be shot in the back of the head there and then.  He chose to come clean and said; “I am Winston Churchill, War Correspondent of the Morning Post. I escaped last night from Pretoria. I am making my way to the frontier. I have plenty of money. Will you help me?”

Now here’s where Winston just got lucky, his host responded; ‘Thank God you have come here! It is the only house for twenty miles where you would not have been handed over. But we are all British here, and we will see you through.”

Brave words from the host, and here’s why, it turns out that Churchill’s new host was John Howard, an Englishman managing Transvaal Collieries. He had become a naturalised citizen of the Zuid-Afrikaansche Republiek and he had bribed the local Boer Field Cornet, so he would not be called up to his Commando and fight the British.  His team was all of British heritage and had been allowed to stay if they remained ‘neutral’.

‘Verraaiers’ (traitors) everywhere!

John Howard and some of his compatriots resolved to hide Churchill under-ground in a nearby coal mine whilst they figured out the next move.  They ran a tremendous risk, had they been caught they would have been shot as traitors and collaborators, especially John Howard who would have been shot outright.

Churchill sat it out in a mine shaft with food provisions given to him, his only company the many rats.  On the fifth day of his escape, John Howard hatched an escape plan for Churchill.  In the neighbourhood of the mine there lived an Afrikaner named Burgener, who was sending a consignment of wool by rail to Delagoa Bay on the 19th December.  Burgener was an Afrikaner ZAR citizen sympathetic to the British cause.

Howard had secretly met with Burgener, told him of Churchill and they agreed to smuggle Churchill into a specially adapted wool bale on the train and take him to safety.  Phew, supreme treason this, had this Boer ‘turncoat’ been caught he would surly have faced a ZAR firing squad or noose.  Burgener was also to accompany Churchill all the way to Portuguese East Arica and safely see him through – now not many people know this part of the narrative, it’s inconvenient to highlight a ‘Afrikaner’ collaborator in all of this.

What all this skullduggery means, the idea of broad partisan loyalty to the Zuid-Afrikaansche Republiek’s cause is simply a myth – thousands of ZAR citizens, English and even some Afrikaans were not behind Kruger’s politics or his cabal.

Do you know who I am?

In the middle of the night on the 19th December, Churchill was taken the train loaded with wool bales, Howard pointed the spot made available for Churchill to hide and Winston snuck away into the centre of the specially modified wool bale (with enough space to sit up in), he was given a revolver and food (chicken, meat and bottles of cold tea) – a small space enabled him to see out.  Off the train trekked, final stop, Portuguese East Africa (Mozambique).

Once safely over the border into neutral Portuguese territory, he emerged from his wool bale sang and shouted in jubilation whilst firing his revolver into the air.

Once in Lourenço Marques (now Maputo), he carefully disembarked the train and saw Mr Burgener (the Afrikaner who had helped him), Burgener then pointed him to the British Consulate.  He marched in expecting a rousing reception – he got none of it.  Instead a terse British civil servant told him to ‘Be off,‘ the Consulate was closed, he added; ‘The Consul cannot see you to-day. Come to his office at nine tomorrow, if you want anything.’

At this point Churchill spat his dummy in the reception area, in a typical ‘do you know who I am’ rant he demanded to see the Consular who was duly called, happily the weekly streamer to Durban was leaving that night, he embarked immediately and arrived in Durban to the jubilant reception he was expecting.

img-310

Churchill addresses the crowd at Durban following his escape from Pretoria and return via Portuguese East Africa (Mozambique)

Becoming a ‘Caesar’

In Durban, Sir Redvers Buller was preparing his next push to relieve the siege at Ladysmith, Winston decided he wanted to re-engage his military commission and get into the fight properly as a British Army officer.  His problem, his contract with the Morning Post,which did not allow him as a correspondent to take part in soldiering, and Buller who had a strict military only doctrine.  So, he struck a unique agreement with Buller, he would do both jobs, the Morning Post would pay him and the British Army would not.  In another first, Churchill became the world’s first ’embedded’ journalist.

22467705_732497103616836_9219497881391366999_o

Colourised portrait of Winston Churchill as part of the South African Light Horse

With that he eagerly found himself back in uniform and off to war, with a lieutenant’s commission in the South African Light Horse.  In his words; “I stitched my badges of rank to my khaki coat and stuck the long plume of feathers from the tail of the sakabulu bird in my hat, and lived from day-to-day in perfect happiness”.

Churchill took part in the famous battle of Spionkop outside Ladysmith from 23-24 January 1900, he acted as a courier to and from the summit at Spionkop and Buller’s headquarters and made a statement about the scene:“Corpses lay here and there. Many of the wounds were of a horrible nature. The splinters and fragments of the shells had torn and mutilated them. The shallow trenches were choked with dead and wounded.”

He fought a number of skirmishes and battles to relieve Ladysmith, watching the final attack on the Boer position by the Irish Brigade, a desperate affair and out of twelve hundred Irish who assaulted, both colonels, three majors, twenty officers and six hundred soldiers had fallen killed or wounded.  The path to Ladysmith was clear, and Churchill was front and forward riding into Ladysmith in triumph, he said; “We all rode together into the long beleaguered, almost starved-out, Ladysmith. It was a thrilling moment”.

This highlights another inconveniently overlooked fact of The South African War (especially in context of Boer and Black concentration camps later in the war), British civilians, women and children included, suffered heavily under Boer siege tactics, they were forced to live in nearby caves and bunkers (in Ladysmith) and in mine shafts (Kimberley) to avoid the indiscriminate shelling of their cities, many died of shrapnel and disease brought about from the ravages of war.  At near starvation they were emancipated.  They were described by their liberators as ‘ghosts’. Churchill’s account of entering Ladysmith recalls; “Suddenly from the brushwood up rose gaunt figures waving hands of welcome”.

Besides his harrowing images at Ladysmith, in Churchill’s writings during the campaign, he chastised British hatred for the Boer, calling for them to be treated with “generosity and tolerance” and urging a “speedy peace”.  His call was to fall on deaf ears, especially Kitchener’s who only got he ‘speedy peace’ part.

23847272_1499827570053847_6859845416546278573_o

British dead in their tench on top of Spionkop, colourised by Tinus Le Roux

Fighting on into the Orange Free State Republic, he was nearly captured again when he found himself well forward and isolated observing Boer movements, they attacked his position and his horse bolted under fire, Winston ran for his life under heavy fire with bullets whizzing around him, his savour came when another officer rode up to him, gave him a stirrup, hoisted him up, the horse was wounded but they still rode with Winston in tandem out of immediate danger.

He was front and forward again when the British eventually marched on Pretoria in June 1900.  He watched the last Boer fighting forces leaving Pretoria on a train and he and his cousin, the Duke of Marlborough, took the opportunity to get ahead of the rest of the troops and he rode into Pretoria like a conquering Caesar.  He immediately found his way to the State Model School POW prison, the very prison he had escaped from at the beginning of the war, here he demanded and received the surrender of 52 Boer prison camp guards.  The relieved British officers in the prison produced a British Union Jack (flag), they took down the Transvaal ‘Vierkleur’ and hosted the British Union flag – the first time a British flag re-appeared flying over Pretoria since Pretoria was annexed by Britain as a colony at the invitation of the Boers (see 1st Anglo-Boer War) in 1880, twenty years earlier.

14516334_10154528497944476_6692268421857196301_nAfter the victory in Pretoria, Winston returned to Cape Town and sailed for Britain in July 1900, on the very same ship he had arrived on, the Dunottar Castle. While he had still been in South Africa, his Morning Post despatches had been published as London to Ladysmith via Pretoria, and they sold like wildfire.  He arrived a national hero, nearly god-like, adored by millions.
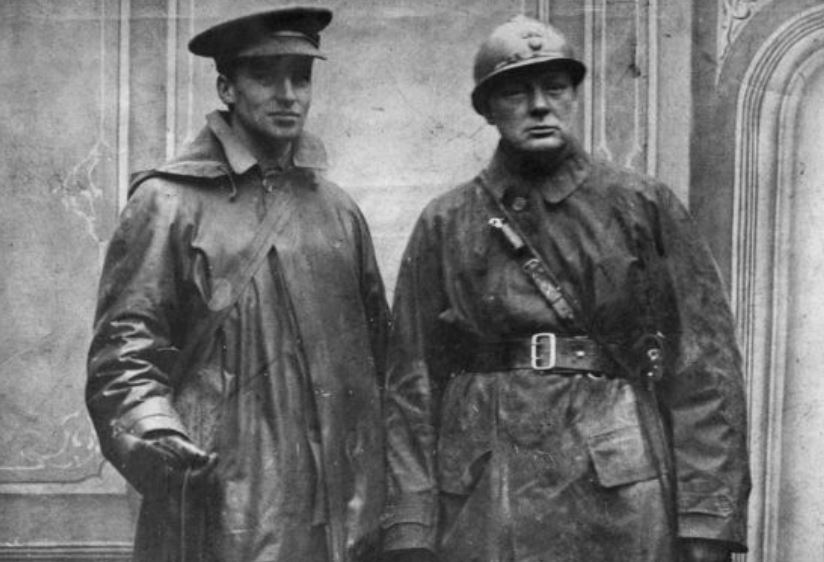
A future fan base

Churchill 1904

Portrait of a young Winston Churchill during his MP days, 1904

There’s a lot not to like about Churchill, his warmongering nature and ability to lie at will, dithering between politician, journalist and army officer all for personal advancement for starters.  But there’s a lot to like in addition when you consider this.

What a Victorian Boy’s Own adventure! Think about it; the story starts with bang! The hero heads off to war on an urgent sea passage to the Cape Colony, braving high seas and a tropical storm to get to Durban.  In Natal he then single-handedly saves an entire British armoured train and its troop from certain death.

Captured by a skilful and determined enemy, he then escapes a POW prison in Pretoria with a ‘dead or alive’ bounty on his head, the subject of an extensive man-hunt for 300 miles and eventually – intrigue, he’s smuggled out the country to freedom by a group of traitors.

He promptly then re-joins the fight and takes part in the epic Battle of Spoinkop, then he’s on to relieve the starved and besieged British folk in Ladysmith riding in triumph. He then fights his way up Africa to take the enemies ‘prize,’ the capital city of Pretoria.

In a perfect ending to the adventure our hero races in to relieve imprisoned British comrades from the same prison he escaped from, and it all ends with the raising the first British Union Flag of the war flying high above the conquered capital.

In all the hero risks being shot in the head on more than five separate occasions, bravery on an almost unsurpassed level – all for Queen and Empire.

You could not make this stuff up! How Churchill did not earn a Victoria Cross is a matter of conjecture (and a topic of many discussions). To the average Victorian prepubescent boy this was an epic ‘Boy’s Own’ adventure, the difference with fiction, it was all true – and a generation of Churchill fans was born.

A fall from Grace

With a stellar career in front of him, as World War 1 churned on Churchill found himself as the 1st Lord of Admiralty, he asked the Prime Minister “Are there not other alternatives than sending our armies to chew barbed wire in Flanders?” Churchill, believed he had the solution for breaking the impasse—a second front.

Churchill fancied himself a military strategist, he said. “I have it in me to be a successful soldier. I can visualize great movements and combinations,” He proposed attacking the Dardanelles in Turkey and opening a second front.  This was Churchill’s ‘soft underbelly of Europe’ theory – and ironically he made the same mistake with the Italy Campaign of the Second World War, and like Italy later, Turkey proved a ‘tough old gut’ in World War One.

The Gallipoli campaign was an outright failure, the Battle of Gallipoli became a slaughter and quickly morphed into a stalemate just as bloody, just as pointless as that on the Western Front.

In May 1915, Churchill was demoted to an obscure cabinet post. “I am the victim of a political intrigue,” he cried to a close friend. “I am finished!”

Churchill-in-French-Helmet

Churchill (right), back from the trenches in WW1 wearing a French Adrian helmet; the officer to his left is Maj. Archibald Sinclair

Displaying his typical dogmatic determination, he resigned to make good his character, and he did this is a most remarkable way, he joined the Army again and chose to spend his time in his ‘political wilderness’ fighting in front line trenches in France, slogging in the blood and mud as a Lt. Colonel with the Royal Scots Fusiliers. After several brushes with death, he returned to politics in 1917 as the Munitions Minister, from his experiences in the front lines he wrote of the urgent need for the armoured ‘tracked caterpillars’ to traverse the mud and ‘no-mans land’ – his involvement with a group of innovators to resolve the problem led to the development of the battle tank and warfare was forever changed.

Destiny 

Churchill became the Chancellor of Exchequer (Cabinet Minister) in 1924 upon re-joining the Conservative Party. Churchill was outspoken on a number of issues, such as the danger of Germany’s re-armament after World War One. His warnings against Hitler were largely ignored, but at the outbreak of the Second World War, his foresight was acknowledged, and he became the war-time Prime Minister. His speeches and military strategy were a great encouragement to the British, and he is regarded today as one of the greatest Britons of his time.

It is largely due to Churchill’s leadership during the Second World War that Britain was not invaded by Hitler’s Nazi forces at the on-set of the Battle of Britain, that Britain (and Western Europe for that matter) is the modern European democracy with the freedoms it enjoys today is largely thanks to Churchill (whether his detractors, of which there are many, like it or not, it remains a fact), and here’s another obscure fact – South Africa had a big role in shaping Churchill, his ‘adventure’ in South Africa took him from a minor politician to a political giant with a near demigod status, even failures like Gallipoli could not unseat his destiny – South Africa both directly and indirectly shaped this future.

Churchill

Winston Churchill (Colorised by Mads Madsen)

Related Works and Links

Winston Churchill and Louis Botha: The Battle of Spionkop shaped 3 future leaders – Churchill, Botha & …. Gandhi

The 1st Boer War; Boers; ‘Don’t forget Majuba, boys’. Brits; ‘No fear, Boere, no fear’.

Winston Churchill and Jan Smuts: A true statesman, Jan Smuts addressing the British Parliament – 1942

Winston Churchill and Jan Smuts: “The force of his intellect has enriched the wisdom of the whole human race”- the death of Jan Smuts.

Winston Churchill and Tobruk; “Defeat is one thing; Disgrace is another!” South Africa’s biggest capitulation of arms – Tobruk

Winston Churchill and Smuts; Two fellow members of The South African Legion – Churchill and Smuts

The Transvaal; Vive la rue du Transvaal, vive la France


Written and Researched by Peter Dickens

References and extracts

My Early Life. A Roving Commission. Author: Churchill, Winston S, published October 1930. The Daring Escape That Forged Winston Churchill by Christopher Klein – for the History Channel, November 2016. Winston Churchill’s World War Disaster by Christopher Klein – for the History Channel. Churchill’s capture and escape – November-December 1899, blog by Robin Smith. The Churchill Factor: How One Man Made History by Boris Johnson.

The ‘Casus Belli’ for war

Comparing the ‘Gulf’ wars & the ‘Boer’ wars

History repeats itself, that’s the ironic part. For starters let’s compare the Anglo-Boer Wars (both of them the 1st and 2nd Anglo-Boer War – one leads to the other) to the last two Gulf Wars (both of them – one leads to the other). Let’s also take the seldom used ‘Economic History’ model rather than the ‘Political’ History model for a change.

The South African War (1899 to 1902) started due to a mix of British expansionist ‘influence’ in Africa, ZAR expansionism in Africa and the wealth in the ground – gold – and attached to it was the need to stabilise the global Gold market and linked currency. There was also unfinished business surrounding previous regional destabilisation which caused the 1st Anglo-Boer War (1880-1881) and this resulted in an ‘Old Score’ Britain had to settle with the South African Republic (ZAR) – and finally the suppression and threat as to civil rights by the South African Republic (ZAR) as to the mainly British citizens working in their Republic on the mines as well as as other indigenous African population’s rights. The last two parts – white miner’s franchise and rights and black African rights and protection from ZAR aggression was the British ‘Casus Belli’ – the justified case for going to war – that, and the fact the Boer Republics declared war on Britain by invading its neighbours on the 11th October 1899 and not the other way round .. was a Casus Belli all on its own.

The Gulf War 2 (or Iraq War 2003 – 2011) started due to a mix of USA expansionist ‘influence’ in the Gulf, Iraqi expansionism in the Gulf and the wealth in the ground – Oil, and attached to it was the need to stabalise the global Oil market and linked currency. There was also unfinished business surrounding previous regional destabilisation which caused Gulf War 1 (1990-1991) and this resulted in a ‘Old Score’ the USA had to settle with Iraq – and finally the perceived threat to Americans and Israelis (or ‘the world’) from Iraqi weapons of mass destruction (entirely fabricated) and threat to civilians in various religious sects, indigenous populations and minorities in Iraq. This last part was the American ‘Casus Belli’ – the justified case for going to war. The fact that Iraq invaded Kuwait on the 2nd August 1990 and had on-going border disputes with Iran and Turkey and had previously declared war on its neighbours … was a Casus Belli all on its own.

World War 2 was a socio-political and economic consequence of World War 1, in effect it is World War 1 – Part 2 (unfinished business), so too the underpinning causes of these wars, Boer War 2, was Boer War 1 – Part 2 (unfinished business), and Gulf War 2, was Gulf War 1 – Part 2 (unfinished business).

All war has an ‘economic’ factor underpinning it, and the Boer and Gulf wars were no different. The  reasons given for the war – mainly that of ‘threat, oppression and persecution’ to minority groups in each case is no different. Like the USA in the modern-day Iraq context (citing oppression of Kurds, Christians, Kuwaitis), Great Britain also put it’s case forward to the ‘world’ (citing oppression by the Boers of British miners) and in both instances the war was passed off as entirely legitimate once it ended for these same reasons … the ‘Casus Belli’ had been made. The fact is the ‘economic’ factor underpinning both these wars was the stability of trading markets – the removal (by force if necessary) of governments, who are holding the pursestrings to these markets, and whose actions and policies around these vital commodities are perceived by global traders to be unstable. If you want to see a recent case of this – look no further Prime Minister Liz Truss, whose government was ousted in record time by the market (not by the populace), simply because the markets found her government’s policies – ‘unstable’.

In 2nd Gulf war, and in the 2nd Boer War, the governments of these vital commodities – deemed unstable by the traders/markets – receive an endless demonisation and bad press. Paul Kruger was painted as an aggressive, dictatorial, backward, ignoramus and incompetent leader of a corrupt government – and Saddam Hussein and his government received exactly the same press. In turn the ZAR painted Britain as having warmongering entrepreneurs coveting their gold – and so too did Iraq – painting the American entrepreneurs coveting their oil as warmongering.

In Iraq, America remained as an occupier after their last war – Great Britain did the same in South Africa after their last war– and in both instances the rational given to the ‘world’ was the reconstruction of the state both economically and politically until it’s perceived ‘threat’ to international mineral market stability was removed and the country was moulded into a more palatable ‘less aggressive’ version to the ‘world’. In both instances they attempted coalition political parties to govern the country as a means to gradually withdraw from direct governance, but retain influence – and in both instances injecting huge economic aid into both to ‘reconstruct’ them.

In both instances, a tiny state took on a superpower and in both instances resorted to guerrilla warfare as the only real means to fight a superpower (in Iraq’s case the ‘guerilla’ warfare phase was labelled as the ‘surge’ in 2007). In both cases civilians were oppressed and randomly imprisoned as a means of removing support to guerrilla cells. In the case of South Africa it was to curtail supply to ‘guerilla cells’  and in Iraq it was to curtail supply to ‘terrorist cells’ (both these guerrilla groupings where locally based). In both instances civilians were exploited to achieve these military objectives.

Oil in 1990 is to Gold in 1900. On the economic front the ‘world’ was presented a case that ‘aggressive’ states where not allowed to be in charge of the world economy as they hold the ‘key’ to it, and these states needed to be removed to ensure worldwide economic stability – this was argued by the USA in 1990 and by Great Britain in 1900 with a similar outcome and some support to both.

The ‘Gulf’ wars – lets face it the whole Weapons of Mass Destruction (WMD) as a ‘Casus Belli’ was a complete farce, human rights, aggression and expansionist reasons lie behind the war and millions of people were affected and will be for years to come, and whose kidding whom it was also about the MONEY i.e. market access, price stability and supply of Oil – same thing with the ‘Boer’ Wars, human rights, aggressive and expansionist reasons lie behind the war, millions of people affected for years to come, and whose kidding whom it was also about the MONEY i.e. market access, price stability and supply of Gold.

Notably, is that in establishing ‘Casus Belli’ – the USA, as a world Super-power embarked on a mission for global assurance by announcing a “coalition of the willing”- countries around the world where the USA held influence who fight side by side with USA and ‘stabilise the situation’ – Iraq could conjurer up no such significant ‘coalition’. The same is true of Britain and the South African War, it had to find a ‘coalition of the willing’ from its sphere of influence – Canada, Australia, New Zealand and India to fight side by side with them as a sort of global assurance to ‘stabilise the situation’. The Boer Republics could conjurer up no such significant ‘coalition’.

In summary, the cruel thing about history is that it repeats as it is often only one basic human condition that guides it, wealth generation (expressed by all sides in the conflict, never just one). The reasons for war are always about economic gain but they are also guided by emotional and political convictions (religion, political dogma, ethnic oppression, human persecution etc).

The even crueller thing about both Iraq and South Africa is that ‘world’ opinion will always justify the war because of the strong cases put forward before and after the war by the victor (albeit very flawed cases in both instances). For this reason it is very unlikely that the USA will be compensating Iraqi families 120 years after the war and apologising, the same is also true of Great Britain and South Africa.


Written by Peter Dickens

Kruger “blunders” and declares war on the world’s Superpower!

This period cartoon captures that moment when President Paul Kruger, who in a game of political chess with Queen Victoria, is about to make a “blunder” – a disastrous move in chess which is ill considered. The British Army is ominously overseeing the move and Kruger, rightfully so, looks very worried.

The “blunder” move was simply this, after much sabre rattling and posturing by Milner and other British Imperialists in Southern Africa over mineworker representation in the Transvaal, on 11 October 1899 President Paul Kruger of the Transvaal/South African Republic (a day after his 74th birthday) in alliance with another Boer Republic – The Orange Free State, in a rather surprising move to many – declared war on Great Britain.

The move by two relatively small Boer Republics to declare war on what was then the world’s only real superpower came with some astonishment to Queen Victoria and the British Government in the United Kingdom. The British Imperialists in Southern Africa, along with the British Gold and Diamond mining magnets, on the other hand could hardly believe their luck.

Alfred Milner, the Governor of the Cape Colony had taken a belligerent stand with Kruger and pressed very hard for war against the “Transvaal” Boer Republic, it essentially stood in the way of Imperial expansionist plans.  However he did not generally have poplar support back in the United Kingdom for a war .  Once the declaration of war came from Kruger it was used as a “causes belli” (a legitimate justification to go to war) to the British public.

More alarming to the British at home in the United Kingdom was that night 800 men of the Potchefstroom and Lichtenburg commandos under General Koos de la Rey (one of General Piet Cronjé’s field generals) attacked and captured the British garrison and railway siding at Kraaipan between Vryburg and Mafeking, some 60 kilometres south west of Mafeking and well inside sovereign British territory.

Thus, with the invasion by Boer forces of a British Colony, so began the Second Anglo-Boer War. Under the orders of Cronjé the Mafeking railway and telegraph lines were cut on the same day, and the dice was rolled.

Not to trivialise the matter as a game of chess, the move by Kruger would have horrific consequences for the Boer nation. The war would see the desperation of Guerrilla tactics being employed by the Boer Forces, after the “conventional” phase of the war was lost, as a last ditch effort to maintain their sovereignty “in the field”.  The use of this tactic spurred the British to fight the remainder of the war in an utterly ruthless and murderous manner, especially in the treatment of Boer women and children – the British policies of scorched earth and concentration camps would leave a very bitter and tarnished legacy.

The question we ask now, with all the 20/20 hindsight in the world is why? Why on earth would Kruger fall for all the sabre rattling and posturing by The British?   Did he not anticipate the massive mobilisation of biggest expeditionary force the British had ever assembled to go “get their Colonies back”? Did he not see the underpinning greed of mining concerns operating in Africa – did the Jameson Raid not warn him of this?

Contrary to less informed opinion, at the onset of the war there no “massive” build up of British arms along the borders of the two Boer Republics to really threaten imminent invasion of them.  “Sabre rattling” (limited reinforcements where ordered) and warnings – yes, but a vast build up of arms – no. To coin a phrase – they where playing “chess” using an age old tactic to force the hand.

At the on-set the Boer Republics in fact had the upper hand militarily and quickly put siege to the relatively small and isolated British garrisons on the two British Colony’s borders (notably Ladysmith, Kimberley and Mafeking).  At the start of the war, numbers and arms in fact favoured the Boer Republics, it was only after war was declared that a truly massive British Imperial build up of arms and men to be shipped to Southern Africa occurred.

Central to the dispute, for the British at least was the issue of workers rights and political representation of mainly British expatriate population setting up business and working on the Gold mines in the Transvaal. The two sides summited on the 15 May 1899 in Bloemfontein to avoid war and Milner and Kruger immediately clashed over the issue of citizenship – Kruger was only prepared to grant expatriates citizenship to the “Transvaal” i.e. South African Republic after 14 years of residency, Milner insisted the period be 5 years.  The issue came to head and negotiations broke down – both protagonists as belligerent to one another as ever.

Both Milner and Kruger knew that the vast number of British expatriates  in the Transvaal would unseat the Boer government by simple majority if they became citizens, to Kruger the proposals where an attempt by Britain to take over his country (and its resources) by simple subjection.  It is best summed up in his own reply to Milner when he said “Our enfranchised burghers are probably about 30,000, and the newcomers may be from 60,000 to 70,000 and if we give them the franchise tomorrow we may as well give up the Republic.’ Kruger went on to say, “It would be ‘worse than annexation’.

To the British it was a matter of individual rights to political representation in the Republic, which was now at a boiling point on the rand.  Given the simple change in the country’s demographic due to the Gold Rush, this change was likely to be permanent and these rights could not be avoided – in essence the Boer Republic would eventually cease to exist through popular vote, it was just a really a matter of when.

To the Boers it was a fight to remain in power and keep their country. It had been contested before, the British military had already taken over the Transvaal some years before as a British Protectorate (over the issue of representation again – this time the African tribes had disputed the territory) and the British had been outed by the Boers in a small and swift war (the 1st Boer War or “Transvaal War” in 1880/81) which re-gained them their sovereignty over the territory.  It however remained a disputed territory to many, it had now become even more complex with the massive influx of expatriates and business, and the memory of Britain’s control of the Transvaal was still fresh – for both the Boers and the British.

The answer to why Kruger moved when he did, lay in the hope that the initial successes of the Boer Forces against the smaller British Forces garrisoned in Natal and the Cape Colony at the time would bring about detente.  As with the victory of the Transvaal War (the 1st Boer War 1880 to 1881) to out the British from that Republic then, Kruger hoped a swift victory would bring sense to the British position with regard to British expatriates “rights” and “citizenship” on the mines in the Transvaal and put any Imperial British expansionist plans and Milner’s obstinate attitude towards the Boer Republics to bed.

In hindsight, the move was indeed a blunder, Kruger did not get the detente he sought.  Change in the Transvaal’s political and demographic make-up was inevitable, and Kruger would not embrace it – a fierce sense of patriotism and sovereignty where central edifices for him and he chose to take up arms to stall the inevitable in a last ditch effort to keep his country under Boer control (a similar parallel can be drawn years later when the “union” of South Africa was taken back politically by the hard line Afrikaner Nationalists in 1948).

No doubt “Gold” played a role, the simple fact that it was discovered is very central to the dispute.  However of interest is just how much of a factor it played – The Boer standpoint at the time was Britain’s “Gold-magnets” started the war out of greed (the Jameson raid in their eyes proved that to them).  Some modern option is the British wanted to “steal” the Republic’s gold, however the economics of matter is that the Gold was in fact already owned by the British private concerns mining it and they paid a tax to the Transvaal government for the sale of it. This agreement on ownership and tax did not change when the Union of South Africa was established after the war, so there was no real financial gain for Britain in going to war (the fact is they owned the Gold already).

What lies more at the heart of this matter of greed is “Empire” as an ideology central to the world politics at the time – the expansion of territory around the globe by the British – the concept of a “Cape to Cairo” band of control over the whole of Africa and the sun never setting on the British Union flag.  British global expansionism was central to Milner and others as Victorian characters and the two Boer Republics stood in the way of it.

To put perspective on the robust, very brave, tenacious and largely suicidal move by Kruger in today’s context – it would be akin to two relatively small prosperous oil/gas neighbouring states like “Qatar” and “The United Arab Emirates” getting into a coalition and then declaring war against the current global Superpower – the United States of America – who has vested interest in their territories (business and large numbers of expats) and in their product (oil/gas). Today’s “Oil” is yesterday’s “Gold” in the context of global monetary exchange and world dominance (the on-going wars in the Middle East involving all the Superpowers is testament to that).  There would only be one outcome, and it would be as disastrous in this comparison context now as it was for the Boer Republics in their context then.


Written by Peter Dickens

Boers; ‘Don’t forget Majuba, boys’. Brits; ‘No fear, Boere, no fear’.

A little bit of ‘Army’ banter between Boer and British Forces. Graffiti scrawled by both sides on a bedroom wall in a house originally taken by the Boers and recaptured by British forces. The Boer graffiti reads: ‘Don’t forget Majuba, Boys’. The British grafitti reads: ‘No fear, Boere, no fear’. Majuba was a disastrous British defeat in the lesser known First Boer War of 1881, and it was an “old score” to be settled in the Second Boer War 1899-1902 with devastating effect and further reaching punitive damage.

Many people in South Africa don’t know too much about the history of the 1st Boer War (also known as The Transvaal War) as they do about the 2nd Boer War i.e. the “Anglo Boer War” or “South African War” (as it is known in Britain).  As, by far, the second war had the most devastating and greatest impact to modern South African history, especially when the Concentration Camp policy and Scorched Earth policies are factored.  In fact it’s only as a consequence of the 2nd Anglo Boer War that South Africa as a “whole” country came into existence.

Many people in South Africa would also be surprised to learn that at one point, some 22 years before the 2nd Anglo Boer War, the Transvaal (known as the South African Republic) was “colonised” by way of a political annexe and effectively became British in 1877. A special “warrant” was issued by the British ostensibly to protect the Transvaal Boers against Zulu and local Pedi aggression.

It was the Transvaal War that changed this arrangement and re-established the South African Republic (Transvaal Republic) under the control of the Boers, setting the stage for the bigger conflict to come.

The Battle of Majuba Hill (near Volksrust, South Africa) on 27 February 1881 was the main and decisive battle of the First Anglo-Boer War (Transvaal War). It was a resounding victory for the Boers and the battle is considered to have been one of the most humiliating defeats of British arms in history.

Major-General Sir George Pomeroy Colley occupied the summit of the hill on the night of 26–27 February 1881. His motive for occupying the hill remains unclear. The Boers believed that he may have been attempting to outflank their positions at Laing’s Nek. The hill was not considered scale-able by the Boers for military purposes and thus it is often assumed that the purpose of occupying the summit may have been Colley’s attempt to emphasize British power and strike fear into the Boer camp.  Who knows, but the end result was that it was scaled and a resounding and very one sided Boer victory  ensued – the Boer suffering only 1 dead and 5 wounded, whereas the British suffered 92 dead, 134 wounded and 59 captured.

The impact of this battle was far reaching. It led to the signing of a peace treaty and later the Pretoria Convention, between the British and the reinstated South African Republic (Transvaal Republic), effectively ending the First Boer War and giving the Transvaal back to the Boers.

Coupled with the defeats at Laing’s Nek and Schuinshoogte, this third crushing defeat at the hands of the Boers ratified the strength of the Boers in the minds of the British, arguably to have consequences in the Second Anglo-Boer War, when “Remember Majuba” would become a rallying cry (as is seen in the feature image).

This defeat marked the beginning of the decline of the British Empire. Since the American Revolution, Great Britain had never signed a treaty on unfavourable terms with anyone and had never lost the final engagements of the war. In every preceding conflict, even if the British suffered a defeat initially, they would retaliate with a decisive victory. The Boers showed that the British were not the invincible foe the world feared.

However the British “Retaliation” for the Battle of Majuba Hill and the surrender of a British “protectorate” (the Transvaal) was yet to come and when it did, twenty two years later, the punitive measures of the British military, against combatants and non combatants alike, had devastating and tragic consequences for the Boer nation as a whole.

This underpinning “old score to settle” was very much a rally call of the 2nd Anglo Boer war, it’s often overlooked by some historians that claim they entire war was about British Imperial greed for Gold and Diamonds, and whilst only partly true – there remains a score of other reasons for the Anglo Boer War (2nd Boer War) – and this is no doubt, one of them.

Images above show a 2nd Boer War (Anglo Boer War) postcard to “avenge” Majuba and wipe the slate clean and British soldiers from the 2nd Anglo Boer posing at the Battle of Majuba Hill memorial on the summit of Majuba, making a profound statement of eventual victory.

Feature Image: Copyright Imperial War Museum Collection, reference wikipedia and the Imperial War Museum.

SCOPE Magazine – any troopie’s ‘must have’ reading material

SCOPE magazine – the ‘must have’ reading material for any troop serving in the SADF during the 70’s and the 80’s, many a SCOPE centre-fold model adorned signal/Ops rooms, tents and bungalow walls during the Border War.

By today’s standards SCOPE would be seen as a pretty tame mens lifestyle magazine, but then it pushed the barriers of soft porn and allowable content banned by the government of the day’s censorship board.

The magazine was launched in 1966 by Winston Charles Hyman and Jack Shepherd Smith became the long-time editor. Scope magazine would achieve iconic status in South African media as a publication that petitioned for freedom of the press with its censorship-defying content. The magazine was also known for placing strategically placed black stars concealing certain body parts of the nude female models per the censorship regulations.

The magazine had an on-going battle with the National Party’s Apartheid era policies of media censorship.  In 1972, the censor board of South Africa banned the weekly magazine, but this was overturned by the Supreme Court. This marked the seventh time in four years that the board had banned the magazine. The censor board had taken exception to a photograph published in May by the magazine, that showed a black man in New York embracing a white woman. They also took exception to a semi-nude shoot of a model in the forest and at the beach. In other attempts, the board had formerly attempted to ban the magazine because of a cover article on abortion and a story on test tube babies. In 1975, editor Shepherd Smith maintained that fair censorship was impossible in South Africa because of the cultural diversity of the nation “Whose particular way of life are the censors going to help to uphold?”. In May 1976, again the censor board issued a notice banning the magazine.

2408527183_43e82ca21d_b

However believe it or not, SCOPE also had excellent editorial content and investigative journalism receiving a number of industry awards.

The magazine also covered important crime stories. In 1984 the weekly published a telephone interview with South Africa’s most-wanted bank robber Allan Heyl of the Stander Gang who was in hiding in Britain at the time. The newspaper has also covered political stories and interviewed figures such as the spy Craig Williamson.

Stories also appeared during the South African Border War that celebrated the military training of SADF soldiers and contributed to a sense of heroism. The weekly also published a series on the experiences of Horace Morgan, an ex-psychiatric patient who spent 37 years in mental institutions. Scope conducted interviews with Morgan (who had been admitted in 1937 after losing his memory) and reported the hostility of the institutions and Morgan’s inability to escape the fate of a “wasted, tragic life in a cage”.

Several notable journalists have contributed to the magazine. In 1990, former Sunday Times writer, Jani Allan launched the self-titled Jani Allan column at Scope.  An article written by Allan on 5 October 1990, volume 25, number 20 in the magazine was presented to the South African parliament in 1991 in support of a legislation issue.

996516_183881248448282_1581793463_n

As the apartheid policies and governance crumbled in the 1990s, so too did the magazine.  Ironic considering it had played such an iconic role in countenance to Apartheid and it’s policies.  In a sense its success lay in the ability to challenge the status quo and to sensationalise it – it was taken up and enjoyed by thousands of young white South African men seeking an avenue to express their sense of independence and individualism. It was especially appealing to those serving in the armed forces where conformity and censorship was the order of the day.  With no status quo and censorship laws left to challenge, the magazine found itself without a mission.  It suffered from heavy circulation losses and the final issue was published in 1996.

For a great insight into the magazine in its heyday, order ‘The Journey Man” a biography by Chris Marais, Chis was a contributing journalist and his insights into the magazine are second to none – here’s a link The Journey Man by Chris Marais


Researched by Peter Dickens. Source wikipedia.  Photo copyright John Liebenberg