It’s a thorny issue in South Africa, the taking of farm land without compensation. However the Anglo-Boer Wars (both of them) and even the Voortrekker Zulu War carry with them some interesting history and it asks the question ‘whose land is it anyway’ One significant and conveniently overlooked answer lies in the grounding history and cause of the South African War 1899-1902 (also known as the 2nd Anglo-Boer War).
This answer makes the case for the giving of annexed land by the Transvaal and Orange Free State Republics (The Boers) back to the black indigenous peoples of South Africa who existed in those two republics prior to The South African War, and it ALSO makes a case which reinforces the ‘white’ Boer ownership of vast tracks of land in the two old Boer Republics annexed by the British during The South African War.
To many South Africans the chief cause of the Second Anglo-Boer War is completely misunderstood, it is shrouded by a National Party narrative and bias caused by the fierce sense of Afrikaner Nationalism created by this party’s ideology. Dismiss for a minute the whole Nationalist idea that all the land was ’empty’ or bartered and traded for fairly during the Great Trek. Also, dismiss for a minute also the whole idea that the 2nd Anglo-Anglo Boer war was all only about ‘gold’ and ‘diamonds’ and British greed for it. Finally, dismiss the idea that the Boer concentration camps of The South African War were systematic ‘extermination’ camps designed to rid the British world of the Boer nation in its entirety (Nazi style). All of these Nationalist fuelled ideas are either falsehoods or at best only half-truths. When putting these into correct context and in the ‘inconvenient’ truth that the case for ‘who owns the land’ is found.
Let’s start with the real underpinning reason for the 2nd Anglo-Boer war (The South African War), which is the 1st Anglo-Boer War (The Transvaal War). Like World War 2 is World War 1, Part 2, so too a key underpinning cause of the 2nd Anglo-Boer War was the 1st Anglo-Boer War. In effect ‘Boer War’ 2 is ‘Boer War 1’; Part 2.
1st Anglo-Boer War
The 1st Anglo-Boer War (Transvaal War) is an enigma to most South Africans, barely understood even today, the events and outrages of the 2nd Anglo-Boer War completely cloud it out, and it’s an inconvenient war to look at as it throws up these thorny truths which don’t suit the political narrative:
- The Transvaal Republic was at one stage a British Colony BEFORE the 2nd Anglo- Boer War
- The Transvaal Republic ‘raad’ handed their Republic, with all its wealth and their state coffers (tax), their flag and their independence to the British in April 1877 – willingly and WITHOUT one single protest or shot fired.
- ‘Native Land’ and ‘Protection’ were also a central reason why the Transvaal Boer Republic INVITED the British to colonise their Republic.
In 1876 the tiny Boer population of the ‘Transvaal’ people was under threat from a much bigger population of warring African tribes in the Transvaal Republic and on the Republic’s borders (remember this was before the discovery of gold in 1886 and before the future ZAR Republic was rich in arms and munitions).
The reason why the Transvaal Boers were under threat is that they were annexing tribal land by force and demanding tax from various tribal groups for the land (and forcing labour) on land they were allowed to occupy. This had stirred up the Pedi, led by Sekhukune I and resulted in a war in 1876 which is recorded as a Boer defeat. To the East the very powerful Zulu kingdom was also making claims on ‘Transvaal’ territory.
This ‘Black African’ uprising was one the Boers could not cope with alone. So the Boers INVITED the British to Colonise their Republic and protect them.
The Black Africans in the Transvaal Republic felt they had a case too, and they too called on the British to help them from what they saw as Transvaal Republic aggression, land grabbing and subjection. They also INVITED the British to protect them.
All good then, invited by EVERYONE in the Transvaal Republic the British moved into the Transvaal on the 12th April 1877 to settle the peace, annexed it as British Colony, with no resistance they took down the ZAR ‘Vier-Kleur’ and hoisted the Union Flag (Jack) over Pretoria and erected a British government. In doing so the ex-Boer Republic also handed over the money, tax would now be collected by the British – all tax, the taxes on mining and the taxes on land.
In addition, to protect the ex-Boer capital they built forts around Pretoria (Johannesburg did not really exist as a complete mining city and some of these forts in Pretoria are still there as an inconvenient reminder of this history). For their efforts, the British got to expand their territory in Africa (more land for them) suiting their expansionist Imperialism agenda right down to the ground, everyone happy right?
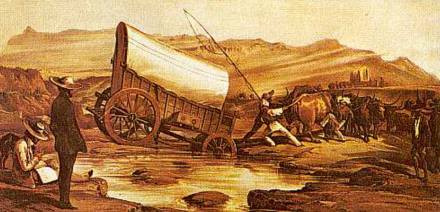
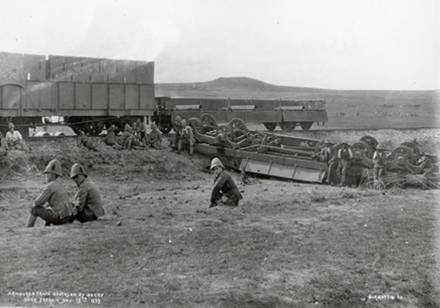
But not for long, the British had crushed the Zulu threat in 1879 (Anglo-Zulu War), with the threat gone, it did not take long before the British policies on Black African land rights and their policies of taxation of Boer land became an issue with the resident Boer population. It all came to a head with the Boers when the British confiscated one Boer’s wagon in lieu of his backdated tax, which he refused to pay. This brought them into direct conflict with a Boer Commando drafted to help the farmer and simply put the Boers now wanted their old Republic back and the British OUT. This then kicked off the 1st Anglo-Boer War, the ‘Transvaal War’ in November 1880.
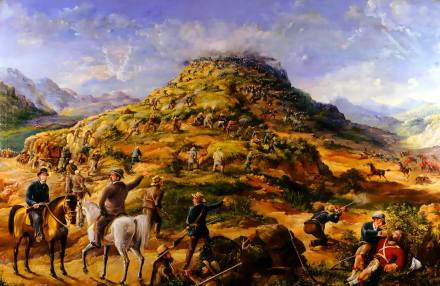
The Siege of Rustenburg, 1st Anglo-Boer War
So what was the issue really – it can’t just be one wagon? We have to ask ‘whose land is it anyway’ and ‘who really needed it protected from who’? The Boer case lies in two events in history which occurred more or less at the same time, the ‘Great Trek’ and the ‘Mfecane’.
The turbulent early 1800’s
Its complicated history, but in a nutshell in the early 1800’s are the key, specifically the period 1819 to 1838 – this was the epicentre of events in South Africa which were to shape the problem we have in South Africa today, especially as to ‘freedoms and land’.
It all started in one part of the country on the 1st December 1834 when the British took the bold decision to ban slavery in the Cape Colony and in addition gave franchise (the ‘vote’) and property ownership rights to all its inhabitants – Black and White (Setter, Coloured and Indigenous) on an equal footing. This did not sit well with the mainly Dutch (with a blend of French and German) farmers many of which found themselves in an intolerable situation as ex-slave owners and they chose, just a short 6 months later, in June 1834, to up-sticks and leave the British colony and their endless meddling in their social structures, beliefs and social spheres. At the same time taking with them into South Africa’s hinterland their ideologies of racial servitude, ideologies which would underpin the future Boer Republics which they formed. They would also form a new nation an ‘Afrikaner’ one, with an Afrikaans language both named after their ‘land’ in ‘Africa’ – essentially a ‘White African Tribe’.
The Great Trek – artists impression
Around the same time, in another part of the country Shaka Zulu and the Zulu nation was born. In 1819 Shaka Zulu managed to unite, through force and war, a number of small tribes into a newly established ‘Zulu nation’. Like the Boer ‘Afrikaners’ their nation did not exist as a ‘Zulu’ one prior to the early 1800’s.
The 1st ‘depopulation’ of land
So when and how did these northern ‘Black African Tribes’ establish themselves in South Africa? The answer lies in the Mfecane (meaning ‘the crushing’), also known by the Sesotho name Difaqane (scattering, forced dispersal or forced migration). This great displacement of Black tribal people took place between 1815 and about 1840.

King Shaka – artists impression
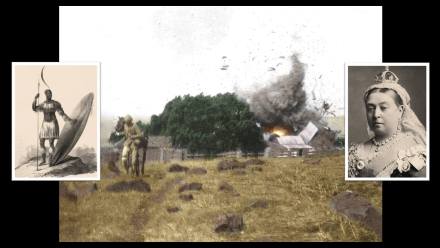
As King Shaka created a very militaristic Zulu Kingdom (situated in the territory between the Tugela River and Pongola River) his forces expanded outwards in a wave, subjecting or simply annihilating all other peoples. This expansionism also became the prelude to the Mfecane, which spread from this Zulu epicentre. The forced movement of peoples caused many displaced tribes to wage war on those in other territories, leading to widespread warfare and death as well as the consolidation of various tribes. Notably, it brought up the Matabele actions who dominated in what was the ‘Transvaal’ when Mzilikazi, a king of the Matabele, who between 1826 to 1836 ordered widespread killings and reorganised his territory to establish the new Ndebele order. The death toll is estimated between 1 to 2 million people (it cannot be satisfactory determined), however the result can, as simply put was massive swaths of land in the region became depopulated, either entirely or partially.
Now, enter the trekking ‘white tribe’ Afrikaner Boers, who in 1836 whilst all this is taking place arrive in the same place as the Mfecane, and to survive as nation and not be ethnically cleansed themselves in addition to the other tribes, the Boers take on by force this warring Matabele nation and then they take on the warring Zulu nation by force of arms, the cumulation was the Battle of Blood River on the 16th December 1838.
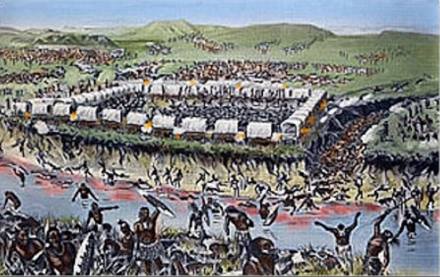
Artists impression of the Battle of Blood River – artist unknown
The Battle of Blood River is significant, not just for the Boers, but for all future Black South Africans who are not of Zulu or Matabele ethnic origin. In effect the Boers, by decimating the Matabele army and then the Zulu army put a temporary end to their respective fighting capabilities and therefore put an end to the Mfecane, they ended what is South Africa’s first and only mass genocide and ethnic cleansing. It’s an ironic twist but the very existence of any of these ‘Black’ South Africans in South Africa today (other than the aforementioned Matabele and Zulu), and the very fact they are even identified as tribes and exist as nations, is largely thanks to the Afrikaner Voortrekkers – the ‘white tribe’ Boer nation. They literally owe them their lives and nationhood.
Now, as to the old ‘half truth’ the land was ’empty’ or ‘traded fairly’ so the Boers could occupy it. In part there is truth, some of the land had been depopulated by the Mfecane also many tribes welcomed the Voortrekkers giving them parcels of land in trade and in grateful thanks for their ‘protection’ against been slaughtered by Matabele or Zulu armies. All good right – fair is fair? Not so, it’s only partly true. There’s a more sinister side to the formation of the two Boer Republics, not all the land was fairly settled, the two Boer Republics also embarked on expansionism to establish borders and forced various tribal Africans from some of their land at the same time as annexing land belonging to various chiefdoms and putting it under Boer ownership.
1820 Settlers
To be fair the Boers, the British in the early 1800’s were also securing and expanding their own borders and territory (land) and endeavoured to repel the southward migration of the Xhoza tribe, driven very much by the Mfecane up north. This issue came to a head around Grahamstown, on what was known as the ‘Border’.
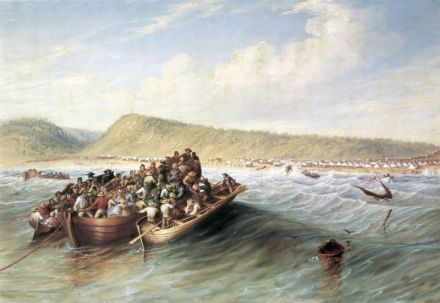
British 1820 Settlers arriving in South Africa
In the UK, the end of the napoleonic wars at the Battle of Waterloo 18 June 1815 posed a problem, they had massive unemployment, especially soldiers who were no longer needed and rising debt from fighting the wars. They solved this by offering citizens, who were to become the ‘1820 Settlers’, their own land, and it was land which they needed reconciled on the ‘Border’ of the Cape Colony. After a number of small wars were fought with indigenous tribes settling the ‘border’ issue – the British then went about reconciling the land under deed, some farm land was even given under deed to Black African farmers, but others remained controversial and it still is.
The even more turbulent late 1800’s
Now, fast forward to the Anglo-Zulu War of 1879 and a year later to the 1st Anglo-Boer War of 1880. The African chiefdoms in the North and West Transvaal have recovered from the Mfecane, and have been armed in part by missionaries and traders trading rifles. Whilst at the same time the Zulu Chiefdom bordering the ‘Natal Colony’ settled by the British and the newly minted British ‘Transvaal Colony’ also now settled by the British, is again back up to fighting strength. ‘Land’ becomes the central problem again (the Zulu’s were really not that interested in gold).

President Thomas Burgers
Consider for the underpinning tensions leading up to the 1st Anglo-Boer War (The Transvaal War) in 1880. The British annexed the Transvaal in 1877 at the invitation of the out-going ‘Boer’ Transvaal President, Thomas Burgers. President Burgers laid squarely the blame for bringing the British to the Transvaal at the future President, Paul Kruger and his cabal. His blame and anger is expressed with this most extraordinary outburst and it is most illuminating:
“I would rather be a policeman under a strong government than a President of such a State. It is you—you members of the Raad and the Boers—who have ruined the country, who have sold your independence for a drink. You have ill-treated the natives, you have shot them down, you have sold them into slavery, and now you have to pay the penalty.”
The missionary, Rev John Mackenzie, gives us another example. Here is how Mackenzie described the motives behind the First Boer War:
“The Transvaal rising (1st Anglo Boer War) was not dictated, as was believed in England, by a (Boer) love of freedom and preference for a (Boer) republic rather than a limited monarchy (Great Britain). It was inspired by men who were planning a policy which would banish the English language and English influence from South Africa. Their action was a blow directly dealt against freedom, progress, and union of Europeans in South Africa.”

Paul Kruger
After Kruger et al regained control of the Transvaal, another missionary, the Rev John Moffat, was tasked with giving the news to some of the black tribal leaders who would again be abandoned to their tender mercies:
“for the most part there was the silence of despair. One gentle old man, Mokhatle, a man of great influence, used the language of resignation, ‘When I was a child, the Matabele came, they swept over us like the wind and we bowed before them like the long white grass on the plains. They left us and we stood upright again. The Boers came and we bowed ourselves under them in like manner. The British came and we rose upright, our hearts lived within us and we said: Now we are the children of the Great Lady. And now that is past and we must lie flat again under the wind—who knows what are the ways of God?’”
The thoughts of a few more African leaders are equally illuminating:
In response to the endless violent expansion of the pre-annexation Transvaal into their territory, Montsioa Toane, Chief of the Barolong, requested that Great Britain take his people under imperial protection. In a letter addressed to ‘His Excellency Her Britannic Majesty’s High Commissioner, Sir P. Wodehouse, KCB’, the chief requested “refuge under your protecting wings from the injustice of the Transvaal Republic, whose government have lately, by proclamation, included our country within the possessions of the said Republic”.
He went on to explain: “…without the least provocation on our side, though the Boers have from time to time murdered some of my people and enslaved several Balala villages, the Transvaal Republic deprives us, by said proclamation, of our land and our liberty, against which we would protest in the strongest terms, and entreat your Excellency, as Her Britannic Majesty’s High Commissioner, to protect us.”
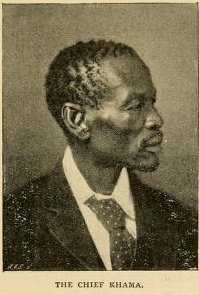 In 1876, King Khama, Chief of the Bamangwato people from northern Bechuanaland, joined the appeal:
“I write to you, Sir Henry, in order that your queen may preserve for me my country, it being in her hands. The Boers are coming into it, and I do not like them. Their actions are cruel among us black people. We are like money, they sell us and our children. I ask Her Majesty to defend me, as she defends all her people. There are three things which distress me very much: war, selling people, and drink. All these things I shall find in the Boers, and it is these things which destroy people to make an end of them in the country. The custom of the Boers has always been to cause people to be sold, and to-day they are still selling people.”

King Cetshwayo
Even King Cetawayo of the Zulu laid the blame for the tensions which led to the Anglo-Zulu War of 1879 against the British squarely at the feet of the Transvaal Boers, now this is ironic from the leaders of Zulu themselves, he said:
“This war (the Zulu War) was forced on me and the Zulus. We never desired to fight the English. The Boers were the real cause of that war. They were continually worrying the Zulus about their land and threatening to invade the country if we did not give them land, and this forced us to get our forces ready to resist, and consequently the land became disturbed, and the Natal people mistakenly believed we were preparing against them.”

John X Merriman
Just prior to the 1st Anglo-Boer and the British annexation of the ‘Transvaal Colony’, in 1885, the liberal Cape politician, John X. Merriman described Kruger’s newly independent, and ever-expanding, republic as follows: “The policy of the Transvaal was to push out bands of freebooters, and to get them in quarrels with the natives. They wished to push their border over the land westwards, and realize the dream of President Pretorius, which was that the Transvaal should stretch from the Indian Ocean to the Atlantic. The result was robbery, rapine and murder.”

Dr Abraham Kuyper
The ZAR ‘Transvaal’ Republic’s main-cheerleader in Europe, Dr Kuyper, commented enthusiastically on the racial policies of the Republic: “The English prided themselves on protecting the imaginary rights of the natives… The Boers are not sentimentalists, but are eminently practical. They recognized that these Hottentots and Basutos were an inferior race.”
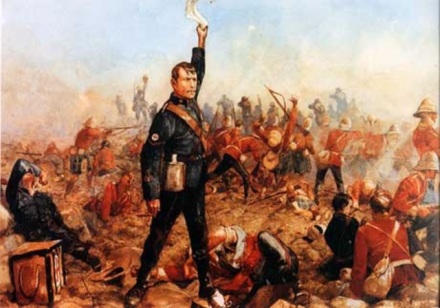
Majuba
Things came to a head in the 1st Anglo-Boer War at The Battle of Majuba Hill (near Volksrust, South Africa) on 27 February 1881. This was the main and decisive battle of the 1st Anglo-Boer War (Transvaal War). It was a resounding victory for the Boers and the battle is considered to have been one of the most humiliating defeats of British arms in history.
It sent the British back over their border to Natal, but it also resulted in a very uneasy ‘peace’ as to the British ‘Transvaal Colony’. In the aftermath of the war the South African Republic (Transvaal) regained its independence. The Pretoria Convention (1881) and the London Convention (1884) laid down the terms of the peace agreement. In terms of land the Pretoria agreement settled the Transvaal’s borders and re-established an independent Boer Republic again, but it still had to have its foreign relations and policies regarding black people approved by the British government. The new version of the Boer Transvaal Republic was also not allowed by the British to expand towards the West (and link with the Atlantic Ocean).
These policies meant that the Transvaal was still under British suzerainty or influence. In 1884 the London Convention was signed. The Transvaal was given a new Western border and adopted the name of the South African Republic (ZAR). Even then, the ZAR still had to get permission from the British government for any treaty entered into with any other country other than the Orange Free State.
An ‘uneasy’ peace
The Boers saw this as a way for the British government to interfere in Transvaal affairs and this led to tension between Britain and ZAR. This increased steadily until the outbreak of the 2nd Anglo-Boer War in 1899, especially with the on-set of gold mining. which saw tens of thousands of British miners settle in the Transvaal. Gold mining was done under concession from Kruger’s government. Kruger took the position that his people, the Boers, were farmers and not miners, so he gave British mining concerns a mandate to mine and pay the ZAR government a hefty tax for the privilege. Initially mining in the Transvaal was an all British affair – from the mining concerns, to the infrastructure (rail and buildings) and even right down to the labour. Again ‘land’ had been conceded by the Boer Republic to British miners and companies. As inconvenient truths go, they already ‘owned’ the gold at the onset of the 2nd Boer War and had no reason to ‘steal’ it.
The unsettling problem for the British and the Boers was a demographic and representation one, there were more Britons on the reef than Boers. These British citizens were denied political representation and citizenship qualification periods became an issue (Kruger realised if he allowed citizenships after 5 years residency he would lose his state).
Also the Boer State was crushing political protest on the reef in a jack-booted and heavy-handed manner using their Police, known as ZARP. Things came to a head with a privateer raid (supported privately by Rhodes) called the Jameson Raid in 1895 which was planned in the billiards room of the Rand Club in Johannesburg (and not by British Parliament in Whitehall as is incorrectly assumed – in fact to British politicians the whole affair came as uncomfortable surprise). The Raid, financed by the mine owners and not the British government, was intended to trigger a simmering civil revolt on the reef. The revolt was crushed by the Boers.

Jamesons Last Stand The Battle Of Doornkop 1896.
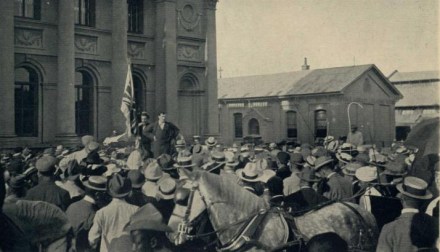
This unrest and uneasy peace established after the 1st Anglo Boer War all came to a another head when negotiations on citizenship and political representation of the Transvaal Britons broke down. To settle the dispute the Boers declared war on Britain and invaded the British colonies late 1899 – in effect they wanted a swift victory whilst British forces were weak and unsupported by any substantial expeditionary force – as they did at Majuba and weaken the British negotiation hand, re-set the table so to speak.
It backfired. The mandate given to the Boers to re-establish their ‘British Transvaal Colony’ as an independent Boer Republic lasted barely 15 years after the London Convention peace agreement which properly ended the 1st Anglo-Boer War and finally established the ZAR territorial borders.
To the British, there was an ‘old’ score to settle with the Transvaal Boers, and it had nothing to do with ‘gold’ and everything to do with territory – ‘land’. It is best summed up by Churchill who reflected on the 1st Anglo-Boer War as “a disgraceful, cowardly peace” – and now they wanted their Colony back.
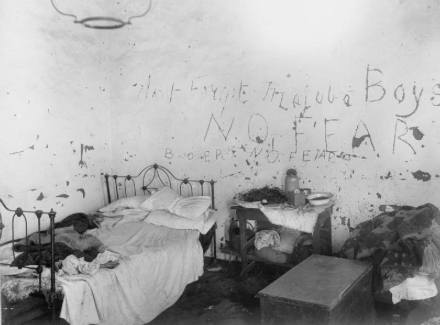
Graffiti scrawled by both sides in a house recaptured by the British in the 2nd Anglo Boer War. The Boer graffiti reads: ‘Don’t forget Majuba, Boys’. British graffiti reads: ‘No fear, Boere, no fear’.
1st Anglo-Boer War – Part 2, the 2nd Anglo-Boer War
Now, as ‘Boer War’ 2 is the logical expansion of ‘Boer War’ 1, consider that these tensions over land and the whole of the Transvaal had by the late 1800’s escalated somewhat. In the intervening period between ‘Anglo-Boer War’ 1 and ‘Anglo-Boer War’ 2, gold was discovered in the Transvaal, and in addition to this the local Black tribes flourished, with no more large wars to fight and no Mfecane and aided by the introduction of medicine by missionaries, this mounting black population of the Transvaal added to the hundreds of thousands of mainly British immigrant mine workers now settled in the Transvaal.
Now, with a ‘old score’ to settle over the Transvaal territory, along with a simmering revolt of miners over their rights to the land, the Boer declaration of war against the British, provided a ‘Casus Belli’ to the British to again wage war them again, and so began the 2nd Anglo-Boer War (1899 to 1902). To give perspective of how long the ZAR lasted, from the time the British Union ‘Jack’ was taken down over Pretoria to the time it was put up again took a mere 16 years.
The 2nd ‘depopulation’ of land
Back to the issue of land. During the 2nd Anglo-Boer war the British, after winning the ‘conventional’ war phase were forced into a second and more bitter phase, guerrilla war with disposed Boer governments now ‘in the field’ and running their Republics from the veldt, a moving and endlessly fraught war where Boer forces relied on their communities and families for supply to keep the fighting.
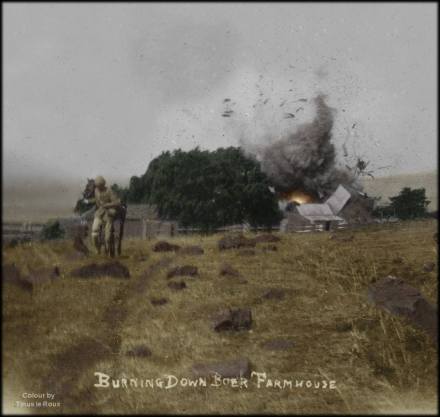
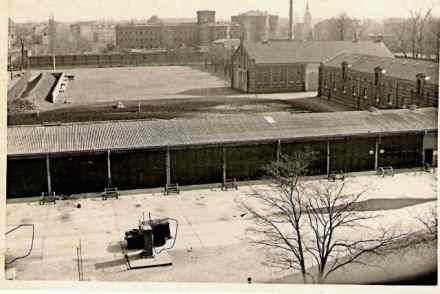
Lord Kitchener in an attempt to bring the war to rest adopted a policy depriving the Boer forces of supply, and so began a policy of ‘concentration camps’. This can be better described as ‘forced removal’ from land and the placing of citizens in ‘deportation camps’, it involved rounding up of both White and Black civilians in demarcated conflict zones and effectively ‘depopulating’ the land and moving all the people to isolated camps. The policy which resulted in the deaths of tens of thousands and people deprived of their land leaves a deep scar on many South Africans, and not just the white Afrikaners, the black South Africans caught up are equally traumatised.
So, now we have an interesting dilemma for the current citizens of South Africa who own vast tracks of land in the Republic, the inconvenient truth is that not only was it ‘depopulated’ by the Zulu Kingdom in the early 1800’s, it was depopulated again by the United Kingdom – eighty or so years later.
The international case
Now here is where the issue of land ownership gets interesting, and funnily it is in line with the issues now surrounding the Palestinian question and Israel (and best illustrated by this case as it surrounds ‘land’ ownership and war). Many people are not familiar with the underlying problem of land under occupation in Israel. In international law an occupying force can do anything within limitations on the land it occupies as long as a state of war exists. This has become a thorny issue with the Palestinians who, like the Boers, were deposed of their land by war – land which the British sold to Palestinians under title-deed whist Palestine was a British protectorate (those pesky British again), and this land is now under private title deed is owned by Palestinians and occupied by Israelis – and it makes up massive portions of modern Israel.

If given back to the legal owners it will most certainly unseat Israel as a state and put millions of dollars invested in land at risk. The only way Israel can hold onto the land legally is to be in a constant state of war with the Palestinians (not really the other way round – see annual Palestinian protests when the bring the house keys and title deeds to their land to the fore – which over the border are now occupied by Israeli families or developed into multi-million dollar property estates and shopping malls).
How does this odd bit of International law apply to South Africa’s farmers. Simply put they were deposed of their land during the 2nd Anglo-Boer war, it came under British control under the edicts of war. Unlike the Palestinians the Boers were allowed to return to the land, land on which families were decimated and could not be re-settled was re-allocated by the British and the Union governments after the war, the last ‘legal’ owner of this land expropriated during the war were in fact the British. In the subsequent years after The South African War, as a colony of Britain and then under British administration and dominion as a Union, the country went about formalising land title and ownership from the old Boer Republics and concluding war repatriation and re-settlement.
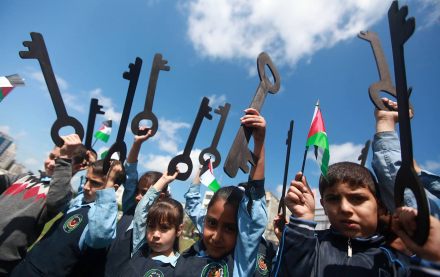
Palestine ‘Keys’ and ‘Deeds’ protest symbolised by their old keys to their houses in Israel
So, in our modern day, if this land is now taken away without compensation, the Israeli/Palestinian dilemma and the annual ‘keys’ protest rears it head, where the ‘British’ issue is now again at the forefront of title deeds and like the Palestinians, the dispossessed modern Boer family will want to turn to Britain for an answer, adding to the many dispossessed Zimbabwean white farmers with a similar case. That would be a nasty surprise for the modern British Foreign Secretary.
Here’s another interesting question over South African land located in the Centre and Northern provinces and the two seismic events that depopulated much of it, not to mention the British sale of land in the Cape, especially in contested ‘Border’ region which they purposely ‘settled’.
Would a claim now for restitution or compensation for land ‘re-appropriated without compensation’ be laid at the feet of the Zulu King or at the feet of the British Queen?


In Conclusion
All very complicated this land reformation business, now an almost impossible job to simply unbundle through declarations of ‘mine – you stole it’ and simply grabbing it. A case example here is the land grabbing which recently took place in Midrand and Hermanus, this land has nothing to do with the disputed historical African territories unseated by the expansion and creation of the old Transvaal, Orange Free State, Natal and Cape Colony borders, and the people occupying it are not all the proper ancestors anyway. This is a political grab using a very bent interpretation of history.
There is value in identity of having a ‘homeland’, but whose people are we referring to when we say ‘our people’, the ‘homeland of the Afrikaner nation is also Africa. By all means look at the land taken by force of arms from various Chiefdoms as their tribal land borders and were they stood after the Mfecane, and the resultant occupation by Zulu, Matabele, Brit and Boer alike and not the land ‘sold’ to the Boers or the British for that matter for trade or protection. Present the historical evidence showing which families and grouping were unseated by force of occupation and how this ‘stolen’ land was then put under plough by the occupiers. There’s not much to go by in the way of arable and profitable ‘land’ here, but lets challenge it properly.
Generally the historically contested farm land is nowhere near the bulk of multi-million rand privately owned title-deed farms – so really of no political value. Unless you provide the argument that all land was occupied by whites, and this is not historically true at all. In which case everybody who has a white skin can have his property simply taken away – now we are into a ludicrous argument, and one used to incite racial disharmony and hatred.
Urban land, depopulated by Apartheid policy only really accounts to small areas located near Johannesburg and Cape Town city centrals, Land, which now, because it worth literally millions of Rand, is under contention, the reason for the slow progress is that multiple families are making claims to the land, families which actually own it and families which rented it. District 6 is a prime example, it really is a political quagmire as its now vastly profit driven and less about the ‘home’ it once offered. Also in reality it cannot be settled by huge numbers of the ‘people’ offered by the EFF – they want the nice well run profitable farm land which is under title-deed and owned for decades by private individuals (who are not Black) – whether it’s under real historic contention or not, so it’s entirely wrong of Cyril Ramaposa to cite District 6 in his SONA address as a key underpinning social cause of the ANC’s entire land without compensation drive.
The biggest dilemma facing the proposed amendment to the Constitution is that in reality the land everyone in the ANC and EFF wants and is highly productive – and its land which has not only been depopulated once, its been depopulated twice and resettled twice over after the end of the Mfcane and 2nd Anglo-Boer War respectively.
The lands negotiated with and allocated to the Zulu kingdom are even a more thornier question and we might want to ask is the Zulu kingdom is going to pay for land depopulated by their expansionism and militarism, so too can the same question be asked of the Matabele. There another human trait here, one that will not go away once this particular monkey is out the cage, it’s called greed, and it’s an intrinsic human condition the ANC has been indulging itself in, time and again. Here is where the Zulu have drawn the line when Mangosuthu Buthelezi rightly accused the ANC and EFF of ‘playing with fire’.


The simple truth is this. ‘Land’ ownership in South Africa has been defined by war and armed ‘struggle’, and not just war between ‘Blacks and Whites’, war between ‘Blacks and Blacks’ and even war between ‘Whites and Whites’. The burning question is, will it be defined again by another ‘war’ – another armed ‘struggle’?
Related articles and Links
Concentration Camps; To fully reconcile The Boer War is to fully understand the ‘BLACK’ Concentration Camps
Concentration Camps; I’m not pro Boer, I’m British, this isn’t OUR way!
Majuba; Boers; ‘Don’t forget Majuba, boys’. Brits; ‘No fear, Boere, no fear’.
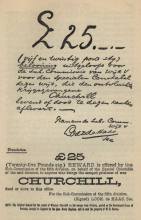
Winston Churchill; Churchill’s epic ‘Boy’s Own’ Adventure in South Africa
Kruger and Victoria; Kruger “blunders” and declares war on the world’s Superpower!
Written and researched by Peter Dickens. References from Wikipedia, the South African History Association on-line, quotes gleaned from ‘getting to the source’ by Chris Ash. Colourised 2nd-Anglo Boer War photograph copyright Tinus Le Roux.


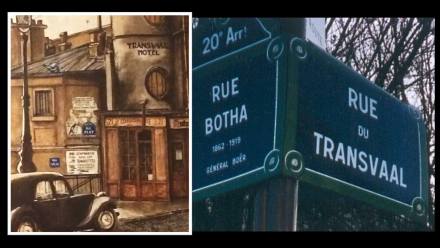
 I glanced up at an art mural of the quarter depicting its early 20th Century heyday, and noticed its old landmark hotel was called the ‘Transvaal Hotel’, nipping outside I realised I was in the famous old ‘working class quarter’ of Paris, the epicentre of French equality and multiculturalism … Belleville … the birthplace and childhood home of Édith Piaf, with its panoramic view of the Paris at the Parc de Belleville, and I was standing in one its most well-known streets, leading to the Parc de Belleville, the ‘Rue du Transvaal’.

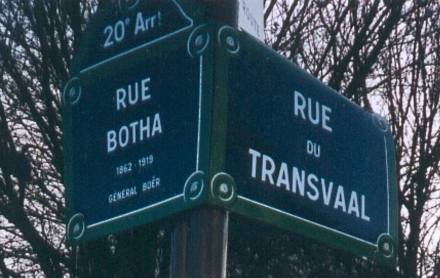
 In their Republicanism and concepts of Liberty, Equality and Brotherhood they found kindred “Brothers’ in the form of the Boers of The Transvaal Republic and the Orange Free State Republic, a hard ‘working class’ and determined people (like themselves) seeking ‘freedom’ and ‘equality’ from the oppressive yoke of British Class Elitism and Monarchism. The French fully supported the Boer cause for Republic autonomy and found Britain to be unduly pressuring them, and lets not forget – the Boers were up against their old enemy; “les rosbifs” (the roast beefs) – the English.

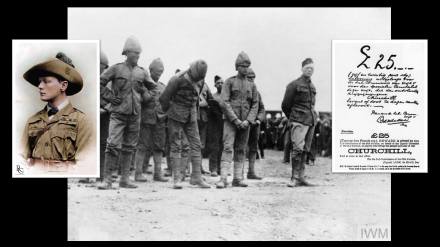
 Because Churchill’s exploits in the South African War were marketed as a grand adventure, it vaulted this failing politician into the annuals of British heroism and resuscitated his career in a manner that can only be described as ‘stellar’.
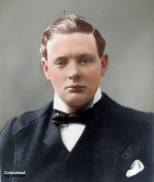
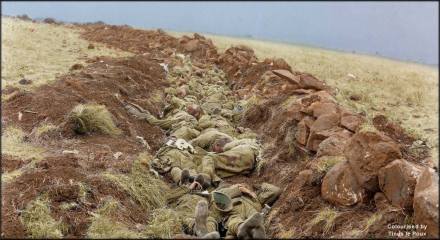
 It a ‘myth’ that Britain had built up large forces to invade the Boer Republics before the start of the war. The ‘truth’ is they were relatively unprepared and much weaker than the well equipped Boer forces – ‘Black November’ illustrates this perfectly. The Boers had banked on a swift victory whilst Britain was weak, hence their ultimatum was followed immediately with a surprise Boer invasion of the British colonies – Natal and the Cape Colony.
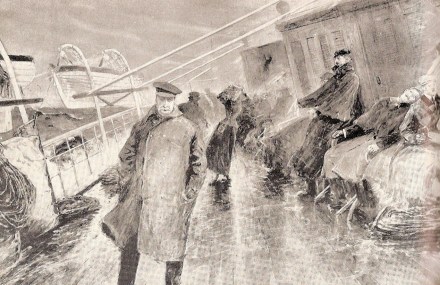
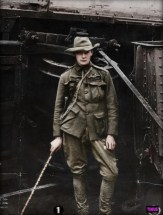
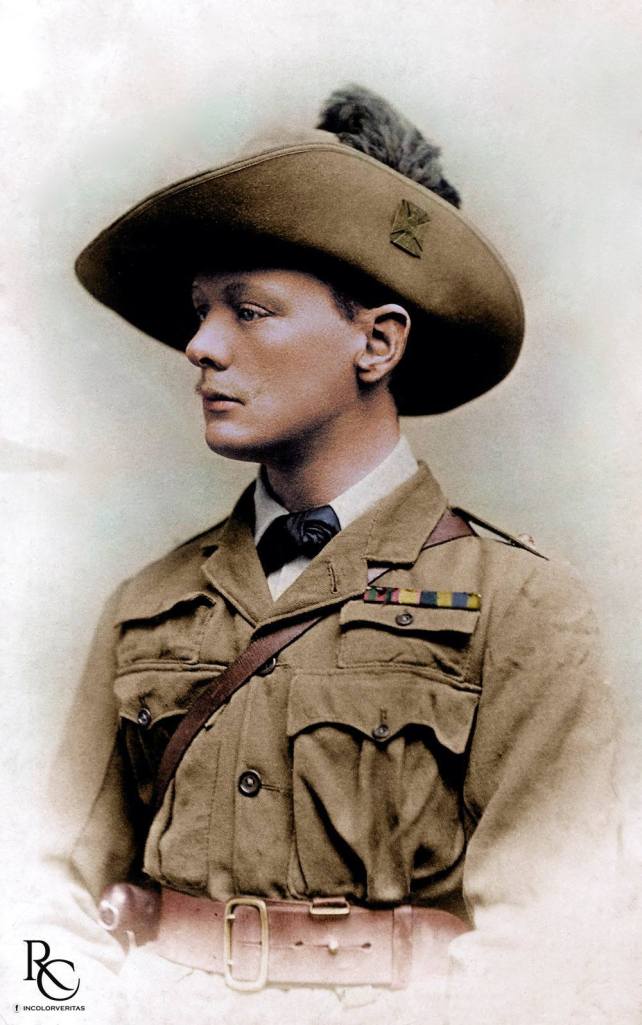
 After the victory in Pretoria, Winston returned to Cape Town and sailed for Britain in July 1900, on the very same ship he had arrived on, the Dunottar Castle. While he had still been in South Africa, his Morning Post despatches had been published as London to Ladysmith via Pretoria, and they sold like wildfire. He arrived a national hero, nearly god-like, adored by millions.
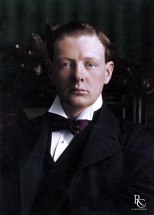


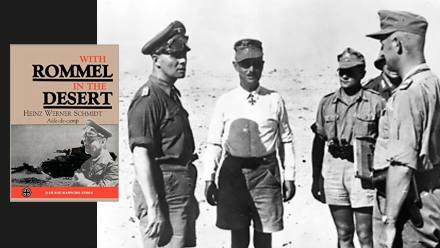
 He moved to a small German community in Natal called ‘New Germany’, located just inland from Durban. ‘New Germany’ was established well before World War 2 in 1848 by a party of 183 German immigrants. With the strong cultural ties to Germany, German social clubs and many German compatriots, this island of German heritage in South Africa proved ideal for Heinz Schmidt to start again, and he did so with great success.
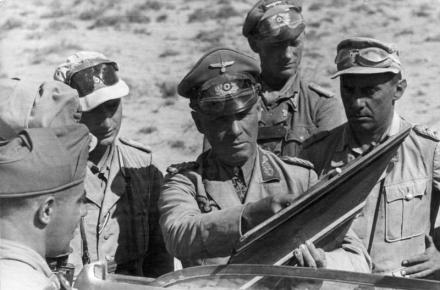
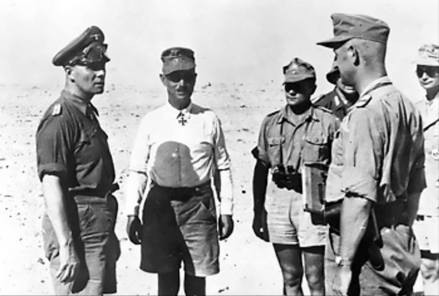
 To give an idea of the value his book from an insight perspective, the famous Rommel quotable quote as to using captured ‘booty’ (enemy equipment) for personal use is thanks to Schmidt’s work. Rommel, whose signature British issue goggles often worn above his visor on his cap said “Booty is permissible I assume; even for a general“. A quote which now finds itself in use in military outfits the world over when reasoning over the use of ‘booty’.
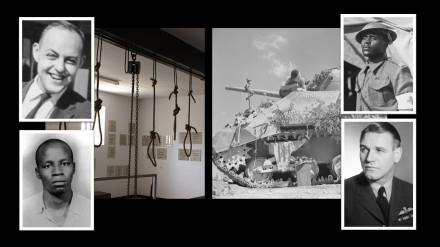
 Once again the media is alive on the anniversary of Solomon Mahlangu’s hanging, no mention of course as to why he was hanged, other than the ‘Apartheid Regime’ did it and he’s a struggle hero, and so much attention is given his hanging anniversary that it is attended by the Vice President with a message to remind every-one again as to the brutality of Apartheid and white oppression.
 In 1976 Mahlangu joined an African National Congress (ANC) MK military training camp called “Engineering” in Angola – one of the thousands of disenchanted youth from the Soweto uprising known in MK as the 76’s which fundamentally swelled MK numbers (up to then MK was a very small group).
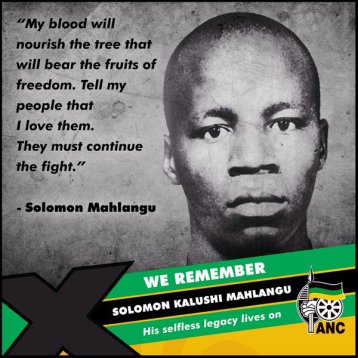
 So let’s examine John Harris and why he went to the gallows and not into political confinement.
 Much has been written on Sailor Malan as a Fighter Ace, his rules for combat and his command of 74 Squadron during the Battle of Britain which played such a pivot role in winning the Battle. His combat record, promotions and decorations alone are simply astonishing.
 Now consider this real military hero, Lucas Majozi. Here’s a very notable South African military hero. The highest decoration awarded to a Black South African soldier during the Second World War was the DCM (Distinguished Conduct Medal) and it was awarded to Lucas Majozi.
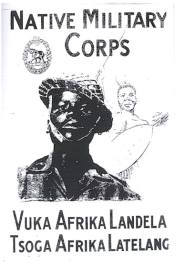
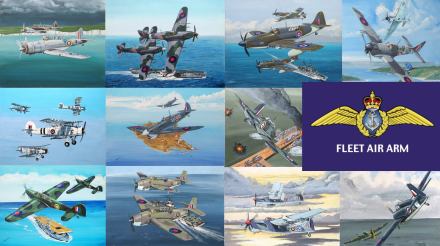

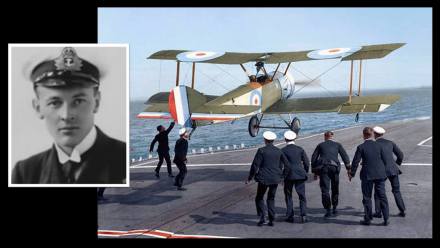
 MACWHIRTER, Cecil J, Ty/Sub Lieutenant (A), Fleet Air Arm (Royal Navy) 851 Squadron HMS Shah, air crash, SANF, MPK 14 April 1944
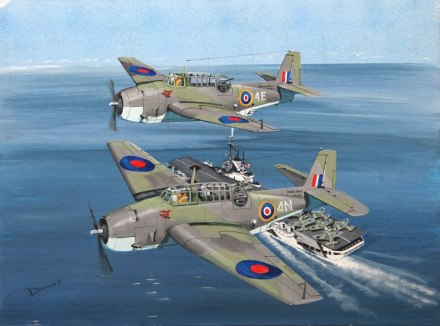
 WAKE, Vivian H, Ty/Lieutenant (A), FAA Fleet Air Arm (Royal Navy) 815 Squadron HMS Landrail, air crash, SANF, MPK 28 March 1945
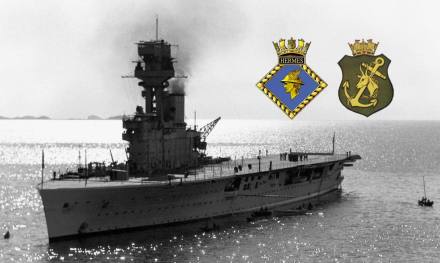
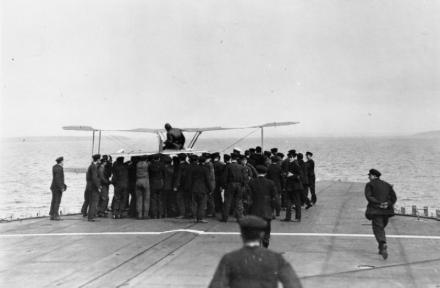
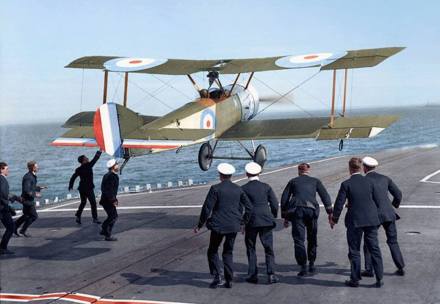
 The best way to summarise the Fleet Air Arm, its commitment and sacrifice is in fact found in the forward of Derrick Dickens’ Stringbag to Shar’ written by none other than the Admiral of the Fleet, HRH Prince Philip, Duke of Edinburgh K.G., K.T., O.M., G.B.E.
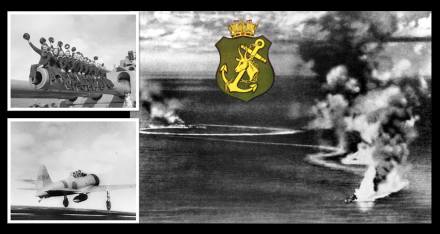
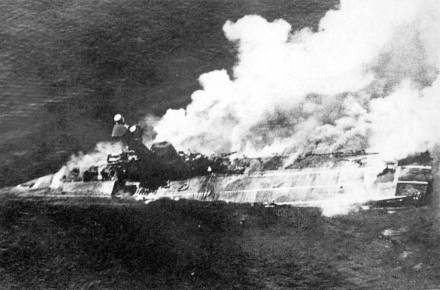
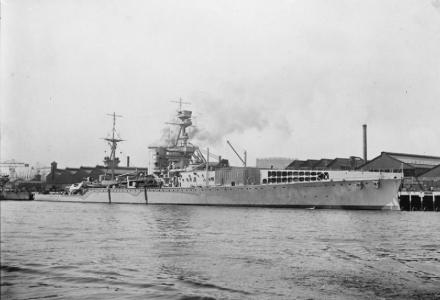
 Here’s a question for many, in what action did the South African Navy (SAN) experience its greatest single loss of personnel, the largest sacrifice of South African life in a single sea battle – in essence when and what was the South African Navy’s ‘darkest hour’?
 Most (actually the majority) of SAN officers and veterans would say it was the loss of the SAS President Kruger (16 souls) but that would also be very wrong, both in terms of scale and action, the SAS President Kruger loss was also an accident at sea and not a combat action.
 These are the HMSAS Southern Floe (24 souls) or the HMSAS Parktown (5 souls), or the HMSAS Bever (17 souls) or the HMSAS Treen (23 souls) – getting warm but that too would be wrong, as these did not happen over a defined period of the war that would warrant a ‘darkest hour’ in Churchill’s definition of the phrase (Churchill coined the term).