The Holocaust, the reason Freemasonry became a ‘secret’ order – World War 2 (1939-1945).
By Peter Albert Dickens
Incorrectly understood by many is the idea that Freemasonry is a “secret organisation” – however understood by only a few is why it is regarded as secretive in the first place. Upfront there’s noting secretive about it, Masonic temples and halls can be found the world over – hundreds of them, clear as a bell they stand openly in towns and suburbs all over the place, anyone is free to enquire. Of the organisation itself – many of its members are very public, and as an organisation with charity as its primary purpose they operate perfectly happily and openly in their communities and they do essential and good charity work. You can even jump onto ‘google’ and find everything you need to know from the freemasons themselves just using a simple search bar – or just buy a credible book or read a proper thesis on it – its all there, secrets included. So what’s with the big ‘Secret’ when clearly there is nothing really secretive about it?
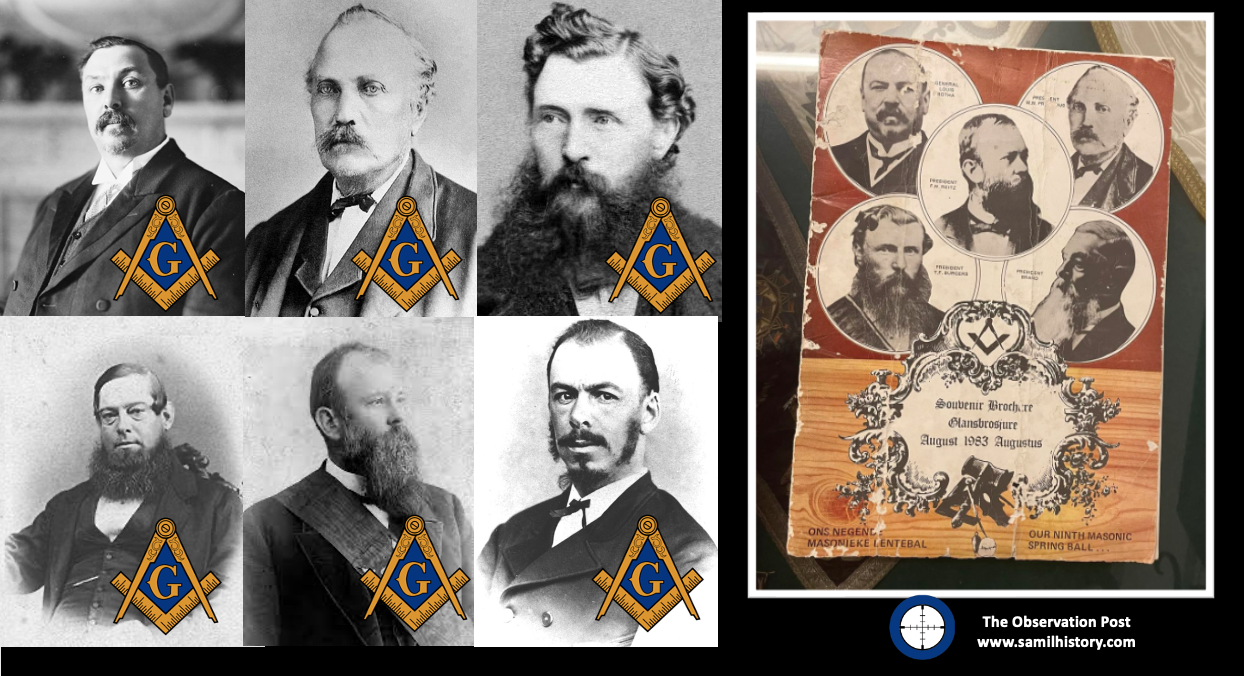
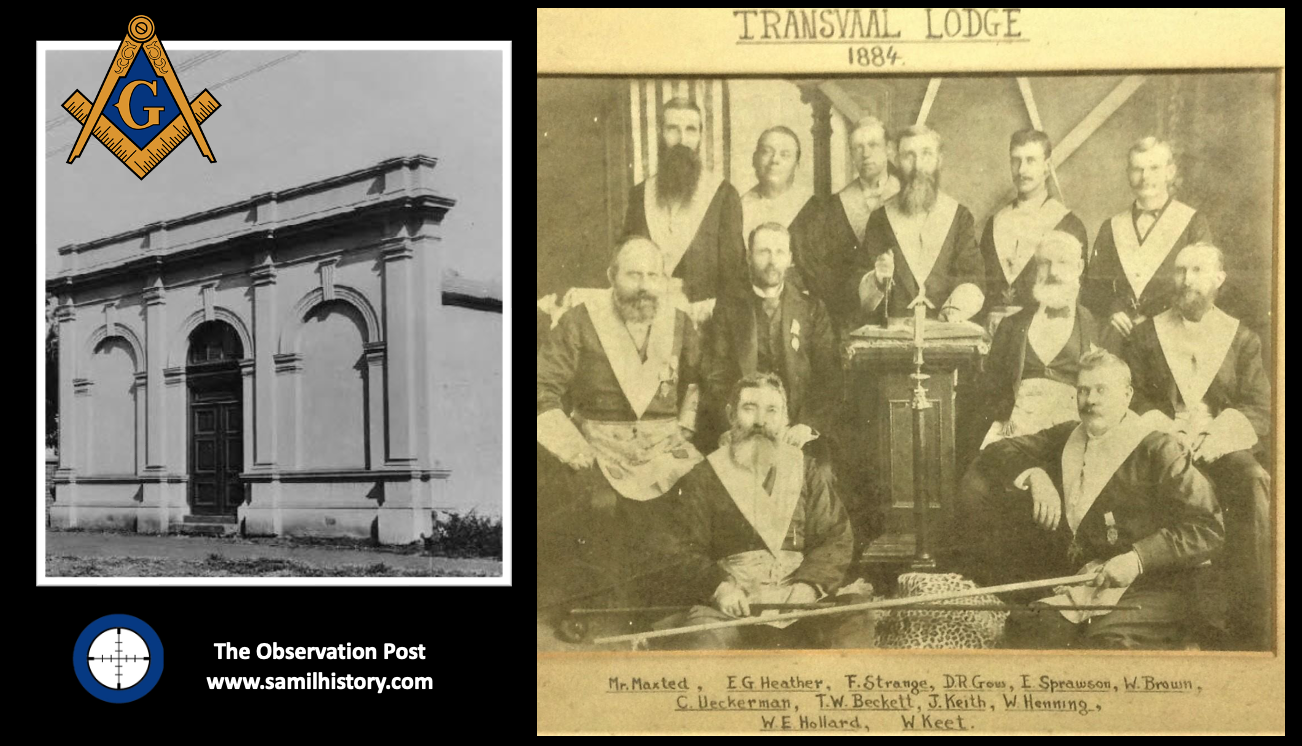
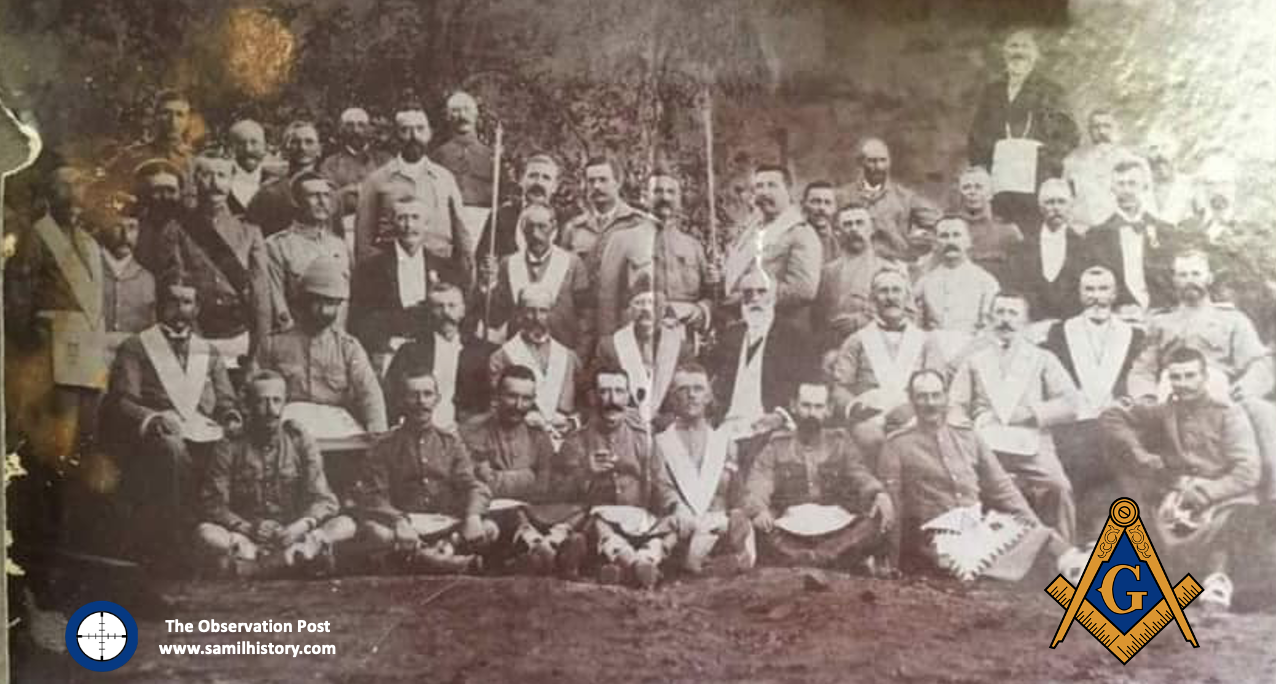
Here’s the thing, anyone researching Freemason history will find a time before the Second World War (1939-1945) when Freemasons and masonic lodges were overtly in the public space. They participated in parades and fetes wearing all their regalia, took part in community events, photographs of all the lodge members and their names are easily found in countless local newspaper and magazine articles, the ‘worshipful masters’ quoted on many community affairs and even speaking publicly, keynote people in their society – just about everyone knew who belonged to their local lodge and they made no secret about it.
So what happened?
The answer lies in World War 2 (1939-1945), it lies in the relationship between the Holocaust and Freemasonry and how this impacted Freemasons in South Africa and in the rest of the world during and even after the war. The war is the primary reason Freemasonry “went dark” and “secret” – it is not because of any sinister illuminati’s plan to take over the world or a strange Hollywood inspired desire to protect Jesus’ bloodline by ‘rose’ hall.
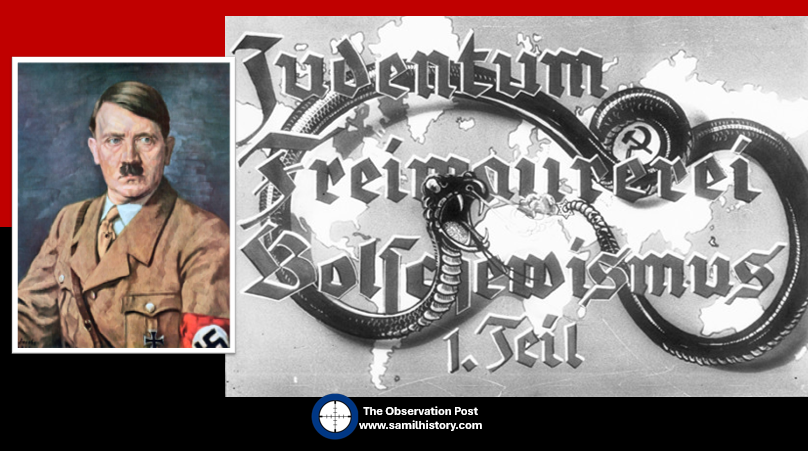
The balance Freemasons enjoyed between themselves and the societies in which they function was fundamentally changed by Adolf Hitler and his cabal. Hitler began by associating a Freemason’s conspiracy with that of a Jewish conspiracy in his political testament Mein Kampf. He said:
“To strengthen (the Jew’s) political position, he tries to tear down the racial and civil barriers which for a time continue to restrain him at every step … in Freemasonry, which has succumbed to (the Jew) completely, he has an excellent instrument with which to fight for his aims and put them across. The governing circles and the higher strata of the political and economic bourgeoisie are brought into his nets by the strings of Freemasonry, and never need to suspect what is happening.”1
Hitler would even declare that the League of Nations, the source of Germany’s dishonour, was controlled by Freemasonry. He said in a speech to Nazi faithfull in Munich in 1928:
“All of Germany is being delivered to the Freemasons through the League of Nations.”2
As early as the 5 August 1934, in a speech delivered at Essen, Dr. Wilhelm Frick, the Reich Minister of the Interior, declared:
‘It is inappropriate that a secret society with obscure aims should continue to exist in the Third Reich. It is high time that the Freemasons’ Lodges should disappear in Germany just as they have disappeared in Italy. If this is not realised in Masonic circles, I will soon help them in this direction”.3
By 28 October 1934, Frick issued a decree defining the Masonic lodges as “hostile to the state” and hence subject to closure and having their assets confiscated.4
Nazi propaganda stated on political poster no. 64 in a series of issued posters entitled “Erblehre und Rassenkunde” (Theory of Inheritance and Racial Hygiene), published by the Verlag fuer nationale Literatur (Publisher for National Literature), Stuttgart in 1935:
‘Freemasonry is an international organisation beholden to Jewry with the political goal of establishing Jewish domination through world-wide revolution.’5
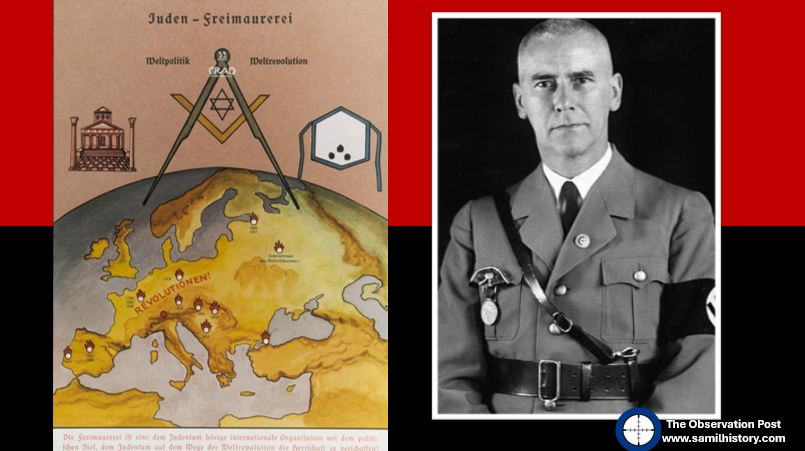
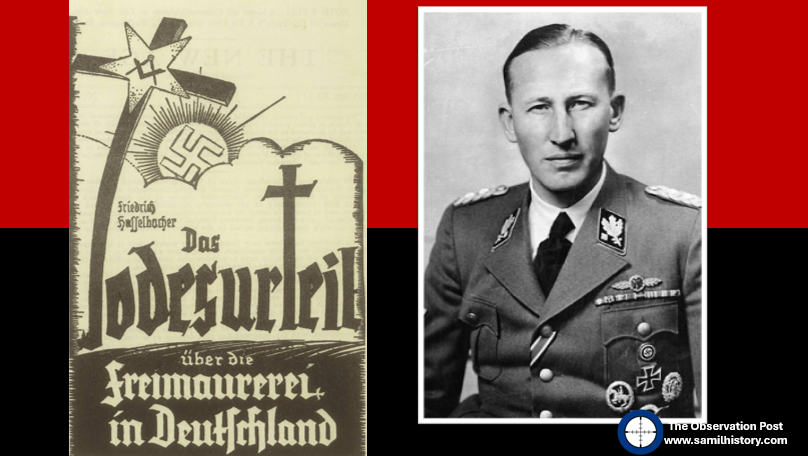
Chief of Security Police and SD, Reinhard Heydrich regarded the Masons, along with the Jews as the
“most implacable enemies of the German race.”
In 1935 Heydrich argued for the need to eliminate and root out these “enemies” from the German world. Heydrich then created a special section of the SS Security Service (Sicherheitsdienst; SD), Section II/111, to deal specifically with Freemasonry.6
The SD argued that Freemasonry, through control of the media and exercising political influence was now in a position to provoke war, subversion, and revolution. In 1939, the SD amalgamated with another SS security department – Section VII B 1 of the Reich Security Main Office (Reichssicherheitshauptamt; RSHA), and it continued to devote itself to investigating Freemasonry.
The Exhibitions
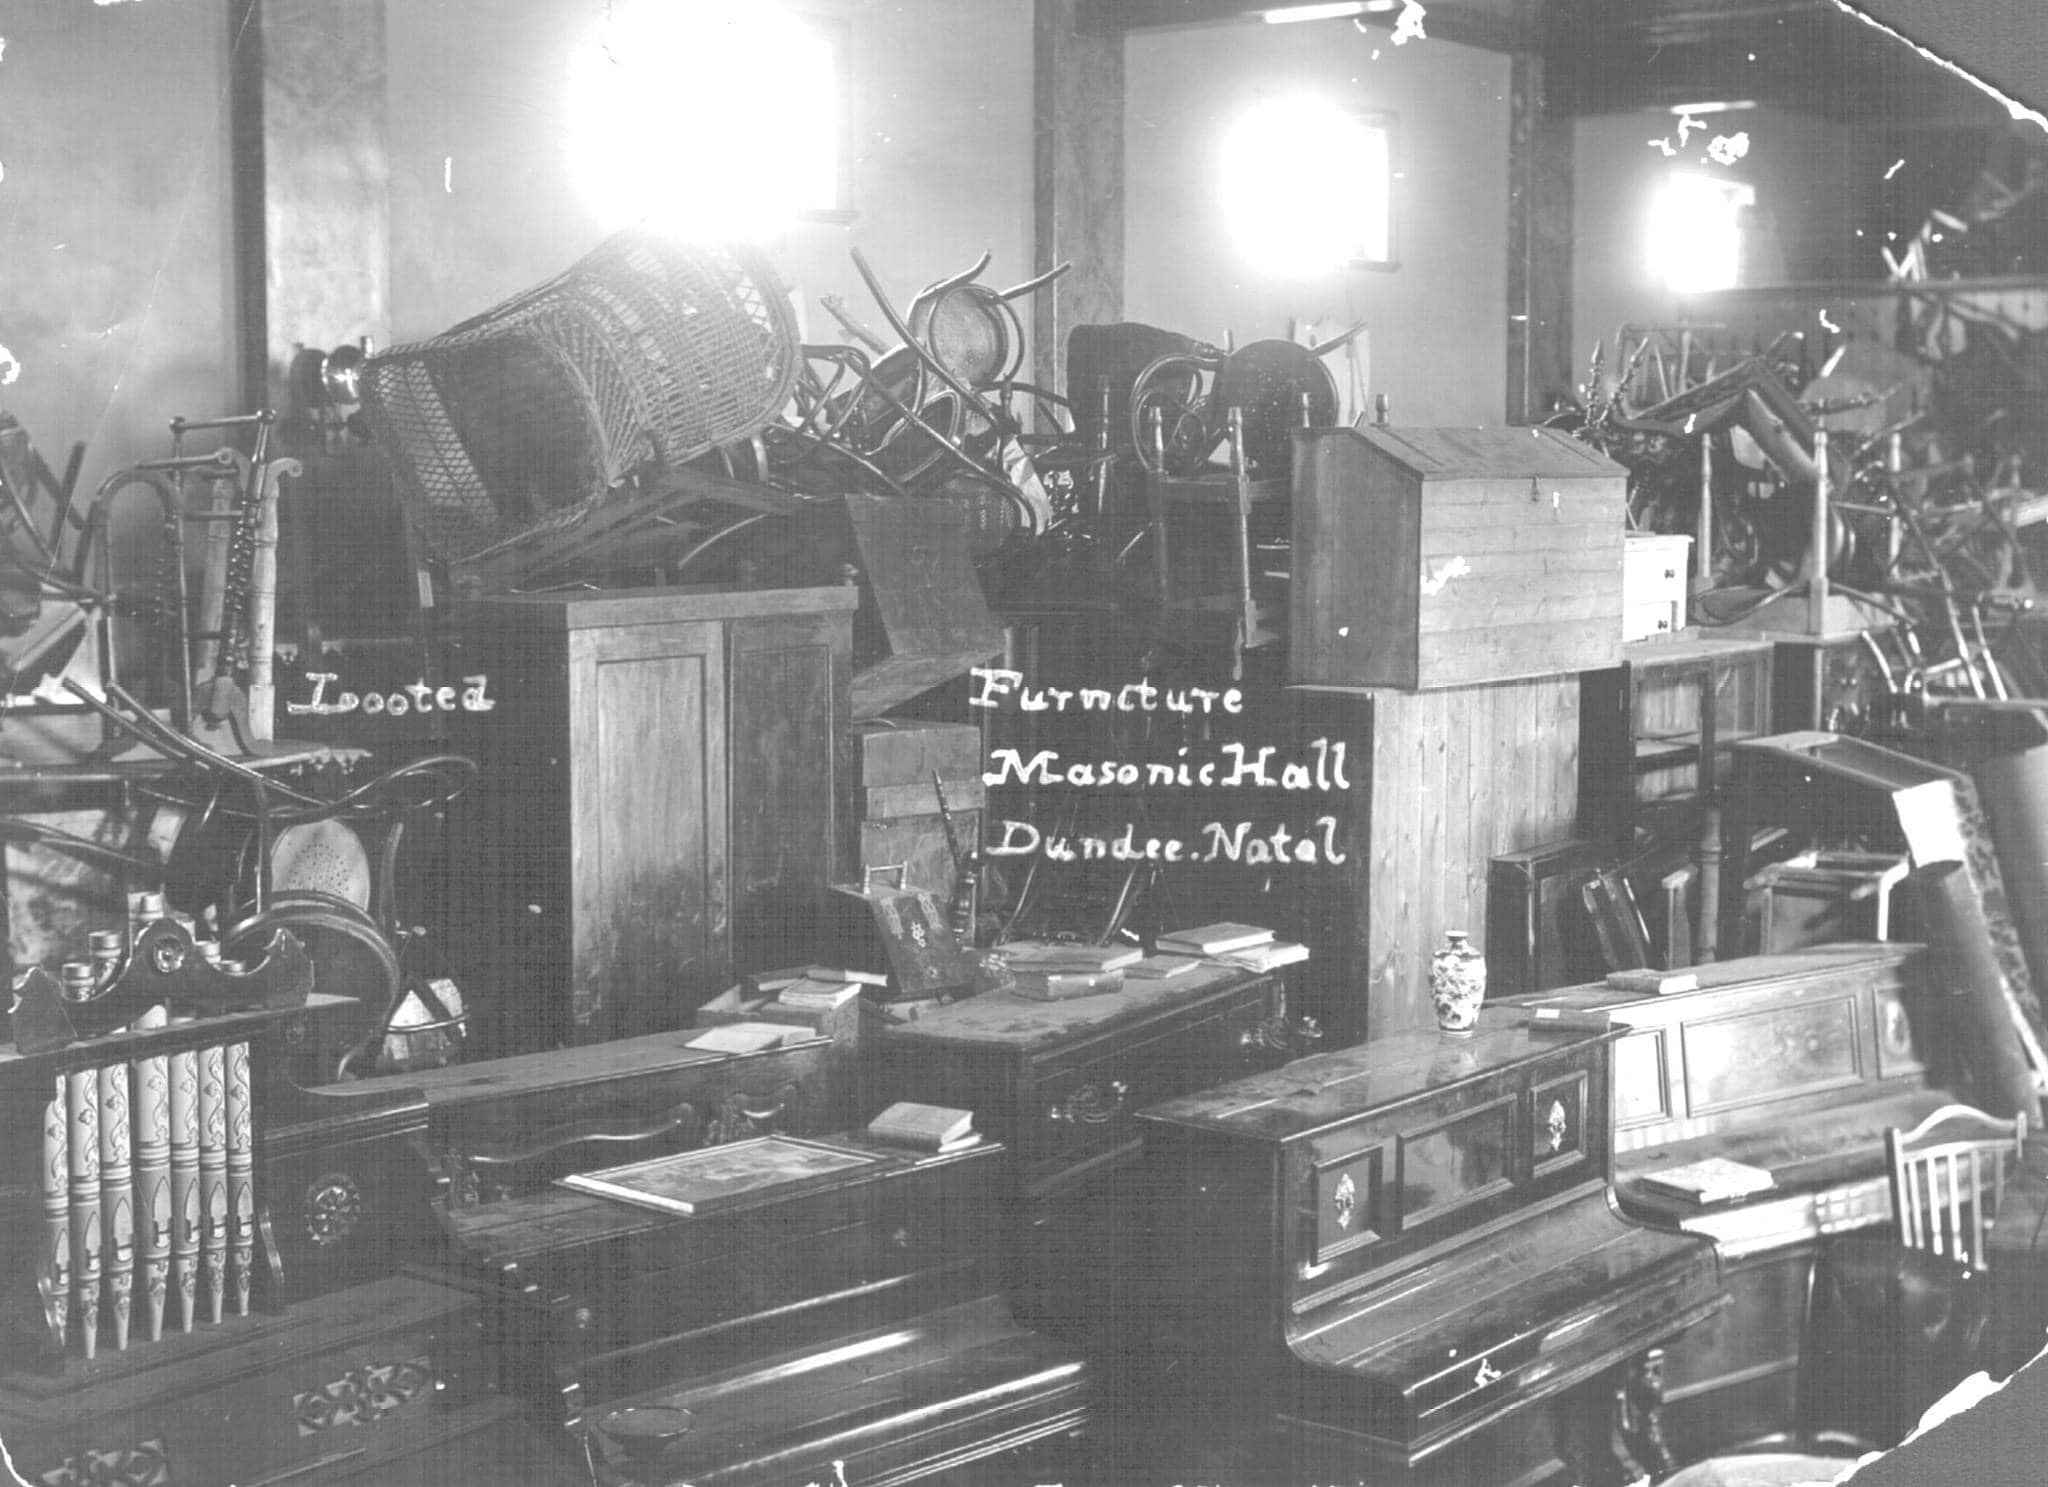
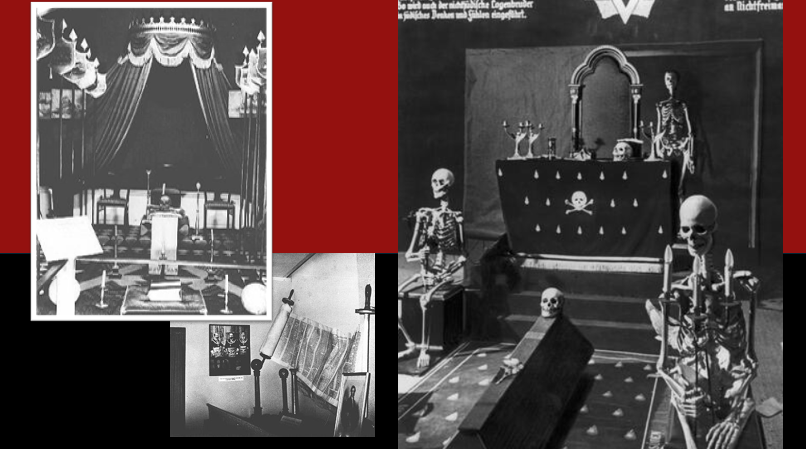
From 1938 as Nazi Germany conquered Europe, the Germans forcibly dissolved Masonic organisations, ransacked lodges and confiscated their assets, monies and documents. Cultural artefacts and Masonic items were seized and sent to Berlin for a special rather sinister and ghoulish exhibition at the Berlin Museum. This in turn was sent to other capital cities in occupied Europe. Paris, France hosted an anti-Masonic exhibition in October 1940, as did Brussels in February 1941, so too did Nuremberg. Other anti-masonic exhibitions took place in Hannover, Düsseldorf and Erlangen all of which were aimed to ridicule and direct hatred towards Freemasons and to heighten fears of a Jewish-Masonic conspiracy.
In fact one complete lodges’ interior was removed from the Isle of Jersey for a “British” Freemasonry exhibition in Germany, this occurred after a night of heavy bombing on 29th June 1940, and the Island was invaded by Nazi Germany. Despite promises given by German commanders that Freemasons and Masonic property were not at risk, the Masonic Temple was completely ransacked and shipped off to Germany.7
The role of seizing all this wealth for the Reich was given to Heinrich Himmler, the Reichführer of the Schutzstaffel (the SS), Himmler had special dislike for Freemasons, and happily ransacked Masonic lodges out of both greed and his personal ideology.8
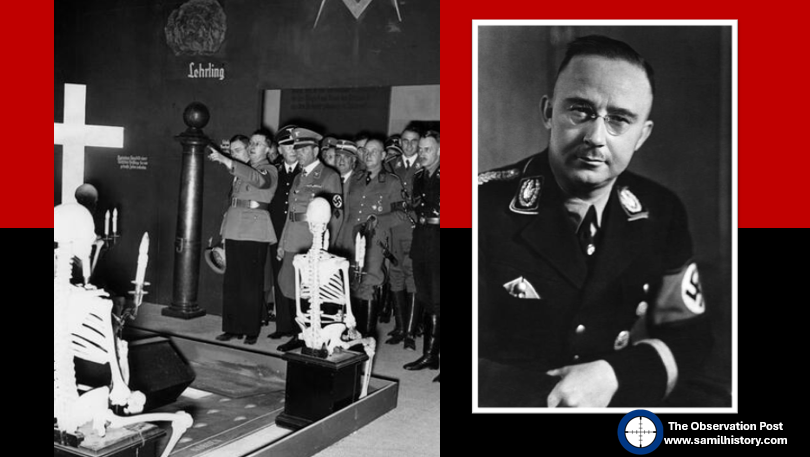
In all this Himmler and the SS established an interest in non-negotiable lodge property in order to further their study of Freemasonry. In 1935, guidelines were published as to the categorising of Lodge items, photos taken of them “in situation” and then removed for the anti-masonic (and anti-Jew) “exhibitions” and “museums”.
It is also worth noting that the ransacking of Masonic lodges did not just include the taking of items for exhibition, it also included the raiding of Lodge bank accounts, the taking of valuable jewels and artworks and the seizing of bank accounts of predominant Freemasons. Most lodge contents went to private homes, auction blocks or the smelter, documents and archive materials went to the Geheimenreichsarchiv (The Nazi Top Secret Government archive).9
Himmler acted as a broker for valuable acquisitions, but “he also had a special interest in lodge rituals. He was convinced high-degree Masonry involved a “blood ritual” in which:
‘the candidate cuts his thumbs and lets a little blood drop into a cup. Wine is then mixed in the bowl. Next a bottle containing the blood of the other brothers (from when they first performed this ritual) is added to the cup. The candidate then drinks the liquid, thus imbibing the blood of all Freemasons, including Jews. Thus the triumph of the Jews is complete.’10
Himmler pointed to this ritual as the means whereby Jews use Freemasonry to literally taint the blood of Aryans and to him this wildly unhinged idea of a Freemason ritual was proof positive of this. ‘The truth of the matter is that some do indeed have rituals that involve drinking wine, but references to blood are symbolic, much like the rituals performed in Christian churches.’11 This of course did not deter Himmler whose obscure view of Freemasonry was used to “study freemasonry” by ransacking lodges and looting their bank accounts for wealth.
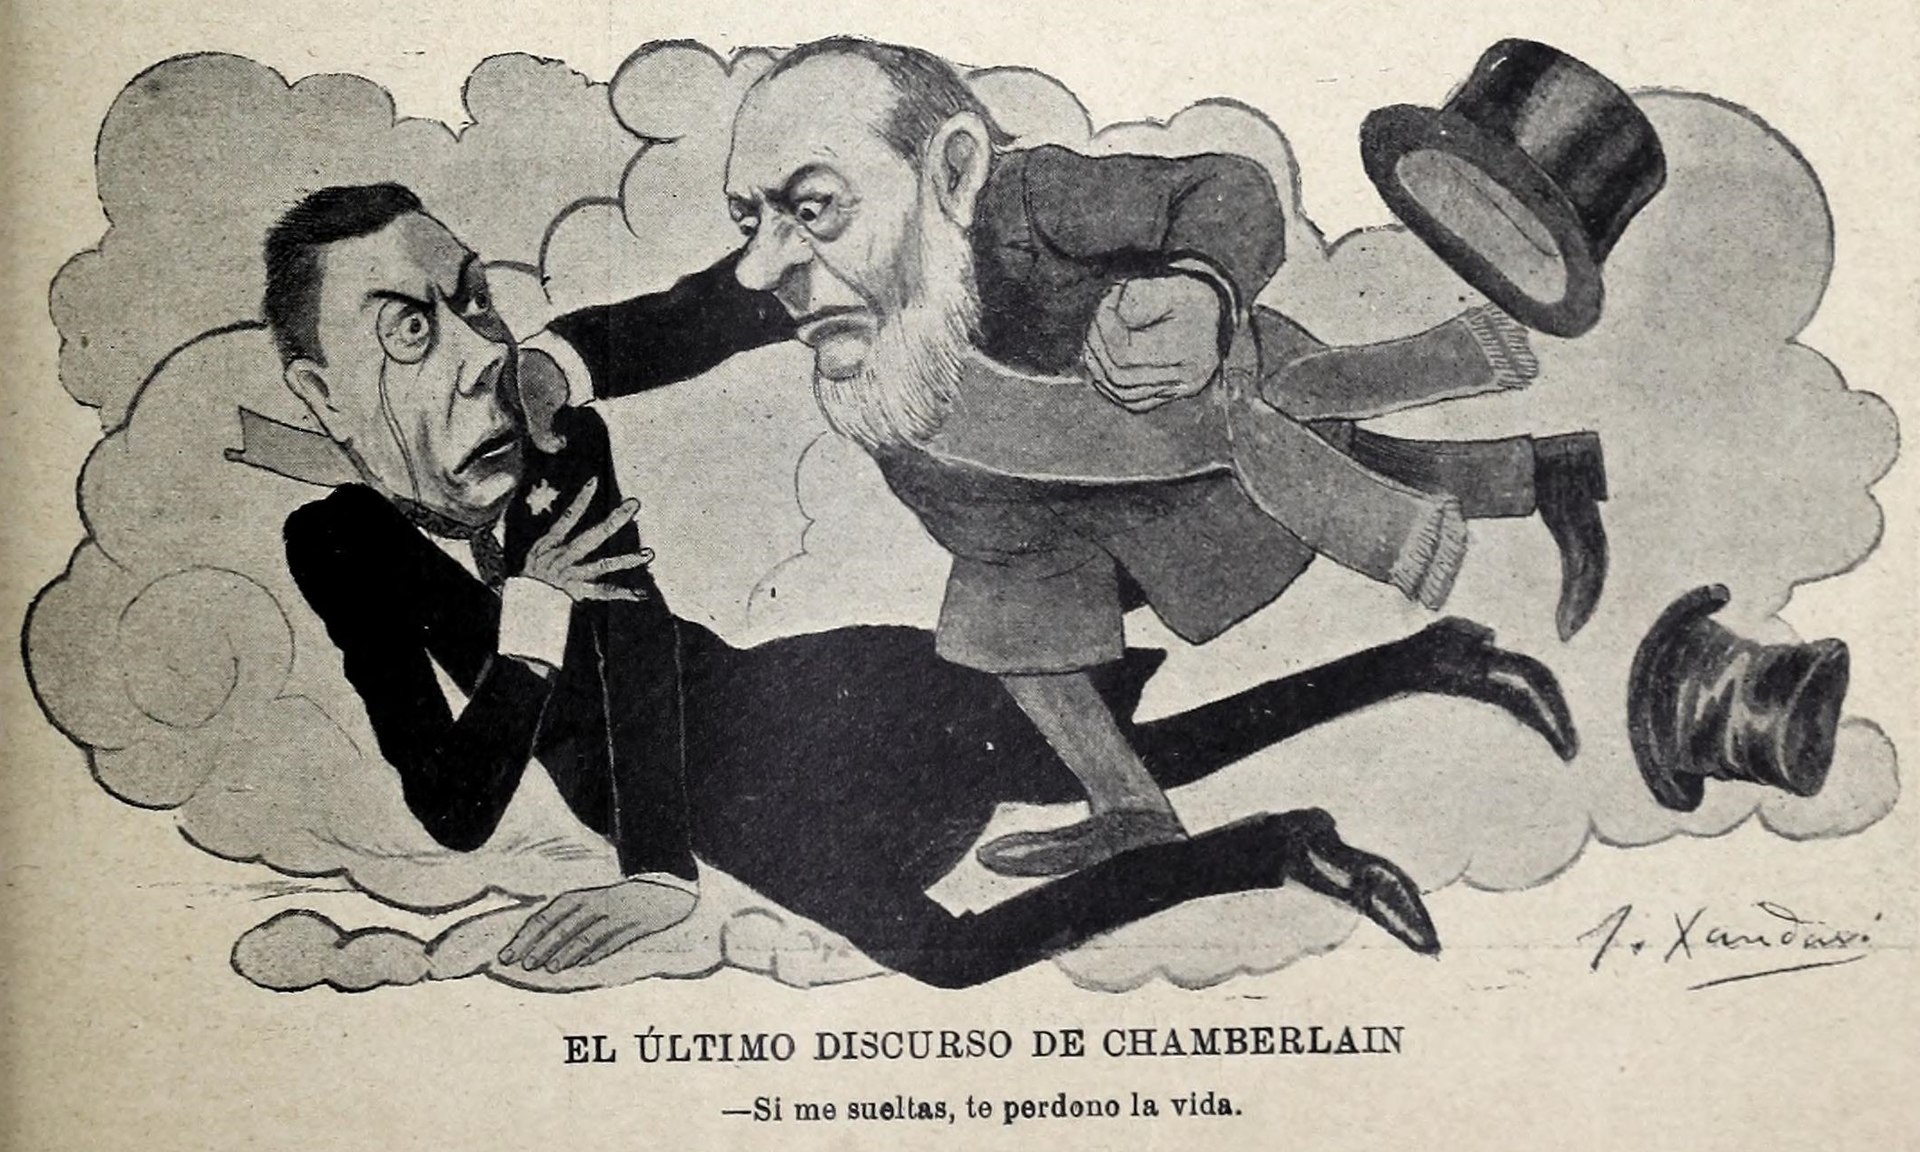
One of the most infamous foreign exhibitions was the The Grand Anti-Masonic Exhibition, opened in Belgrade, in occupied Serbia on 22 October 1941. Financed by the Germans and opened with the support of collaborationist leader Milan Nedić it featured an estimated 200,000 brochures, 108,000 copies of nine different types of envelopes, 100,000 flyers, 60,000 copies of twenty different posters, and 176 different propaganda films that had previously been seen during ‘The Eternal Jew’ exhibitions in Munich and Vienna in 1937. Although being anti-Masonic in its title, the primary purpose was to promote antisemitic ideology using the Protocols of the Elders of Zion to rationalise and intensify hatred of Jews.
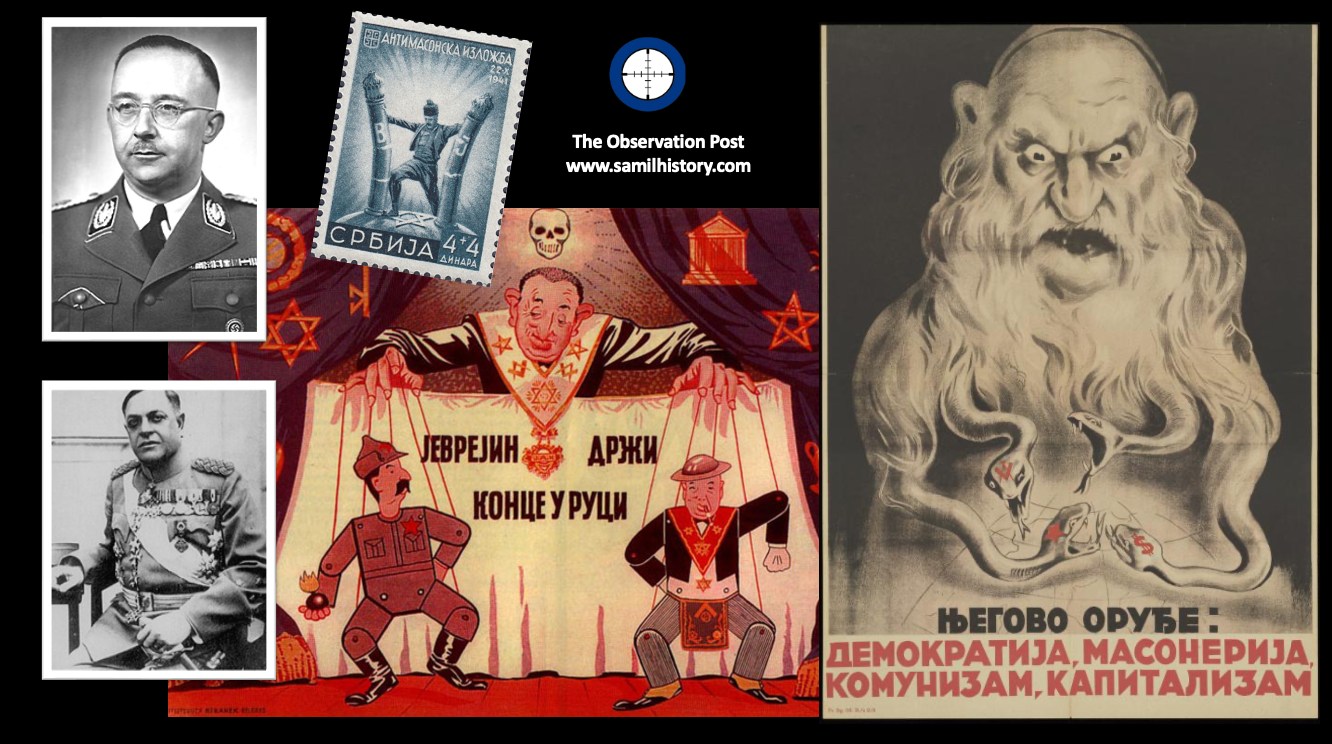
Depicted in the image are three key artefacts from the Grand Anti-Masonic Exhibition, the Serbian anti-Semitic propaganda poster “His Weapons: Democracy, Masonry, Communism, Capitalism” issued for the Grand Anti-Masonic Exhibition opening. It has a caricature of an evil looking Jewish elderly man with a long beard that turns into snakes with symbols for Capitalism, Communism and Freemasonry.
The second poster shows the Jews and Masons controlling the Soviet Union and the United Kingdom, with marionettes of Stalin and Churchill, also depicted as a Freemason (it’s unrelated but in fact he was a mason for a short time). The caption reads: “The Jew is holding the strings. Whose strings and how? He’ll answer you. The anti-masonic exhibit”.
The final artefact is a stamp of a triumphal Serbian pushing over the two Pillars of King David’s temple, a symbol pertinent to Freemasonry and lodges, four stamps were issued by Serbian authorities and put into circulation to promote the ‘Grand Anti Masonic Exhibition’ – all depicting Judaism as being the source of all evil in the world and portraying a “strong and victorious Serbia triumphing over the plot of world domination.”
An estimated 80,000 people, including Milan Nedić and some of his ministers, visited the exhibition prior to its closure on January 19, 1942.
The central idea of all these museums and exhibitions was to promote an antisemitic work called ‘the protocols of Zion’ in which a Masonic and Jewish world order was exposed and these morbid displays brought it to life.
The Protocols of the Elders of Zion
The Protocols of the Elders of Zion, also known as ‘The Protocols’ are a fictional work, it’s a combination of a number of documents targeting Jews primarily, but also Freemasonry. It purports to be the minutes of meetings of 24 speeches made by Jewish leaders during the First Zionist Congress in 1897. It actually had its roots as early as the 1860’s in a anti-Napoleon III pamphlet and became a forged rational for the Russian pogroms against Jews. By 1903 the Protocols appeared as an appendix in an anonymous Russian antisemitic pamphlet called The Great Within the Minuscule and Antichrist. The ‘Protocols’ eventually found their way into a German antisemitic book called The Secrets of the Wise Men of Zion – the first documented version of ‘The Protocols’ published outside of Russia and published in Charlottenburg, Germany in 1920 – which was subsequently read and used widely by Hitler and the Nazi Party in Germany.
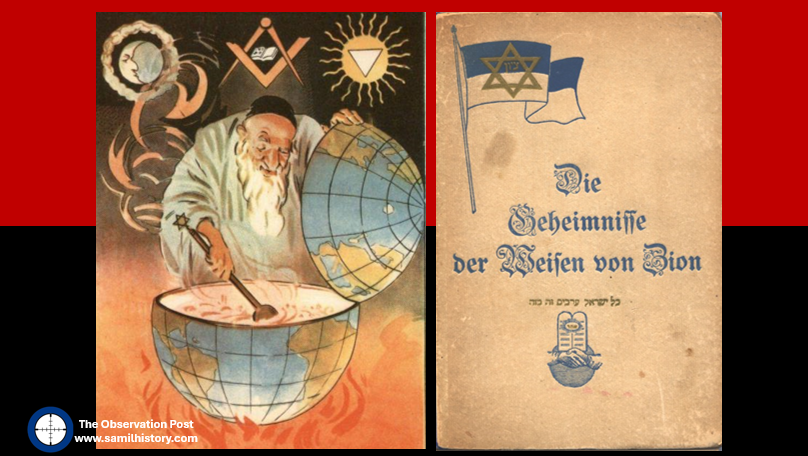
The Protocols of the Elders of Zion often found itself in a pamphlet format of some 70 pages. The pamphlet detailed a Satanic plot by Jewish/Zionist/Freemason conspirators to conquer the world. Alleging that Jews controlled much of the world’s finance, the media, the educational institutions, the court systems and many of the world’s governments, the Protocols claimed that the Jews indulged in all forms of trickery and deceit to tighten their hold. The Jews deliberately spread diseases and immorality to weaken Gentiles, and did not hesitate to use murder and terrorism to destroy all religions except their own. Jews were striving to establish their own autocracy based on a false Messiah, the “Son of David”, and posed a fiendishly devious omnipresent peril to the rest of mankind.12
Although exposed many times as a forgery, by the 1930’s it found its way into Nazi philosophy, and Adolf Hitler upfront supported its validity – now as a ‘truism’ in both Nazi Germany and occupied Europe – the ‘Protocols’ formed the groundwork to the Jewish ‘final solution’ and the holocaust.
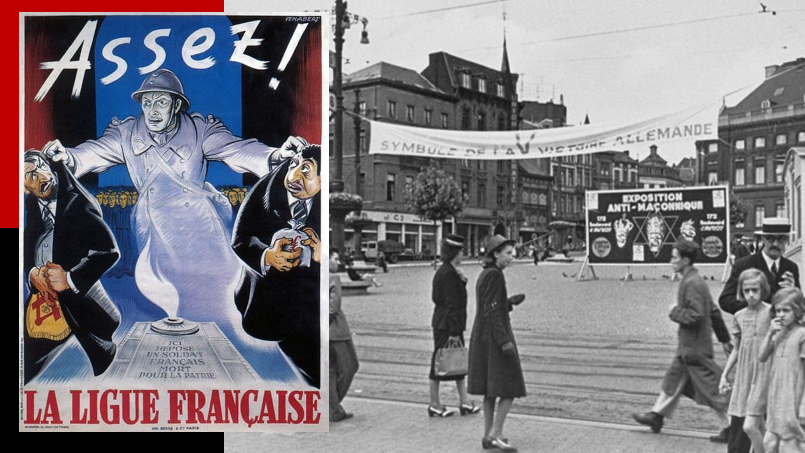
The protocols also found their way into all sorts of propaganda, and not just Germany before and during the war, but it also found favour in antisemitic circles all over Europe and Russia – here are two French examples of it:
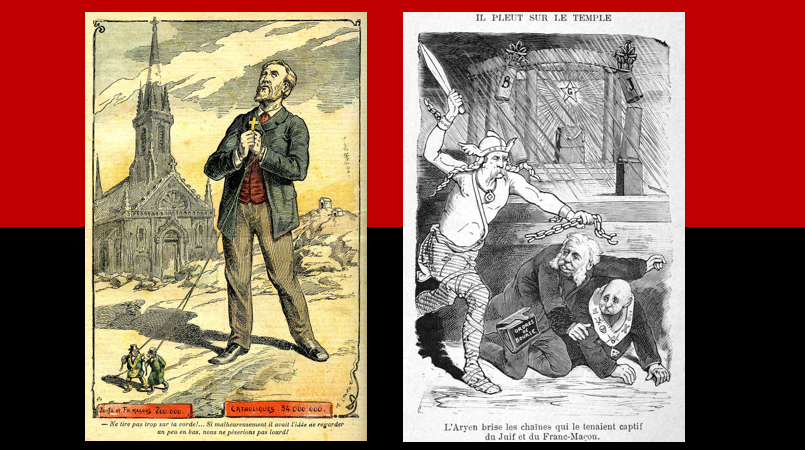
On the left is a poster which shows an international Freemason and Jewish conspiracy (involving only 200,000 Jews and Masons) leading innocent and God fearing Catholics (the majority 34,000,000) to their nefarious ends. On the right is a French poster, very much in Nazi lore, which shows the pure ‘Aryan’ warrior striking the chain bonds of the Jew being held captive by the Freemason.
The Protocols of Zion in South Africa
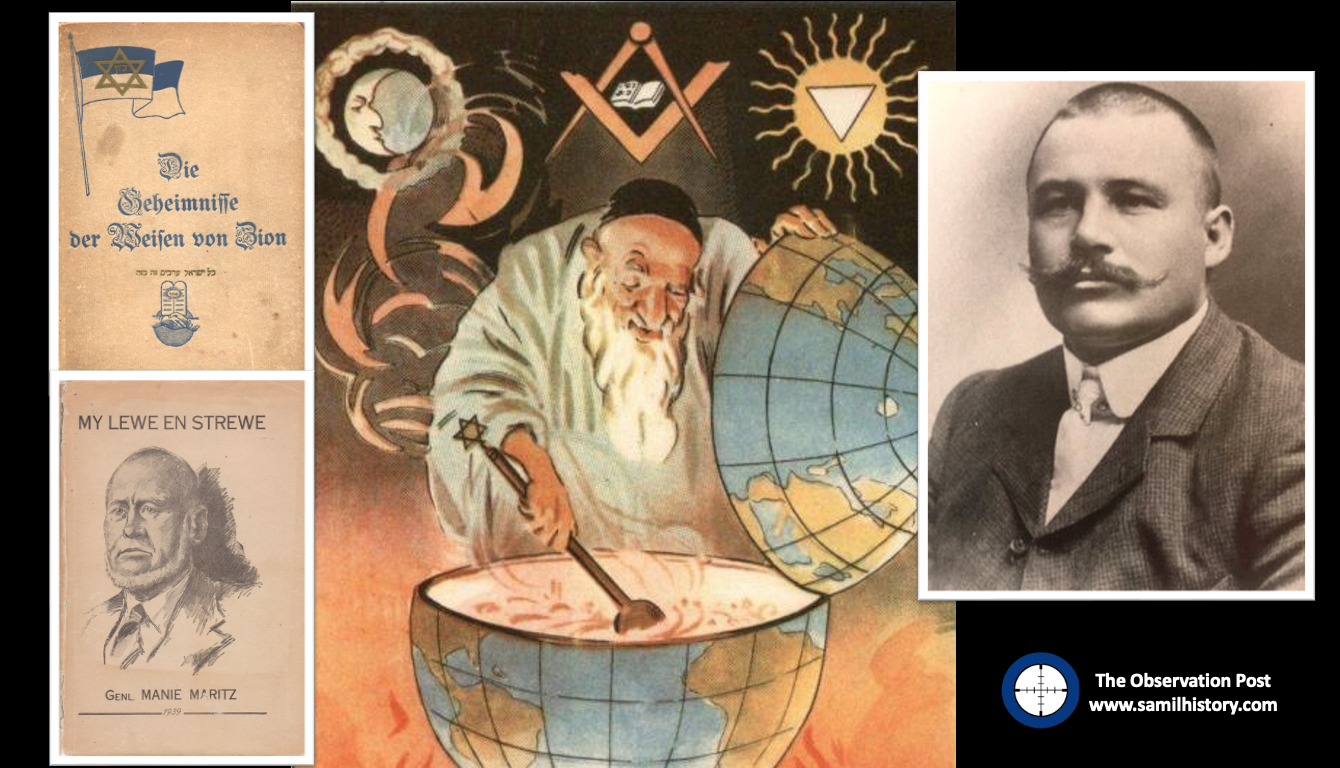
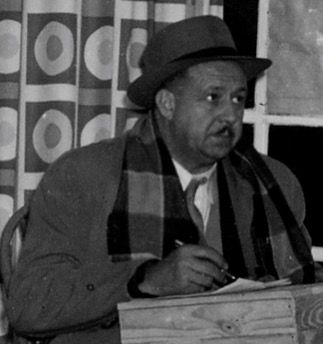
In South Africa, the three main protagonists behind promoting the validity of the Protocols of the Elders of Zion are General Manie Maritz – the 1914-15 Afrikaner Revolt leader and leader of the Boerenasie Party, Louis Theodor Weichardt, a National Party stalwart who breaks away believing the party should focus all its attention on National Socialism and forms the ‘Greyshirts’ and finally the Afrikaner Nationalist ‘Broederbond’ under the Germanophile Dr. Nico Diederichs.
The Boerenasie Party
General Manie Maritz, a veteran of the South African War and influential leader of the failed 1914-15 Afrikaner Rebellion, also admired German National Socialism. A converted antisemite, he even blamed the South African War (1899-1902), commonly called The Boer War on a Jewish conspiracy. Defeated after the Afrikaner Rebellion, Maritz would become a hardened admirer of National Socialism (Nazism) and Adolf Hitler – initially joining Theodor Weichardt and his SANP Grey-shirts, and after falling out with Weichardt over a Führerprinzip (leadership principle) conflict he joins a more hardline Nazi ‘Shirt’ movement called the ‘Black-shirts’ – the ‘South African National People’s Movement’ (Suid Afrikaanse Nasionale Volksbeweging), started by Chris Havemann in Johannesburg.
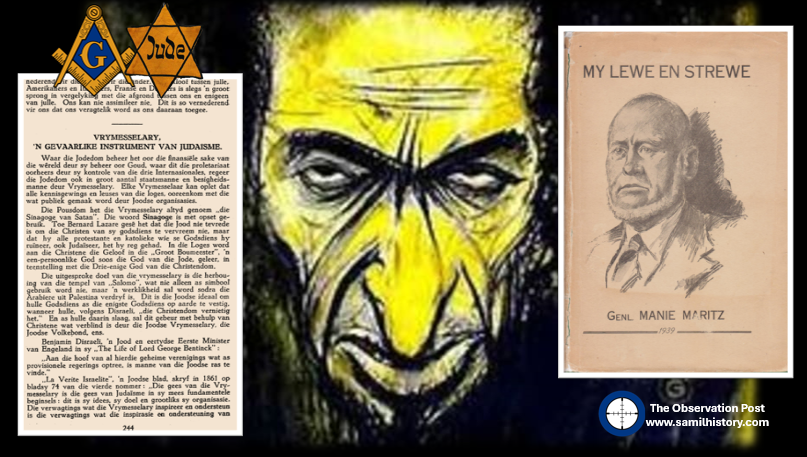
By July 1940 Maritz founded the anti-parliamentary, pro National Socialist, antisemitic ‘Volksparty’, in Pietersburg. 13This evolved and merged into ‘Die Boerenasie’ (The Boer Nation), a party with National Socialist leanings originally led by J.C.C. Lass (the first Commandant General of the Ossewabrandwag) but briefly taken over by Maritz until his accidental death in December 1940. Thereafter it was headed up by S.K. Rudman. 14 Maritz would also detail his Antisemitic and National Socialist views in his autobiography ‘My Lewe en Strewe’ (My life and Aspiration/Purpose) published in 1939 and modelled on Hitler’s own ‘Mein Kampf’.15
In 1924, Maritz would become a convert to the racist and anti-Semitic myth ‘the Protocols of the Elders of Zion’ and convinced of a Jewish and Freemason conspiracy to world domination, when he was shown the Protocols by the Kristelike-bond (Christian Bond) in Pretoria.16 He would make the ‘Protocols of Zion’ as his life’s meaning and make it his mission to educate the Afrikaner people (his ‘Volk’) to it – in it he would blame the ‘hidden hand’ of the Jews as the true conspiracists behind starting the Boer War. In ‘my Lewe en Strewe’ Maritz frames up the entire rational as to why the Jews are responsible for all the ills that have befallen the Afrikaner ‘Volk’ – and the ‘Protocols of the Elders of Zion’ are the way forward to understanding the Jewish, Freemasonry, and Communist conspiracy against Afrikaners. It starts with Maritz using a quote from President Kruger’s speech at the Johannesburg market square in February 1899, where he declared:
‘If it was possible to throw the Jewish monopolists out the country with everything they own (Sak en Pak), without getting into a war with England, then the problem of perpetual peace in South Africa be resolved’.17
Maritz then grounds his entire argument on the simple premise that even President Kruger foresaw the Jewish Problem and forewarned his people. His own warning then follows, and in the machinations of Maritz’ mind he declares:
‘Socialists, anarchists, communists, Bolsheviks, Marxists, Freemasons and super-capitalists are the key antagonists and they are none other than all Jews.’
Then Maritz concludes by way of a warning that by helping and entertaining the Jews and their requests Smuts and Botha and other Boer Generals are committing Christian fratricide :
‘… thus carry out the Jewish prescriptions and policies, perhaps unknowingly. They are the “Slavishly obedient politicians” of which the Jew speaks in his “Protocols”. One Christian must exterminate the other.’18
Part 1 of ‘My Lewe en Strewe’ covers Maritz’ autobiography – pages 1 to 96, but Part 2, the bulk of his book from pages 97 to 270 covers Maritz’ politics and ‘purpose’ and it begins with a chapter titled ‘The hidden hand of the Jew’ … and this particular theme does not stop, Part 2 covers the ‘Protocols of the Elders of Zion’ – literally translated and edited into Afrikaans with some South African references here and there to give them local flair. Abridged Protocols number 1 to number 23 and the alleged global Jewish/Freemasonry conspiracy are mapped out for simpleton consumption. Maritz also used large extracts lifted from ‘The Key to the Mystery’ 19 another discredited work on a Jewish, Communist, Freemason conspiracy and worldwide domination written by a leading Canadian antisemite – Adrian Archand.
The South African Jewish Board of Deputies attempted unsuccessfully to have ‘My Lewe en Strewe’ banned for inciting race hate in South Africa. In South West Africa they were a little more successful, when taken to court Maritz was found guilty in August 1939 in Windhoek of ‘promoting a strong feeling of hostility against the Jewish race.’ and fined.20 Although Judge Hoexter described ‘My Lewe en Strewe’ as ‘filthy, contemptable and venomous racial propaganda’ according to Die Volksblad demand in South Africa for the book was off the charts, and its selling spree was only curtailed during World War 2 when it was finally banned under Smuts’ emergency regulations.21
The Grey-shirts
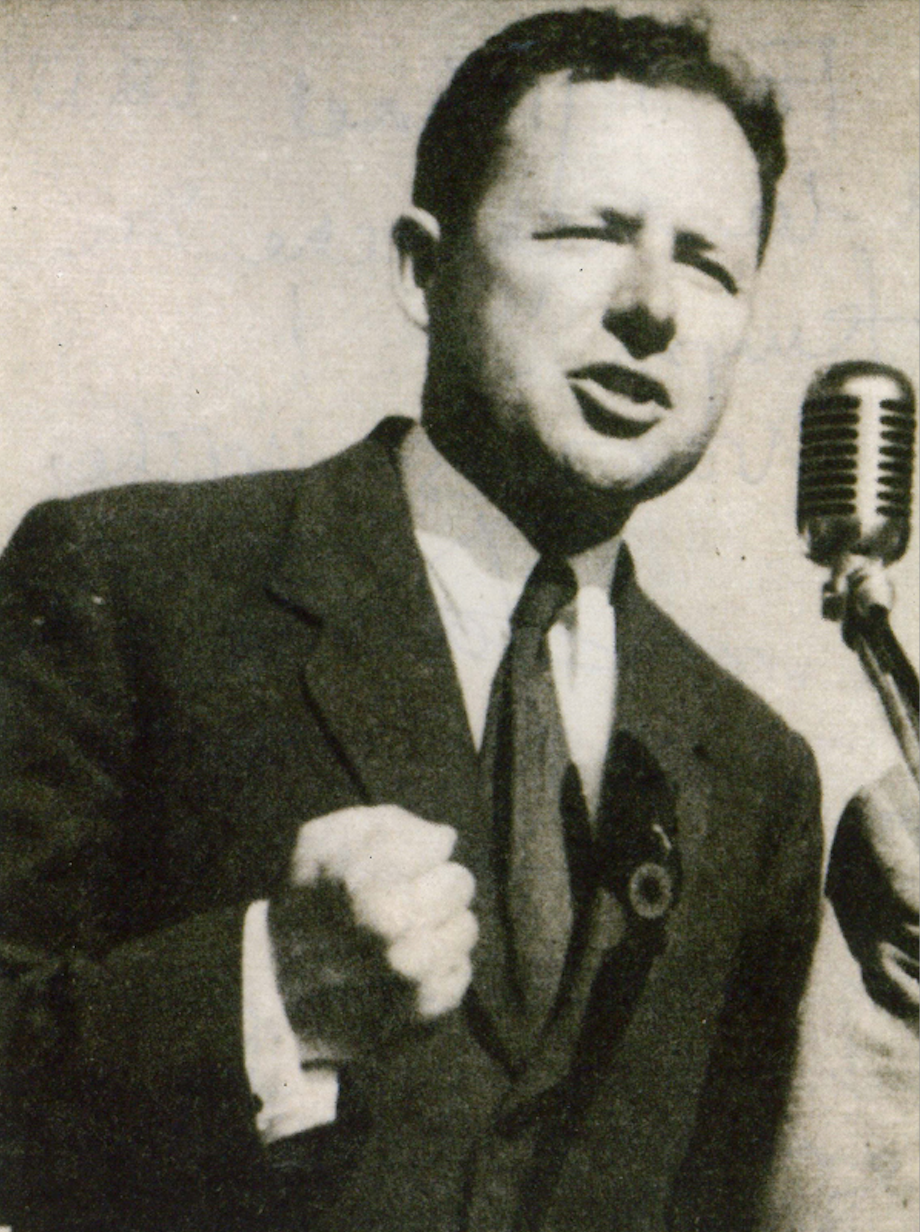
As a committed antisemite, Louis Theodor Weichardt founded the South African Christian National Socialist Movement when he broke with the National Party on the 26 October 1933. This included a paramilitary ‘security’ or ‘body-guard’ section (modelled on Nazi Germany’s brown-shirted Sturmabteilung) called the “Gryshemde” or “Grey-shirts”. In May 1934, the paramilitary Grey-shirts officially merged with the South African Christian National Socialist Movement and formed a new enterprise called ‘The South African National Party’ (SANP). The SANP would continue wearing Grey-shirts as their identifying dress and would also make use of other Nazi iconography, including extensive use of the swastika.22 Overall, Weichardt saw democracy as an outdated system and an invention of British imperialism and Jews.23
Weichardt also pitched the SANP as a fully bilingual organisation appealing to both English and Afrikaans speakers, he found favour in some English speaking corners with hardened antisemites, however for the most part his organisation and its ideology appealed to Afrikaners. Their primary communication mouthpiece was a newspaper called ‘Die Waarheid/The truth’ which was nothing more than a vehicle to spread Nazi doctrine in South Africa – the Nazi emblem emblazoned on the masthead.
Louis Weichardt would spell out his National Socialist vision in the ‘Die Waarheid/The truth’ and trace South Africa’s problems to one source – the Jews. He claimed Jewish ‘domination’ of the legal, medical, dental, commerce, trading, liquor trade etc. as between 60% to 100%, and he would write:
“We are determined to put the Jew in his place. We are not going to tolerate bootlicking, Gentile South Africans – English or Dutch speaking – are no longer prepared to play second fiddle to these aliens”.24
As to the The Protocols of the Elders of Zion, in March 1934 when the SANP held a rally in Aberdeen in the Eastern Cape, Harry Victor Inch – one of the Greyshirt leaders – announced that he had in his possession a ‘stolen’ document from a Port Elizabeth synagogue – signed by its Rabbi – which outlined a secret plot by the Jews to destroy the Christian religion and civilisation.
The Rabbi in question was not in fact a Rabbi, he was a Jewish Reverent, Reverent Abraham Levy, and he took the SANP Grey-shirt leadership in the Eastern Cape to court in Grahamstown in a landmark case. The SANP accused; Johannes von Strauss Moltke who was the Regional SANP leader, Harry Inch, who allegedly ‘stole’ the document and David Olivier, who had printed the document for circulation as the owner and publisher of “Rapport”, another media organ of the ‘shirt’ movements. All now have to account for themselves – the case billed as a mighty ‘Gentile vs. Jew’ showdown and a legal test of the ‘Great Jewish Conspiracy.’ `
‘Die Waarheid/The truth’ would pick up this ‘Protocols of the Elders of Zion’ and really twist it for a South African audience claiming:
“the disastrous Anglo-Boer War 1899-1902 was deliberately brought about by the Jewish mine magnets who circumvented Rhodes and Kruger alike”.25
In addition, Jews were accused of inciting blacks against whites and controlling the economy, exploiting ordinary Afrikaners as part of an international Jewish conspiracy. The ‘Die Waarheid/The truth’ statements were accompanied by a propaganda leaflet printed by the SANP and distributed in Port Elizabeth.
The ‘stolen’ document was scrutinised legally, it was found to be based on the entirely discredited antisemitic ‘international Jewish conspiracy’ document – ‘the Protocols of the Elders of Zion’ and given a South African twist by the SANP. In a carefully considered 30,000 word judgement, the court concluded inter alia;
“the protocols are an impudent forgery, obviously published for the purposes of anti-Jewish propaganda”.26
As a result the three Grey-shirt leaders were all fined, Harry Victor Inch was found guilty of perjury and forging documents defaming the Jewish race and swearing under oath that those documents were genuine – and fined £1,000, later also receiving a short prison sentence. 27 David Hermanus Olivier was fined £25 for acting improperly and printing the document and Johannes von Moltke was fined £750 for “playing a leading role in the plot”.

The result was widely hailed in South Africa as a complete vindication of the Jewish people of a global plot and of Rev. Abraham Levy who brought the lawsuit against the Grey-shirt leaders.
The Afrikaner Broederbond
The Afrikaner Broederbond (AB) would also find itself immersed into this fabricated Jewish and Freemason worldwide conspiracy and it too would act. Dr. Nico Diederichs would become the Chairman of the Broederbond in 1938, in that same year he would visit Nazi Germany and became an admirer of Adolf Hitler and National Socialism. He would later meet the Nazi German ministerial delegate in South Africa – on 19 May 1939, Herr. H. Kirchner – in that meeting he confided that the Broederbond had been compromised in the past by Freemasons in the Broederbond (presumably by all the Dutch Constitution Freemasons in it, Jews were banned from the Broederbond upfront).
He declared the bond as having now been purged of its Freemasons, he had personally seen to it – and the Bond was ready to do its work on promoting anti-semitism and the National Socialist anti-democracy principle in the Afrikaner Nationalist sphere.
In fact he reassures the German delegate that the National Party had hung its hat completely on the anti-Semitic principle, and he even squashes concerns that Dr D.F. Malan was not strongly antisemite enough, confirming that he in fact is one. He goes on state that it is the Broederbond’s mission as a secret society is to both infiltrate and undermine the goals of the Smuts government and the state.28
Not to lose sight of Dr Nico Diederichs, he became a National Party MP stalwart, served as the first chancellor of the Rand Afrikaans University and became ceremonial State President of South Africa from 1975 to 1978.
The male fraternity war between the various fraternal societies in South Africa is interesting – especially the disposition of the Afrikaner Broederbond (AB) to the Freemasons – an uneasy relationship caused by the more “verlighte” (liberal) Afrikaners being members of the Dutch Freemason Constitution – and these included powerful and highly politically regarded figures over the course of the history of the OFS, ZAR and then Union, including Presidents and Prime Ministers – none of whom really favoured “Afrikaner Nationalism” as it was defined by the more “verkrampt” (conservative) Broederbonders.
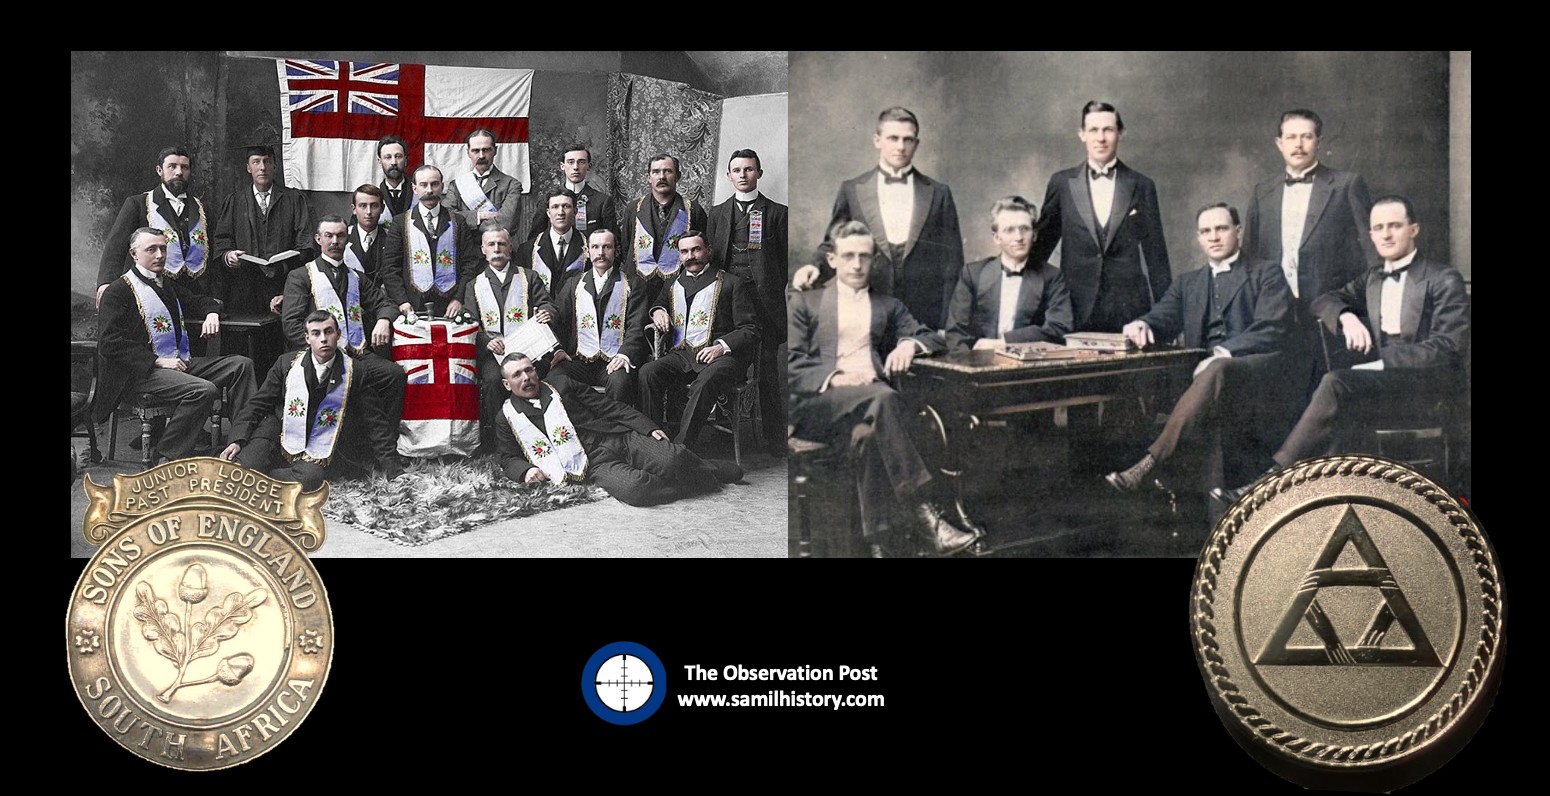
That all aside, the real opponent of the AB was not the Freemasons, the real ‘cultural’ opponent is a little understood and rarely discussed “English” fraternity called “The Sons of England” – the SOE. The full name – the Sons of England Patriotic and Benevolent Society – was a fraternal society for English Protestants residing in Commonwealth countries. It was originally founded in Toronto, Canada in 1874 but it especially took root in South Africa, starting in 1881 in Uitenhage and eventually establishing a Head Office in Durban and lodges in ever major metropole. Their goal was to bring Englishmen together for mutual support, networking, and to provide financial relief to them and their families if they fell on hard times. The society acted as a cultural organisation and was run along Masonic Lodge principles, regalia and rites – it aspired to preserve and celebrate the Anglo-Protestant cultural heritage of its members – which was diametrically opposite to the Broederbond who sought to do exactly the same thing, but for the promotion and preservation of Afrikaner-Protestant cultural heritage for its members. The key difference, the SOE was not ‘secret’, it was very openly public, whereas the AB was indeed ‘secret’.
Historically, the AB had three objects: to unite all Afrikaners who have the welfare of their people at heart; to foster national awareness; to implant a love of language, religion, tradition and fatherland; and to promote all of Afrikanerdom’s interests. Within the purely domestic Afrikaner arena, it acted as a secret coordinating council to weld Afrikaners into a single integrated insulated laager and as the guardian of the Nationalist spirit.29
The AB would however also lock itself in mortal combat with Freemasonry, which as a fraternity was open to men of any religion, race or creed including a great many Afrikaners in the English, Scottish, Irish and Dutch constitutions. Freemasons were specifically denied membership of the AB by the bond’s recruitment policy which was restricted to upstanding white Afrikaner adult males, protestants only, anti-Communist and specifically not a Freemason. The result of this, is that although many Afrikaner Freemasons enjoyed membership of the National Party, they did not really find themselves in key leadership roles of it – no National Party Prime Minister or President post 1948 was ever a Freemason, yet they were all Broederbonders to a man.
The AB eventually even took to aggressively targeting Freemasons when it put out a circular warning its members of Freemason conspiracies and to take action via the Dutch Reformed Church, it reads:
‘Freemasons are pouncing on school committees and city councils and are not slow to seek control of cultural organisations. These fronts must be watched carefully therefore against Freemasons! Freemasonry, however innocent it might appear, is fundamentally anti-Christian and action must be taken with that in mind … action against Freemasonry must start at (Dutch Reformed) church level.’30
Inside the AB, a task force, headed by Professor F.J. van Zyl, was even set up ‘to combat communism, liberalism and other enemies such as Freemasonry.‘31
The campaign becomes murderous
By August 1940, the Vichy France regime also issued a decree declaring Masons to be enemies of the state. Later in Germany during 1942, Hitler authorised Alfred Rosenberg to wage an “intellectual war” against all Jews and Freemasons. This transitioned in a police response under the authority the German Armed Forces (Oberkommando der Wehrmacht – OKW) to fulfil the objectives of this war by way of a ‘final solution’.
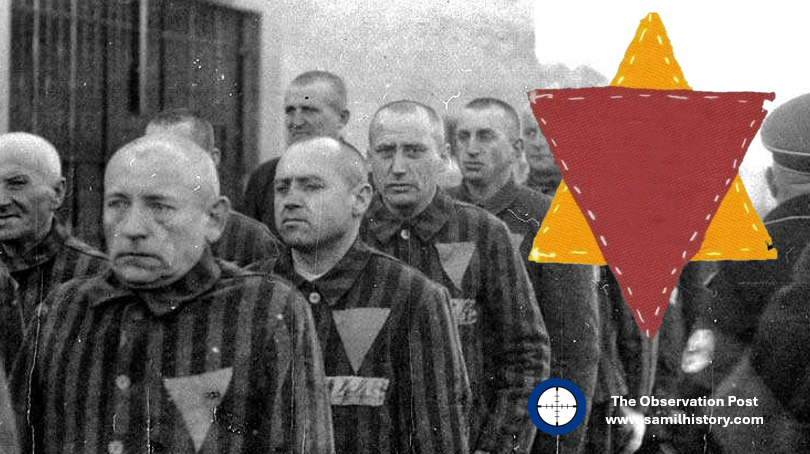
Thousands of Freemasons were arrested as ‘enemies of the state’ all over Germany and occupied Europe and sent to concentration camps. They were made to wear a red triangle on their prison uniforms to signify them as ‘political prisoners’. Jewish Freemasons were made to wear a red and yellow triangle in the shape of a Star of David – in all it is estimated that 150,000 Freemasons were murdered by the Nazi regime in their death camps by their death squads alongside 6,000,000 Jews.
After World War II, Soviet forces found much of the Masonic material that had been stolen by the Nazis. ‘They transported it to archives in Russia and Poland where the material remained unseen for more than 40 years. The Soviets, like the Nazis before them, wanted to learn about the Fraternity because, in a strange twist, they too, found Freemasonry threatening to their totalitarian government.’32
For this reason, European freemasonry including British Freemasonry, which anticipated an invasion of the British Isles by Nazi Germany decided to “go dark” in order to protect its members and its artefacts. To identify themselves Freemasons took to wearing small ‘forget-me-not’ flowers as lapel pins.
Forget me not
As Freemasonry across Europe (and in the UK and its Commonwealth) went “dark” and “secret” to protect itself from Nazi persecution – Freemasons in Europe (and in Commonwealth countries including South Africa) started to use the ‘Forget-me-Not’ flower as a lapel pin so they could recognise one another. Some lodges even became known as ‘Forget me Not’ Lodges (even in South Africa).
But why the ‘Forget-me-Not’ flower? The origins have a sinister and Nazi beginning. During the war, three Lodges were actually secretly formed inside German Nazi concentration/POW camps – to classify and identify inmates as Freemasons the Nazis used the inverted red triangle, which was reserved for ‘political prisoners’.
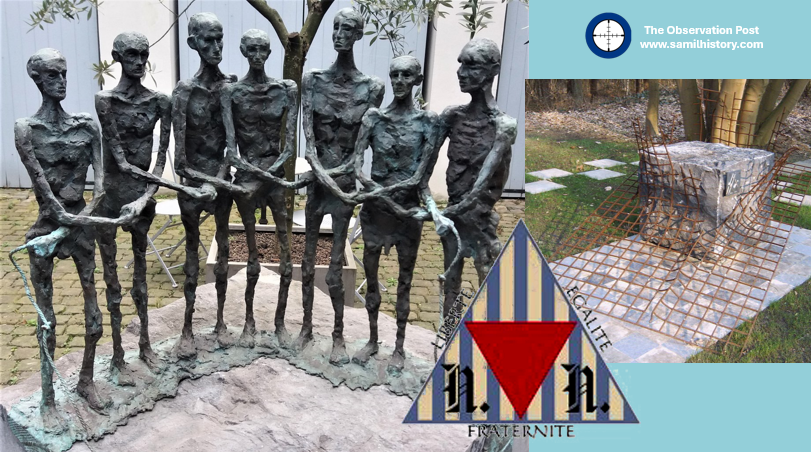
The first and more famous lodge was the Liberté Chérie or Beloved/Cherished Liberty Lodge one of very few lodges founded inside a Nazi concentration camp. It was established inside Hut 6 at Esterwegen (a political prisoner concentration camp). Founded November 1943 by 7 Belgian Freemasons and resistance fighters. During its existence it ‘Entered’, ‘Passed’, and ‘Raised’ at least 2 additional members. A memorial and sculpture is now part of the memorial site of the Esterwegen Cemetery.33
The Obstinate Lodge, L’Obstinée was another Masonic Lodge founded inside the walls of a Nazi prisoner-of-war (POW) camp. Oflag X-D POW camp near Hamburg. Founded by members of the Grand Orient of Belgium. L’Obstinée was a the second Masonic Lodge and was founded in the Oflag XD camp by
members of the Grand Orient of Belgium which recognised the Lodge on14 July 1946.34
The third Lodge was “Les Frères captifs d’Allach” and who’s register is now located at the Grand Orient of France museum.35
The small forget me not flower had been used obscurely in masonic symbology in Germany from 1926. However, by a stroke of luck and irony the National Socialist (Nazi) German government decided to use a ‘Forget-me-Not’ flower as the symbol for its annual Winterhilfswerk (Winter Relief) campaign. A charitable, food, coal and clothing campaign with the slogan “None shall starve nor freeze”. Set for the harsh winter months (see insert pic of the forget-me-not used by the Winterhilfswerk charity from 1938).
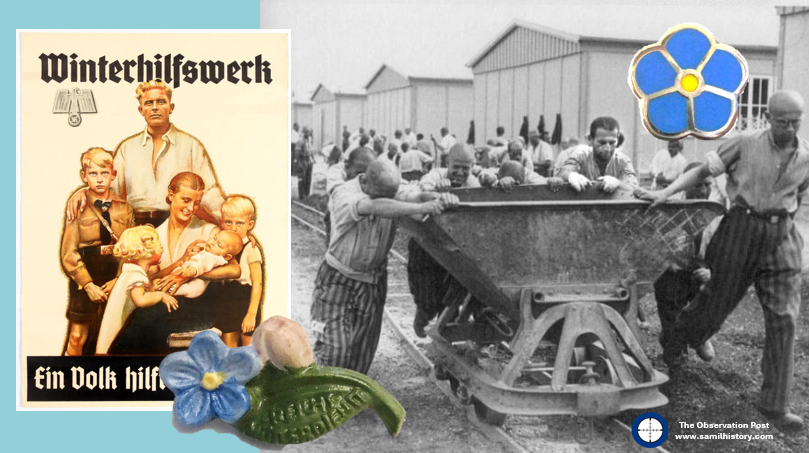
As the flower pin was common to anyone supporting the winter relief campaign in Germany, this enabled some Freemasons to openly wear the Forget-me-Not as a secret sign of Freemasonry membership during the holocaust and avoid persecution or identification. The use of the Forget-me-Not lapel pin did not only occur in Germany, but Freemasons picked it as a symbol the world over during the war.36
The Forget-me-Not even appeared after the war at the first Annual Convention of the United Grand Lodges of Germany. It has continued to be worn by Freemasons world over to remember those that suffered in the name of Freemasonry.
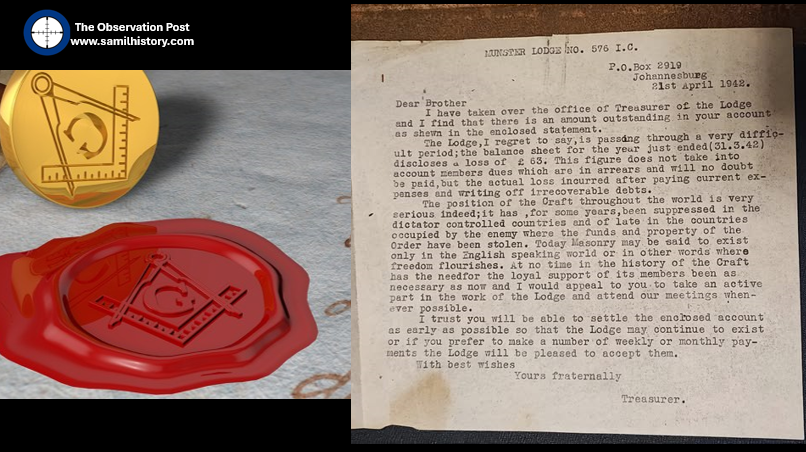
In South Africa the Freemason fraternity would endure their remembrance duties and lament the situation in Europe, here is interesting piece of Masonic lore at Kensington Masonic Hall. It comes from Munster Lodge Irish Constitution and essentially it is a letter between a Brother and the Treasurer regarding the non-payment of his dues, it is written on the 21st April 1942 mid way though the war. It gives a grave picture of Masonry world-wide and in the occupied countries and urges the need to retain membership against difficult times. A second letter, also held at the Kensington Masonic Hall, is a set of minutes and funds raised for the family of a Freemason killed in action.37
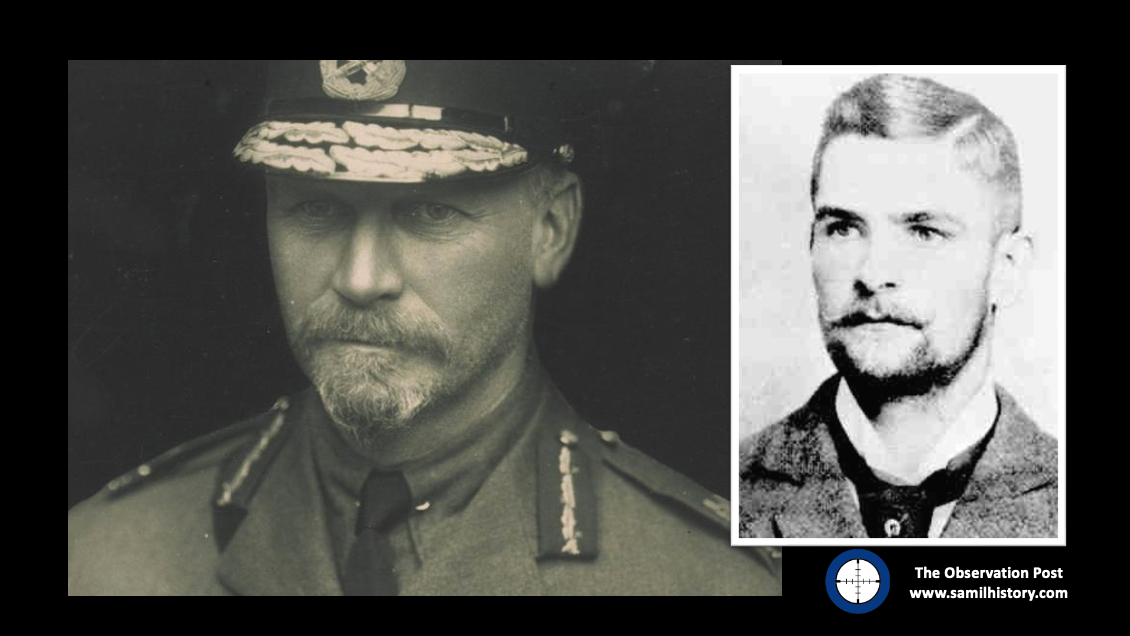
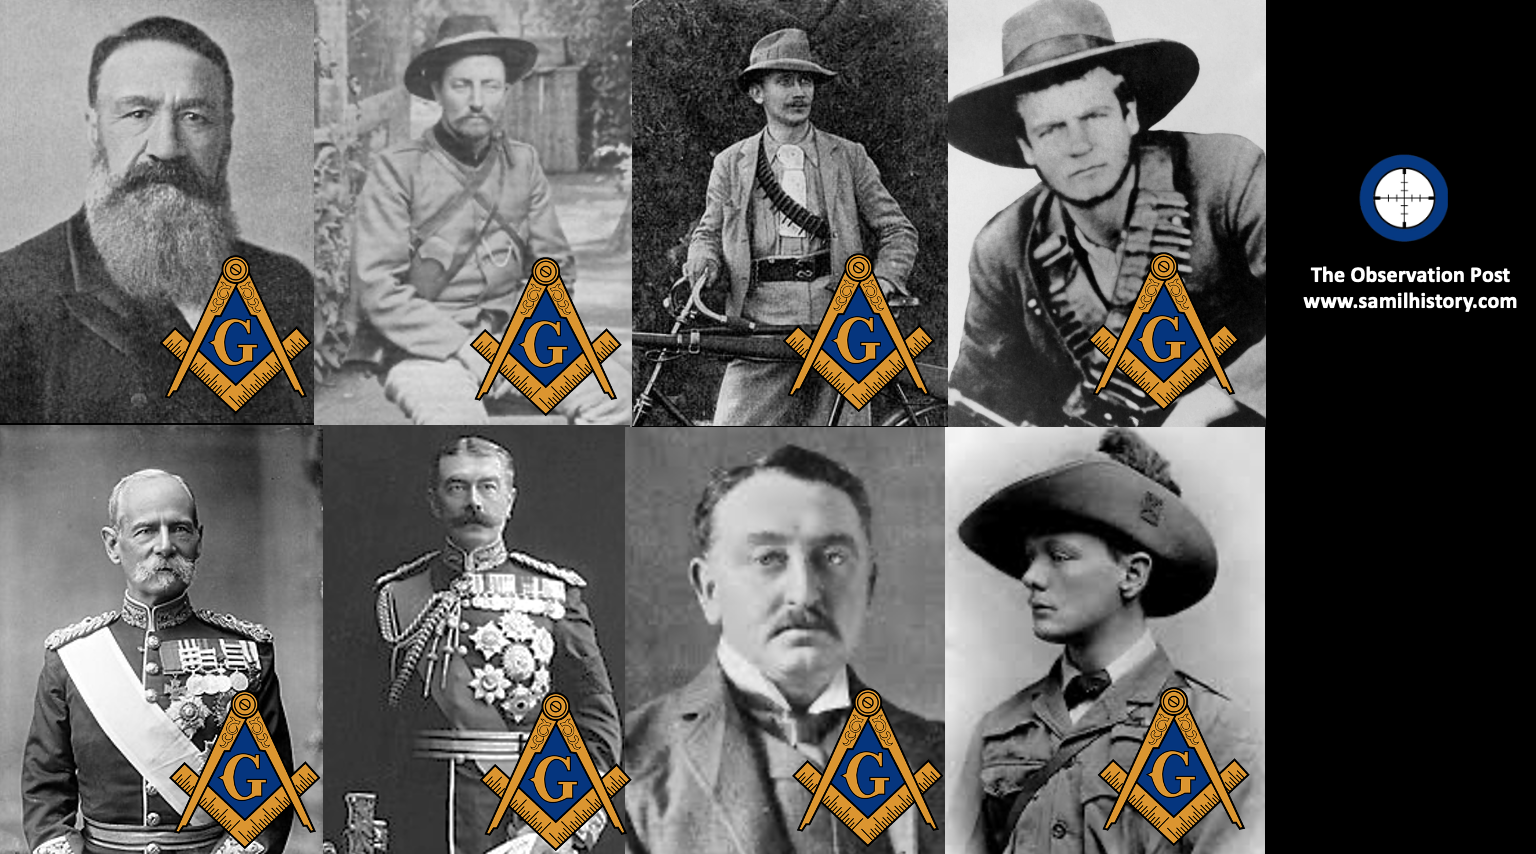
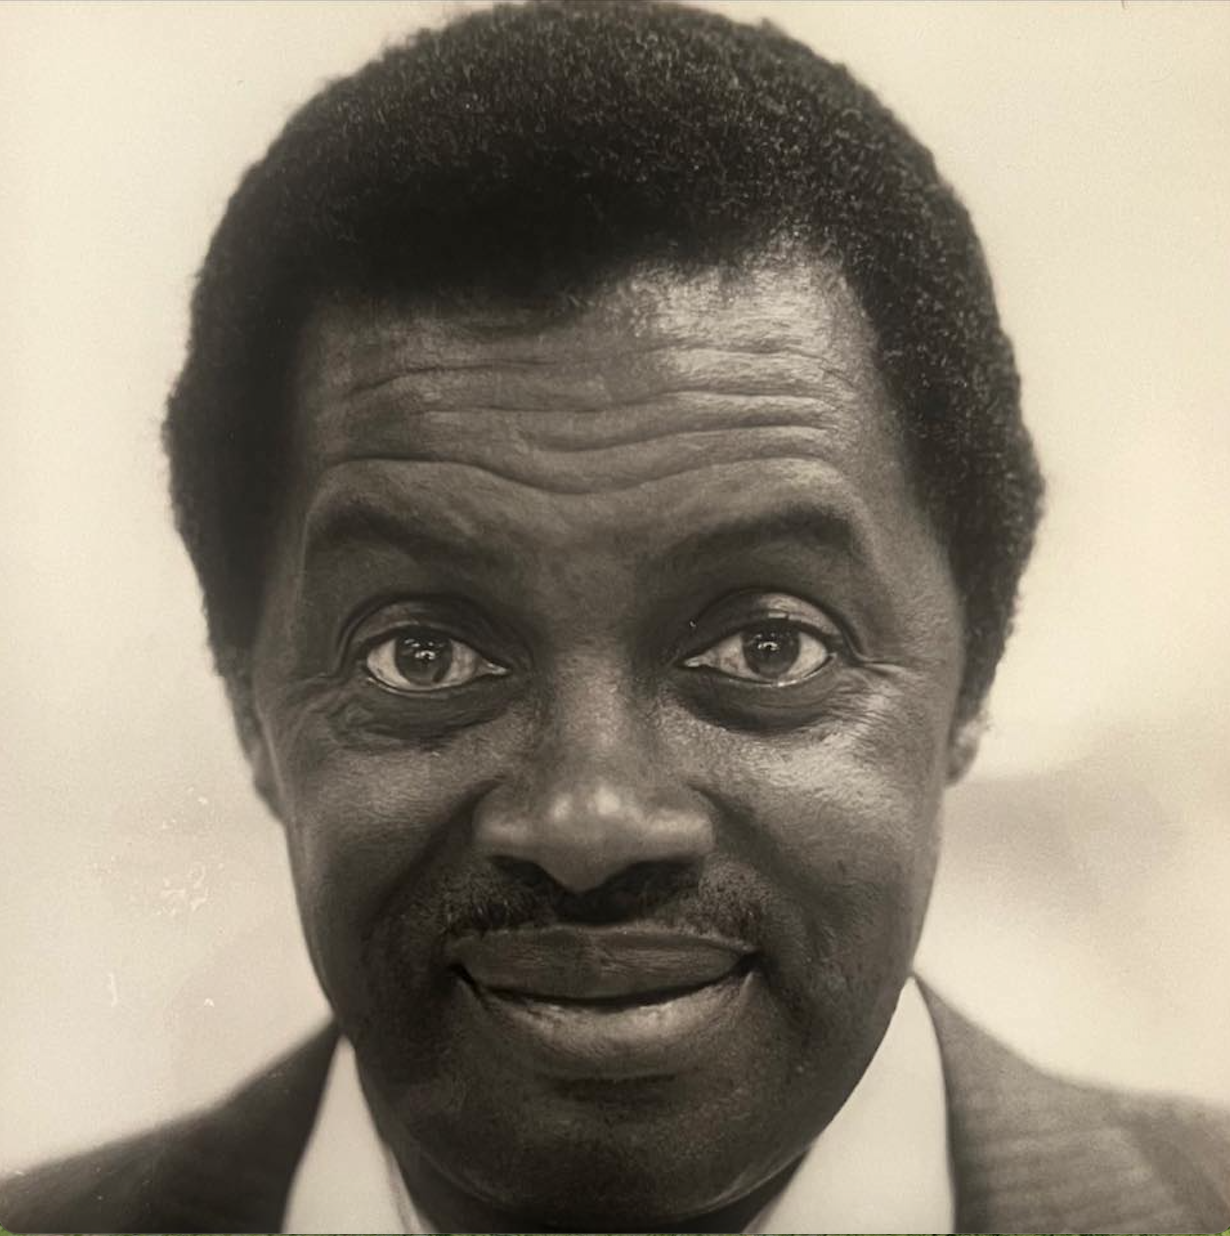
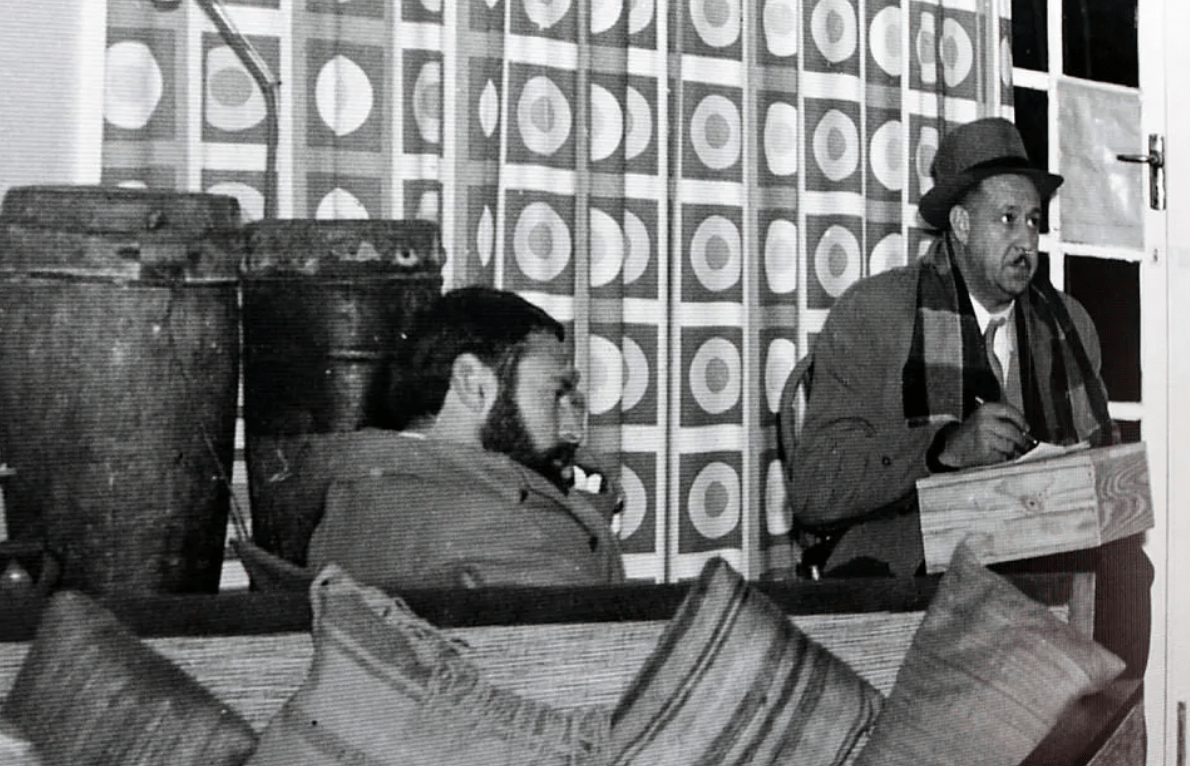
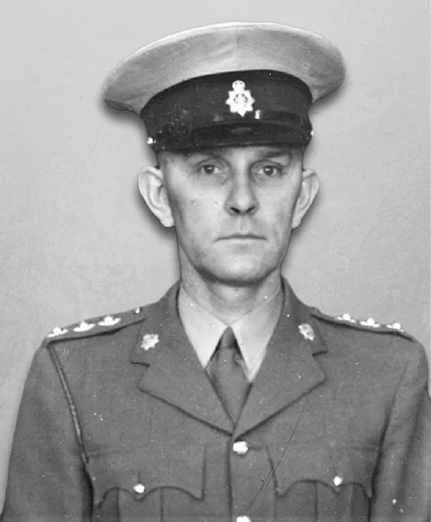
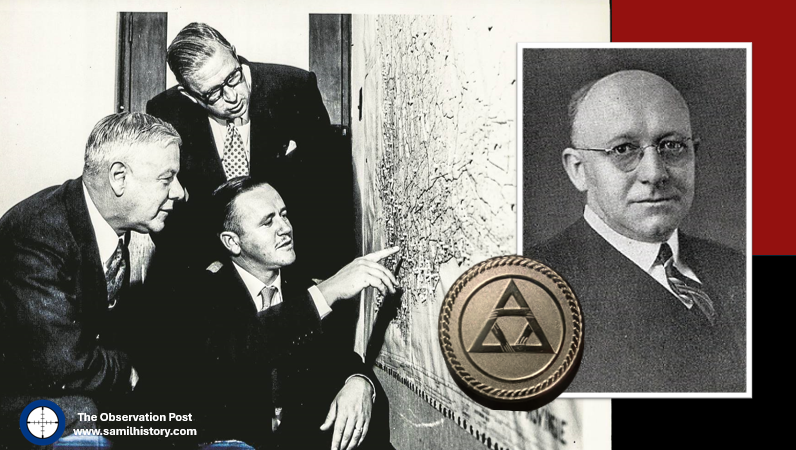
Numerous South African Freemasons served in the South African Union’s Defence Force during World War 2, and seconded to British Armed Forces, many attaining high accolade and Masons can also count many fallen amongst themselves. A notable World War 2 Freemason was the very popular Maj. General Dan Hermanus Pienaar, his role in the Battle of Al Alamein would contribute to the turning point of the war and the ultimate Allied victory. Dan Pienaar was a member of Lodge Rising Star (English Constitution) in Bloemfontein, initiated on 1 October 1935 and raised 14 April 1936. He was tragically killed during the war in an aircraft accident. 38
In Conclusion
It took some time after the war for the “all clear” to be given and for Freemasons to return to their normative position in society and open up their lodges and memberships, even as late as 2018 the United Grand Lodge of England was still calling officially for the end of discrimination of Freemasonry.
Freemasonry operates as a charity – not unlike a Lions Club or Rotary, it operates in public and as Freemasons put it – Freemasonry is organisation with secrets, but not a secret society. Freemason’s secrets are gestures, words and handshakes so they can recognise where each fellow mason is on their respective masonic journey and for the delight and surprise of the candidate passing his degrees. Freemasons have exposed their rituals, temples and gestures multiple times, and although not encouraged, the public can easily source them.
It is important to note, as often Freemasonry is not factored in the lexicon on the Holocaust which usually focusses on the victims as being Jews, Homosexuals, Gypsies and Political Prisoners generally – it is important to stress that every single Führer Order in respect of the Holocaust started with the following words:
‘An Order in respect of Freemasons and Jews’.39
Written and researched by Peter Dickens
Footnotes
- Hitler, Adolf. Mein Kampf (Ralph Manheim Translation), Houghton Mifflin Company, New York, 1925 original publication, translation published 1999. ↩︎
- Hitler, Adolf. Speech at an NSDAP meeting in Munich, February 29, 1928. Hitler, Reden, Schriften, Anordnungen, Vol. II/2, 706. ↩︎
- Smith, Gary. Freemasonry and the Holocaust By W. Bro. Gary W. Smith, Pr.D.G.D.C. ↩︎
- Campbell, Thomas. Compass, Square and Swastika: Freemasonry in the Third Reich. Texas A&M University. 2011 – Page 119 ↩︎
- United States Holocaust Museum – on-line resource, fetched 1 December 2024 ↩︎
- Thomas, Christopher. Compass, Square and Swastika: Freemasonry in the Third Reich. PhD thesis. 2011 ↩︎
- Smith, Gary. Freemasonry and the Holocaust By W. Bro. Gary W. Smith, Pr.D.G.D.C. ↩︎
- Thomas, Compass, Square and Swastika: Freemasonry in the Third Reich, Page 126 ↩︎
- Thomas, Compass, Square and Swastika: Freemasonry in the Third Reich, Page 126 ↩︎
- Thomas, Compass, Square and Swastika: Freemasonry in the Third Reich, Page 126 – 127 ↩︎
- Thomas, Compass, Square and Swastika: Freemasonry in the Third Reich, Page 127 ↩︎
- Scher, David. Echoes of David Irving – The Greyshirt Trial of 1934. 2004 ↩︎
- Shain, A Perfect Storm, 230 ↩︎
- Bunting, The Rise of the South African Reich, 84 ↩︎
- Shain, A Perfect Storm, 231 ↩︎
- Shain, A Perfect Storm, 231 ↩︎
- Maritz, Manie ‘My Lewe en Strewe’ Pretoria 1939. Page 121. ↩︎
- Maritz, Manie ‘My Lewe en Strewe’ Pretoria 1939. Page 139 ↩︎
- Shain, A Perfect Storm, 230 ↩︎
- Shain, A Perfect Storm, 230 ↩︎
- Shain, A Perfect Storm, 231 ↩︎
- Shain, Milton. ‘A Perfect Storm’, Antisemitism in South Africa 1930-1948, (Johannesburg: Jonathan Ball Publishers, 2015) , 55–58. ↩︎
- Bouwer W, National Socialism and Nazism in South Africa: The case of L.T. Weichardt and his Greyshirt movements, 1933-1946. (MA Thesis, University of the Free State, Bloemfontein 2021), 18. ↩︎
- Shain, A Perfect Storm, 58 ↩︎
- Shain, A Perfect Storm, 58 ↩︎
- Shain, A Perfect Storm, 73 ↩︎
- Scher, David. Echoes of David Irving – The Greyshirt Trial of 1934. 2004 ↩︎
- Rein Commission. Unpublished ↩︎
- Bloomberg, Charles. Christian Nationalism and the Rise of the Afrikaner Broederbond in South Africa, 1918-48, Page 32 ↩︎
- Wilkins, Ivor. The Broederbond. Jonathan Ball Publishers, 1978. Page 150 ↩︎
- Wilkins, The Broederbond, 407 ↩︎
- Smith, Gary. Freemasonry and the Holocaust By W. Bro. Gary W. Smith, Pr.D.G.D.C. ↩︎
- Smith, Gary. Freemasonry and the Holocaust By W. Bro. Gary W. Smith, Pr.D.G.D.C. ↩︎
- Smith, Gary. Freemasonry and the Holocaust By W. Bro. Gary W. Smith, Pr.D.G.D.C. ↩︎
- Smith, Gary. Freemasonry and the Holocaust By W. Bro. Gary W. Smith, Pr.D.G.D.C. ↩︎
- The Forget-Me-Not and Anti-Freemasonry in Nazi Germany – The Square Magazine on-line. ↩︎
- With the kind permission of Bro. Eric Cleaver – Germiston Charity Lodge. ↩︎
- Rossouw, B (compiler). 250 Years of Freemasonry in South Africa, a Heritage Collection 1772 – 2022. Grand Lodge of South Africa. 2022. Page 1031 ↩︎
- Smith, Gary. Freemasonry and the Holocaust By W. Bro. Gary W. Smith, Pr.D.G.D.C. ↩︎
Bibliography and References
Bloomberg, Charles. Christian Nationalism and the Rise of the Afrikaner Broederbond in South Africa, 1918-48. Palgrave Macmillan. 1990.
Bouwer, Werner. National Socialism and Nazism in South Africa: The case of L.T. Weichardt and his Greyshirt movements, 1933-1946
Bunting, Brian. The Rise of the South African Reich. Penguin Books. 1964
Feng, Albert. Freemasonry: Survival and Compromise – Freemasonry in the Third Reich.
Hitler, Adolf. Mein Kampf (Ralph Manheim Translation), Houghton Mifflin Company, New York, 1925 original publication, translation published 1999.
Hitler, Adolf. Speech at an NSDAP meeting in Munich, February 29, 1928. Hitler, Reden, Schriften, Anordnungen, Vol. II/2, 706.
Maritz, Manie. ‘My Lewe en Strewe’ Pretoria 1939
Rossouw, B (compiler). 250 Years of Freemasonry in South Africa, a Heritage Collection 1772 – 2022. Grand Lodge of South Africa. 2022.
Scher, David, M. Echoes of David Irving – The Greyshirt Trial of 1934. December 2004.
Thomas, Christopher, Campbell. Compass, Square and Swastika: Freemasonry in the Third Reich. Doctorate of Philosophy thesis. Texas A&M University. 2011
Milton, Shain. A Perfect Storm – Antisemitism in South Africa 1930-1948. Jonathan Ball. 2015
Smith, Gary. Freemasonry and the Holocaust By W. Bro. Gary W. Smith, Pr.D.G.D.C
United States Holocaust Museum – on-line resource, 2024
The Square Magazine (on-line). The Forget-Me-Not and Anti-Freemasonry in Nazi Germany
Wilkins, Ivor. The Broederbond. Jonathan Ball Publishers, Johannesburg. 1978