Tobruk – “Defeat is one thing; Disgrace is another!”

South Africa’s worst military defeat – The Fall of Tobruk

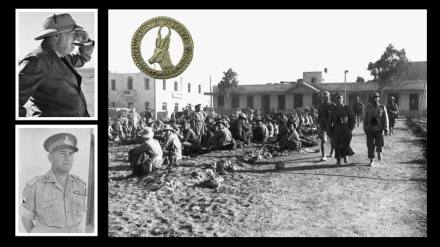
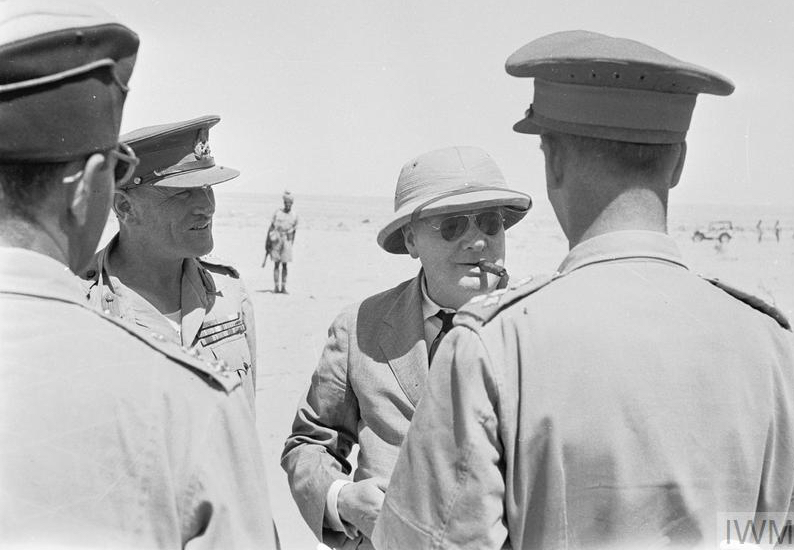
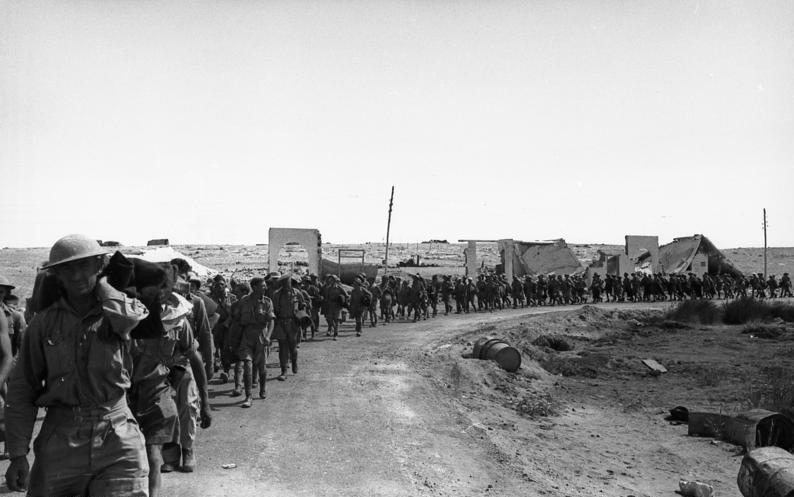
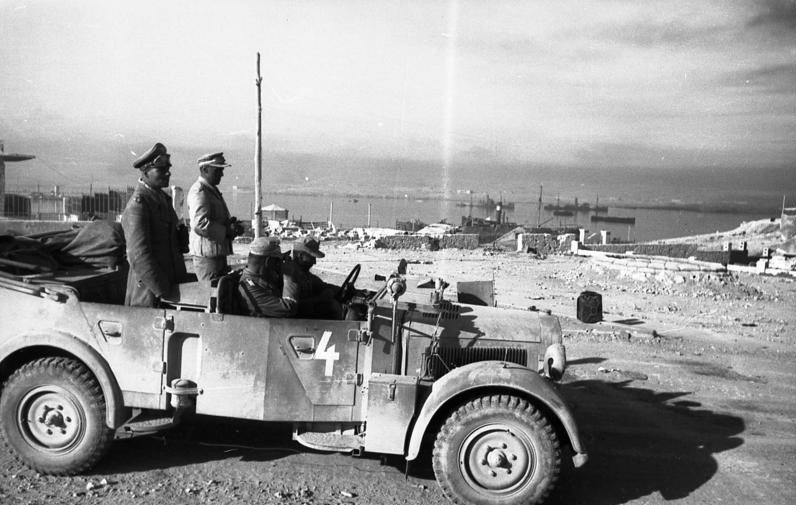
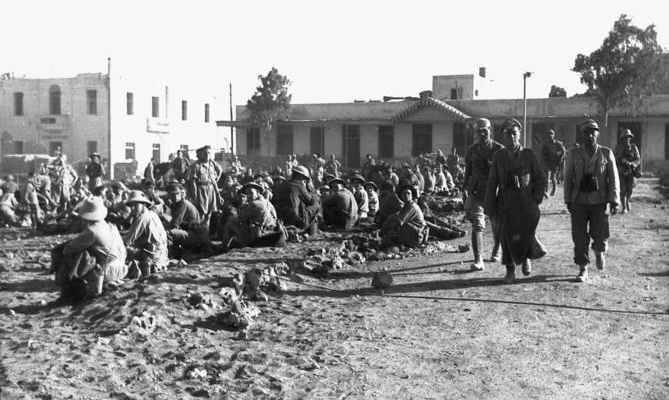
The featured photograph of Field Marshal Rommel inspecting South African and British Prisoners of War (POW’s) after the fall of Tobruk is very telling of South Africa’s singular biggest capitulation of arms in its proud military history.  Sir Winston Churchill, who rather embarrassingly on his trip to Washington had to hear the news from President Roosevelt, was to famously later write on his feelings about the fall of Tobruk:

“This was one of the heaviest blows I can recall during the war. Not only were the military effects grim, but it affected the reputation of British arms ……. Defeat is one thing; disgrace is another.”

So let’s have a look at why this loss of a small North African coastal port in World War 2 affected the British in this way, its ramifications for the British and South Africans, and why Churchill chose such a harsh rebuke of South African military prowess – which prior to Tobruk had been held in high regard and after Tobruk the South African military establishment literally had to fight an uphill battle in Italy to earn their respect again and recover their honour.  In effect we need to ask ourselves if this was indeed a fair comment, so let’s have a look at what actually happened.

church
The Prime Minister, Mr Winston Churchill, chatting with British Army General Staff Officers during his tour of the Western Desert.

The Rats of Tobruk

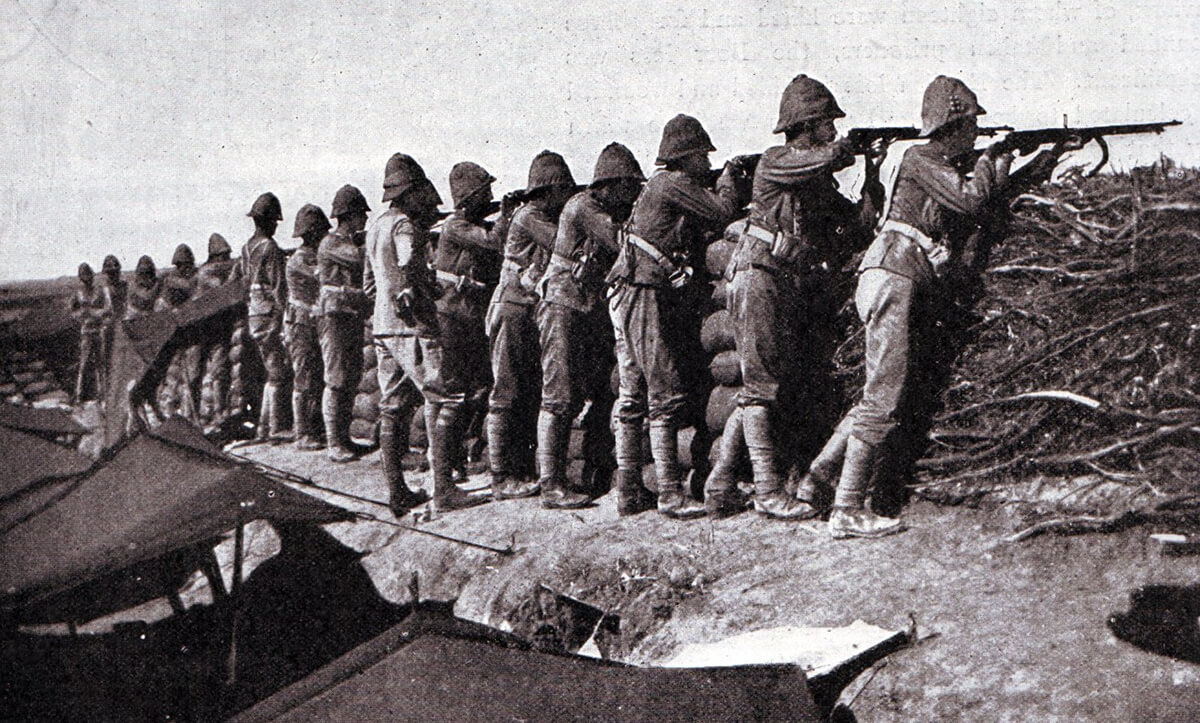
The Rats of Tobruk was a nickname given to the soldiers who held the small Libyan port of Tobruk against Rommel’s German ‘Afrika Corps”and their Italian axis forces.  Rommel had laid siege to the port in his push to invade Egypt, these hardened, belligerent  soldiers effectively put Rommel’s plans on hold as they dogmatically dug in and resisted for 8 long months.  The siege started on 10 April 1941 and was only to end later in November 1941.

They consisted of  around 14,000 Australian soldiers from the 9th Australian Division commanded by Lieutenant General Leslie Morshead, accompanied by regiments of British artillery, the Polish Independent Carpathian Rifle Brigade and 3rd Indian Motor Brigade – reporting to Australian command.  In all they constituted about 30 000 troops – a very strong garrison.

At the time the port was surrounded by a strong line of defences, the garrison had air support, and Rommel had been at the end of his supply lines. Early Axis attacks were disorganised affairs that were easily fought off, and by the time Rommel was able to launch a stronger assault the defenders were really dug in ready to meet him. The defence of Tobruk became one of the iconic moments of the entire British war effort.

It dominated strategy in the desert in 1941, and the relief of Tobruk was the target of the unsuccessful Operation Brevity and Operation Battleaxe. The siege was finally lifted as a result of Operation Crusader and in the aftermath Rommel was forced to retreat west out of Cyrenaica, ending the year back at his starting point.

aus 2
The ‘Rats of Tobruk’ – some of the 15,000 men of General Morshead’s 9th Australian Division shelter in caves during an air raid during the siege of Tobruk. After six months besieged in the vital supply port the Australians were evacuated by sea and relieved by fresh troops. 823 men had been killed, 2214 wounded and 700 captured.

Tobruk was held in hero status and its defenders, the ‘rats’ went into the annuals of history as legends.

South African Honour to defend Tobruk

Tobruk secured, the Australians finally relieved and cycled out, by 1942 the Allied Middle East Command decided to leave a ‘temporary’ force to hold Tobruk while a new strike force was built up near the new frontier – on the Gazala line to the west.

1024px-MajGenHBKlopper
Major General Klopper

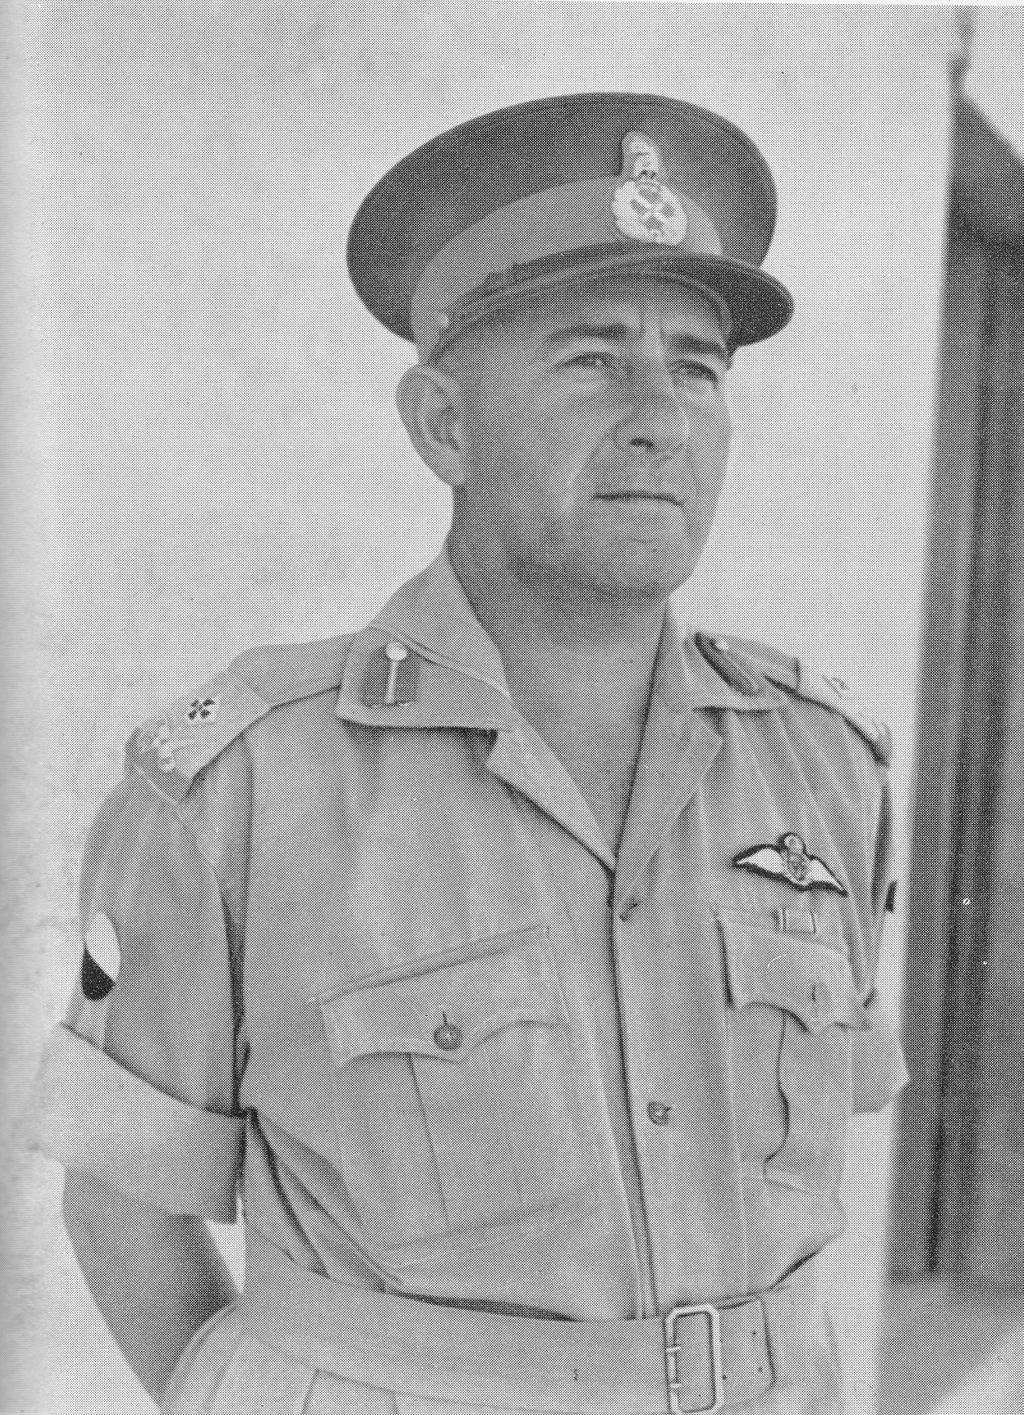
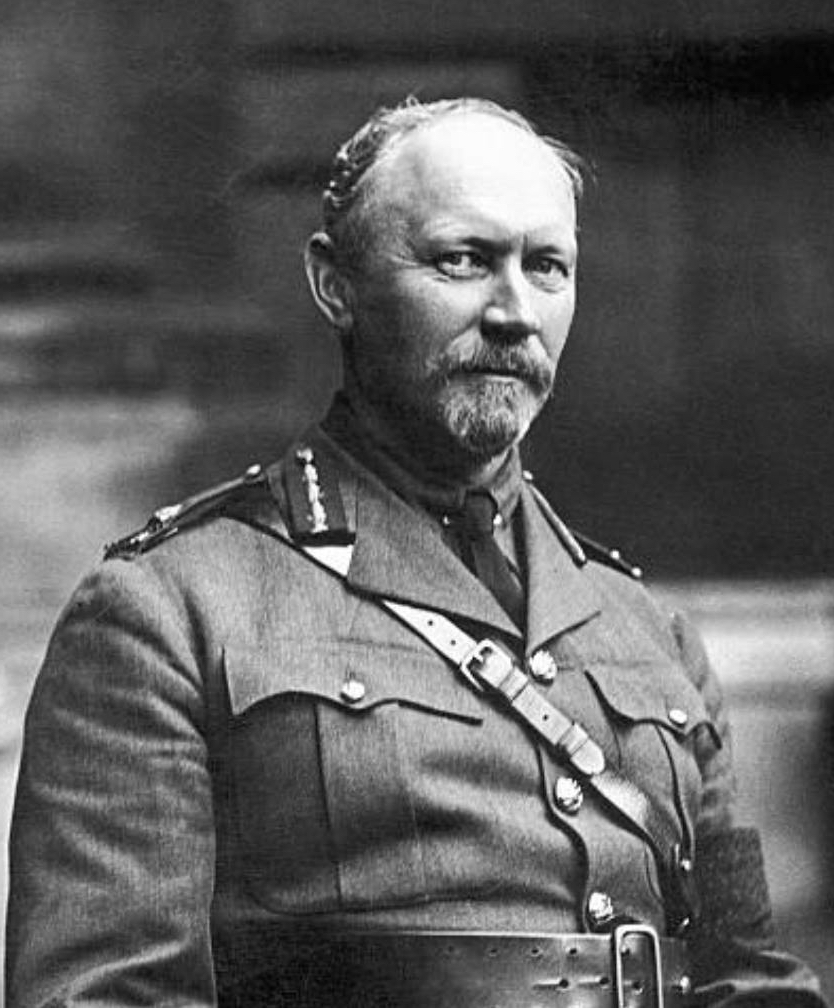
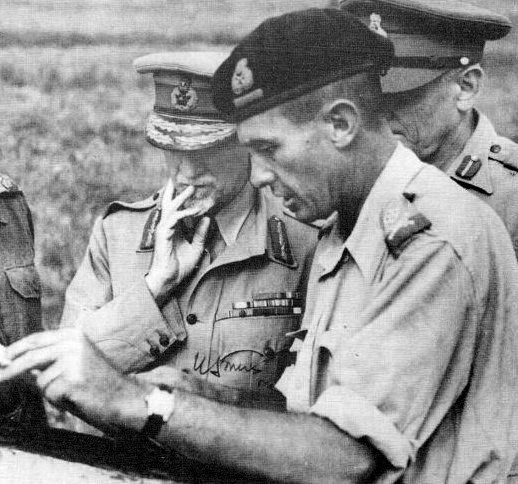
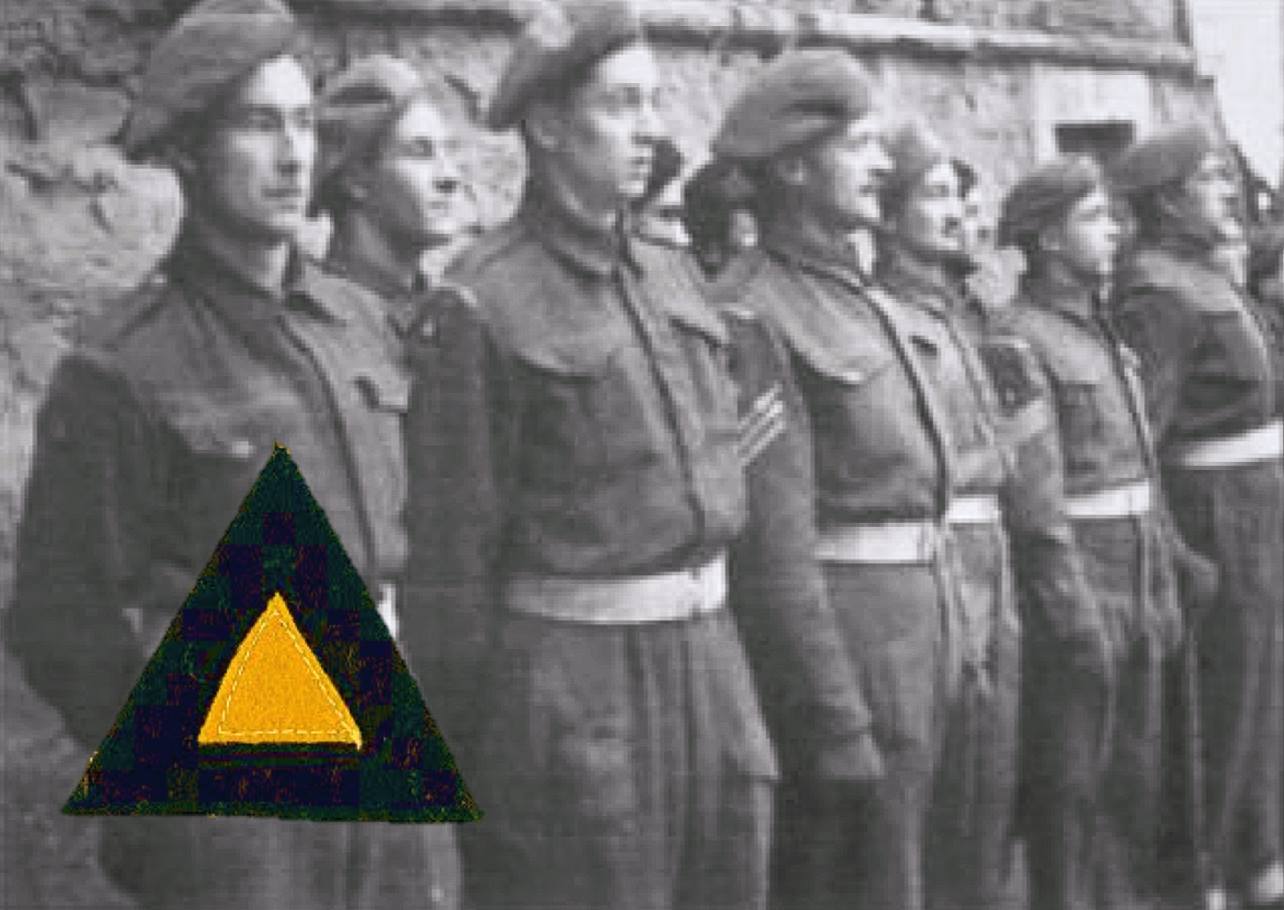
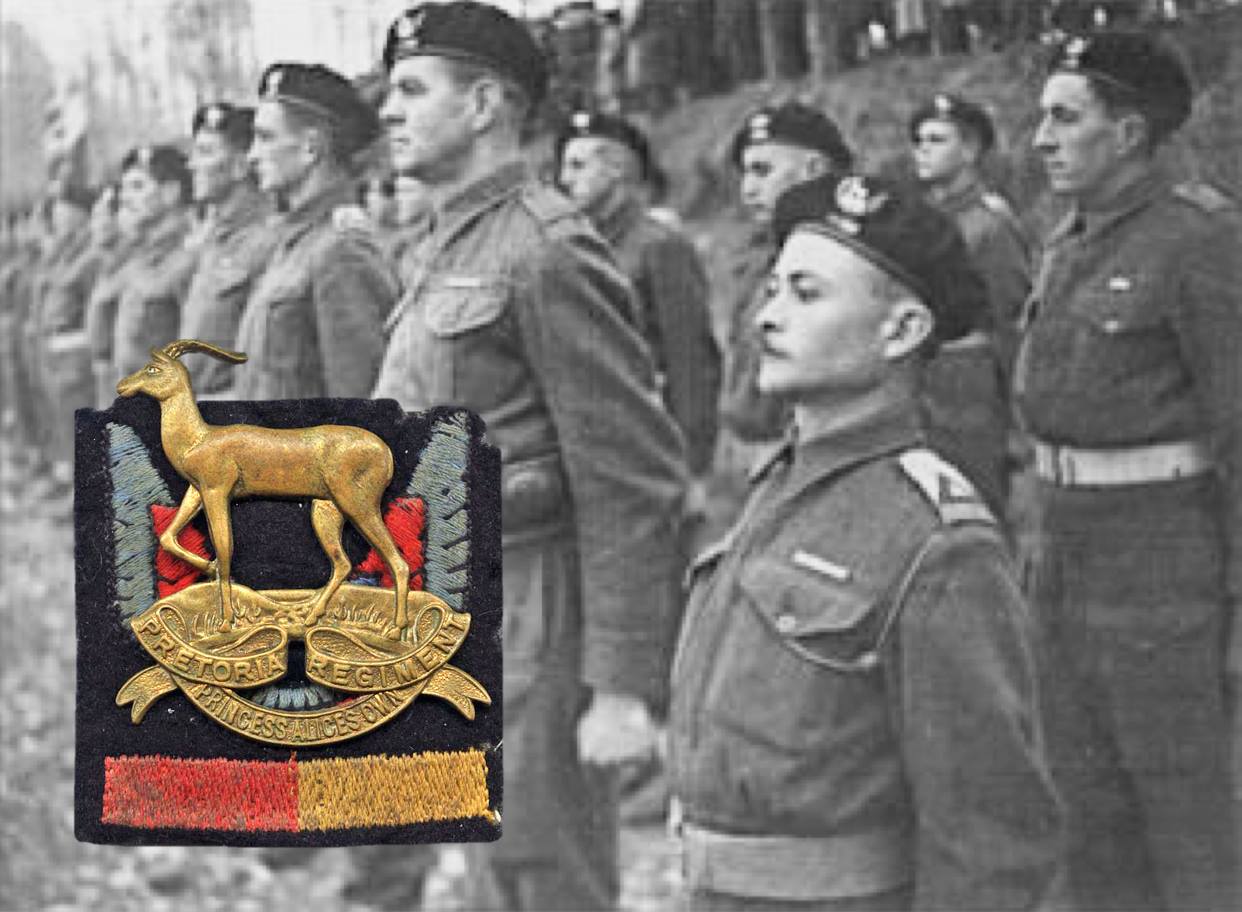
The ‘honour’ of defending Tobruk was given to the South Africans. The new  garrison was to be formed by the 2nd South African Infantry Division with Major General Hendrik Balzazar Klopper in command.  General H.B. Klopper, was a school teacher before joining the South African Army. He was a Major General of one month’s standing when he was given overall command of Tobruk with limited combat experience.  In all the same number of troops, over 30 000 were given to him to defend Tobruk if attacked, as had been the troop strength with the Australians earlier.  Only with some relatively small but key differences.

Simply put, the defences of Tobruk weren’t as solid in 1942 as they had been in 1941. The main reason for this was that large numbers of mines had been lifted and moved to the Gazala line, as had a great deal of the barbed wire. The tank traps and anti-tank ditch were also in a very poor state and had begun to silt up with sand. Although not ideal, this condition of the defences left to Klopper was highlighted as the cause of the defeat in the subsequent military tribunal held after the war – and it effectively exonerated him of the defeat – however modern historians are now pointing to the fact that General Klopper had more than enough resources at his disposal to mount a convincing defence.

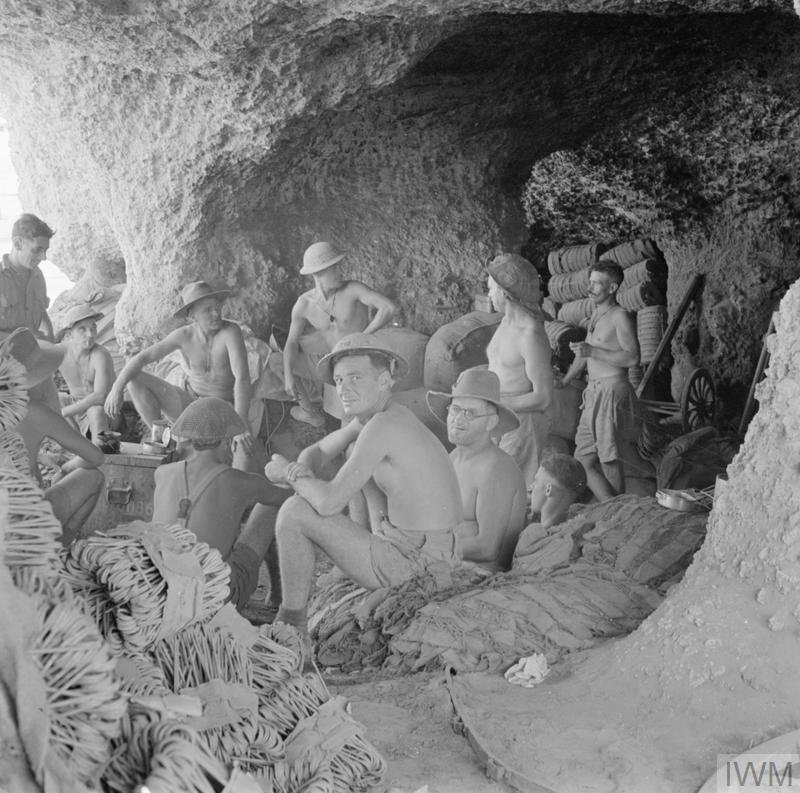
These historians point out his plus side, and its impressive, General Klopper had at his disposal some fine fighting units and very good equipment, he had his own division, the second South African Infantry Division, as well as some British and Commonwealth detachments – 60 Infantry Tanks of the 32nd Army Tank Brigade, the 201st Guards Brigade, the 11th Indian Infantry Brigade, three regiments of field artillery and two of medium artillery. There were 35 000 men in total. Tobruk had also now become a major supply base for the Gazala Line, and as a result was also crammed full of stores, ammunition and equipment.

But, again on the down side, unlike the Australians, there was little chance of solid air support for the South Africans, as the Desert Air Force had been forced to retreat to Sidi Barrani, and there were only fifteen 6-pounder anti-tank guns in the fortress.

There was also another very important difference, this time some of the defending troops were exhausted, their morale was lower, and the garrison was filled with a feeling of insecurity and impermanence.  Something later historians would point it out as a failing as General Klopper had not inspired change or adequately dealt with it, other sources point to the relative inexperience of the South African troops, stating that although morale amoungst the South Africans specifically has high, their Commander himself was out of his depth.

That all said, what’s the big deal surrounding this tiny Libyan port – why’s was it so important to the North African Desert campaign? The answer is simply because it was the only deep water harbour in the theatre of operations – critical for supply and shipping of fuel, equipment and munitions to either the Axis forces or the Allied forces. To this end Tobruk was a key strategic asset – and all the Allied commanders knew it.

The fatal flaw

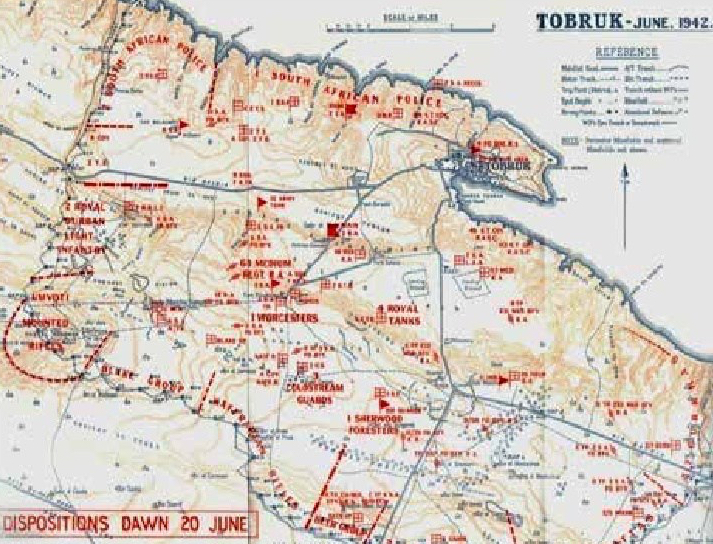
In terms of the defence perimeter, the Western and Southern sides of the port were well defended by the South Africans, but the East side was weak, and it proved to be fatal.

The eastern perimeter defences were left in a very weak state, and now they were to be defended by mainly Indian regiments reporting to General Kloppers command located in the centre.   The 2/5th Mahrattas and the 2/7th Gurkas were great fighting units and till that point had been involved in the thick of fighting, so they had been pulled to rear to recuperate and these men were utterly exhausted.

14-d32580d27e

An even more critical flaw in planning was an underestimate of German resolve, by both the Allied command and General Klopper. Erwin Rommel’s was utterly resolved to take Tobruk once and for all, his entire campaign to invade Egypt depended on it, and unlike the earlier siege of Tobruk with its Australian defenders, now he was going to throw just about everything at his disposal into the advance on Tobruk.  He replenished and reinvigorated his forces, consolidated his plans and began his advance east again.

The Desert Fox Attacks 

General Erwin Rommel had a fearsome reputation amongst the Allied Forces and was nicknamed ‘The Desert Fox’ by his enemy because of his skill in manoeuvre and deception, as usual for Rommel he also devised a ruse for capturing Tobruk.

Only his infantry approached the western perimeter, while his mobile forces swept on past, to give the impression that the German and Italian armour was heading straight for the Egyptian border (sending radio messages to that effect to complete the ruse).  He then swung his mobile armoured forces around and attacked Tobruk from its weak point – the eastern perimeter.

Rommel’s zero hour was 05h20 on 20 June 1942. As dawn broke long black lines of tanks, trucks and infantry slowly started to move forward. As it grew louder and closer to Tobruk waves of German Stukas and Ju 88’s aircraft appeared overhead (Rommel pressed every single Axis airplane in service in North Africa into taking Tobruk).

As the heavy artillery began to fire, the planes released their bombs and quickly got out of the way for the next wave, operating a shuttle service between the defence perimeter and El Adem airfield, 10 miles away. They pounded a gap open 600 yards wide. Behind them, under cover of artillery barrage and half-hidden by smoke and dust, German and Italian sappers raced forward to lift mines and bridge the tank traps with tanks and infantry racing through the gaps. As they move forward, they lit green, red and purple flares and the Stukas dropped their bombs just ahead of the advancing, multi-coloured smoke screen while the other planes and artillery blasted the South African rear (the seaward side of the port) with shells and bombs.

Tobruk, Rommel, Bayerlein, Panzer III
German armour and Rommel encicling Tobruk

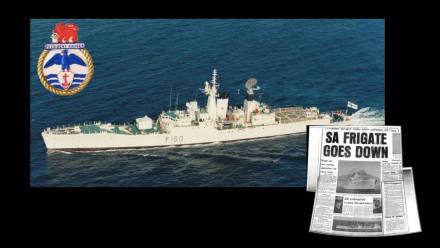
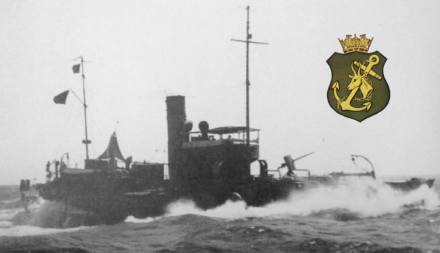
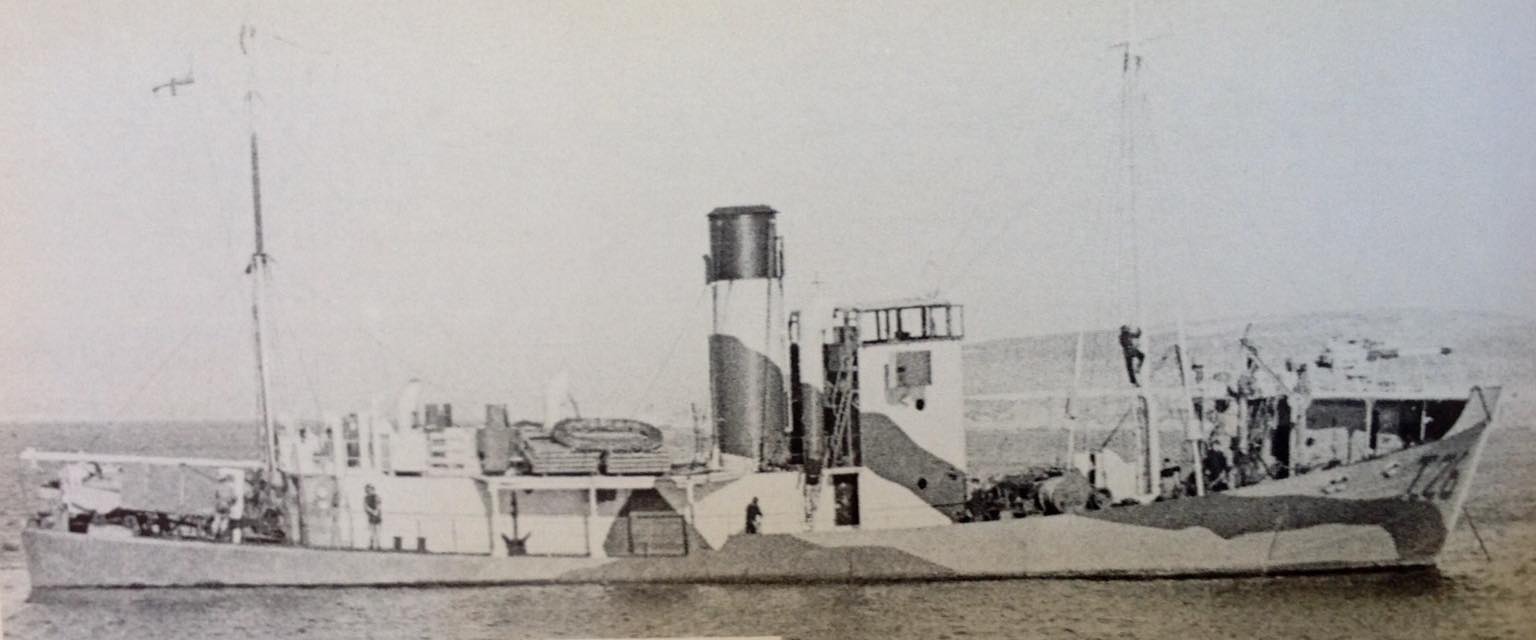
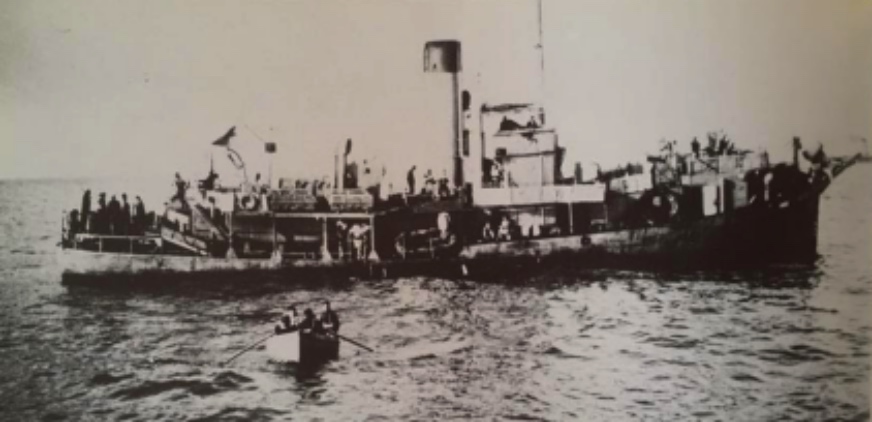
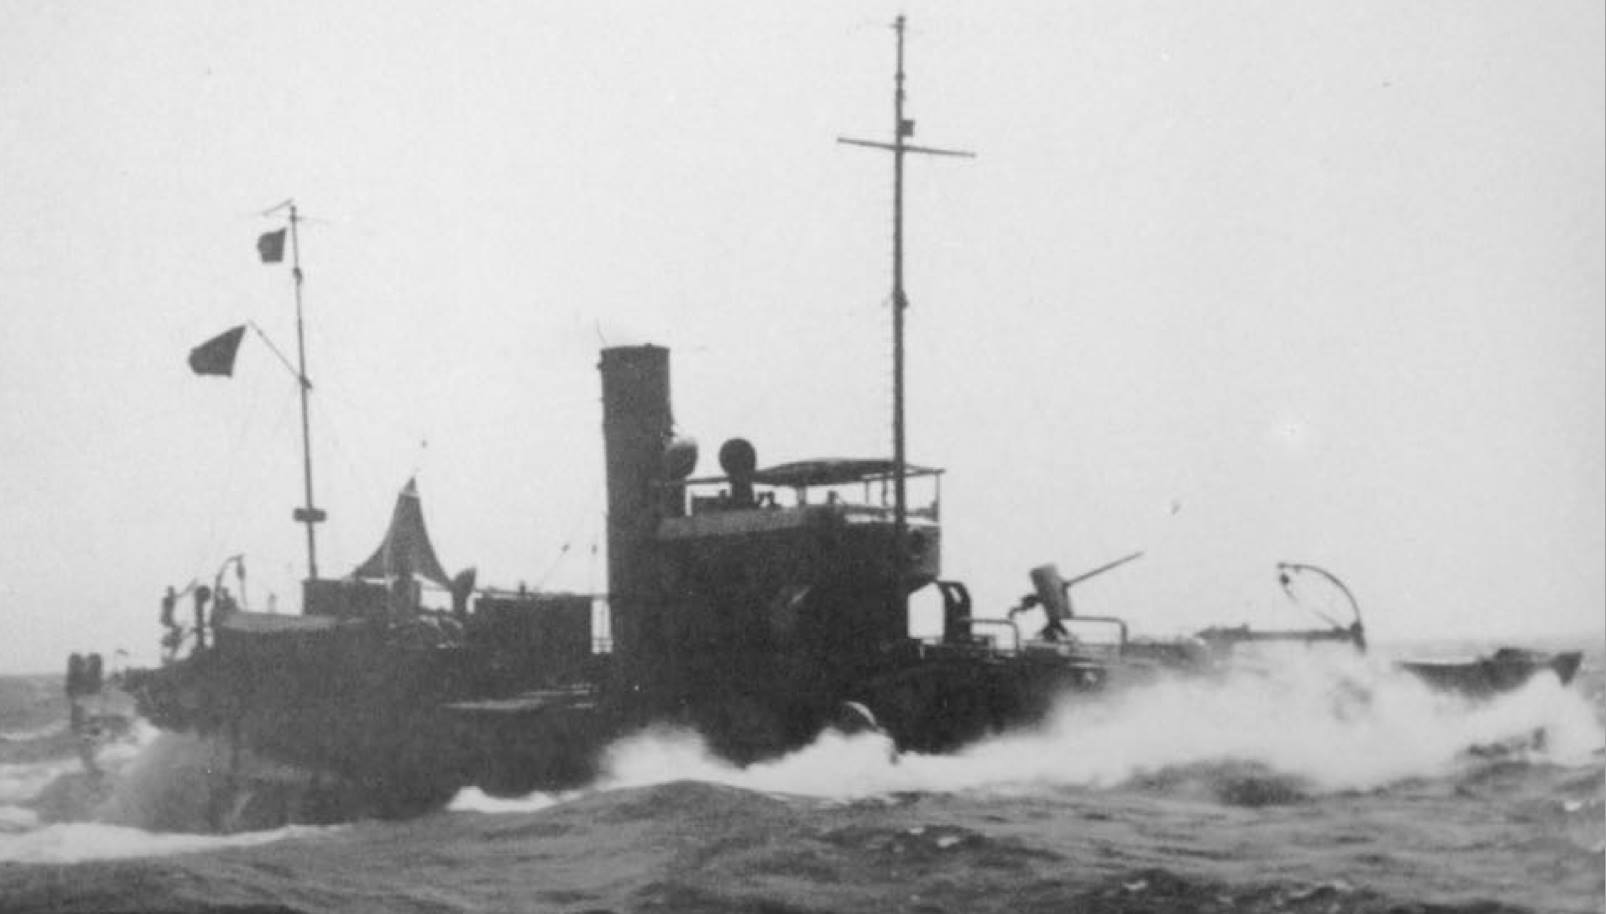
The situation inside Tobruk under this juggernaut attack very quickly became very desperate.  It literally became a fight for survival and into the fight went everyone,  including the ‘non combative’ members of The South African Native Military Corps who were given rifles and expected to fight on the front line with everyone else.  As the fight became more and more desperate, three small minesweepers, two of them South African – the HMSAS Bever and HMSAS Parktown were called into port to take on evacuation duties.

Both the Bever and the Parktown acquitted themselves in the highest order whilst under a hail of shelling and bombing – and please feel free to refer to two earlier Observation Posts’ links for an in-depth profile on their brave fight – “Under a hail of shells”; Recounting the bravery and loss of HMSAS Bever and The feisty South African minesweeper that went down fighting – HMSAS Parktown

Inside Tobruk the situation was chaotic. General Klopper – his Head Quarters now bombed out, his radio and telephone wrecked and his code booked destroyed, lost the last vestige of control.

Left with no choice General Klopper and staff could do nothing but watch the German Panzers (tanks) race past their headquarters on their way to capture the fuel dumps in the harbour.

Tobruk, beschädigte Häuser, Soldaten
South African troops in disarray as Tobruk capitulates

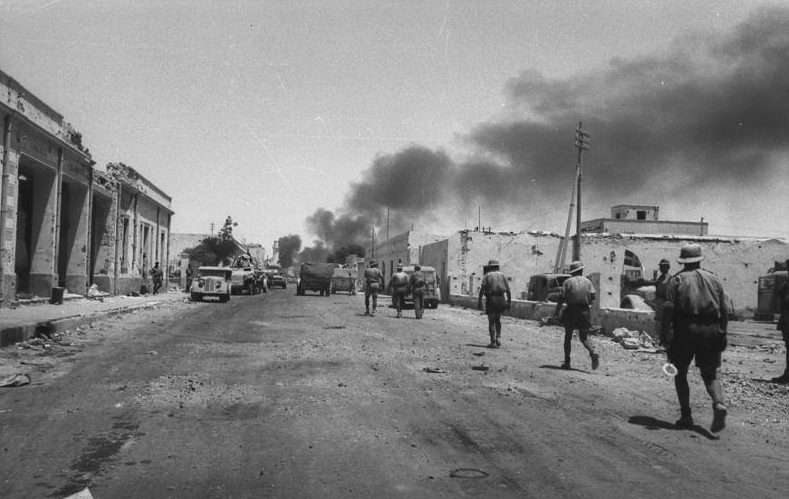
Some British and South African troops managed to break out and make their way back to Allied lines, whilst most stayed and fought a lost cause as grimly and with as much determination as they could. By dawn on 21 June 1942, Tobruk was just a pile of ruins with a massive pall of smoke reaching up into the atmosphere.  The harbour riddled with the wrecks of destroyed ships.  General Klopper gave his compass and staff car to 7 young South African soldiers determined to escape, saying, ”I wish I was coming with you.”

Surrender and shame

Shortly afterwards a small party of officers set off in a truck with a little white flag of surrender fluttering over the hood to negotiate terms of surrender, and by 09h40 Tobruk was officially turned over to Rommel. Soon after, a large white flag was hoisted over the South African Head Quarters by South African Native Military Corps drivers.

And that was it. Major-General KIopper formally surrendered with 32,000 men, including 10,722 South Africans of the 2nd Infantry Division, of whom 1,200 were members of the Native Military Corps, and all the British and Commonwealth units under his command.  Of the two South African Infantry Divisions in the North African combat zone of operations, one entire division (literally half of the South African Army’s fighting force in North Africa) went into captivity.  This and thousands of tonnes of resources – the Germans captured 2,000 tons of fuel, 5,000 tons of provisions, 2,000 vehicles and large stockpiles of ammunition – the situation now for the Allies in North Africa was a very grim one indeed.

Tobruk, Rommel, Bayerlein, englische Kriegsgefangene
Erwin Rommel inspects South African POW in Tobruk

Britain’s entire war effort was now compromised and very much in the balance, the fight from here out would be a herculean one.  It was also the single biggest capitulation of South African forces in the country’s history – before or since.  Now you can begin to see Churchill’s point, as to him it seemed more than a ‘defeat’ and more of a ‘disgrace’ – as in the Battle of Britain in 1940, without this vital deep water port, the British and Allied armed forces by 1942 found themselves once again with their backs against a wall – and as a result South Africa was going to get the full blame for it by literally every single Commonwealth country, Allied country and the British themselves.

Captivity

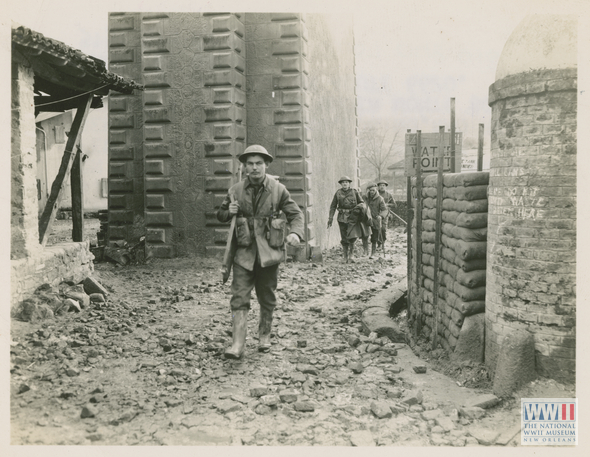
The South African, British and other Commonwealth units forced to march across the desert to an Italian POW camp.  The Italian treatment of South African and British prisoners of war was nothing short of diabolical, prisoners were murdered, punitive measures on food allocations and other atrocities became normative.

Tobruk, englische Kriegsgefangene
British and South African troops marching into captivity after Tobruk falls.

However an even worse treatment was reserved for Black members of the South African Native Military Corps and the Indian troops in captivity.  German and Italian forces displayed a complete disregard for the rights of the Indian or black POWs as they did not view them as regular troops due to Nazi and Facist doctrine and in-bred racism .

There are however accounts of bravery whilst in captivity, with a number of escape attempts and escapes.  Even that General Klopper himself managed to escape captivity in 1943.

One notable heroic deed in captivity at Tobruk was that of a South African Native Military Corps man – Job Maseko, who created a bomb using a condensed milk tin, cordite taken from bullets and an extremely long fuse to blow up a German freighter ship (F Type) in Tobruk harbour as a retaliation for his treatment as a black man and those of his colleagues by the Italians.  To learn more of his heroic tale please visit this Observation Post link Job Maseko; one very remarkable South African war hero

Rommel’s Success  

After 2 years in British hands Tobruk had fallen in 2 days, Rommel had captured enough supplies to carry him on his drive to invade Egypt. On 22 June 1942, Rommel received a message from the Fuhrer – Adolph Hitler, informing him that at the age 49 he had just been appointed Germany’s youngest Field Marshal.

Rommel celebrated that night with canned pineapple and a small glass of whisky, but after dinner he wrote his wife, ”Hitler has made me a Field Marshal. I would much rather he had given me one more division.

Tobruk, Rommel und Bayerlein, Hafen
Rommel surveying Tobruk after he captures it

But true to character, by the very next day he was on the advance again.  His order: ”Soldiers of the Panzer Army Africa! Now we must utterly destroy the enemy! During the coming days I shall be making great demands upon you once more, so that we may reach our goal.” The Nile.

Rommel would never get to the Nile and take Egypt.  For Winston Churchill the German advance in North Africa was the desperately needed ‘second front’ which would see the end of Nazi Germany, for the Germans however the North African campaign was nothing more than a side-show in support of Italian imperialism in Africa.  The bulk of their military effort was focussed on the invasion of Soviet Russia. Hitler discontinued the attack on Malta and refused to send Rommel adequate supplies, these actions would make defeat in the North African desert for Germany and Italy inevitable.

Consequences for the British and South Africans

Ironically there was an upside to the Fall of Tobruk, The defeat did have some positives. It forced Churchill and the British to fundamentally re-appraise the Command and strategy in North Africa.  It led to a shake up of Command which would see General Bernard Montgomery take over overall Command of the British 8th Army (after Churchill’s original replacement, General William Gott was killed in action). Under ‘Monty’ the entire operation received a boost in resources, purpose and training (including much-needed American armour).  Monty and the 8th Army would then go on to victory at El Alamein and more successive victories for the British and Commonwealth forces followed (eventually with American assistance when they entered the war), and it would see the entire German Afrika Corps pushed back completely from North Africa and into captivity.  The issue of Tobruk and Britain ‘against the wall’ gradually became a distant memory.

monty
Lieutenant General B L Montgomery, General Officer Commanding Eighth Army, watches the beginning of the German retreat from El Alamein from the turret of his Grant Tank. He is wearing his famous tank beret.

The remaining South African forces in North Africa i.e, The 1st South African Infantry Division would go on to recover their reputation somewhat in these strings of success under Montgomery, also starting with Battle of El Alamein.  However Tobruk continued to haunt them and the British still remained dubious of South Africa’s military prowess by the time the next phase i.e. the Italian campaign came around.

After the 1st South African Infantry Division’s job was done in North Africa, the 6th South African Armoured Division was formed to continue with South Africa’s World War 2 contribution.   The British initially wanted to side-line the 6th South African Armoured Division and allocated it just to go to Palestine – in what was really a side-show.

At this point it is actually Churchill who comes around to bat for the South Africans, despite his anger and lambasting of the South Africa military establishment as a ‘disgrace’ over Tobruk, it is Churchill (influenced by Jan Smuts) who insisted that the South African 6th Armoured Division join the main thrust of the war in Italy and not sit it out in Palestine.  The 6th South African Armoured Division then went on to serve in Italy with great gallantry and distinction – and ultimately recovered the country’s pride.

General Klopper’s career post Tobruk

The fall of Tobruk came as a shattering blow to the British public and British morale. General Klopper came in for most of the criticism, but was he entirely to blame?  The inquest into the Fall of Tobruk found fundamental short-falls in overall British Command and the decision to invest in Tobruk and concluded that General Klopper was placed in an extremely difficult position at Tobruk from which he had little hope of a proper defence – the circumstances he had faced were very different to those the Australians had faced before.  In conclusion to the inquest General Klopper was exonerated for the loss of Tobruk.

General Klopper however did come into a hail of controversy as to his command ability and experience subsequently to the inquest, and had South Africa remained a British Dominion after the war it would have been doubtful that his career would have advanced.

Luckily for General Klopper, the Afrikaner Nationalist government came into power in 1948, and he found more favour with them than he did under the old Smuts government. The new Nationalist Minister of Defence, Frans Erasmus and his ‘Erasmus Reforms’ of Union Defence Force sought to advance ‘Afrikaner’ personnel above all else – and he saw to it that Klopper was very controversially promoted to serve on the Army Chief of Staff from 1951 to 1953. After that a stellar career ensued as he was promoted to Inspector-General from 1953 to 1956, and finally he took the most honoured position in the South African Defence force as Commandant-General, which is the head of the South African Defence Force, a post he held from 1956 to 1958.

In conclusion

To answer the question of whether Churchill’s comment that South Africa’s capitulation at Tobruk was the difference between ‘defeat’ and ‘disgrace’ it can honestly be said that Churchill’s comment is somewhat unfair, however given the circumstances and the timing it is understandable that he was enraged, the consequences were very bleak for the British War effort.

Churchill was equally vicious in his remarks as to his own forces when the British garrison at Singapore capitulated due to poor command earlier in February 1942 with an equal consequence in the Asian Pacific field of operations. On Singapore’s fall Churchill asserted that the British commander General Percival’s decision to surrender was “the worst disaster and largest capitulation in British history”.

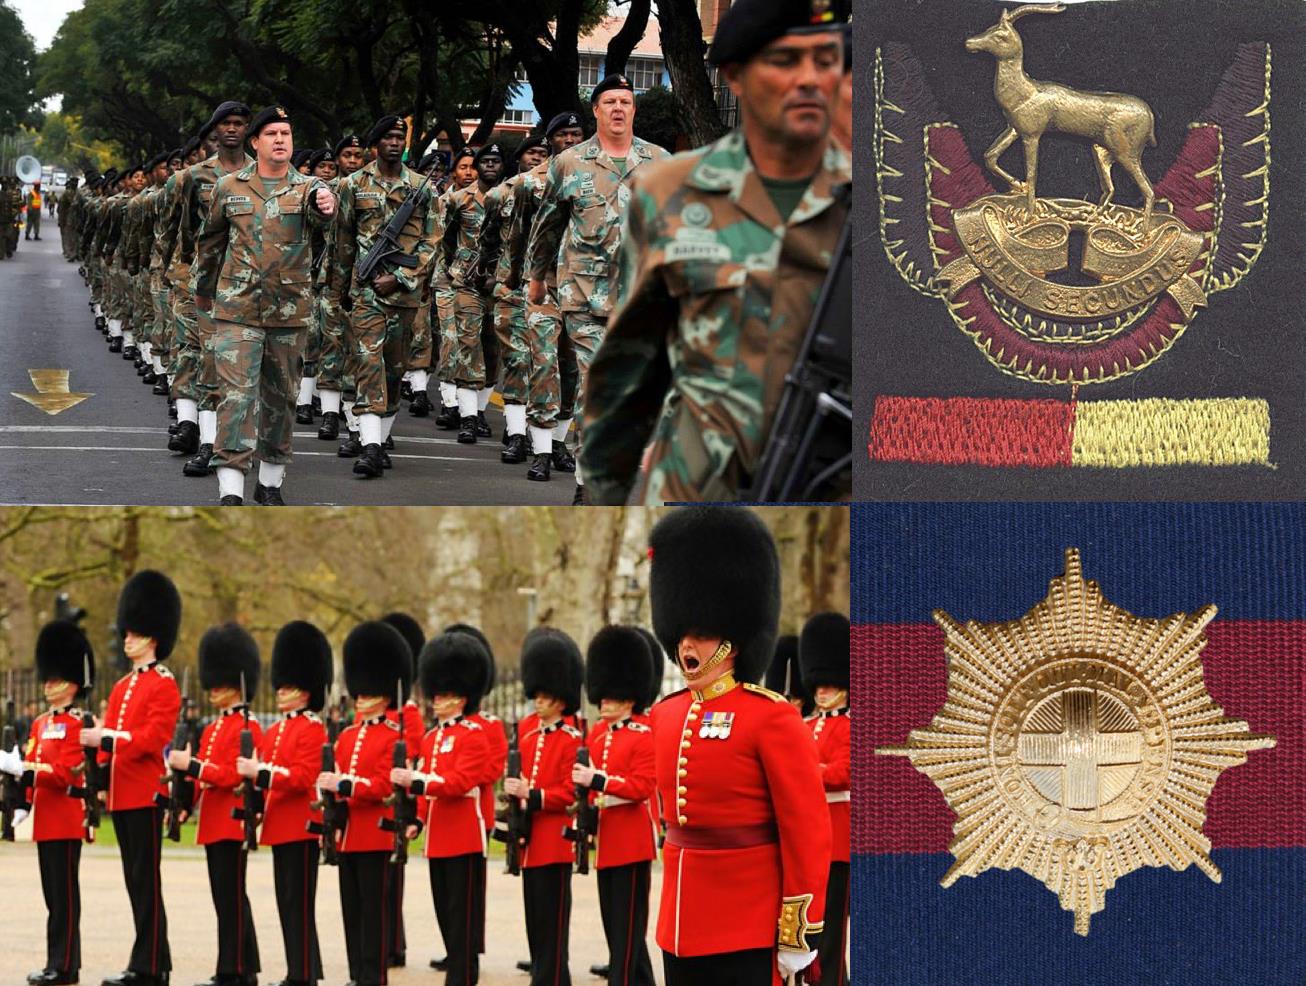
So we have to take Churchill and his comments in context of the man, his politics and the circumstances he found himself in. Also, in the end it is Churchill himself who plays a role in recovering South Africa’s pride by insisting the 6th Armoured Division take part in the  Italy campaign – even placing British Household Division Guards under South African 6th Armoured Division command as their Infantry support.  In the greater scheme of things South Africans can hold their heads very high in the role they played ridding the world of Nazism in what Smuts would call ‘the Great War for Liberty and man’s Freedom’ – Churchill’s need to alliterate one of his quotes aside.

0aayzhghjgfjhf9999777_7

Researched by Peter Dickens  

References – Wikipedia, Extracts and references from. THE GREATEST MILITARY REVERSALOF SOUTH AFRICAN ARMS: THE FALL OFTOBRUK 1942, AN AVOIDABLE BLUNDER OR ANINEVITABLE DISASTER? by David Katz. Extracts from Military History Journal Vol 7 No 6 – December 1988 TOBRUK – 1942 Compiled and translated from the official War Diary of the German Supreme Command by Jochen OEO Mahncke.  Image copyrights – Imperial War Museum. Narratives from North Africa: South African Prisoner of War experience following the fall of Tobruk, June 1942 by Karen Horn.

“Under a hail of shells”; Recounting the bravery and loss of HMSAS Bever

The third South African ship to be lost in the Mediterranean during the Second World War was the HMSAS Bever.  She was the brave little minesweeper who had earlier fought her way out of Tobruk with her sister ship – the  HMSAS Parktown.  She had a very proud legacy from her actions in Tobruk and her loss later in the war was deeply felt, so let’s have a look at another brave South African whaler, converted to a fighting ship, punching way above her weight.

On the 10 October 1941, the little whaler ‘Hektor 10’ was commissioned in South Africa as His Majesty’s South African Ship (HMSAS) Bever for wartime service as a minesweeper.

Barely a month later, on the 1 November 1941, she joined the small flotilla of South African minesweepers sailing from Durban for the war in North Africa.  This flotilla was made up of the HMSAS Bever, HMSAS Gribb, HMSAS Seksern, HMSAS Imhoff, HMSAS Treern, HMSAS Parktown and HMSAS Langlaagte.

All were former whale catchers of about 260 tons built between 1926 and 1930 and each was fitted with one 3 inch gun plus smaller QF guns, depth charges and LL sweeps.  They are the second group of South African minesweepers to sail from Durban for the Mediterranean.

Little would they know that all of them would make a significant difference to the war effort – and sadly, three of the four ships South Africa would lose during the war would come from this flotilla – the HMSAS Parktown, the HMSAS Bever and the HMSAS Treern.  The first South African minesweeper had already been lost in the combat zone by this stage – the HMSAS Southern Floe (see The Southern Floe was the SA Navy’s first ship loss, but it also carries a remarkable tale of survival.)

17546669_10154957768326480_68053892438750609_o

HMSAS Southern Floe

The fall of Tobruk

The HMSAS Bever and HMSAS Parktown sailed from Alexandria, Egypt on the 9 June 1942 as part of a escort for a convoy bound for Tobruk. During the passage they see combat for the first time when the convoy is attacked and the HMSAS Parktown is involved in the gallant rescue of 28 survivors from a ship that had been sunk, many of whom are badly burnt.

After their arrival in Tobruk on 12 June 1942, the HMSAS Parktown and her consort, HMSAS Bever (at this stage under the command of Lt P A North), are tasked with keeping the approaches to Tobruk clear of mines.

parktown

HMSAS Parktown

In 1941 the Australians had held Tobruk for 9 months, until Rommel’s withdrawal of his Axis forces to the west.  Tobruk secured, by 1942 the Allied Middle East Command decided to leave a smaller ‘temporary’ force to hold Tobruk while a new strike force was built up near the frontier.  The task of defending Tobruk was left to the South Africans. The new  garrison was to be formed by the 2nd South African Infantry Division with General Klopper, a major general of 1 month’s standing, given command of Tobruk.  In addition, units of British and Indian detachments fell under South Arican command defending Tobruk.

It is generally understood that by this stage Tobruk’s defences were in a poor shape with much of the armour and artillery taken away to the new frontier, the Western and Southern sides of the port were well defended by the South Africans, but the East side was weak, and it proved to be fatal.

As usual, Rommel had devised a ruse for capturing Tobruk. Only his infantry approached the western perimeter, while his mobile forces swept on past, to give the impression that the German and Italian armour was heading straight for the Egyptian border (sending radio messages to that effect to complete the ruse).  He then swung his mobile armoured forces around and attacked Tobruk from its weak point – the eastern perimeter.

Rommel’s zero hour was 05h20 on 20 June 1942. As dawn broke long black lines of tanks, trucks and infantry slowly started to move forward. As it grew louder and closer to Tobruk waves of German Stukas and Ju 88’s aircraft appeared overhead (Rommel pressed every single Axis airplane in service in North Africa into taking Tobruk).

As the heavy artillery began to fire, the planes released their bombs and quickly got out of the way for the next wave, operating a shuttle service between the defence perimeter and El Adem airfield, 10 miles away. They pounded a gap open 600 yards wide. Behind them, under cover of artillery barrage and half-hidden by smoke and dust, German and Italian sappers raced forward to lift mines and bridge the tank traps with tanks and infantry racing through the gaps. As they move forward, they lit green, red and purple flares and the Stukas dropped their bombs just ahead of the advancing, multi-coloured smoke screen while the other planes and artillery blasted the South African rear (the seaward side of the port) with shells and bombs.

Tobruk, beschädigte Häuser, Soldaten

Surrounded South African troops going into captivity as Tobruk falls

Inside Tobruk the situation was chaotic. General Klopper – his HQ’s bombed out, his radio and telephone wrecked and his code booked destroyed, lost the last vestige of control.  It became clear that a crisis was imminent. Late that same afternoon HMSAS Parktown and HMSAS Bever were ordered to enter harbour to embark evacuation parties and get as many Allied troops out as they can.

By 20:00 that evening the two minesweepers watch the Axis forces entering the town and then reach the harbour shortly afterwards. The rapidity of the attack causes great confusion, however, the two brave little South African minesweepers still manage to embark most of the men allocated to them before they sail under a hail of artillery and gunfire.

“It was like hell”

The account is best described by an ordinary South African, Stoker Petty Officer (SPO) Turner who was on the HMSAS Bever (‘Jerry’ means the Germans).

“At the end of the fifth week we had been there, Jerry started a terrific push which carried him through almost to Tobruk. We had some very nasty air raids, but the warning came one night when a shell whistled over us and landed behind the town. We knew then that they had brought up big guns and were going to shell us out of the place.

Our ship (HMSAS Bever) and our partner ship (the HMSAS Parktown) continued their work through a week of this shelling and I can assure you it was very uncomfortable.

Then we were informed that Tobruk was besieged, as Jerry had completely surrounded us. On Saturday, June 2O, it happened, and that date will be impressed on my memory as long as I live. It was early morning and we were just pulling away to start our daily job, when the shells started coming over with a vengeance.

They had found their range and planted their shots just where they wanted them, in the town, on the quay, round the wrecks, at the oil berth – and we were sailing along with this lot falling around us:

Then bombers appeared on the scene. We went out, did our job, and returned to our anchorage. This went on until about three clock in the afternoon. The target area was mostly the quay and wharfs.

Then Stukas appeared over the hill and started giving our troops the works. It was like hell. Shells, level bombing and dive-bombing – and there we were at anchor in the centre of it all, expecting any moment to stop something and be blown sky high.

At about four o’cock Jerry broke through our lines and our lads had to retire. This was all done in an orderly manner, and they burned everything they had to abandon. Then we received orders to go to the quay, which all the available ships did and picked up what men we could under a hail of shells. As we pulled away, a shell got us in the funnel. The quay was blown up and Jerry tanks entered the town.

Sandy and I, down in the engine room, gave her all she had and she never travelled faster in her life. Meanwhile a motor launch laid smoke screen for us. Jerry tanks opened up on us from the shore and in all we received four hits by explosive shells.

It was a miracle that we were not blown to bits, because the tanks along the shore were following us with their fire. At the harbour entrance the fire was even more concentrated and only God Himself took us past that. We lost the steward in our dash. As he tried to help a man out of the water into the boat, an exploding shell killed him.

The last I saw of Tobruk” concludes Stoker Petty-Officer Turner “was flashes and flames and a great pall of smoke on the horizon, as the troops continued giving Jerry everything they had till the end.”

Tobruk, Rommel und Bayerlein, Hafen

Erwin Rommel surveys Tobruk after capturing it

Fighting their way out

Fighting bravely next to the HMSAS Bever was the HMSAS Parktown, both these South African vessels received order to embark as many men as possible from shore and to await sailing orders. Late that afternoon Bever was instructed to sail.  Parktown would follow later.

Heavily laden with men clinging to all parts of ship, HMSAS Bever put to sea. By that stage at least six German tanks had taken up a position on shore with their guns covering the harbour. The minute HMSAS Bever began to move out of the harbour she was heavily engaged by the tanks and received several direct hits.

The Bever’s commander, Lt Peter Allan North was later awarded the Distinguished Service Cross for gallantry as he decided to take the ship out himself and ordered all men below decks. One man disobeyed the order, a steward who came up on deck to help a soldier who was trying to climb aboard, the two of them were killed instantly by an incoming tank shell.

The Bever cleared the harbour but the attack did not stop there as German bombers swooped in on her, with all her guns blazing the Bever beat off the air assault.

The HMSAS Parktown was the next to leave Tobruk with hundreds of the men from the garrison aboard.  Her fight out the harbour however met with tragedy.  During the night just off Tobruk port the Parktown and Bever became separated as the Parktown goes to the assistance of a disabled tug, also crowded with men.

After taking the tug in tow the HMSAS Parktown’s speed is slowed.  At daybreak on the 21 June the Parktown came under attack by Italian “MAS” torpedo boats (E-Boats), directed to the slow-moving vessel by a German reconnaissance aircraft.  Fighting all the way with all guns blazing the Parktown was eventually overwhelmed by the faster E-Boats and sunk with the loss of many lives.

For a full account of this brave action by the HMSAS Parktown please feel free to read the Observation Post  The feisty South African minesweeper that went down fighting – HMSAS Parktown)

The HMSAS Bever eventually safely reached Mersa Matruh with holes through her funnels, with mast rigging shot away and riddled with splinter holes.

Awards and Citations for the crew of HMSAS Bever

The following awards and decorations to officers and men of HMSAS Bever were bestowed by King George VI.

Distinguished Service Cross. Lieutenant Peter Allan North (H.M.S.A.S. Bever). Comes from Amanzimtoti. Natal. Age 28. Before the war employed in Geduld Mine. Rand. Served in Training Ship General Botha.

Distinguished Service Medal. No. 69628. Petty Officer Alan Sidney Hargreaves (H.M.S.A.S. Bever). Home address, 8. Worcester-road. Sea Point. Age 26. Served in Training Ship General Botha.

Mentioned in Dispatches. No. 132522. Engine-room Artificer Alexander James McCall (H.M.S.A.S. Bever) Home address, 7, Antrim-road Three Anchor Bay. Engineer in private life.

22520227_2035612373334417_1329303744284136988_o

HMSAS Bever

After Tobruk

By November 1944 HMSAS Bever had been in the Mediterranean for nearly two years, by now the war in the Mediterranean had over to the European mainland and the liberation of Greece and conquest of Italy were underway.

Accompanied by another South African minesweeper HMSAS Seksern and a flotilla of other converted trawlers, the Bever arrives in the Gulf of Nauplia (south of the Gulf of Athens) late on 29 November 1944 from Herakleon in Crete, about 160 miles to the south-east.  On that first evening, two motor launches carrying out a skimming sweep destroy several mines and clear a narrow channel enabling the flotilla to anchor for the night.

1891559_464422300374999_2454611779820884_o

Ships company HMSAS Seksern Benghazi 1943

The loss of the HMSAS Bever

Next morning (30 November) the clearance continued, with HMSAS Seksern being used as a mark-ship owing to the low visibility (mist and rain-squalls). So many mines now explode in the sweeps that progress soon slowed down and finally halted at about 14:00 whilst four of the ships hove to in order to repair their gear. HMSAS Bever, stationed astern of the trawlers to deal with unexploded mines, also stopped.

At 14:30, while manoeuvring her engines to keep in position, the HMSAS Bever struck a mine with the inevitable result for so small a ship: the bridge collapsed while the after-part disintegrated, its fragments mingling with a huge discoloured geyser which shot up many times higher than the ship’s masthead; and by the time the spray and steam had blown clear, nothing remained but the fore-part which turned over and sank a few seconds later.

Although the normal practice had been followed of making all hands not actually on duty below, remain on deck, considering the rapidity of Bever’s destruction, it is remarkable that eight men were to survive and be picked up alive. The captain and second-in-command were literally blown off the bridge, ending up in the water some distance away. The other survivors appear to have left the ship in much the same manner. One man died of his injuries soon after but the remainder, after receiving first-aid treatment, all recovered satisfactorily.

22308811_10155537271456480_3745202244434378650_n
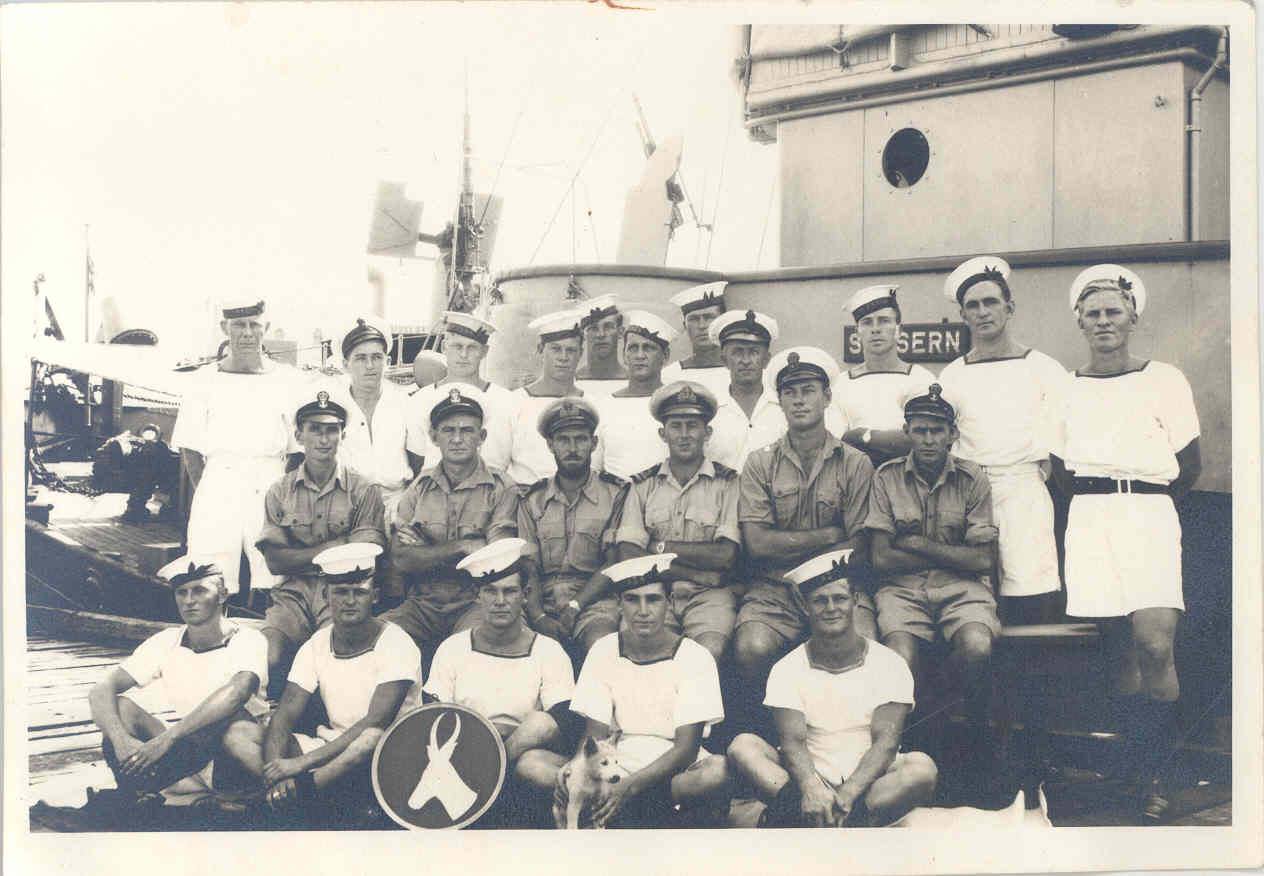
The brave men of the HMSAS Bever sacrificed that day are outlined on the honour roll below (MPK means “Missing Presumed Killed”):

ARMERANTIS, Sideris, Stoker 1c, 282953 V (SANF), MPK
DE PACE, Luigi S, Petty Officer, 66539 V (SANF), MPK
DE REUCK, Leslie B, Telegraphist, 75320 V (SANF), MPK
DREYER, Peter, Leading Cook (S), 585236 V (SANF), MPK
HIGGS, George E, Stoker 1c, 562712 V (SANF), MPK
HUSBAND, Charles A, Stoker 1c, 280098 V (SANF), MPK
KETTLES, John D, Engine Room Artificer 3c, 562458 (SANF), MPK
LAWLOR, Robert J, Act/Chief Motor Mechanic 4c, P/KX 127225, MPK
LINDE, Carl M, Able Seaman, 71194 V (SANF), MPK
LYALL, John D R, Stoker 1c, 562179 V (SANF), MPK
MATTHEWS, William R, Leading Wireman, 562794 V (SANF), killed
PHILLIPSON, Joseph H, Signalman, 181160 V (SANF), MPK
RODDA, Harold J, Stoker 1c, 70451 V (SANF), (served as Harold J Andresen), MPK
SCRIMGEOUR, Quintin, Petty Officer, 69691 (SANF), MPK
TRUSCOTT, E (initial only) W, Able Seaman, 585184 V (SANF), MPK
WHITE, Claude, Leading Seaman, 586420 V (SANF), MPK
WILLIAMS, Desmond, Able Seaman, 70433 V (SANF), killed

The end of a very gallant South African fighting ship. May they all Rest In Peace.

supporting-poppy-appeal


Researched by Peter Dickens, extracts taken from the Military History Journal, Volume 9, Number 1 – June 1992  THE STORY OF A WARSHIP’S CREST by F V Demartinis. Extracts also taken from Day by Day SA Naval History by Chris Bennett. Casualty Lists of the Royal Navy and Dominion Navies, World War 2 by Don Kindell. Images of South African vessels courtesy Allan du Toit and reference from his book ‘South African Fighting Ships’.

‘Blue Stone’ debunked

14102646_631520407017695_4015987586448349141_n
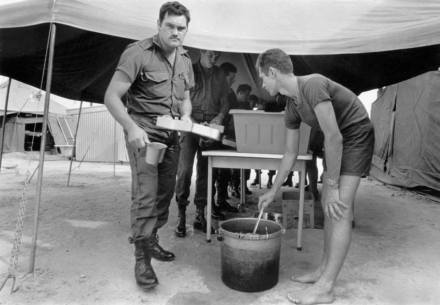
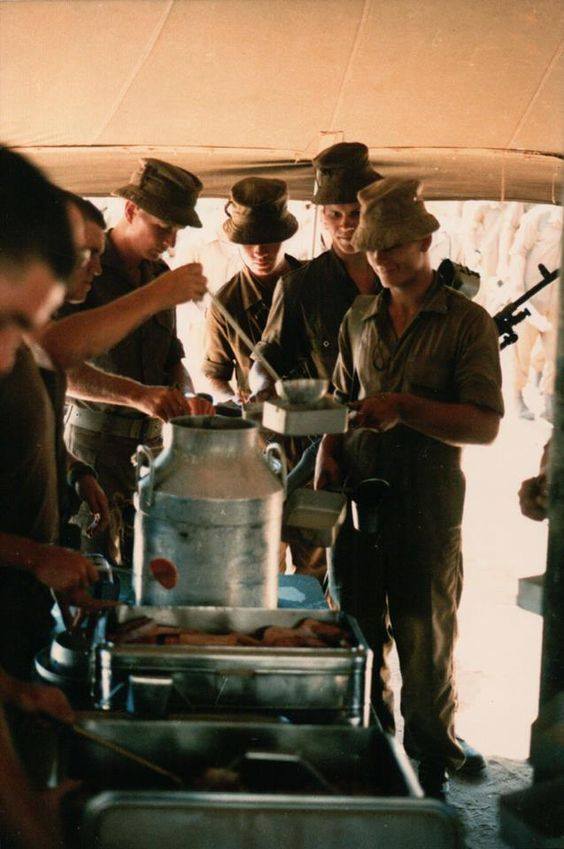
Back in the day, there was always a base rumour that the SADF put ‘Blue Stone’ into the food and drink to repress the sexual urges of young National Servicemen.  It was always declared as proof positive by some or other young recruit whenever the coffee urn came out and the ‘strange salty taste’ was attributed to this drug.

However the idea of drugging soldiers with a suppressant to ‘calm’ them down – especially sexually – is not an old one, and it has been a rumour in military forces the world over.  The myth of ‘Blue Stone’ originated to a degree in the British Army during World War 2.

Regular army soldiers in the British Army attested that ‘someone’ (whoever that ‘someone’ was nobody knows) put bromide in their food to keep their sexual libido well suppressed. The myth that the new recruits are so virile that they need to be tamed and contained by drugs is in an odd way a  backhanded compliment to young soldiers and their sexual prowess.

It was not just the British who came up with this myth, military recruits around the world have the same story.  In Poland it is that the coffee has been treated, while in France, the legend is that the French soldiers are given adulterated wine. The South African recruits also called this mysterious substance ‘blue stone’ and claimed it was added to their coffee to keep them sexually calm, while in Germany, the tale is that German recruits are kept in line with a double dose — the addition of iodine into the coffee as well as soda in the meat.

image

Bromine is one of the 92 elements that belong to the halogen family. These halogens include fluorine, chlorine, bromine and iodine. Discovered by the French chemist Antoine-Jérôme Balard in 1826 from the residues left over after sea salt had been taken out of sea water, and in small doses it has been used in medicine, mainly because of its sedative effect — and this is where the myth comes from.

Bromide as a sedative in the UK dates back to 19th century Victorian Britain. Children of the upper classes were surreptitiously fed salts of bromine to sedate them, and calm down the natural vigour and exuberance of youth (delivered to them via their own personal salt shaker at the table).

So if bromide salts made you sleepy, the logic was extended to include the effects of reducing sexual libido as a side effect.  But the simple fact is that in the military, recruits undergoing basic training (and even combat deployment) are stretched to the limit in terms of physical exhaustion and lack of sleep.  It is simply the rigours of soldering that led to tiredness and subsequently any sort of suppressed sexual libido.

There are no recorded cases of South African national servicemen been universally drugged with a sexual suppressant.  It’s a myth lads, Simply put – the coffee tasted bad because it was low-grade crap coffee.

61OlMrZT-HL
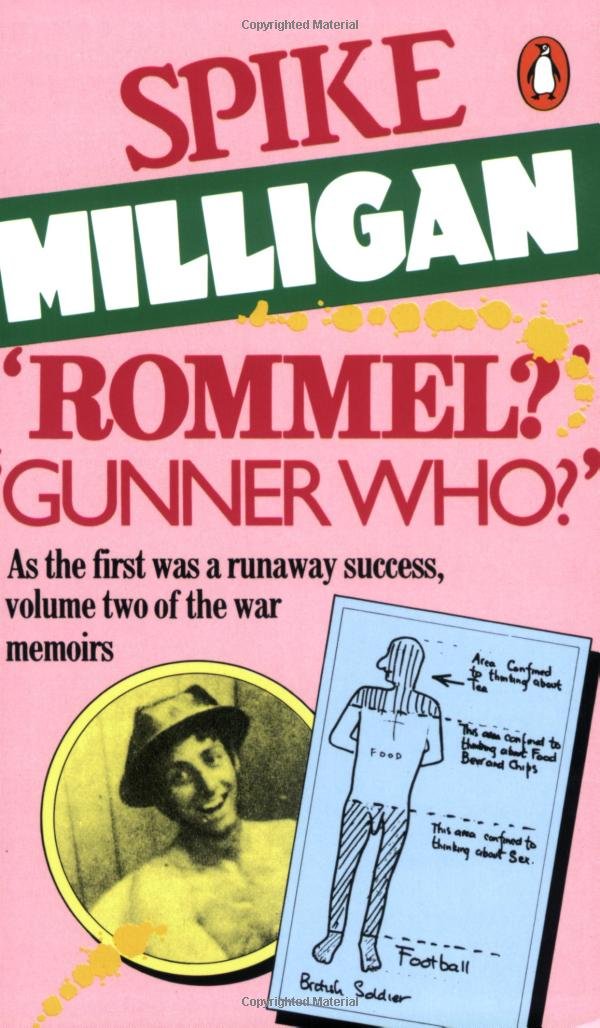
As to the myth of bromide, the comedian Spike Milligan, who served with the British Army in World War II, summed the myth up very well in his book Rommel? Gunner Who?

“I don’t think that bromide had any lasting effect, the only way to stop a British soldier feeling randy is to load bromide into a 300lb shell and fire it at him from the waist down.”


Written by Peter Dickens.  Reference Dr Karl’s Great Moments in Science.  Feature photo copyright Peter Marlow


South Africa’s very own Communist Revolution – The Rand Revolt of 1922

The narrative that many South Africans understand of The Rand Revolt today is one linked to Jan Smuts, sending tanks and aeroplanes to brutally repress a miners strike murdering his own kind – white South Africans, and it is a narrative his opposition, the National Party, used repeatedly to criticise Smuts for political expediency for decades.

The Nationalists went further, as during the Apartheid period Smuts was painted as traitor to his own ‘Volk’ (people) partly because of the actions he took to quell this ‘miners strike’ and adding to this was the example of Jopie Fourie and the ‘1914 Afrikaner Revolt,’ both of which proved beyond doubt Smuts’ betrayal and brutality to his own kind, certainly according to the Nationalists.

However, like any history derived for political expediency, much of this above narrative is very incorrect.  The truth is the Rand Revolt was much more than a simple miners strike and a deep irony sits behind the old Nationalists claims of Smuts’ betrayal – as the nationalists had found sympathy using their traditional enemies – the Communists – in order to gain political points. It is the strangest of bedfellows on which to press a criticism.  The truth is The Rand Revolt was South Africa’s first ‘Communist Revolution’ and the rebels (not just strikers) were not Afrikaner Boere ‘Volk’, they were, for the most part, led by a bunch of very militant English Communists with origins in Great Britain.

cf3a58deee1c56e29aca7e29793bef26

These Communist miners were joined by the ‘Syndicalists’ in their upcoming fight to overthrow the South African Union government, the Syndicalists were a similar organisation to the Communists as they held the same view – that an economic system should exist where the worker ‘syndicate’ owns the mine, not the capitalist.

These miners were in fact the same miners who provided the British with the trigger to start the Boer War, the same ‘British’ miners who repeatedly protested for their workers rights to the old Transvaal Government, and even then Paul Kruger sent in his infamous ‘ZAR’ Policemen to baton and break up these miners’ strikes and protests on the Rand.

They were also the rational behind the Jameson Raid. Leander Starr Jameson and his colleagues on the mines in Johannesburg planned the raid ostensibly to liberate these miners from Transvaal government oppression (coupled of course with Rhodes’ ideals of imperial expansionism). This time the Jameson ‘revolt’ and miners uprising was universally crushed by the Transvaal government (The old South African Republic) who sent in their military Commandos to put an end to it.

The white miners on the Rand and their issues, which almost universally revolved  around citizen and worker rights, were a constant thorn in both Boer Republics, they were the reason behind the destruction of the Boer nation by Britain in the 2nd Anglo Boer war, friends of the Afrikaner ‘Boer’ population they were not.

So now that we have dispelled the first miss-truth, let’s have a look at what this revolt was really all about and ask ourselves if Smuts had any alternative to the course he took. Also lets hypothetically challenge whether the Rand Revolt of 1922 would have been handled any differently by the old Transvaal government (should the Boer War not have happened) and the Nationalist government (should they have been in power at the time of the revolt instead of Smuts).

Origins of a Communist Rebellion in South Africa

Emblem_of_the_South_African_Communist_Party
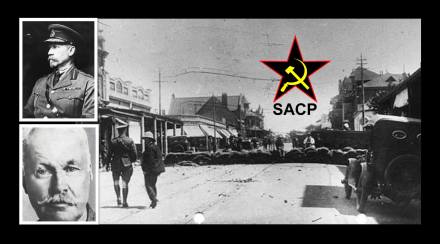
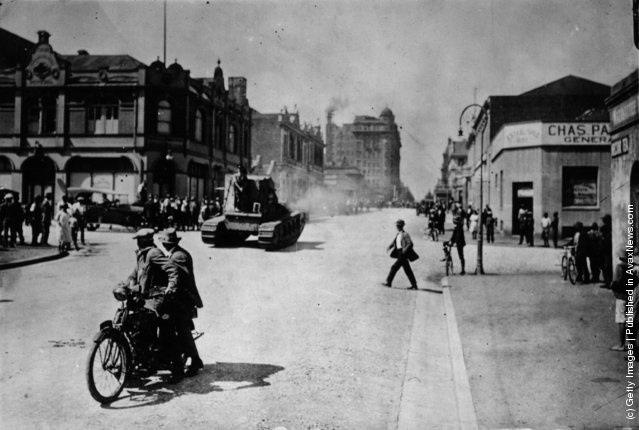
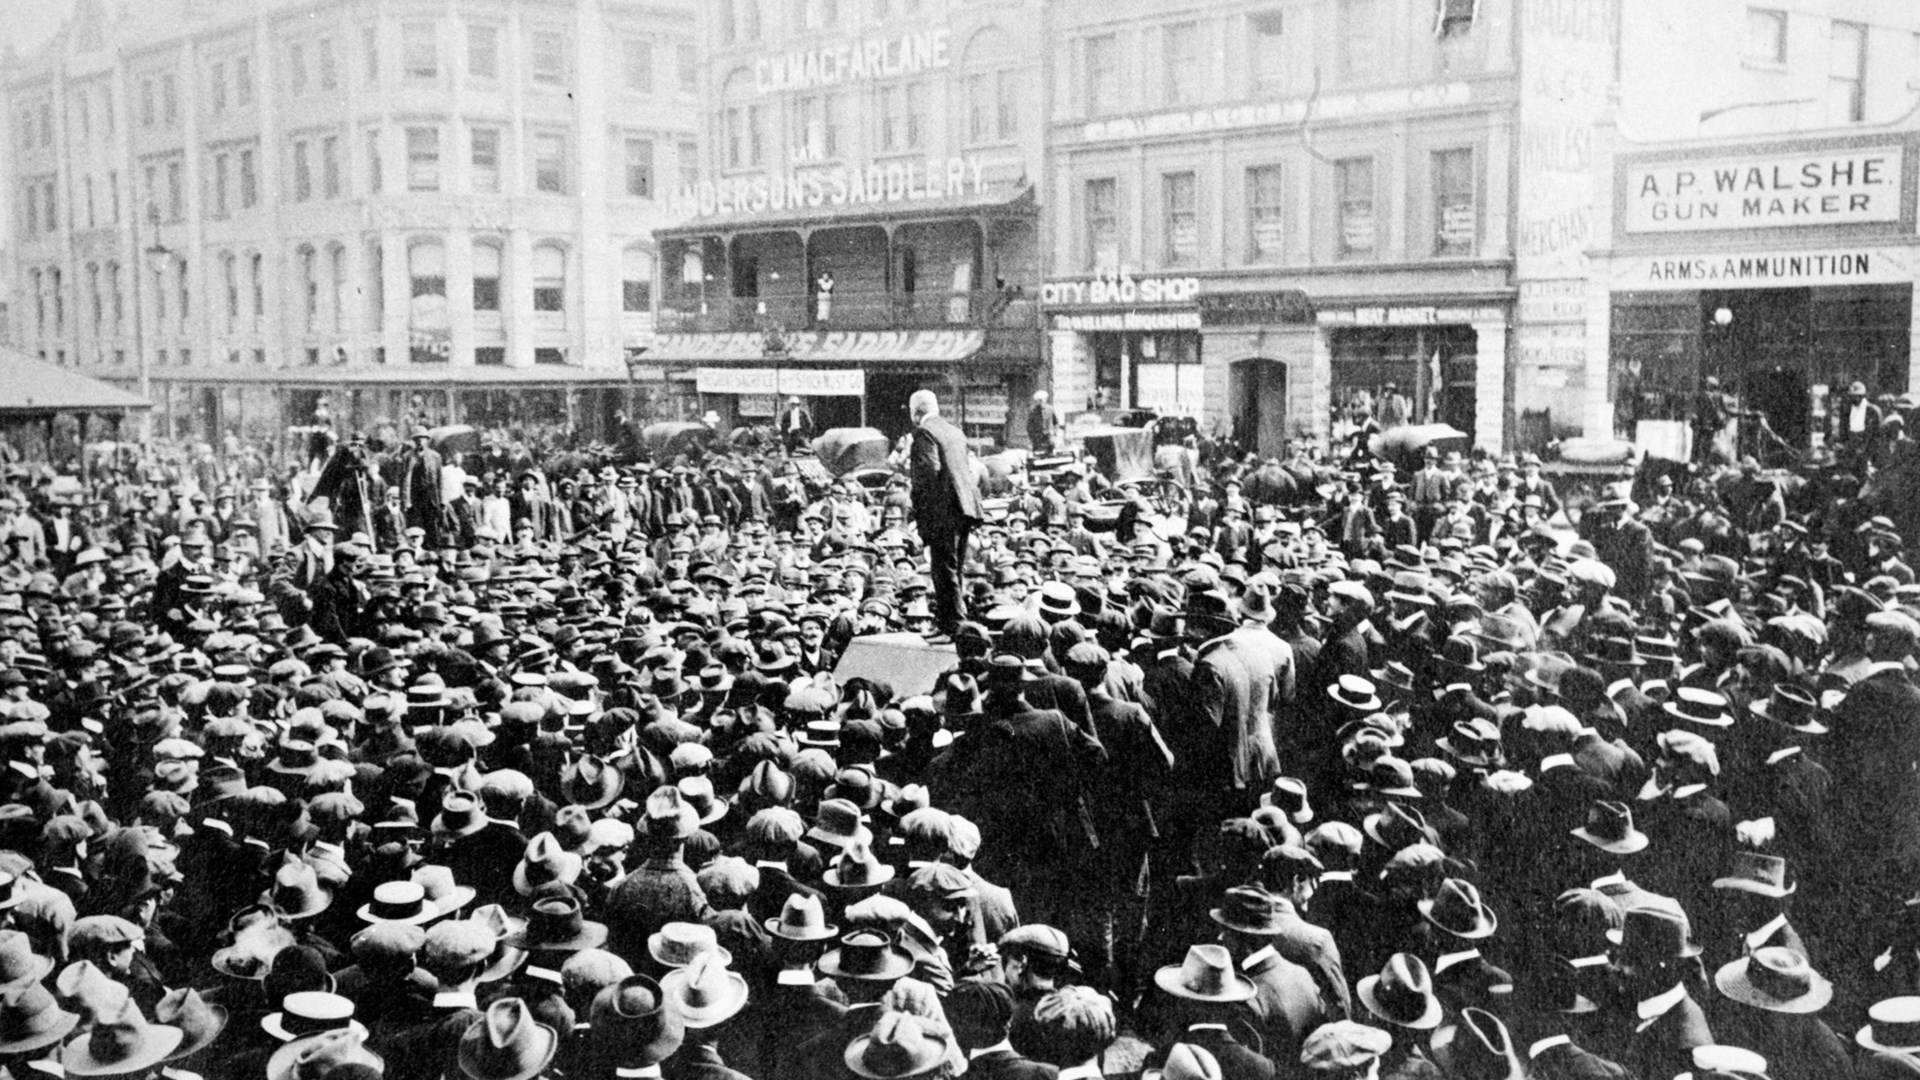
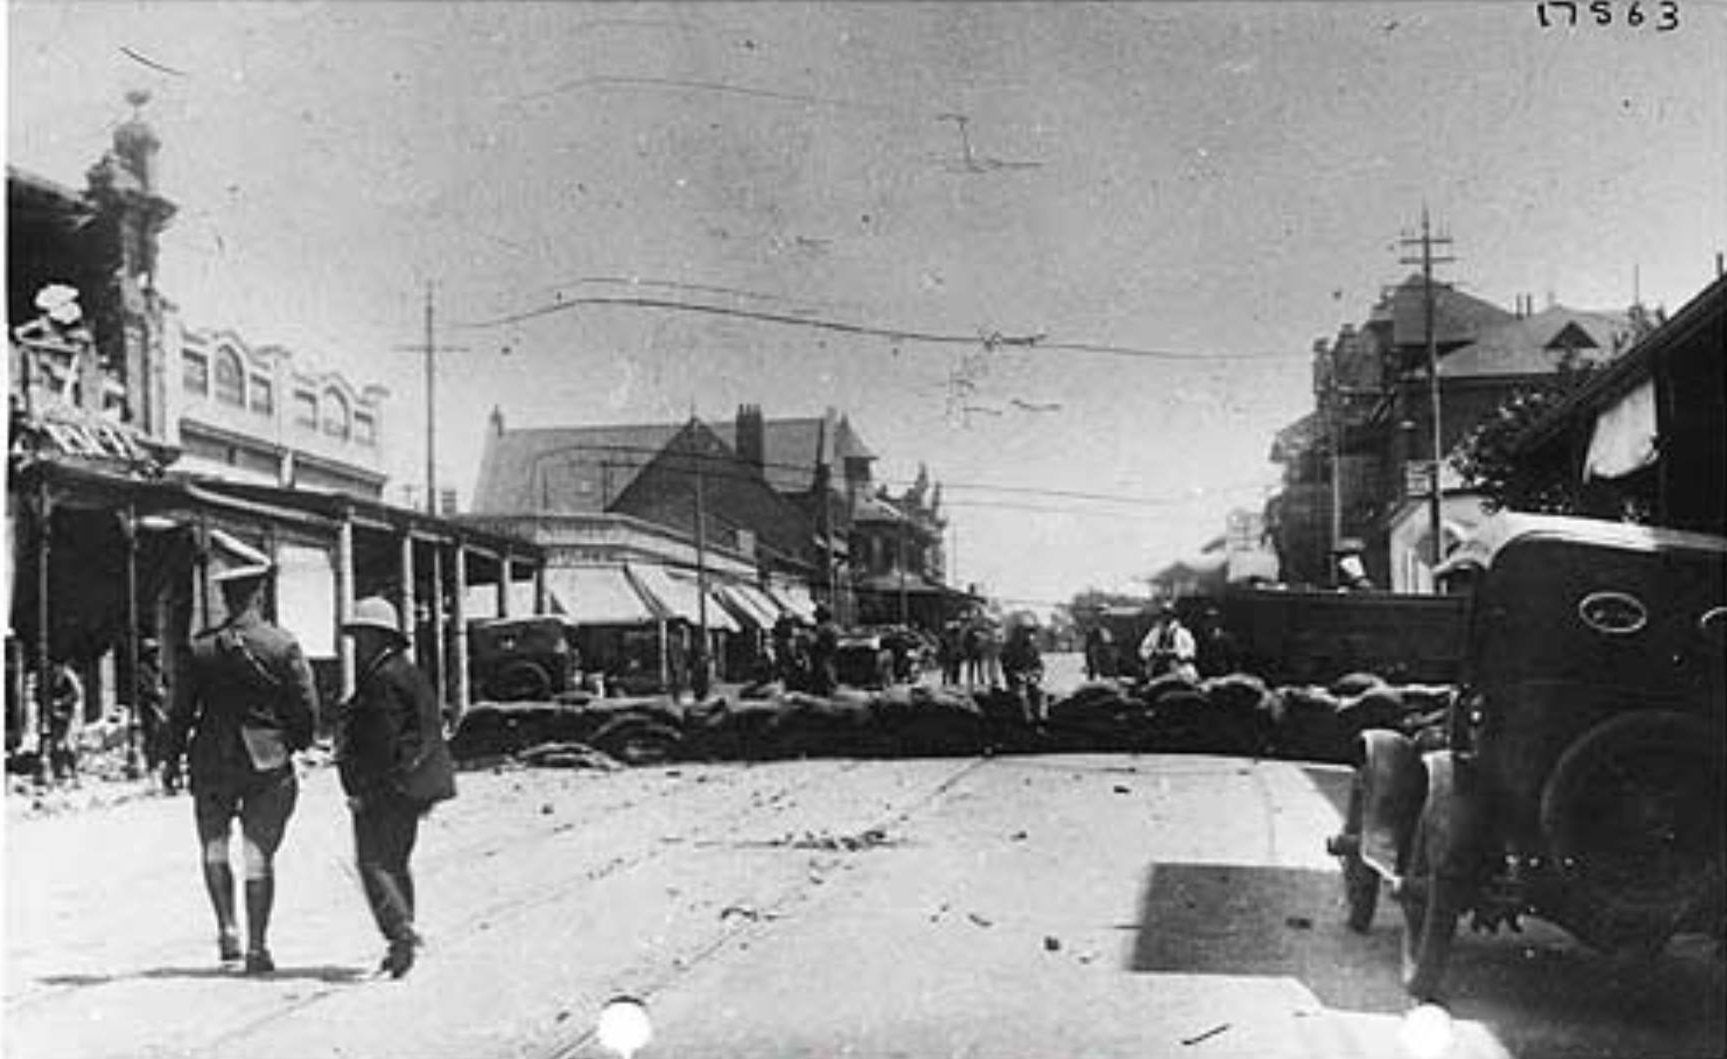
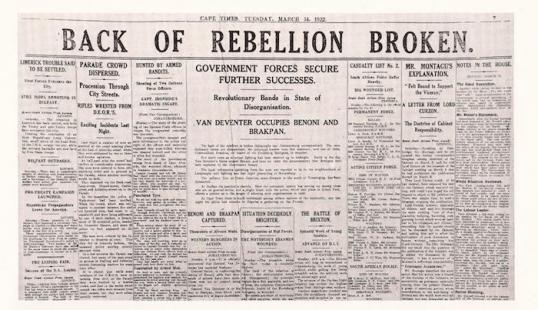
The Rand Rebellion (also known as the Rand Revolt or Second Rand Revolt – the Jameson Raid was the first) was an armed uprising of white miners on the Witwatersrand mining belt in March 1922.

The trigger was a drop in the world price of gold from 130 shillings (£6 10s) a fine troy ounce in 1919 to 95s/oz (£4 15s) in December 1921, the companies tried to cut their operating costs by decreasing wages, and by weakening the colour bar to enable the promotion of cheaper black miners to skilled and supervisory positions.

This in turn triggered a strike action led by the South African Communist Party which very quickly turned into an open armed rebellion against the state.  The Communist Party in South Africa in fact took a very proactive role in transcending a simple strike to an open armed revolt, they based their argument on the ‘class struggle’ premise and sought to follow the lead of the Russian Communist workers revolution in 1917 which saw the overthrow of the Tzar by the Bolsheviks and the establishment of Soviet Russia.

Consider that by 1922 this revolution in Russia had only occurred 5 years perviously.  Buoyed by the success of the Russian communists, the South African Communists hoped that their action in Africa would force regime change in the Transvaal and furthermore inspire more Communist overthrows of state by other worker colonies in far-flung countries like Australia and India.

Consider the summary of the Revolt given by David Ivon Jones – a mine-union communist and you’ll see the point:

The Rand Revolt was ‘the deed of indictment against capitalism [which was] filling up from every land and every clime; and the roll of honour of proletarian heroism [was] growing from Africa, Australia and India . . . ‘

The South African Communist Party’s racist beginnings

However, contrary to current views of The South African Communist Party (SACP), the SACP has as its origin an ‘Apartheid’ beginning, it was initially not the party for Black Africans, in fact by the time of the Rand Revolt it had a pretty strong ‘whites only’ philosophy underpinning it.

Bill_Andrews_1930_c

‘Comrade Bill’ Andrews

It was founded by William (Bill) Henry Andrews who became the first Chairman of the SACP.  Bill Andrews was born in England and by 1890 he had travelled to South Africa to work on the mines, here he became a predominant trade union organiser.

A fighter for the rights of ″white″ labour, Bill Andrews was always quick to complain when he perceived that an African (whom he openly called ″Kaffirs″) might take away a job from a white man.

By 1922 Bill Andrews was the first General Secretary of the South African Communist Party, and as a result the SACP approached the Rand Rebellion as a fight for white worker rights and white worker job reservation.  In fact they used the slogan”Workers of the world, unite and fight for a white South Africa!” as a rally call to their Communist brethren all over the world to join them.

To anyone who is wondering at this stage why the modern African National Congress (ANC) politicians when in conflict with the modern South African Communist Party (SACP) politicians feely call them ‘racists’, now you know the reason why.

The Rand Revolt background

In the early days of mining no Africans possessed the skills necessary for deep level mining, therefore the division of the work force had been between white miners and white management. The custom that skilled work was done by white men had been reinforced by legislation when Chinese labourers were introduced.  During World War I the overall ratio of white to black workers had been maintained. As time passed, however, black miners began to acquire these skills, although their wages remained at very low rates. In September 1918, white mine workers had succeeded in persuading the Chamber of Mines to agree that no position filled by a white worker should be given to an African or Coloured worker.

When the Chamber of Mines gave notice that it would be abandoning the agreement and would be replacing 2,000 semi-skilled white men with cheap black labour, the white miners reacted strongly. Their jobs and pay packets were threatened by the removal of the colour bar, and they feared the social encroachment on their lives that differences in colour, standards of living, and the cultural background of the coloured races might make. Sporadic strikes were launched in 1921, but these did not become widespread until the end of the year.

The trade unions

Because of the large number of mines and workingmen living in and around Fordsburg, Johannesburg, trade unions had become active in this area. This set the scene for the revolt in Fordsburg. At this time some trade union members were attracted to the spirit of socialism and others became communists, who referred to themselves as ‘Reds’. The leader of the Communist Party, Bill Andrews, known to his chums as ‘Comrade Bill’, urged a general strike. In the meanwhile, a group of revolutionaries organized commandos under the leadership of people who called themselves the ‘Federation of Labour.’

Strikes

The New Year marked a strike on the collieries of the Transvaal. Strikes soon spread to the gold mines of the Reef, especially those in the East Rand, when electrical power workers and those in engineering and foundry occupations followed suit. By January 10, stoppage of work in mining and allied trades was complete. Bob Waterston, Labour Party MP, sponsored a resolution urging that a provisional government declare a South Africa republic. Tielman Roos, leader of the National Party in the Transvaal, submitted this proposal to a conference of MPs convened in Pretoria, but they rejected it outright. Roos himself was emphatic that the National Party would have nothing to do with a revolt.

15235526_10154121323392444_8688316480568324123_o

The revolt itself

In February 1922, the protracted negotiations with the South African Industrial Federation broke down when the Action Group seized control, armed some white miners, and set up barricades. Mob violence spread alarmingly with bands of white men shooting and bludgeoning unoffending Africans and coloured men ‘as though they were on a rat hunt’. A general strike was proclaimed on Monday, 6 March and on Wednesday, the strike turned into open revolution in a bid to capture the city.

On 8 March, white workers attempted to take over the Johannesburg post office and the power station, but they met with stout resistance from the police, and the day ended in fights between white strikers and black miners. The Red commandos made the most of this chaos by encouraging their rebel followers to obtain firearms and other weapons from white miners and their sympathizers under the pretext of trying to protect women and children from attacking blacks. By spreading the alarm, they discovered who had firearms and immediately confiscated them. The following day six units of the Active Citizen Force were called out to prevent further disorder.

22539033_2034488626780125_2758876348532888164_o

On Friday, 10 March, a series of explosions signalled the advance of the Red commandos and an orgy of violence began. To quell this the Union Defence Force was called out, as well as the aircraft of the fledgling SAAF and the artillery. By this time, Brakpan was already in the hands of the rebels, and pitched battles were raging between the strikers and the police for control of Benoni and Springs. Aeroplanes strafed rebels and bombed the Workers’ Hall at Benoni. Rebels besieged the Brakpan and Benoni police garrisons. At Brixton 1,500 rebels surrounded 183 policemen and besieged them for 48 hours. From the air, pilots observed the plight of the beleaguered Brixton policemen. Swooping over them, they dropped supplies, and then returned to bomb the rebels. During one of these sorties Colonel Sir Pierre van Ryneveld’s observer, Captain Carey Thomas, was shot through the heart.

Martial law was proclaimed and burgher commandos were called up from the surrounding districts. On Saturday, 11 March, the Reds attacked a small detachment of the Imperial Light Horse at Ellis Park in Doornfontein, which sustained serious losses, and, on their way to the East Rand, the Transvaal Scottish marched into an ambush at Dunswart, sustaining heavy losses. The rebels searched citizens passing through Jeppestown and Fordsburg and sniped at those they thought were supporters of the mine management, as well as many policemen on duty in the streets. Prime Minister General Jan Smuts was widely blamed for letting the situation get out of hand. He arrived on the Rand at midnight to take charge of the situation.

The rebellion is crushed

On Sunday, 12 March, military forces and citizens attacked the rebels holding out on the Brixton ridge and took 2,200 prisoners. The next day government troops led by General van Deventer relieved the besieged police garrisons in Brakpan and Benoni. On 15 March, the artillery bombarded the strikers’ stronghold at Fordsburg Square and in the afternoon, it fell to the government. Before committing suicide in this building, the two communist leaders, Fisher and Spendiff, left a joint note: ‘We died for what we believed in – the Cause’. Samuel Alfred (Taffy) Long, heralded by subsequent labour histories as one of South Africa’s greatest working-class martyrs, was arrested after the defeat of Fordsburg. He was charged with murder and later also with high treason and the possession of loot.

540x293_20131103_59701098b54a83a1476f50413e6068fa_jpg
From 15 to 19 March 1922, government troops cleared areas of snipers and did house-to-house searches of premises belonging to the Reds, making many arrests. On March 16, the Union Defence Headquarters issued a press statement that the revolt had been a social revolution organized by Bolshevists, international socialists and communists. The revolt was declared over from midnight on 18 March.

Aftermath and resultant changes in goverment and law

In all the Rand Revolt was a calamity. It cost many lives and millions of pounds. About 200 people were killed – including many policemen, and more than 1,000 people were injured. Fifteen thousand men were put out of work and gold production slumped. In the aftermath, some of the rebels were deported and a few were executed for deeds that amounted to murder. John Garsworthy, leader of the Brakpan commando, was sentenced to death, but he was later reprieved. Four of the leaders were condemned to death and went to the gallows singing their anthem, ‘The Red Flag’.

The Red Flag anthem was the rally anthem for British Communists – and as an aside it is still the official song for the British Labour Party and sung at their annual party rally.

Smuts was widely criticised for his severe handling of the revolt. He lost support and was defeated in the 1924 general election. This gave Hertzog’s Nationalist Party and the Labour Party, supported by white urban workers, the opportunity to form a pact (the old adage ‘enemy of my enemy is my friend’ applied – a strange and uneasy pact indeed).

JBM_Hertzog_-_SA

JBM Hertzog

Whilst Smuts stood in opposition, three important Acts were passed by Hertzog’s Nationalists whilst in pact with Labour.  They gave increasing employment opportunities to whites and introduced programme of African segregation. The first was the Industrial Conciliation Act of 1924, which set up machinery for consultation between employers’ organisations and trade unions. The second was the Wage Act, which set up a board to recommend minimum wages and conditions of employment. The third was the Mines and Works Amendment Act of 1926, which firmly established the principle of the colour bar in certain mining jobs.

 South African Communists U-turn

Two things happened after the 1922 Revolt that would have long reacting ramifications. Firstly Jan Smuts lost the next election and had to sit in the opposition bench and endure coalition Nationalist law making in the Union along race barrier lines for 15 years until 1939, when he finally became Prime Minister of South Africa for a second time.

Secondly the South African Communist Party evolved into the political juggernaut it is now, and in a strange twist, the Rand Revolt in 1922 forced the hard-line Communists to re-appraise their views on ‘white’ worker rights.  The Rand Revolt showed this to be a weakness and broader population support was needed if there was to be any significant Communist revolt in South Africa to create an independent Republic under communist rule.

So, even though their jobs were now protected by ‘colour bar’ laws, they turned against these hard fought for rights.  ‘Comrade Bill’ Andrews was expelled from the South African Communist Party in a series of purges over the their new “black Republic” policy (he was only permitted to rejoin the SACP many years later in 1938 aged 68).

Just six years after the Rand Revolt, by 1928 the SACP agreed with their controlling body ‘Communist International’ to adopt the “Native Republic” thesis which stipulated that South Africa was a country belonging to the Natives i.e. the Blacks. The resolution was influenced by a delegation from South Africa. James la Guma, the new Communist Party Chairperson from Cape Town, he had already met with the leadership of ‘Communist International’ to agree the new way forward.

By 1928, 1,600 of the SACP’s 1,750 members were Black. During this period, the party was accused of dismissing attempts by other multiracial revolutionary organisations (the ANC and  Syndicalists) and using revisionist history to claim that the Communist party and its Native Republic policy was the only viable route to African liberation.

By 1929: the party adopted a “strategic line” which held that, “The most direct line of advance to socialism runs through the mass struggle for majority rule”.

7659953606_7f0d9f9f50_b

The SACP today

Did Smuts have a choice?

Smuts sent in 20 000 troops to crush the Revolt.  The fact is, it was a Communist Revolt to establish the Transvaal as a Communist Republic, and not just a simple strike.  The Communists wanted the fight, tooled up for the fight and even annexed cities to forward their goal.  So the answer in truth is that Smuts did not really have a choice.

Would anyone else have reacted any differently to Smuts?

22498946_2034494743446180_9027430172028438091_o

Jan Smuts

Upfront we established that the old Boere Transvaal Republic had no appetite for these militant miners and their strikes and revolts.  Their reaction in quelling them was brutal and swift.

Politically expedient packs between the Communists and the Nationalists after the 1922 Revolt aside, the Nationalists had real no appetite for the Communists – and by 1928 the Communists certainly had no appetite for the Nationalists.

The Nationalists, who by 1948 were in full control of South Africa, had a deep-seated hatred for Communism, they regarded them as the ‘Rooi gevaar’ (Red Danger) and used this as a call to action when embarking South Africa on a war against Communism.  This manifested itself in not only the implementation of ‘anti-communist’ legislation and the ‘banning’ of the organisation in 1950, but also in a proxy Cold War against ‘Communism’ fought in Angola and Namibia from 1966 to 1989.  Over the two decades of The Border War, the Nationalists killed thousands more ‘communists’ using the country’s defence force.  It was certainly a far stronger reaction against Communism than Smuts’ use of the defence force against the Communists in the Rand Revolt.

So to answer the hypothetical question whether the Nationalists would have reacted differently to the Rand Revolt had they been in power instead of Smuts, the answer would in all likelihood be ‘no’, in fact it would be very probable that their reaction would have been even more brutal.

In Conclusion

The irony does not end there as to strange bedfellows and the war against Communism for the Nationalists, in waging their war against Communism the Nationalists found themselves in bed with Jonus Savimbi and his ‘anti-colonial’ movement UNITA fighting the proxy Cold War in Angola.  By 1988, the Battle of Cuito Cuanavale found the National Party in a deep political hole and they had to use the South African Defence Force to very bravely (and successfully) fight their way out of it.  To negotiate a peace, PW Botha and the National Party hung UNITA out to dry, agreed with Cuba and the MPLA’s Soviet alliance as to the withdrawal of their Communist forces from Angola so the Nationalists could go home and declare a ‘victory’ over Communism (the Cubans in turn could go home and declare they liberated Namibia see ‘The enemy of my enemy is my friend’).

dbKkeMN

Thereafter, just five very short years later, by 1994, the Nationalists of FW de Klerk had handed South Africa to the ANC/COSATU/Communist Party Tripartite Alliance with the Nationalists in coalition government again.  The twists and turns of history now really show up the ‘full circle’ nature of history and why it repeats itself – because by April 2005 the ‘sunset clause’ was over and the National Party folded shop completely – and for political expediency again – their MP’s walked the floor to amalgamate with the ANC and their Communist labour alliance in a full merger.  You could cut the irony with a knife at this stage.

How predictable is history in that it ‘repeats’ itself, and in light of all this ‘political expediency’, ‘irony’, ‘strange bedfellows’ and twisting by the party of Afrikaner nationalism, we have to genuinely ask ourselves how much of their constant criticism of Smuts over the 1922 Revolt was genuine and how much was just a case of political sandbagging?


Researched by Peter Dickens.  Chief extract of the time-line of the Revolt taken from South African History Online (SAHO) 1922 Rand Rebellion.  Other references include Wikipedia.

The little known South African connection with The Household Division (The Guards)

The Household Division are very well-known for the spectacular marches they perform, in their distinctive red tunics and black bearskins, with ceremonies ranging from a daily Changing of the Guard at Buckingham Palace to the annual Trooping of the Colour at the Horse Guards parade ground.  However, for all the pomp and ceremony, the Household Division is actually a combat ready fighting division in the British Army and it has a very long list of Battle Honours, including ones shared with South African fighting units, and here a very special relationship has existed between ‘The Guards’ and South Africa.

The origin of The Changing of the Guard dates back several centuries, since 1660, Household Troops have guarded the monarch and the Royal Palaces.  The Guard at Buckingham Palace is usually carried out by one of the five Foot Guards Regiments of the Household Division – the Grenadier, Coldstream, Welsh, Irish & Scots Guards. (They are identified by the number of buttons on their tunics and the plume in their bearskin head-dress).  The mounted cavalry of the Household Division comprises the Life Guards and the Blues and Royals.

15723598_715817448585487_3193926731460184077_o

However, at certain times the honour of guarding Buckingham Palace is given to regiments and units of the Commonwealth forces, and that certainly is also the case with South Africa. Here members of the South African Coronation Contingent of 1937 take over guard duty at Buckingham Palace from 1 Bn Welsh Guards.

Yes, South Africans have had the honour of Changing the Guard at Buckingham Palace, however the history of the Household Division and South Africa has not just been a ceremonial one, a long history exists between The Guards and South African fighting units and it unveils a largely forgotten but very special relationship, where even some current South African military insignia carries with it Household Division accolade and honour.

guards

So how did this unique history and relationship between the Household Division and South African Regiments and units come about, like many British regimental relationships with South African ones, this relationship starts with the Boer War.

The Boer War

The Household Cavalry Composite Regiment was the first unit to be sent to South Africa and served with the 2nd Cavalry Division throughout the first phase of the Boer War campaign (the ‘conventional’ phase). The 1st Guards Brigade consisting of the 3 Bn Grenadier Guards, 1 Bn Coldstream Guards, 2 Bn Coldstream Guards, and 1 Bn Scots Guards, also joined the force sent to relieve the siege of Kimberley. The Brigade took part in various battles in the northern Cape Colony to relieve Kimberley, leading up to Black Week 10-16 December 1899 – where the Boers gained the upper hand and the British suffered a number of humiliating defeats.

1stlifeguardsboerwar2

Life Guards during The Boer War

Following the ‘Black week’ disasters, more Guards were sent to South Africa to boost their numbers, two additional Guards battalions in fact, 2 Bn Grenadier Guards and 2 Bn Scots Guards.

As the war progressed, the two Boer republics were annexed by the British, and the Boer commandos reverted to guerrilla warfare tactics in a new second phase.  To combat the ‘hit and run’ tactics of guerrilla war, the British then established blockhouses across the country to restrict the movement of the Boer guerillas. Mobile units were created to protect the forts and chase down the Boer Commandos. These included two Guards’ mounted infantry companies comprising recruits from all four regiments of the Foot Guards at the time.

9-British-troops-manning-a-defensive-position-at-Modder-River

Grenadier Guards at Magersfontein during the Boer War

After the end of the 2nd Anglo Boer War, May 1902, the Guards, both Cavalry and Foot, returned to the United Kingdom.

The Irish Guards has South African roots

The Sovereign’s fourth regiment of Foot Guards, the Irish Guards, owes its establishment to the actions of various Irish regiments in South Africa during the Anglo-Boer War. During ‘Black Week’, when the British experienced set-backs at the battles of Magersfontein, Stormberg, Colenso and Spionkop, the only comfort the British people could derive from these early disasters was that the soldiers had served gallantly and specifically the Irish regiments, especially at the Battle of Spionkop.

In an expression of appreciation for the bravery of the Irish Regiments in South Africa, on 1 March 1900, a letter to the editor appeared in the Sunday Times from Summing Macdona suggesting that the same honour be given them as was the case with English and Scottish Foot “ There are Scotch Guards and English Guards – why not add to the roll of glory a regiment of Irish Guards?”

Queen Victoria approved the proposal and on 1 April 1900, Army Order No 77 was issued: ‘Her Majesty the Queen having deemed it desirable to commemorate the bravery shown by the Irish Regiments during the operations in South Africa in the years 1899-1900 has been graciously pleased that an Irish Regiment of Foot Guards be formed to be designated the Irish Guards.’

22339296_2032779333617721_6524740468024653096_o

General Poole and the Guards

After the Boer War, several South Africans either served with or were seconded to a Guards regiment. One significant South African officer of the South African Union Defence Force to do this was Maj. General William Henry Everard Poole. General Poole led the 6th South African Armoured Division during World War 2 in Italy.

GENERAL_POOLE_WITH_FM_SMUTS

General Poole and Jan Smuts

In 1935, as a temporary lieutenant-colonel and after a period as the Officer Commanding the Special Service Battalion in South Africa, Poole was sent to the United Kingdom, and attached to the Brigade of Guards.  He spent time with three Guards battalions: 2 Bn Grenadier Guards, 1 Bn Scots Guards and 1 Bn Welsh Guards. Whilst serving with the Grenadier Guards, he took part in the Royal Review of the British Army by King George V and was presented to the King.

Poole’s experience with the Guards was to be cemented in the coming of World War 2, where an important association was to be formed, and detachments of Guards were to find themselves under South African command.

The Second World War – North Africa

During the June 1942 crisis in North Africa the South Africans and the Guards were rather unexpectedly thrown together. When the British Eighth Army withdrew from the Gazala line, only the Tobruk garrison lay in the path of Rommel’s the advancing Axis forces.

The Garrison at Tobruk was hastily put together and the defences were inadequate, however the task of defending it was put to the 2nd South African Division under the command of Maj Gen H B Klopper, under his command were also a handful of British and Indian brigades, including the 201st Guards Brigade, the main component of which were the Coldstream Guards.

Rommel quickly encircled the garrison at Tobruk and attacked from the weakest point – from the east.  Tobruk fell and the South African 2nd Division were forced to surrender on 21 June 1942, however some 400 Guardsmen managed to escape capture and make it back to Allied lines.

Tobruk, Rommel, Bayerlein, englische Kriegsgefangene

Rommel inspecting South African and British POW at Tobruk

WW2 Italy – 24th Guards Brigade and the 6th South African Armoured Division

When the North Africa campaign ended in 1943, the Allied High Command took the decision to invade Italy, then ally of Nazi Germany in the Axis Pact. The 6th South Africa Armoured Division was eventually earmarked for service in Italy at the insistence of Smuts and Churchill. The Division comprised one armoured and one motorised infantry brigade, however due to the mountainous terrain of Italy it was necessary to add an additional infantry component to the Division, this  fell to the British 24th Guards Brigade, comprising 5 Bn Grenadier Guards, 3 Bn Coldstream Guards and 1 Bn Scots Guards, all of whom were allocated to the 6th South African Armoured Division under South African command on 20 May 1944.

For nine months this close association existed between the Guards and the South Africans.  Whilst under South African command, this association was described by Capt the Hon D H Erskine, the official historian of the Scots Guards, as ‘ … the happiest of the campaign – if not the whole war’.

The success of the association can be directly attributed the General Officer Commanding the 6th South African Armoured Division, Maj General William Poole, who had (as previously noted) been attached to the Guards in the inter-war years.  In some senses it also ‘qualified’ him for command in the eyes of the Guardsmen, who by tradition had always been commanded by a Guardsman (this was the first time a ‘foreigner’ had commanded The Guards).

The British Guard Brigade fought with the South African Armoured Division until 17 February 1945. During that time, the high regard in which the 6th SA Armoured Division was held was manifested by the Guards in different ways. The regimental history of the Coldstream Guards records that ‘ … it was a marked breach of tradition for the men of the 3rd Battalion to wear a divisional sign, used as they were to sport only a Roman III on their sleeves; but even the most conservative was proud to wear on his battledress the green and yellow triangle of the 6th SA Armoured Division’.

22338951_2032794746949513_7341445631972073537_o

3rd BN Coldstream Guards with 6th SA Armoured Division triangular flash

One Guardsman even felt it necessary to express his feelings for the Springboks in the following letter published in Division’s magazine, The Sable:

‘Hello Springboks! Somebody ought to tell you about yourselves, so why not I? !t’s a pleasure. I like you. Nobody with a red tab on his shoulders has told me yet how big the skyscrapers are in Cape Town and I haven’t heard yet that you are winning the war for us. You grouse as much as I do, and about the same things, but it’s always a private grouse and you keep it in the family. When we first got together, you knew us – mind you, we’ve been in British divisions who couldn’t tell one guardsman from another.

British troops generally are never unanimous in their opinions of anything or anybody – of course with the agreed exceptions but I’ve yet to hear any guardsman who doesn’t want to stay in “Our Div”. There’s a general satisfaction with the news that the flash is now on our vehicles, and that’s significant.

Yes, we’ve never been out of sound of your tracks and wheels since we came among you. Where a Sherman has not got to go, has been due to mechanical impossibility and you’ve proved it by trial. This may not be sound brasshat economics but it’s very convincing to the footslogger. Even if it means a tank out of commission, he knows you had a damn good try, and although I wish every mother’s son of you a speedy return to the kopjes and kloofs of sunny SA, I hope you’ll see the Guards Bde through these deadly hills first! – I’ll trek along with you.’

2007.048.013_1.590x590.marked

Coldstream Guards attached to the SA Armoured Div advancing in Italy

Members of the Coldstream Guards after battle for Monte Sole on the 15 December 1944. These tired and exhausted members of the Coldstream Guards were attached to the 6th South African Armoured Division, as they reach La Quercia on their way back to the rear for a few days rest. These men fought several days taking, losing and retaking a hill just under Monte Sole, South of Bologna on Route 6620.

Guards wings

24th Guards Brigade winged badge

The Pretoria Regiment was the most closely associated South African Regiment with the Guards, as it was the Pretoria Regiment who provided much of the armoured support for the 24th Guards Brigade. (see Observation Post Pretoria Regiment Sherman tanks in Italy – Operation Olive)

At the farewell parade held on 26 March 1945, the Pretoria Regiment was permitted to wear the winged blue-red-blue flash of the Household Division, and it is still worn today behind their headdress badge.

The significance of the wings is that, on several occasions, the Regiment had managed to get their tanks supporting the Guardsmen into such inaccessible positions in the mountains that it was remarked that ‘ … they must have flown there.’ In appreciation, the Pretoria Regiment presented each of the Brigade’s battalions with a mounted impala head, the emblem of the Regiment.

22382095_2032804223615232_8546806336758117004_o

Pretoria Regiment with Guards Colours and wings behind their beret badge

At the same parade, the 24th Guards Brigade provided the 6th SA Armoured Division with 9 company colour of 5 Bn Grenadier Guards and the commanding officer’s flags of 3 Bn Coldstream Guards and 1 Bn Scots Guards.

These flags and colour can be seen in the display featuring the 6th South African Armoured Division at the South African National Museum of Military History in Johannesburg.

The Guards Chapel’s South African Association

On 18 June 1944 the Guards Chapel, located in Wellington Barracks in London, was hit by a V1 flying bomb. The bomb hit the chapel during a Sunday morning service and 121 people were killed. Much of the building was destroyed. As a token of their regard for the Guardsmen, the men of the 6th SA Armoured Division contributed £5 000 towards rebuilding the Chapel.

This gesture aroused the deepest feelings of gratitude throughout the Brigade of Guards.’ The gift was used to purchase new bronze doors for the main entrance of the Chapel and to renovate the mosaics in the apse. Today the bronze doors carry both the star of the Household Division and the green and gold flash of the 6th South African Armoured Division.

In Conclusion

Unfortunately this strong association between South Africa and the Household Division has deteriorated somewhat. It started when the Nationalist Party Government came to power in 1948 with its proposals of Apartheid and its abject hatred of anything British (fuelled by deep seated Afrikaner resentment of British actions in the Boer War).  To this end they re-established the Union Defence Force as the South African Defence Force when they withdrew South Africa from the Commonwealth in 1961,  ‘British’ associations to South African regiments were either removed or reduced in the case of some Regiments to a more token association – either in insignia, name or relationship ties.

Much of this association was further lost in South Africa’s isolation years.  To a degree some of these relationships were re-kindled post 1994, with South African Regiments invited to and attending key ceremonies and parades in the United Kingdom.  However they remain relatively low key as the now re-configured South African National Defence Force (SANDF) has focussed its priorities on African issues only and gone even further to strip any ‘Colonial’ references from South African Regiments.  New proposals have now been accepted to change or remove much of this association from the SANDF Reserve Regiments.

It is hoped that in all the political transformation of the SANDF, that the traditions and hard-fought for battle honours won by South African units with the Household Division, which were brushed aside by the Apartheid regime, are now properly rekindled and maintained.

However it is very unlikely at this stage given the current ‘transformation’ trajectory, and it is not a sentiment held by the British, who remain keen on heritage and have maintained it for Australian and Canadian Regiments associated with the Guards, but the will to reassert these links has to come from the South African military and political establishment themselves or they will forever be lost to modern South Africans.

22382127_2032895540272767_368649844039853849_o


Researched by Peter Dickens. References – Coldstream Guards in Italy = Photo by Baker. 3131 Signal Service Co.” Near Madonna della Quercia, Italy. 15 December 1944.  Photo copyright of Guards and Pretoria Regiment SANMMH copyright.

Key extracts and photos  taken from the Military History Journal, Vol 13, Number 1, June 2004 written by Allan Sinclair of the South African National Museum of Military History in Saxonwold, Johannesburg

“She blew sky high”; Recounting South African sacrifice on the HMS Barham!

During the Second World War, South African Navy personnel – known at the time as the “South African Naval Forces” (SANF) were seconded to serve on ships in the Royal Navy. This is a story of one such ship in His Majesty’s service the HMS Barham, she was a 31,100 ton, Queen Elizabeth-class, Battleship of the Royal Navy and she was sunk during the Second World War by a German submarine off the coast of Egypt.

Prior to this HMS Barham visited Durban, South Africa, in June 1941 for extensive repairs at the Victoria Graving Dock. The repairs where due to damage sustained in the Crete bombing. She sailed from Durban on the 31st July 1941 with a number of South African naval force members seconded to the Royal Navy on board.

On the 25th November 1941, HMS Barham forms part of “Force K” hunting for Italian convoys to North Africa, she was supported by the British Mediterranean Fleet along with battleships HMS Queen Elizabeth and HMS Valiant. On the same day, German submarine U-331 was on her 3rd patrol of the Mediterranean along the coast of Egypt, north of Sidi Barrani, U-331 when she came within range of the HMS Barham.

The commander of U-331, Kptlt. Von Tiesenhausen fired a spread of 4 torpedoes towards the group, 3 of which hit HMS Barham’s port side causing it to list heavily and spread fire towards the ammunition storages. Only 2 and a half minutes passed from the torpedo impact until the ship rolled onto its side and capsized as the aft magazine exploded in an almighty explosion, instantly killing 862 out of the roughly 1260 man complement. U-331 took a terrible beating from Barham’s defending destroyers but managed to slip away and return safely on 21th of February 1942 to Salamis, Greece.

Recorded on film by one of the resue vessels, HMS Barham’s calamitous end is often used in documentaries, and nothing drives home the peril of serving on a fighting ship harder than this newsreel footage, it is simply jaw dropping.

This video is made even more poignant for us as South Africans if you consider we are witnessing the loss of the following South African naval personnel in this tragedy.

22308811_10155537271456480_3745202244434378650_nBAKER, Dennis E W, Ordinary Seaman, 68617 (SANF)
GLENN, Paul V, Ordinary Seaman, 68906 (SANF)
HAYES, Richard T, Ordinary Seaman, 68499 (SANF)
MORRIS, Cyril D, Ordinary Seaman, 68932 (SANF)
UNSWORTH, Owen P (also known as R K Jevon), Ordinary Seaman, 69089 (SANF)
WHYMARK, Vivian G, Ordinary Seaman, 69024 (SANF)

An eye-witness account by survivor Ronald Dando vividly describes the terrifying last minutes of HMS Barham.

“We were now off Sollum, Q.E. ahead flying Admiral Cunningham’s flag, then Barham, with Valiant astern. It was about 1625 hours when a loud explosion came from somewhere aft, on the port side; then came two more, all in the space of seconds.

Men came scrambling on to the upper decks, getting from below decks as quickly as they could. It was only then that I realised Barham was going over quite quickly on her port side and that we’d been torpedoed, at least three times. We must have been at a 45 degrees angle now with water lapping over the port side. It was of course useless jumping off the port side there being the danger of being sucked back into the ship by water that must be rushing it. The only thing to do was to get up on the starboard side, the only way of doing it now being to drag oneself up on ones stomach. I managed it after a struggle and sat high up in the air together with quite a few more chaps, wondering “what now!”

Then I heard someone say “what the hell are you waiting for, get into the bloody water”, or words to that effect it was Vice-Admiral Pridham Wippell; at once we started to slide down the side of Barham into the sea.

I must have been a few hundred yards astern of Barham when there was a terrific roar and she blew sky high, men, guns, all sorts flying through the air; a great wave, it seemed like a mile high, came rushing towards us, struggling and floundering in the swell. I remember thinking to myself, this is the end; then the wave crashed down on us. I felt myself rammed down then whirled round and round like a cork.

I held my breath for what seemed an eternity then started to strike out wildly, trying to surface.

My heard seemed to be bursting and I thought, “I must breathe, I must breathe”. I opened my mouth fully expecting to swallow water, but it was air. I’d been thinking I was still under the water, it was so dark, but the reason was the thick smoke and fumes low over the water”.

Although over 800 men are lost with her, a remarkable number are saved. Just before this tragedy, Force K has sunk two more Axis supply ships west of Crete. At this stage 60 percent of Axis North African supplies (German and Italian) are being lost to attacks by British aircraft, submarines and warships.

On returning to Salamis after sinking HMS Barham, U-331’s commander, Freiherr Hans-Diedrich von Tiesenhausen, was promptly promoted to Kapitanleutnant and awarded the Knight’s Cross of the Iron Cross.  U-331 enjoyed successes on a number of more patrols, but on her 10th patrol in the Mediterranean, on the 17th November 1942, her luck ran out when the main hatch was damaged by an attacking RAF Hudson, which preventing it from diving.   It was then finished off by Fairy Albacore torpedo bombers and Grumman Martlets from the aircraft carrier – HMS Formidable. Of her crew 32 were killed and 17 survived, including her commander.

As South Africans it is very important we keep track of this part of South African naval history.   Much effort and time is spent by the SANDF on the SS Mendi, and rightly so given it was obscured from the national consciousness for so long, but so too has the history of South African naval sacrifice in World War 2, especially those serving in the Royal Navy – their sacrifice has also been completely obscured from history.  Ironically by the same Nationalists who obscured the SS Mendi, choosing political expediency to promote white Afrikaner nationalism ahead of what they regarded as ‘traitors’ serving the crown in World War 1 and 2.

It is time that the full scope of South African service in both The Royal Navy and The South African Navy during WW2 is known, and if this article goes a little way to opening that consciousness so much the better.

6de40b100e2d2f78654345b73edc4599


Researched and written by Peter Dickens.  Video copyright British Pathe.  References the HMS Barham Association and Wikipedia.

A “grievous error”; Recounting South African Sacrifice on the HMS Gloucester

This is the HMS Gloucester under attack by Ju-87 Stukas. May, 1941.  As Simon’s Town in South Africa was a British Naval base thousands of South Africans in WW2 served in the Royal Navy. The loss of the HMS Gloucester is one of the most tragic losses of the war for the Royal Navy, and it unfortunately, as what is arguably the worst wartime loss for the Royal Navy it also has the highest South African naval casualty roll call of the war. Read on for their story.

GLOS SINKING

German gun camera captures the HMS Gloucester under attack

HMS Gloucester was one of the second group of three ships of the Town class of light cruisers. She was launched on 19 October 1937 prior to commissioning on 31 January 1939.

hms_gloucester_D96_emb_n12985
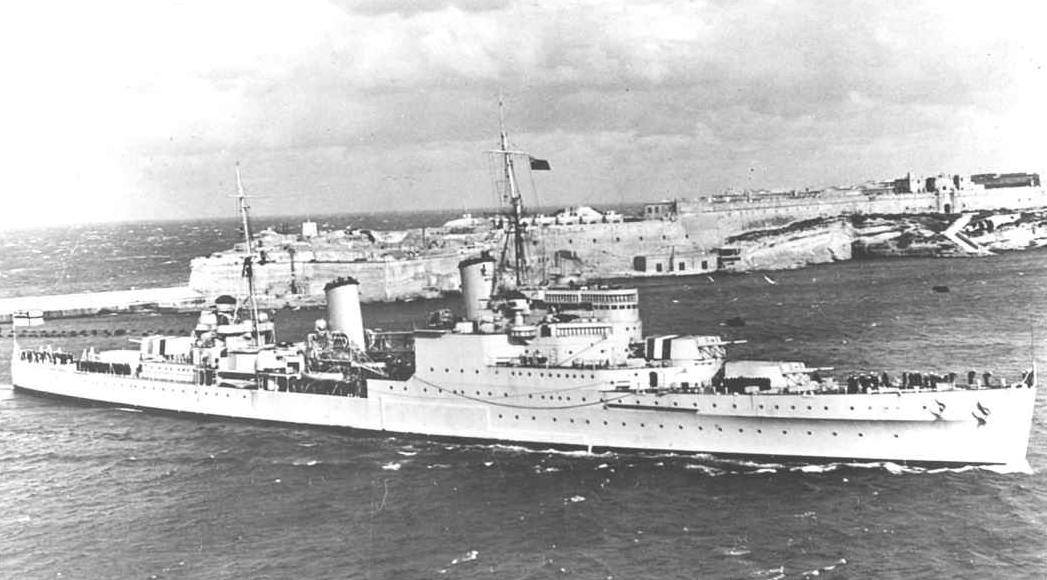
Gloucester was nicknamed The Fighting G and saw heavy service in the early years of World War II. The ship was deployed initially to the Indian Ocean and later South Africa before joining Vice Admiral Cunningham’s Mediterranean fleet in 1940. She was sunk on 22 May 1941 during the Battle of Crete with the loss of 722 men out of a crew of 807.

Gloucester formed part of a naval force acting against German military transports to Crete, with some success. Prior to moving to the Mediterranean she spent much of her time patrolling the Indian Ocean off South Africa. In December 1939, she was moved to Simonstown, South Africa where she was used, unsuccessfully, against German raiders. Hence the high number of South Africans serving on her by the time she got to the Mediterranean theatre of operations.

22254780_10155537388346480_1703967884046440289_o
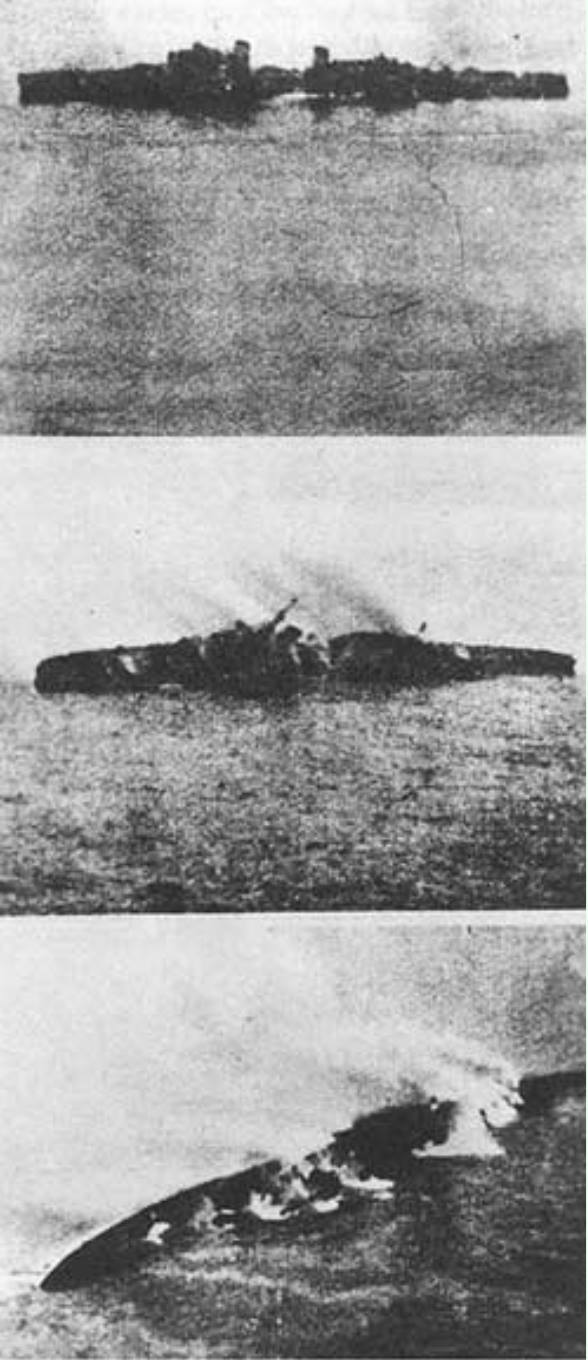
After German paratroopers landed on Crete on 20 May, the cruiser HMS Gloucester was assigned to Force C that was tasked with interdicting any efforts to reinforce the German forces on the island. On 22 May, while in the Kythria Strait about 14 miles (12 nmi; 23 km) north of Crete, she was attacked by German “Stuka”s of StG 2 shortly before 14:00, together with the light cruiser HMS Fiji and the destroyer HMS Greyhound.  The Greyhound was sunk and the two cruisers were each hit by 250-kilogramme bombs, but not seriously damaged. Two other destroyers were ordered to recover the survivors while the two cruisers covered the rescue efforts. Gloucester was attacked almost immediately and sustained three more hits and three near-misses and sank. Of the 807 men aboard at the time of her sinking, only 85 survived. Her sinking is considered to be one of Britain’s worst wartime naval disasters.

The circumstances of the sinking has also recently pointed to blunders by Royal Navy, when dispatching the HMS Gloucester for the rescue effort, she was low on fuel and anti-aircraft ammunition (less than 20% remaining), and therefore sending her into danger was a “grievous error”.

Furthermore, the Royal Navy failed to attempt to rescue survivors of the HMS Gloucester after it turned dark, one of the reasons why the death toll from the HMS Gloucester is so high.  This lack of action was “contrary to usual Navy practice”. A survivor commented “The tradition in the Navy is that when a ship has sunk, a vessel is sent back to pick up survivors under cover of darkness. That did not happen and we do not know why. We were picked up by Germans.

On 30 May 1941, in a letter to the First Sea Lord, Sir Dudley Pound, Vice Admiral Cunningham wrote, “The sending back of Gloucester and Fiji to the Greyhound was another grave error and cost us those two ships. They were practically out of ammunition but even had they been full up I think they would have gone. The Commanding Officer of Fiji told me that the air over Gloucester was black with planes.”

Whether it was a blunder or whether it was an unavoidable course of action that led to her sinking, there is one thing for certain, a lot of good men died fighting very bravely that day.  Today, the wreck site is a protected place under the Protection of Military Remains Act. The honour roll of South Africans lost in action on the MHS Gloucester as follows (MPK means “Missing Presumed Killed”):

22308811_10155537271456480_3745202244434378650_nALLISON, Oswald H, Able Seaman RNVR, 67349 (SANF), killed
NOWLAN, Francis C, Able Seaman RNVR, 67409 (SANF), DOW

ANGEL, Walter J H, Able Seaman, 67351 (SANF), MPK
AUSTIN-SMITH, John R, Ordinary Seaman, 67336 (SANF), MPK
BAGSHAW-SMITH, Philip R, Ordinary Seaman, 67337 (SANF), MPK
BAGSHAWE-SMITH, Sydney Q, Able Seaman, 68454 (SANF), MPK
BARBER, Edgar F, Able Seaman, 67302 (SANF), MPK
BRUCE, John, Able Seaman, 67355 (SANF), MPK
CARTER, Frederick G, Able Seaman, 67345 (SANF), MPK
CHILTON, Ronald H D, Ordinary Seaman, 67335 (SANF), MPK
EDWARDS, Ronald E, Ordinary Seaman, 67384 (SANF), MPK
ELLIOT, Edward R, Leading Seaman, 66584 (SANF), MPK
GERAGHTY, Herbert C, Able Seaman, 67338 (SANF), MPK
GROGAN, Graham B, Able Seaman, 67343 (SANF), MPK
JAMES, Victor F, Ordinary Seaman, 67303 (SANF), MPK
JENSEN, Niels P, Able Seaman, 67347 (SANF), MPK
MCCARTHY, Henry F, Ordinary Seaman, 67223 (SANF), MPK
MOORE, Albert, Able Seaman, 67416 (SANF), MPK
SLATER, Bryan M, Able Seaman, 67358 (SANF), MPK
SMITH, Matthew S, Able Seaman, 67359 (SANF), MPK
SONDERUP, Arthur W, Able Seaman, 67356 (SANF), MPK
STADLANDER, Rowland C, Stoker 1c, 67400 (SANF), MPK
STOKOE, Cyril A M, Act/Leading Seaman, 67264 V (SANF), MPK
SYMONS, Maurice M, Able Seaman, 68245 (SANF), MPK
THOMPSON, Walter E H, Able Seaman, 67360 (SANF), MPK
VAN DYK, Cecil H, Able Seaman, 67404 (SANF), MPK
WEBBER, Reginald, Able Seaman, 67361 (SANF), MPK
WILLIAMS, Dastrey S, Leading Seaman, 67047 (SANF), MPK
WRIGHT, Gerald V, Act/Ordnance Artificer 4, 67375 (SANF), MPK

We will remember them

12819293_556731994496537_2796972653890093296_o

HMS Gloucester


Researched by Peter Dickens, primary reference Wikipedia


South Africa’s one-legged fighter pilot

14440783_645903558912713_8490363046564296900_n

Capt. Doug Rogan DFC

Did you know that during World War 2, South Africa had a one-legged fighter pilot?  This is the extraordinary story of Capt Douglas Smith “Doug”/”Shorty” Rogan DSO, DFC.

2 Squadron SAAF

Doug Rogan Joined the South African Air Force as a Permanent Force pilot and he served with SAAF 2 Squadron from September 1941 in the North African theatre of operations.  2 Squadron were known as the ‘flying cheetahs’.

He almost immediately started seeing some success when on the 12th October 1941, he damaged a German Bf-109 flying a SAAF Tomahawk Mk.IIb, however in the engagement he took some damage.  He had another success later that month, when on the 22 October he logged his first confirmed kill of a German Bf-109F near Gasr el Arid, during the battle his SAAF Tomahawk Mk11b again took on some heavy damage, however he managed to get home and score his first combat victory.

By the next month on the 06 November he had further success in the Tomahawk and recorded his second confirmed kill, that of an Italian S.79 short down in the Matruh area.    The S.79 had taken some punishment from other SAAF pilots, but Doug finished it off, so was accredited with the kill.


22195338_10155531678576480_1621709234945740197_n

SAAF 2 Squadron Tomahawks in action by Derrick Dickens

Luck ran out for Doug late in November 1941.  By this time he logged  60 “operation” flying hours,  however during a routine operation on the 24th November he was Wounded In Action (WIA) when his Tomahawk received anti-aircraft ground fire, a  20mm AA shell struck Doug in his right leg.  Severely wounded and losing blood, Doug turned for home and against the odds managed get both himself and his stricken aircraft back to base.  So severe was the wound to Doug’s leg that his leg had to be amputated

4d21fe43d9bda76b0f1d492a8bf8c03c--douglas-bader-a-stick

Douglas Bader

Recovering in South Africa, Doug took inspiration from Group Captain Sir Douglas Bader CBE, DSO (Bar), DFC (Bar).  Douglas Bader was the famous Royal Air Force pilot who was a double leg amputee during the war, he was credited with 22 aerial victories. Bader had joined the RAF in 1928 and in 1931, while performing some aerobatics he crashed and lost both his legs. When war broke he insisted on flying, even as a double amputee. His determination saw him become a Battle of Britain icon using a “Big Wing” of fighters to attack enemy formations over England. He also became a Prisoner of War after he was shot down over France later in the war, and despite his disability he frustrated his German captors by embarking on a number of escape attempts.

With this proof positive account that pilots who had suffered leg amputations could still perform in combat, Doug focussed on getting back to flying, and back to combat flying.  Col. Laurie Wilmot promised Capt. Doug Rogan that if he could be passed the “fit for flying” test with only one leg, he would see to it that Rogan got a posting “up North” again (i.e. back to the theatre of Operations in North Africa and Italy).

1 Squadron SAAF

Fitted with an artificial leg Doug resumed flying fighters with 6 Sqdn on home defence in the following year. After a check ride he passed his fit for flying test and was returned “up north” as promised.  Back in combat flying he was posted to SAAF 1 Squadron in November 1942, known as the ‘Billy Boys’.

429968_306413649409038_717038371_n

SAAF 1 Squadron Spitfire by Derrick Dickens

His return to operations was marred by a couple of errors up front, one occasion he took off with a mechanic still hanging on to his tailplane but managed to land without damage to either the mechanic or his Spitfire. Also, once landing in a dust storm his Spitfire hit that of another pilot’s already on the ground. He however began scoring again later that same month on 13th December 1942, he damaged a Bf-109G whilst flying a SAAF Spitfire Mk.V.   By 1943 his victories started to stack up flying in the famous Spitfire Mk. V,  12th Jan he shot down a Bf-109G (probable), 21st Jan he shot down a MC.202 (probable) in the Castel Benito-Tarhuna area.  By 27th March he attained a confirmed kill of a German Me 210 near Gabes. On the 08 May he is recorded as damaging an Italian Re.2001.

He was “Returned To Union” (RTU – meaning returned to the Union of South Africa) after his successful tour on Spitfires in August 1943, by this time he was with SAAF 1 Squadron in Sicily. In all is final score from the war: 3 Kills, 2 Probable, 3 Damaged.

On the 19th of March 1943, Doug was awarded a Distinguished Flying Cross (DFC) for his actions and bravery.   In later life he became an air fighting instructor at 11 O.T.U. When he retired from the Air Force he took up residency in the beautiful little coastal town of Knysna.

Another unassuming South Africa hero not known to many now, a true role model and inspiration to any South African, those who have disabilities and even those who do not.


Written by Peter Dickens.  Scorecard comes courtesy of Sandy Evan Hanes’ SAAF Data base. Story content and image provided by Tinus Le Roux on his SAAF Heritage site. Research provided by Sandy Evan Hanes and Warren Williamson.   Artworks of 1 Squadron and 2 Squadron by Derrick Dickens (artist), copyright Peter Dickens.


A documentary on the loss of the SAS President Kruger and 16 souls

This is a must see video on the sinking of the SAS President Kruger by Marc Bow, it outlines everything about the tragedy, and the impact the sinking of this vessel still has on the South African Naval Community – even to this day.

For the full story on The Observation Post, feel free to follow this link:

“Out of the Storm came Courage” … the tragedy of the PK

The honour roll of the South Africans lost that tragic day is as follows:

05507629 PE Chief Petty Officer Johannes Petrus Booysen
77060150PE Chief Petty Officer Hartmut Wilfried Smit
69443794PE Chief Petty Officer Willem Marthinus Gerhardus Van Tonder
07467392PE Chief Petty Officer Donald Webb
05208145PE Petty Officer Stephanus Petrus Bothma
70351226PE Petty Officer Graham Alexander Frank Brind
65718058PE Petty Officer Robin Centlivre Bulterman
73317695PE Petty Officer Granville Williams De Villiers
66510579PE Petty Officer Evert Koen
08302440PE Petty Officer Hjalmar Lotter
70343553PE Petty Officer Roy Anthony McMaster
72362379PE Petty Officer Roy Frederick Skeates
72265465PE Petty Officer William Russel Smith
75060863PN Petty Officer Michael Richard Bruce Whiteley
72249998PE Petty Officer Coenraad Johannes Wium
80100167PE Able Seaman Gilbert Timothy Benjamin

May they rest in peace, never forgotten.


Video Footage:  Marc Bow