This is a very rare audio clip of a SADF crew in a Ratel ZT3 Infantry Fighting Vehicle converted into a anti-tank role taking out Cuban/FAPLA coalition soviet T55 tanks during the Battle on the Lomba River in Angola – Operation Modular in 1987.
Please excuse a little of the “blue” language but this is a ratel crew at the height of combat, listen out for the sounds of the Ratel’s missiles been fired and finding their targets and for the crew members yelps of jubilation and frustrations, also listen to the Ratel manoeuvre itself in an out of danger as it takes up firing positions – and the co-ordination and teamwork of crew members to do so. Also listen out for the intense sounds of explosions in and around the Ratel as they engage the FAPLA/Cuban tanks (click play on the link below).
This is combat at its fiercest in what was arguably one of the most decisive mechanised battles fought on African soil since the Second World War and one which turned the fortunes of the “Cold War” coalition of Cuban and Soviet interests in Southern Africa for the worse.
These men – fighting in inferiorly armoured Infantry fighting vehicles against heavily armoured tanks knew that victory would boil down to strategy, innovation, decisiveness, leadership, teamwork, discipline and training – and not superior equipment or numbers, all of this becomes very apparent in this audio clip.
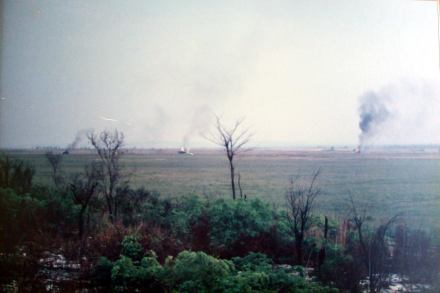
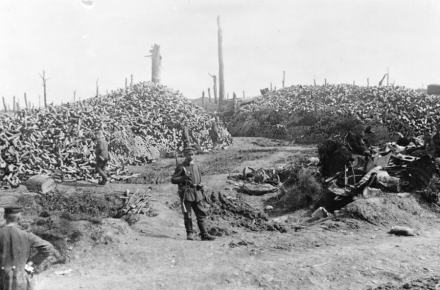
Burning FAPLA armour as seen from the South African position on the Lomba
The backdrop to this battle was the Cuban/FAPLA advance on Mavinga – a UNITA stronghold, in what was to become a manoeuvre called the ‘Battle of the Lomba’ the SADF 61 Mechanised Battalion Group, supported by other formations and SAAF fighter aircraft literally destroyed the entire FAPLA/Cuban 47 Armoured Brigade and stopped the advance in its tracks.
![]() The Operation was Modular, the battle ground was the Lomba River in Angola and Commandant Kobus Smit was the Operational Commander in charge of the SADF’s 61 Mechanised Battle Group. Three combat groups – Alpha under the Command of Cmdt Kobus Smit himself, Bravo under the command of Cmdt Robbie Hartslief, Charlie, under command of Maj Dawid Lotter. All supported by 20 Artillery Regiment (Cmdt Jan van der Westhuizen) – Papa battery from 32 Battalion, Quebec battery from 4 SAI and Sierra battery from 61 Mech Battalion Group.
The Operation was Modular, the battle ground was the Lomba River in Angola and Commandant Kobus Smit was the Operational Commander in charge of the SADF’s 61 Mechanised Battle Group. Three combat groups – Alpha under the Command of Cmdt Kobus Smit himself, Bravo under the command of Cmdt Robbie Hartslief, Charlie, under command of Maj Dawid Lotter. All supported by 20 Artillery Regiment (Cmdt Jan van der Westhuizen) – Papa battery from 32 Battalion, Quebec battery from 4 SAI and Sierra battery from 61 Mech Battalion Group.
Fapla crosses the Lomba River
On the 9 September 1987, Fapla’s 21 Brigade began to cross the Lomba River about twelve kilometres east of its confluence with the Cunzumbia. They were engaged by the South African mechanised armour of Combat Group Bravo with 101 Battalion of the South West African territorial force, destroying a FALPA BTR-60, but they were forced back by a FAPLA artillery counter-attack.
A detached unit of Combat Group Bravo returned on 10 September to the fording site on the Lomba River and again attacked elements of 21 Brigade, but the Angolans’ counter-attacked sending in three tanks. The SADF Ratel-90 Infantry Fighting Vehicles failed to stop the tanks’ advance, so the South Africans brought in their new Ratel ZT3s into the battle.
The ZT3 and it’s launch system was developed under the codename ‘Project Raleigh’ in the 1980s as a “long-range indigenous antitank guided missile”. Essentially a highly manoeuvrable Ratel (honey badger) IFV with anti-tank capabilities, these were untested pre-production models which mounted a triple launcher on top of the Ratel IFV – at the time they were considered state of the art in anti-tank warfare, and their first combat engagement delivered battlefield success to a staggering effect.
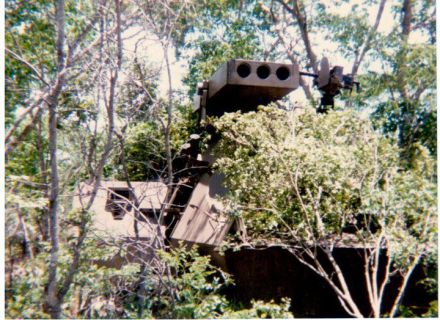
Concealed ZT3 during Ops Modular
The ZT3’s firing seven missiles in total at 21 Brigades armour with four successful strikes on the tanks. Soviet built MiG aircraft then arrived over the battle site and forced the South African units to withdraw but, it was game over for the Cuban/Fapla coalition – they had stopped 21 Brigade’s advances, it would be downhill for the Cubans and Angolans from that point out.
Major Hannes Nortman and 12A
 Major Hannes Nortman from 32 Battalion arrived on the battle scene at the Lomba on the morning of 10 September, the ZT3 Ratel, code 1-2, one of 32 Battalion’s ZT3’s had taken up position under the initial command of Lt Ian Robertson, Lt Robertson was injured when he jumping out of the ratel to give fire guidance to the 90mm Ratel next to his ZT3 Ratel. Unfortunately, he landed at the same spot as one of the incoming mortars and took a large piece of shrapnel in his head. The crew of the ZT3 were busy with the casevac of their injured commander, when three T55 Soviet made, heavily armoured enemy tanks rolled up. Major Hannes Nortman came running up, taking charge of the ZT3 Ratel 1-2 and the attack.
The newly developed Ratel ZT3 had a ‘black box’ which recorded crew actions when the missile system was selected – and this stunning bit of history of South African servicemen in action was forever recorded.
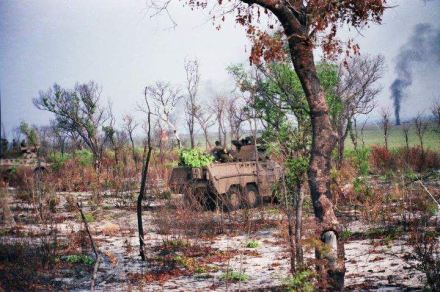
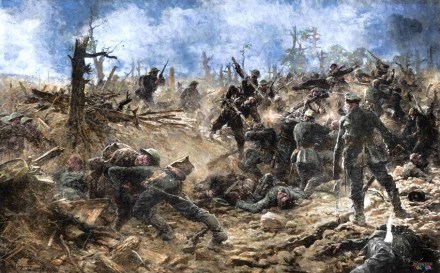
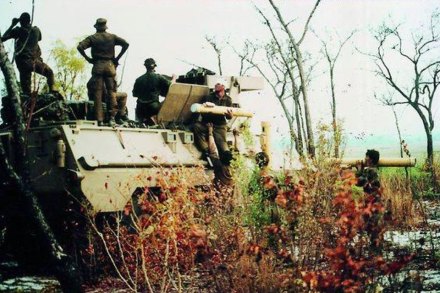
Ratel combat during the Battle of the Lomba
The SADF’s ZT3”s were positioned in a tree-line just short of the Lomba River’s adjacent ‘shona’. The first two missiles fired by 1-2 where fired by a young and very over excited gunner, Darryn Richard Nelson – whose commentary is heard throughout the recording. The first missiles pulled up vertically at around 200 meters. The third did not fire.
The gunner now fired his fourth missile which hit the lead tank in its tracks, stopping it dead. A fifth missile finally destroyed Tank 1 and the gunner his jubilant “I got him! I got him! I got him! Now very excited the young gunner focussed on the second tank, which was retreating back towards the river, his first shot at tank 2 missed as the missile hit the ground just in front of the tank.
Here’s where Major Nortman demonstrated years of senior military experience in combat, he quickly brought the excitement into focus in a time-honoured way – by giving the young gunner a sharp crack to the back of his head. This calmed him down and the sixth missile hit the tank on the rear plate blowing the turret about 25 meters away. Maj Nortman ordered the ZT3 to withdraw and reload, he then maneuverer into a new firing position to fire at the last tank which was still advancing. the Ratel hit tank 3 with two missiles.
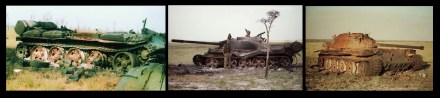
The destroyed Soviet FAPLA T55 Tanks – from left to right Tank 1, Tank 2 and Tank 3
With that the crew of 1-2 march into history, a South African ‘light’ armoured fighting vehicle made by Sandock Austral (now Denel), taking out heavy armour T55 Soviet made ‘heavy’ battle tanks. The only Ratel IFV to ever achieve his – before or since.
The action of this motley crew of English and Afrikaner, senior and junior, permanent force and conscripts, all in a single Ratel, had now played a decisive role in the outcome of the entire battle to come.
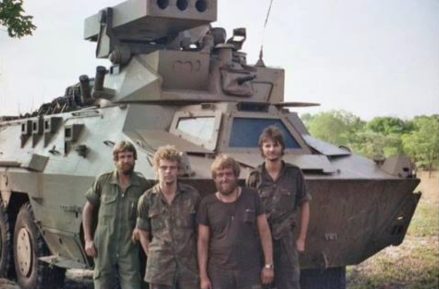
Major Nortman and the crew, Johan Jacobs, Neels Claasen, Darren Nelson, 32 Battalion September 1987
The Battle heats up
According to Cmdt Smit, “21 Brigade utilized all forces at its disposal and its T54 tanks and D 30 used several tons of ammunition to support its forces in crossing the river initially, and later in the day to cover the withdrawal of its forces to the northern side of the river.”
“21 Brigade was forced to abandon its efforts to cross the river and was in need of re-supply before another attempt could be made to cross the river.”
47 Brigade re-deployed it’s tactical group to attack a nearby UNITA base, this was met by the SADF’s Combat Group Bravo on the 13th September 1987, however the terrain was crisscrossed with the UNITA bases’ trenches making manoeuvrability difficult Combat Group Bravo and Cmdt Hartslief withdrew his forces for replenishment and repair, Col Ferreira ordered combat group Charlie to move forward and prevent further movement of 47 Brigade’s 1 Tactical Group to the east.
Missiles been loaded onto a ZT3 during Operation Modular
Major Dawid Lotter moved to the west and hit contact with FAPLA forces the same evening, destroying a number of FAPLA vehicles, contact was broken the next day.
Combat group Alpha was deployed to making contact with 47 Brigade on the 16 September. At the same time Charlie squadron made contact with FAPLA infantry and tanks, even as close as 50 meters. After a fierce firefight the SADF withdrew to consolidate, leaving UNITA to hold the positions.
47 Brigade was now under threat from two flanks and all The FAPLA brigades were ordered back to consolidate their positions on the northern banks of the Lomba.
47 Brigade was ordered to advance over the Lomba River again and established a bridgehead. The South African 61 Mechanised Battle Group assembled to attack them again on the 3rd October, this time Charlie Squadron took the lead commanded by Major Philip van Wyk. Making contact later the same day with 47 Brigade. A tank battle ensued; the largest tank battle ever fought on southern African soil.
The FAPLA infantry soldiers were observed fleeing the battlefield and to keep momentum 61 Mechanised ordered in the reserve squadrons and combat groups, with fresh forces FAPLA’s resistance finally crumbled and the remaining forces fled the battlefield. The South African’s had won the day with the loss of only 3 SADF personnel and a further 6 wounded, one Ratel was lost.
47 Brigade destroyed
47 Brigade was decimated with the majority of its equipment either captured or destroyed, amongst which were 18 x T55 and T54 tanks, 22 x BTR60 and 85 trucks. 47 Brigade for all practical purposes had ceased to exist. The remaining Cuban and FAPLA forces withdrew to their initial positions and The South African objective for Operation Modular – to halt the FAPLA advance and prevent the capture of Mavinga – was decisively achieved.
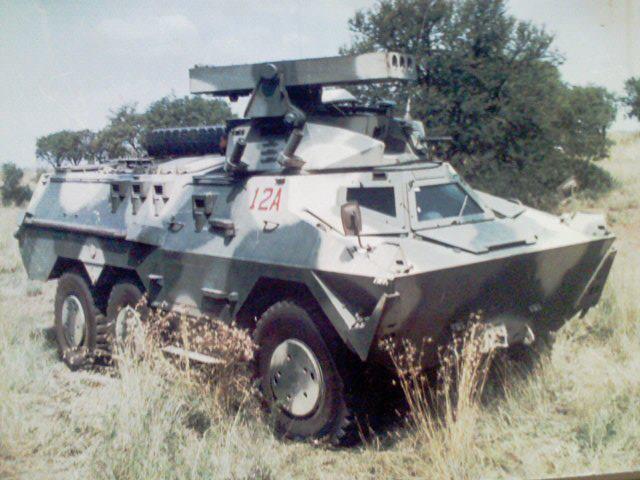
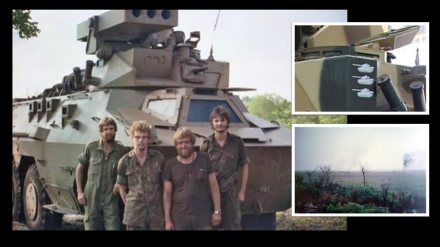
Ratel 1-2, now marked 12A taken after Operation Modular – note the ‘kill’ markings on the turret.
History made
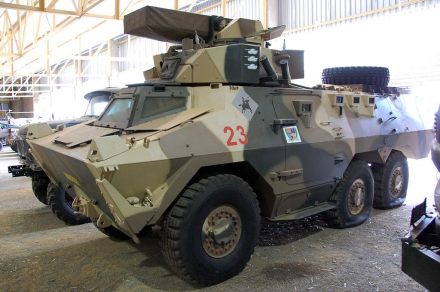
The remarkable efforts of Major Nortman and the crew of ZT3 Ratel 1-2 are now to be seen at the South African Museum of Military History in Johannesburg (later marked 23), the ratel on display is updated composite of various demobilised ratels when upgrades were made, however a part of it comes from Ratel 1-2, therefore the tank ‘kill’ markings were retained on this version and are clearly painted on the side of its missile system.
Researched by Peter Dickens and published with much thanks to Johannes “Hannes” Noortman and the crew of this Ratel – and to the 61 Mechanised Veterans Fraternity, with special thanks again to Dawid Lotter and Kobus Smit