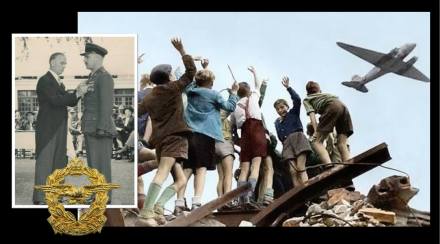
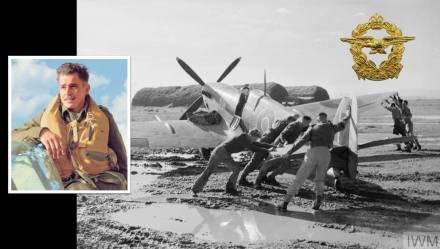
On the 80th anniversary of D-Day and witnessing the French President Macron awarding the Legion d’Honneur (LdH) to attending D-Day/Overlord veterans still with us. I am reminded of this very special South African. Albie Götze took part in D-Day as a Spitfire pilot seconded to the Royal Air Force, he later took part in Operation Market Garden as a Typhoon pilot. After World War 2 (1939-1945), he took part in the Berlin Air Lift as a Navigator (1948 to 1949), he later took part in the Korean War as a Mustang pilot (1950 to 1953) and finished his career as a General in South African Air Force and took part in the Border War (1966-1989). Albie was one of those very rare war veterans having survived all of that.
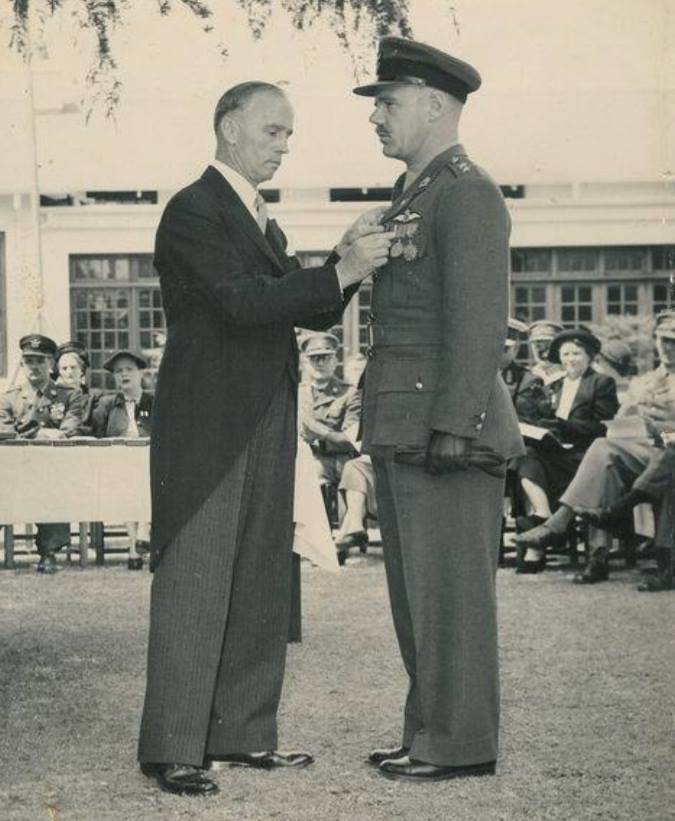
As South African Legion I was involved in the obtaining of Legion d’Honneur, the supreme award given by the French government to all surviving D-Day veterans and at the time South Africa’s only surviving D-Day veteran. Here I am (left) with Albie (on the right) and the French Ambassador, his excellency Christophe Farnaud (in the middle) on the occasion of his medal parade and receipt of his LdH on the 13th February 2018 in Cape Town. I also took he opportunity to also present Albie with a print of my Dad’s painting of a Typhoon.
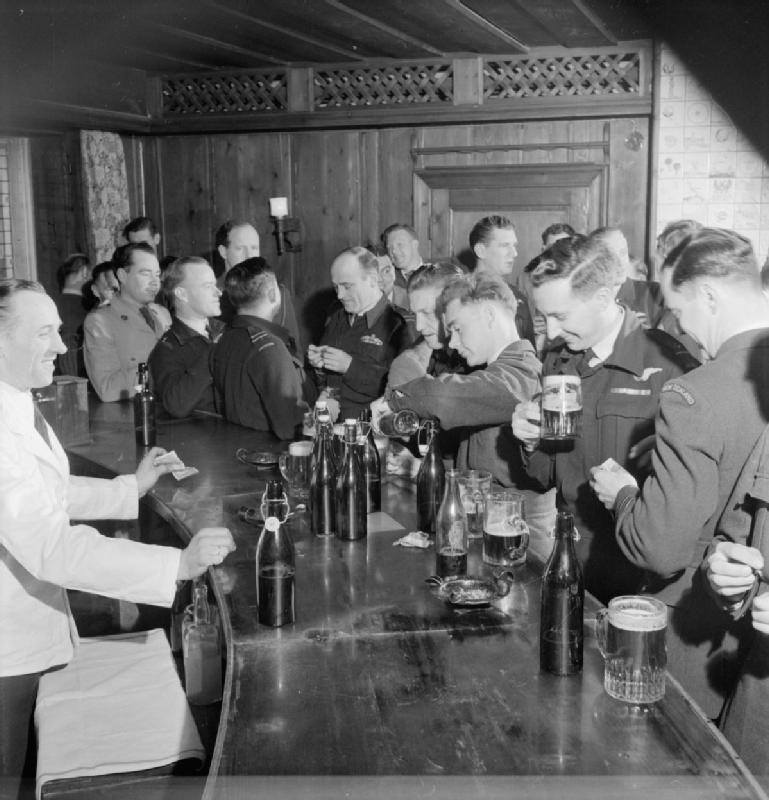
Over time I came to know Albie well and heard many of his stories, I kept my promise to myself to buy any WW2 veteran I meet a beer, and Albie shared this story with me on one such occasion when he and I were hitting a pint of beer and oysters at the Quayside cabin in Hermanus (Albie loved oysters). It says a great deal about this wartime generation, the guts and courage of these young men, they truly are a generation apart.
During D-Day, Operation Overlord and Operation Market Garden Albie’s aircraft was hit on many occasions and he made a few crash landings with damaged aircraft. He recalled on such incident as if they were yesterday, this is a very brave account of combat flying, honest, harrowing and even a little funny – in the darkest manner of ‘military humour’.
“I got shot one day, as a matter of fact I was watching this guy shooting at me, with a 88 mm, he shot at me and I looked and I said to myself ‘this bastard is going to kill me’ … he shot me at the back of the fuselage, but, the 88mm did not explode for some unknown reason, God must have said ‘I not gonna put this fuse on’, But it did cut my trim-wire to my rudder and all it does is that your aircraft just rolls over and you go strait in, but fortunately I was able to ‘catch it’ (arrest the aircraft roll with opposite ailerons);
… but I could only fly at an angle a friend radioed and said ‘Albie are you in trouble?’, I said to him ‘yes’, I can’t see out, at this time as I got down into the cockpit and grabbed hold of the rudder bar in order to keep on flying, otherwise I would go down. He said “I will fly on top of you”, been down there you can’t see out of the cockpit, all I could see was up, he brought me home like that, him flying on top (as a visual marker), me underneath. When I did the crash landing, that scoop on ‘the typhoon’ is full of oil and it sparked and catches fire quickly, I was so scared, before the plane came to a stop, I was out of the cockpit and I ran so fast that the ambulance could not catch me”.
Wow, there’s everything in that story, drama, bravery, camaraderie, action and comedy … and this was one of many many similar stories Albie could relate, not just from WW2, but the Berlin Airlift, the Korean War and the Angolan Border War … this was a man who had truly seen life and death, he had endured some of the greatest blows in history and survived.
When Albie died in September 2018, I had the privilege of giving his eulogy and our local veteran associations, The South African Legion, The Memorable Order of Tin Hats and The South African Air Force Association all saw him off. A true warrior of the sky, and one of the very last of his kind. His humility as a combat pilot is best wrapped up in his own words to me:
‘I survived because of sheer luck alone … with God’s grace.”
Written by Peter Dickens, a privilege to share this story again – lest we forget.
To read a little more about Albie – follow this link:
It’s the 80th anniversary of D-Day and I’ve always upheld a small promise to myself, whenever I meet a WW2 veteran still with us, I buy him a beer.
A couple of years ago I was living in Bicester in the United Kingdom, and as South African Legion I was asked by the local Royal British Legion branch to attend a medal parade for this chap, he was been honoured by the French government with the Légion d’honneur for his involvement in D-Day.
From left to right. Peter Dickens, Patrick Churchill and Karin Churchill (nee Busch)
Meeting him was indeed an honour, and I bought him the beer – but equally remarkable was his wife, and it truly is eye-opening when you sit down and literally ‘touch’ history and hear it first hand. It is a tale which will take us from Operation Overlord to Operation Thunderclap and it has a very human ending.
Operation Overlord
Shortly after 6am on 6 June 1944, Patrick Churchill (the chap been honoured sitting next to me), was a young Royal Marine commando. He described how he waded past the floating corpses of his comrades on Sword beach in the grey dawn of D-Day.
Thinking he would be in trouble for discarding his Mae West jacket as a bullet had just gone through it rendering it useless he eventually made it to shore and took cover.
Film still from the D-Day landings showing Royal Marine commandos aboard a landing craft on their approach to Sword, 6 June 1944.
Patrick was a signaller attached to a Free French Marine Commando unit coming ashore in the first wave of the landings – he later earned the Croix de Gurre for bravery from the French, his unit was cut off by intensive enemy fire entering a French village. Patrick ran into German sniper fire to hoist a radio antenna on top of a statue in the open village square and let accompanying forces know his unit’s position.
Operation Thunderclap
A mere eight months later, in another part of Europe, a 14-year-old German girl, Karin Busch (Patrick’s wife sitting next to him), ran into a sea of flames on the streets of Dresden. She led her screaming twin brother, blinded by the British fire bombing of the city during Operation Thunderclap. Their mother had just been swallowed into the burning wreckage of their home and she witnessed her burn alive. Her story was especially touching and no less brave.
The destruction of Dresden after Operation Thunderclap, the British bombing caused an uncontrollable fire vortex (firestorm) which destroyed more than 1,600 acres (6.5 km2) of the city centre on the night of 13/14 February 1945.
And Back
Patrick and Karin met whilst Patrick formed part of the occupation British forces in West Germany a couple of years after the war, they fell in love and married, eventually moving to England. Proof positive that the human condition of love will always prevail over animosity and hatred.
Truly a generation apart, both believed the Dresden bombing was unnecessary and incredibly tragic, but both believed in the necessity for the liberation of Europe and the sacrifice it took.
A privilege to share their story, written by Peter Dickens
So, here’s an interesting “first” for South Africa, we are the first nation who can hold up the very first aircraft hijacker as our own. Now, it’s not what you think, he’s not your deranged Islamic extremist or strait forward nut-job hijacking some or other commercial airliner … he’s a South African Air Force pilot and the aircraft he hijacked was a military aircraft belonging to the Axis forces during World War 2. His name was Lt. Colonel Edward Theodore Strever, South African Air Force (SAAF) No. 217 Squadron, or just plain “Ted” and both he, and his deeds are the stuff of legend, here’s his hijack story:
The Attack
During the war, Ted Strever, then a SAAF Lieutenant, found himself seconded to the Royal Air Force (RAF) flying a RAF 217 Squadron Bristol Beaufort twin-engined torpedo bomber L9820 and based at Luqa airfield in the isle of Malta. On 28th July 1942, 217 Squadron was engaged in attacking Italian Merchant shipping off Southern Greece. On that day Lt. Edward “Ted” Strever (SAAF) is captaining his Bristol Beaufort with a motley crew, his navigator is Pilot Officer William Dunsmore, Royal Air Force (RAF), from Liverpool. Sergeant John Wilkinson is his wireless operator, Royal New Zealand Air Force (RNZAF) from Auckland and Sergeant Alexander Brown is his Air gunner, also Royal New Zealand Air Force (RNZAF) from Timaru.
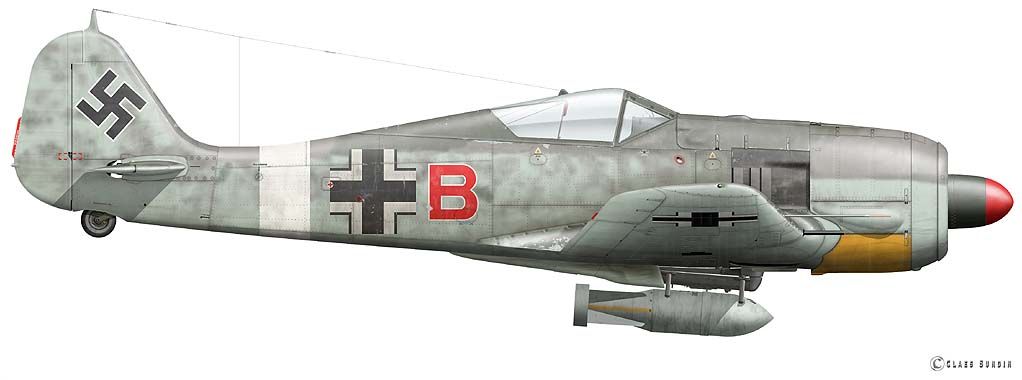
RAF 217 Squadron Bristol Beauforts
They spot a 12,000 ton Italian cargo ship escorted by two destroyers, targeting the cargo ship they go into a torpedo run, intense enemy defensive fire sees Ted Strever’s wingman go down, but Strever is able to get his torpedo away. His torpedo slams into the side of the target in a direct hit, eventually sinking the vessel. However in passing over the target Ted’s Bristol Beaufort is shot up, taking damage to both engines. The stricken bomber is forced into a water crash-landing, the crew all survive and in the 90 seconds it takes the Bristol Beaufort takes to sink, they all manage to scramble into an inflatable dingy.
Taken Prisoner
Not long after scrambling into their dingy after the crash Ted and his crew were picked up by an Axis sea plane – an Italian CANT Z506B ‘Airone’ (Heron), a maritime reconnaissance plane and bomber, it has 3 engines, a crew of 4 and floats – it puts down near the dingy and Ted and his crew are hauled aboard. The Italian crew make the Allied crew Prisoners of War – and kindly give them some brandy and cigarettes to smooth their ordeal of the attack and crash. They are then flown to a small harbour on the island of Corfu. Taken to a nearly camp, the Italians continue to treat them well and they are fed a meal of steak, tomatoes and wine – more cigarettes and given comfortable beds.
The next day after having eggs for breakfast the Italian’s informed the captured Allied crewmen they will be taken to Taranto in Italy, here they would spend the rest of the war as prisoners – they immediately begin to conspire as to escaping. A few hours later they are back at the small harbour, and back in the same aircraft that had rescued them the day before – the CANT Z506B ‘Airone’ – with the same 4 Italian aircrew, only this time there is an extra armed guard – a corporal.
CANT Z506B ‘Airone’
The seaplane took off and set a westwards course, after a short time, the Allied crew talking softly amongst themselves, hatched a hasty escape plan. They are about to make history with the very first “skyjacking”.
The Escape
Sergeant Wilkinson (RNZAF) leans forward and punches the Arione’s wireless operator hard in the face, he leaps over the failing body and over-powers the armed guard, taking his pistol and passing it to Lt. Ted Strever (SAAF). Pilot Officer Dunsmore (RAF) and Sergeant Brown (RNAF), tackle the aircraft’s engineer. The commotion alerts the two pilots, one draws his pistol and the other fumbles with a sub machine gun, however in trying to recover control of the aircraft the pistol is knocked from the pilot’s hand by his colleague. Ted Strever advances on the pilots using the corporal as a human shield and then disarms the pilots – the Italians are then tied up using their own belts. The aircraft is now in the hands of Ted and his crew and Ted takes over the controls – it’s all a little too much for the Italian corporal, not used to flying and in all the excitement he becomes violently air-sick.
More problems rear their heads, Ted Strever is unfamiliar with this aircraft type, cannot understand the fuel situation and had no maps. So, they untie the Italian co-pilot, put him in the pilot’s seat and at gun-point instruct him to fly the aircraft to Malta.
Next was the problem of flying an enemy Italian aircraft into Allied controlled airspace around Malta. On approaching Malta they are intercepted by 3 RAF Spitfires from No. 603 Squadron, the Spitfires immediately pounce on the Arione and start shooting it up. P/O Dunsmore frantically tries to wave the deadly attack off by leaning out and waving his white vest out a window – but to no avail. The Arione, now full of holes and badly shot up, makes an immediate sea landing. The Allied crew climb on top of the wings and start frantically waving the Spitfires off – the target neutralised the Spitfires break the attack. The British then dispatch a RAF ‘crash-boat’, a high speed Air Sea Rescue Launch HSL 107, from Kalafrana to pick the aircrew and tow the sea-plane in.
Astonished to see four Allied aircrew in the enemy plane a member of the RAF crash boat team tasked with towing them to St Paul’s Bay is reported to have said
“We thought it was old Mussolini coming to give himself up!”
RAF ‘Crash Boat’
Feeling a little guilty that the Italian’s had treated them so nicely when they were their POW’s, the Allied crew offered their apologies for not having any wine or brandy on them – but they promised them they would re-pay the compliment. One of the Italian crew, in rather good spirits realising that the war was finally over for him then produced a bottle of wine from his suitcase, which was promptly and very happily shared amongst both the air-crews.
Recognition
William Dunsmore was awarded the Distinguished Flying Cross (DFC), John Wilkinson and Alexander Brown as NCO’s eared the Distinguished Flying Medal (DFM). All survived the war.
Ted Strever also received a Distinguished Flying Cross (DFC) for this action. He died in Haenertsburg, South Africa in 1997 at the age of 77. This was only one instant in what was a very highly colourful and brave career in the Air Force. His daughter Gail Strever-Morkel published a book on his life, called ‘On Laughter-Silvered Wings: The Story of Lt. Col. E.T (Ted) Strever D.F.C’ and it well worth a read should anyone get their hands on a copy or order an electronic copy.
A short documentary was recently made by Mark Felton Productions and is on YouTube, here’s the link:
One thing is certain, they sure don’t make airmen like this anymore. A unique, brave and distinctively South African legacy.
Written and Researched by Peter Dickens
References
On Laughter-Silvered Wings: The Story of Lt. Col. E.T (Ted) Strever D.F.C By Gail Strever-Morkel. Published 2013.
PB Lucas (editor): Wings of War – Published 1983
The Reader’s Digest Illustrated Story of World War 2, vol.I.
The London Gazette dated Friday 4th September, 1942, regarding the award of the DFC.
A friend asked the Observation Post a question, what were Sailor Malan’s medals? So down the rabbit hole and here we are … Sailor’s medals. I’m no medal specialist but this is what I’ve managed to find so far. If I’m wrong please feel free to correct me and add to this.
Image: Sailor Malan’s medals on display at the Johannesburg War Museum in Saxonwald
Left to Right – from the highest value (the decoration/medal closest to the heart when the medal rack is worn on the left breast), to the lowest value decoration/medal (the one furtherest from the ‘heart’), and in the case of foreign decorations (other countries) in order of importance after the lowest ‘own’ country medal – Sailor has a few of foreign awards these too, and they are all ‘decorations’ so very important.
Distinguished Service Order & Bar (DSO)
OK, let’s start with Sailor’s DSO, the ‘& Bar’ bit means he was awarded this decoration not once, but twice. In Sailor’s case the DSO is awarded for bravery. Here are the citations for his Distinguished Service Orders:
Acting Squadron Leader Adolph Gysbert Malan, DFC (37604), Royal Air Force, No.74 Squadron. December 24th, 1940.
“This officer has commanded his squadron with outstanding success over an intensive period of air operations and, by his brilliant leadership, skill and determination has contributed to the success obtained. Since early in August 1940, the squadron has destroyed at least 84 enemy aircraft and damaged many more. Squadron Leader Malan has himself destroyed at least eighteen hostile aircraft and possibly another six.”
And on 22nd July, 1941:
Bar to the DSO
Acting Wing Commander Adolph Gysbert Malan, DSO, DFC (37604) Royal Air Force.
“This officer has displayed the greatest courage and disdain of the enemy whilst leading his Wing on numerous recent operations over Northern France. His cool judgement, exceptional determination and ability have enabled him to increase his confirmed victories over enemy aircraft from 19 to 28, in addition to a further 20 damaged and probably destroyed. His record and behaviour have earned for him the greatest admiration and devotion of his comrades in the Wing. During the past fortnight the Wing has scored heavily against the enemy with 42 hostile aircraft destroyed, a further 15 probably destroyed and 11 damaged.”
Distinguished Flying Cross & Bar
Again, the ‘& Bar’ bit means he was awarded this decoration twice, this is still a ‘decoration’ and not a ‘medal’ so it’s very high on the senior level, and in Sailor’s case both times it is awarded to exceptional flying and bravery. Here are the citations for his Distinguished Flying Crosses;
Flight Lieutenant Adolph Gysbert Malan. (37604), Royal Air Force. June 11th, 1940.
“During May 1940, this officer has led his flight, and on certain occasions his squadron, on ten offensive patrols in Northern France. He has personally shot down two enemy aircraft and, probably, three others. Flight Lieutenant Malan has displayed great skill, courage and relentless determination in his attacks upon the enemy.”
And on August 13th, 1940:
Bar to the DFC
Flight Lieutenant Adolph Gysbert Malan. (37604), Royal Air Force.
“Since the end of May, 1940, this officer has continued to lead his flight and, on many occasions the squadron, in numerous successful engagements against the enemy. During the Dunkirk operations he shot down three enemy aircraft and assisted in destroying a further three. In June, 1940, during a night attack by enemy aircraft, he shot down two Heinkel 111’s. His magnificent leadership, skill and courage have been largely responsible for the many successes obtained by his squadron.”
British and Commonwealth Medals
What follows after the decorations on Sailor’s medal rack are medals for World War 2 in order of seniority and these are:
1939-45 Star with Battle of Britain clasp
Campaign medal awarded to all British and Commonwealth personnel who fought in any theatre of operations during WW2. The ribbon shows arms of service – Navy (dark blue), Army (red) and Air Force (light blue).
The ‘Battle of Britain Clasp’ on Sailor’s 1939-45 Star was awarded to those who were engaged in action in the Battle̴ of Britain between 10th July 31st July 1940
The Air Crew Europe Star with France and Germany clasp
The ACE medal was awarded for operational flying from the UK over Europe, between the period 3rd September 1939 to 5th June 1944 (outbreak of war until the start of Operation Neptune on the 5th June 1944, followed by the D-Day Normandy landings on the 6th, so the cut off date is actually 4 June, 1944 for ACE medal), the ribbon is light blue with black edges and yellow stripes, representing continuous service in the air (blue) by day (yellow) and night (black).
The France and Germany clasp was awarded to those who qualified for the France and Germany Star by having participated in land, sea or air operations in, or over, France, Holland, Belgium or Germany between 6 June 1944 and 8 May 1945.
The Defence Medal
Campaign medal awarded for both Operational and non-Operational service during WW2 to British and Commonwealth service personnel (and civilians involved in Service to armed forces). The ribbon is symbolic of the fire bombing air attacks (Orange) on ‘this green and pleasant’ land (Green) of the UK during the ‘blackouts’ (the two thin black lines).
The War Medal (1939-1945) – with a mid Oak Leaf.
Campaign medal for British and Commonwealth personnel who had served full-time in the Armed Forces or the Merchant Navy for at least 28 days between 3 September 1939 and 2 September 1945. The medal ribbon is distinguished by the colours of the British Union Flag/Jack.
The Oak Leaf signifies that the individual wearing this medal was MiD (Mentioned in Dispatches). The Oak Leaf on Sailor’s ribbon of this medal indicates the award of the King’s Commendation for Brave Conduct.
Foreign Decorations
There are decorations issued by ‘foreign’ countries to Sailor Malan and they are worn in the more junior position of the medal rack regardless of the seniority of the decoration. Here Sailor Malan received the following:
Legion of Honour (France) Officer Grade
The ‘Ordre national de la Légion d’honneur’ or LdH is France’s highest distinction and is awarded in recognition of both military and civilian merit. There are three ranks; Chevalier (Knight), Officier (Officer) and Commandeur (Commander). Sailor has the Officer rank.
Croix de Guerre (France)
The French ‘War Cross’ is awarded either as an individual award or a unit award to those combatants who distinguish themselves by acts of heroism involving combat with the enemy.
Croix de guerre (Belgium) with bronze palm
This is the World War 2 variant of the Belgium ‘War Cross’, awarded for bravery or other military virtue on the battlefield. It was reestablished on 20 July 1940 by the Belgian government in exile for recognition of bravery and military virtue during World War 2.
The Bronze Palm means Sailor Malan was ‘Mentioned in Dispatches’ by the War Office specifically for a performing heroic or significant deed.
Czecho-Slovakian Military Cross
Ceskoslovenský válecný kríž 1939 is a military decoration of the former state of Czechoslovakia which was issued for those who had provided great service to the Czechoslovak state (in exile) during World War 2.
Awarded to Group Captain Adolph Gysbert Malan on March 5th, 1946 “In recognition of valuable services rendered in connection with the war.”
In Conclusion
Now, that’s a lot of ‘Bravery’ and Sailor Malan counts as one of South Africa’s bravest, he’s got the decorations and medals to show for it. I’m no pro when it comes to medals, its a very complex field, so here’s waiting for the medal pros for more information … and go!
Image is from a Johannesburg War Museum PDF. Researched and written by Peter Dickens
Some hidden history – ‘Did you know?’- back of the Chappie gum wrapper facts. Did you know Sir Arthur ‘Bomber’ Harris – the famous Commander of RAF Bomber Command during WW2 was in fact a Rhodesian and he also had a very strong South African connection, here’s an interesting story and it involves a bugle, a bombing and a baronet.
At the commencement of World War 1, a unit called the 1st Rhodesia Regiment was formed in August 1914. In October it consisted of 500 volunteers. In November the Unit went to Bloemfontein and on to Cape Town by train. On Christmas Day 1914 the Regiment landed in Walvis Bay to join the 4th South African Brigade. After that there were marches and skirmishes against the German troops. One young man in this Regiment was the bugler.
After one skirmish, he got fed up and buried his bugle. They had marched and marched in blazing desert sun in German South West Africa (modern day Namibia), from January to June 1915, when the campaign finally ended. He swore he would never march another step into battle. The young man was Arthur Travers (Bomber) Harris and with this act he gave up foot soldiering into battle and took up flying into battle instead.
We have all heard about his exploits and management of RAF Bomber Command during World War 2, but few know of his lifelong connection with South Africa. In fact, he was even a founder member and General Manager of SAFMARINE.
First World War
1st Rhodesia Regiment in Cape Town on their way to German South West Africa (Namibia) December 1914
Born in the Gloucestershire, England, Harris emigrated to Southern Rhodesia (modern day Zimbabwe) in 1910 when he was 17. When the First World War broke out in August 1914, Harris did not learn of it for nearly a month, being out in the bush at the time. Despite his previous reluctance to follow the path his father had in mind for him in the army, and his desire to set up his own ranch in Rhodesia, Harris felt patriotically compelled to join the war effort.
He quickly attempted to join the 1st Rhodesia Regiment, which had been raised by the British South Africa Company administration to help put down the Maritz Rebellion in South Africa, but he found that only two places were available; that of a machine-gunner or that of a bugler. Having learnt to bugle at Allhallows School in Devon, he successfully applied for the bugler slot and was sworn in on the 20th October 1914.
The 1st Rhodesia Regiment briefly garrisoned Bloemfontein, then served alongside the South African forces in South-West Africa under South African command during the first half of 1915. The campaign made a strong impression on Harris, particularly the long desert marches—some three decades later, he wrote that “to this day I never walk a step if I can get any sort of vehicle to carry me”. South-West Africa also provided Harris with his first experience of aerial bombing: the sole German aircraft in South-West Africa attempted to drop artillery shells on his unit, but failed to do any damage. How prophetic that his next idea of a “vehicle” to carry him into battle would be an aeroplane.
When the South-West African Campaign ended in July 1915, the 1st Rhodesia Regiment was withdrawn to Cape Town, where it was disbanded; Harris was formally discharged on 31 July.
He felt initially that he had done his part for the Empire, and went back to Rhodesia to resume work at Lowdale, but he and many of his former comrades soon reconsidered when it became clear that the war in Europe was going to last much longer than they had expected. They were reluctant to join the 2nd Rhodesia Regiment, which was being raised to serve in East Africa, perceiving the “bush whacking” of the war’s African theatre as inferior to the “real war” in Europe. Harris sailed for England from Beira at the Company administration’s expense in August, a member of a 300-man party of white Southern Rhodesian war volunteers.
He arrived in October 1915, moved in with his parents in London and, after unsuccessfully attempting to find spaces in first the cavalry, then the Royal Artillery, he finally joined the Royal Flying Corps as a Second Lieutenant in November 1915.
He served with distinction on the home front and in France during 1917 as a Flight Commander and ultimately CO of No. 45 Squadron, before he returned to Britain to command No. 44 Squadron on Home Defence duties, Harris claimed five enemy aircraft destroyed and was awarded the Air Force Cross (AFC) on 2 November 1918.
He finished the 1st World War a Major and remained in the RAF as a career choice. Although born British, he identified himself as a Rhodesian Intending to return to Rhodesia one day, to this sentiment Harris wore a “Rhodesia” shoulder flash on his RAF uniform.
Second World War
Much is written about ‘Bomber’ Harris in the Second World War and a lot of it very controversial. At the outbreak of the Second World War in 1939, Harris took command of No. 5 Group RAF in England, and in February 1942 was appointed head of Bomber Command. He retained that position for the rest of the war.
In 1942, a seminal paper was put to the British Cabinet advocating the idea of area bombing of German cities in a strategic bombing campaign. It was accepted by Cabinet and Harris was directed to carry out the task. It became an important part of the ‘Total War’ strategy waged against Nazi Germany.
At the start of the bombing campaign, ‘Bomber’ Harris famously justified the idea of area bombing by quoting the Old Testament:
“The Nazis entered this war under the rather childish delusion that they were going to bomb everyone else, and nobody was going to bomb them. At Rotterdam, London, Warsaw and half a hundred other places, they put their rather naive theory into operation. They sowed the wind, and now they are going to reap the whirlwind.”
Images: Colourised images by DB Colour and RJM of Bomber Command Lancaster and crew.
Winston Churchill regarded the idea of area bombing strategy with distaste, official public statements maintained that Bomber Command was attacking only specific industrial targets, any civilian casualties were unavoidable and were unintentional. By 1943, Harris urged the government to be honest with the public regarding the purpose of area bombing and said:
“The aim of the Combined Bomber Offensive … should be unambiguously stated [as] the destruction of German cities, the killing of German workers, and the disruption of civilised life throughout Germany … the destruction of houses, public utilities, transport and lives, the creation of a refugee problem on an unprecedented scale, and the breakdown of morale both at home and at the battle fronts by fear of extended and intensified bombing, are accepted and intended aims of our bombing policy. They are not by-products of attempts to hit factories.”
Harris pressed for raids on a much larger scale and launched the first RAF “thousand bomber raid” against Cologne in May 1942, his successes using this method of aerial warfare saw him promoted to Air Marshal and even acting Air Chief Marshal by March 1943.
The Butcher’s Bill
Leading up to and after D-Day, 6 June 1944, the bombing campaign continued to attract controversy, but the most controversial was the bombing of Dresden on the night of 13 February 1945. More than 1,200 heavy bombers dropped nearly 4,000 tons of high-explosive and incendiary bombs on the city in four successive raids. An estimated 25,000 people were killed in the bombings and the firestorm that raged afterward. More than 75,000 dwellings were destroyed, along with unique monuments of Baroque architecture in the historic city centre. The scale of the death and destruction, coming so late in the war, along with significant questions about the legitimacy of the targets destroyed have led to years of debate about whether the attack was justified.
Image: Colourised Royston Colour image of Dresden post bombing.
This issue on whether Dresden qualified a military target or not and in fact may have been an unnecessary bombing continues to this day, with evidence even pointing to targeting the ‘old city’ for a firestorm rather than the industrial sector as was the officially stated objective. In either event, what is known is that area bombing by nature was very inaccurate and indiscriminate and the death toll extreme, and the RAF and Bomber Command would admit that the entire area bombing campaign including Dresden was ‘somewhat overdone,’ but this sentiment was wrapped in secrecy for many years after the war.
To see this Butcher’s bill in total, consider these estimates. Civilian deaths in Germany from Allied bombing was more recently estimated at 380,000. Bomber Command dropped 53 per cent of all the ordnance sent to Germany. Firestorms caused by Bomber Command’s incendiaries killed over 34,000 civilians in Hamburg in July 1943, 5,600 in Kassel in October 1943, at least 7,500 in Darmstadt in September 1944, 25,000 in Dresden and 17,600 in Pforzheim in February 1945 and 4,000-5,000 in Würzburg in March 1945: nearly 100,000 dead for the half-dozen deadliest raids.
The attitudes to this style bombing of Nazi Germany populace at the time were becoming very ‘hard’, an attitude exhibited by nearly all the Allied combatants involved in it, as the war had rung out an alarming butchers bill on civilians in all the countries of Western and Eastern Europe. Notwithstanding the Nazi Blitz campaign of British cities at the start of the war and Nazi ‘wonder weapons’ indiscriminately bombing London’s civilians towards the end of the war. This hard attitude was best surmised by a British Bomber Command air-crewman when he said this during a World at War interview:
“If you couldn’t get the Kraut in his factory, it was just as easy to knock him off in his bed, and (if) Granny Schicklgruber in the seat next door got the chop that’s hard luck!” (The sarcastic reference to Schicklgruber was Maria Schicklgruber, Adolph Hitler’s paternal Grandmother).
Image: Avro Lancaster Bomber ‘B’ MkI ‘Victorious Virgin’ crew showing the attitude of the day, this 4000 pound ‘cookie’ bomb was dropped on an Oil Refinery in Hemmingstedt in March 1945, near Heide in Germany. Colourised by Tom Thounaojam.
The culmination of Bomber Command’s offensive occurred in March 1945 when the RAF dropped the highest monthly weight of ordnance in the entire war, mainly on Berlin to support the Russian offensive to take the city. In all Harris was asked if strategic area bombing would work in winning the war at the beginning of the campaign and his reaction was “we shall see”. In hindsight, the campaign went a very long to way to ultimately break resolve and bring Germany to its knees economically, but it happened at a tremendous cost in human lives, not only civilian, lets examine the butcher’s bill on Bomber Command:
Of every 100 airmen who joined Bomber Command, 45 were killed, 6 were seriously wounded, 8 became Prisoners of War, and only 41 escaped unscathed (at least physically). Of the 120,000 who served, 55,573 were killed. Of those who were flying at the beginning of the war, only ten percent survived. It is a loss rate comparable only to the worst slaughter of the First World War trenches. Only the Nazi U-Boat force suffered a higher casualty rate. On a single night, Bomber Command suffered more losses than did Fighter Command during the entire Battle of Britain.
One must also caution here, whilst the figures on both sides of the Butcher’s Bill are high for British and American combined Bomber Command Ops, Germany by no means comes through smelling of roses – their campaigns and targeting of civilians is staggering – in all about 90,500 British civilians were killed and that’s nothing compared to the estimated civilian deaths in Yugoslavia of 1.2 million, Poland 5.7 million and USSR 7.0 million. To say that attitudes had hardened when it came to the combatants would be an understatement.
In Conclusion
It would be unfair with a modern day sense of sensibility to look at Bomber Harris and the men of Bomber Command as a war criminals, one has to look them him in the context of their time and the great struggle surrounding them, especially the extreme choices taken to bring about an end to a war of this nature.
However, in his ‘Butcher’s Bill,’ one cannot help but note there is a ‘World War 1’ mind in Bomber Harris, but it’s not an uncommon one for a Commander in his time, Field Marshal Bernard Law Montgomery can also be accused of the same. It is one whereby ‘attrition’ is used to gradually overwhelm using overwhelming odds, it rings true to the WW1 Battle of Verdun, a meat grinding approach to who runs out of resources, especially human resources first. It eventually wins wars, no doubt, but at a tremendous cost in human lives.
After the war Harris moved to South Africa where he founded and managed SAFMARINE, short for the South African Marine Corporation. Safmarine, is a South African business success story involved in international container shipping and break-bulk shipping services worldwide. It is now owned by its parent company, the Maersk Line.
In 1953 he returned to the United Kingdom to accept a Baronetcy, which strangely, Winston Churchill insisted he receive, and here he lived out the rest of his long life in Goring-on-Thames passing away at 91 years old in 1984. He even managed to see the creation of his much loved Rhodesia into Zimbabwe as a nation state.
In all, it’s a fact that Southern Africa in its harshest form would fashion the man into what Arthur Harris was to become, it’s also clear that the German South West African Campaign in World War 1 would fashion a steel willed and uncompromising attitude of endurance and perseverance in a world of hardships, and one in which he would look to aviation instead of marching into battle to ultimately win wars. With all the modern day accusations of Harris been a ‘war criminal’ for his actions against civilians I wonder sometimes if someone may eventually dig up his buried bugle in Namibia and what that would come to symbolise.
Images: Sir Arthur Harris GCB, OBE, AFC and the Green Park Bomber Command Memorial
To the opening statement, I hear some colleagues say “everyone knows he was a Rhodesian”, well nope- the reason I say his South African and Rhodesian (Zimbabwean) heritage and history is relatively unknown, and for that matter this includes a great many other Rhodesians and South Africans (including two Victoria Cross recipients – Wing Commander John Nettleton VC and Captain Edwin Swales VC) who were sacrificed whilst taking part in Bomber Command operations, is that when the Bomber Command War Memorial was finally unveiled in Green Park in London in 2012, not one South African or Rhodesian military veteran association member and not one dignitary from South Africa or Zimbabwe took part in it. From the Commonwealth, Canadians, Australians, New Zealanders, even West Indians – all got a nod, I watched the entire unveiling ceremony on BBC and not even a mention of a South African, not even the Victoria Crosses and numerous other decorations for valour won by them whist in Bomber Command.
Some may even say, given all the controversy, better not to have been there anyway. But that would be to dishonour a generation that sacrificed so much, physically and mentally, for our modern freedoms. Especially our countrymen in Bomber Command who found themselves in this most extraordinary and very tragic period of our wartime history, these are men who had to face hard and very fateful decisions, the world at times has forgotten our WW2 contributions, lest we forget them too.
Researched by Peter Dickens.
Large content and additional research with much thanks to Buskruit Burger.
Large extracts from wikipedia and Bomber Command Museum on line. Statistics referenced from Andrew Knapp: The Horror and the Glory: Bomber Command in British Memories since 1945 and the Encyclopaedia Brittanica.
Today we highlight an act of bravery by a South African during the Battle of Britain which could have earned him the Victoria Cross but unfortunately did not – heralded and remembered in the United Kingdom, his act is hardly known of in South Africa.
Flight Officer Percival Ross-Frames Burton
So let’s have a look at this remarkable South African and his action, and lets remember what ‘sacrifice’ actually meant to the small group of South African airmen defending the last bastion European modern democracy and liberty against the invasion of a Nazi totalitarian tyranny.
There is truth in the words of Sir Winston Churchill when he said “never in the field of human conflict has so much been owed by so many to so few” – and in truth Percy Burton’s death epitomises exactly the type of sacrifice made by these ‘few’. His action is astounding and it’s one which reflects the desperate nature of the fight between young men on both sides and in so it is as deeply tragic as it is liberating – this is the true ‘Price’ paid.
Background
Percival (Percy) Ross-Frames Burton was born in 1917 in Cape Province, South Africa. A military man from the outset, during peacetime he initially joined the South African Coast Garrison and Citizen Force in 1935.
Before the start of the Second World War, Percy decided to read Jurisprudence at Oxford University attending Christ Church College in 1938. An active sportsman’ he took part in the University’s rowing team and boat races and was the reserve cox for the Oxford crew.
Whilst at Oxford, Percy Burton also learned to fly with the University’s Air Squadron. At the onset of war in October 1939 he volunteered and took up a commission in Royal Air Force Reserve (Service Number 74348), and after completing his training at Flight Training School Cranwell he arrived at 6 OTU, Sutton Bridge on the 22nd June 1940 to convert to Hawker Hurricanes.
After one month of training on hurricanes Flight Officer (F/O) Percival Ross-Frames Burton found himelf in RAF No. 249 Squadron. Just in time to walk straight into The Battle of Britain which kicked off in earnest from the 10th July 1940, and he was to fly alongside another great South African hero in the Battle of Britain – Albert ‘Zulu’ Lewis DFC and Bar.
249 Squadron – Left to Right P/O Percival Ross-Frames Burton; Flt/Lt Robert ‘Butch’ Barton; Flt/Lt Albert Gerald ‘Zulu’ Lewis; P/O Terry ‘Ossie’ Crossey; P/O Tom ‘Ginger’ Neil; P/O Hugh John Sherard ‘Beazel’ Beazley; Sqn/Ldr John Grandy C/O; P/O George Barclay Flt/Lt Keith Lofts. (Colourised by Doug)
A ‘successful’ days’ action
On the morning of 27th September 1940, No.249 Squadron was scrambled into action. Burton took off from North Weald in Hurricane V6683 at about 08:50am with eleven other No.249 Squadron Hurricanes.
RAF 249 Squadron’s Hurricanes rendezvoused with Hurricanes RAF 46 Squadron and they began to patrol Wickford before being vectored to the Maidstone area where enemy activity had been reported.
When they got to Maidstone they encountered German aircraft in two defensive formations heading south at low-level. A defensive circle of German Luftwaffe Bf 110s were spotted over Redhill and above them German Luftwaffe Bf 109 fighters were sighted higher up. Flight/Lt Butch Barton rallied No.249 Squadron into a diving attack the Bf 110 formation from out of the sun and individual combats (dogfights) then ensued. The German Bf 109 fighters flying top cover for some reason did not get into the ensuing dogfight – it was later assumed they had not seen the attacking RAF Hurricanes.
It was a successful day for 249 Squadron, when the Squadron’s Hurricanes returned to North Weald they claimed an impressive eight enemy aircraft destroyed and a further five probables, but it came with a price and Flying Officer Percy Burton had paid the ultimate price. However he had done so in a manner which simply breathtaking.
Cutting a Bf 110 in two
Hauptmann Horst Liensberger
During the action Percy Burton locked onto and vigorously pursued a Bf 110 flown by Hauptmann Horst Liensberger in a desperate engagement which covered a distance of about forty miles (64 kilometres), weaving around at an extremely low altitude, often little more than treetop height.
Percy Burton chased the Bf 110 at this low-level, until they arrived over Hailsham, Sussex when Burton’s ammunition had all been fully expended, with silent guns Percy Burton continued the chase and the two aircraft skimmed over the rooftops. The Bf 110 simply could not shake Burton off.
At this point Percy Burton was flying slightly above and behind the twin-engined BF 110 light bomber aircraft when suddenly, and in an unprecedented manoeuvre, he banked his Hurricane, dived down and collided with the Bf 110 in mid-air, literally chopping the Bf 100 into two.
The Bf 100’s Empennage (the tail assembly including the flying surfaces – rudder and elevator) dropped out of the sky and fell into a field, it was followed by the remainder of the severed enemy aircraft’ (the wings, dual engines and cockpit) falling uncontrolled out of the sky into the field – along with Burton’s wingtip.
The Bf 110 pilot Hauptmann Horst Liensberger his rear-gunner, Uffz Albert Kopge, were killed outright. Flying Officer Percy Burton’s Hurricane, now missing its wingtip was also out of control and he crashed into a huge oak tree on New Barn Farm. The impact of hitting such a large oak tree was so excessive it threw Burton out and clear of his Hurricane.
A powerful artists impression showing the ultimate sacrifice by Percy Burton of 249 Squadron as he rams the Stab-V LG1 Bf110C of Horst Liensberger/Albert Koepge.
Burton was killed and his Hurricane burned out. Eye-witness reports indicated that Percy Burton had deliberately rammed the Bf 110 in a final act of valour. Percy’s body was found riddled with bullets, which led to speculation that Percy Burton was severely wounded in the attack and had consciously pursued and rammed the Bf 100 knowing he was not coming back.
As to a conscious decision to ram the Bf 100, fellow RAF pilot Tich Palliser who had also witnessed the collision from the air reported:
“I saw his contortions, then I saw him straighten out and fly straight into the German aircraft. I was close enough to see his letters (squadron code-markings), as other pilots must have been who also confirmed the incident, which in itself caused me to realise that my young life and its future, if any, had jumped into another dimension.”
The German witness also tells a tale young lives sacrificed, A colleague and friend of the Bf 110 pilot, wrote at the time of the incident:
“I regarded Horst Liensberger highly as my commander and as a human being… Over the radio we heard his last message: ‘Both engines are hit … am trying to turn … it’s impossible … I will try to land.’ Then nothing more.”
Recommendation for a VC
As all the eye-witness reports indicate strongly that Percy Burton deliberately rammed the Bf 110 in an act of sacrifice. In a letter from Fighter Command to the Hailsham ARP Chief, Percy Burton was recommended that for this action, bravery and sacrifice at Hailsham that he receive a posthumous Victoria Cross.
However, because of the speculated issues surrounding his action, and much to the outrage, displeasure and disappointment of his fellow pilots in No. 249 Squadron, Percy Burton did not receive the VC or any gallantry award for that metter and he was only ‘Mentioned in Dispatches’.
Remembrance
If you wish to visit another brave South African in a foreign field, Percy Burton is buried in St Andrew’s churchyard, Tangmere, England (Plot E, Row 1, Grave 480). In 1980 a road in a housing estate near the crash site was named ‘Burton Walk’ in his memory. There is also a humble memorial plaque dedicated to Burton’s memory at Hailsham near the oak tree that he hit.
The two German crew were initially buried in Hailsham Cemetery but were exhumed after the war and buried elsewhere.
Looking at this recently colourised image of Percy Burton by Doug, we are reminded of just how young these brave men were, Percy Burton was just 23 years old when he boldly sacrificed his life. In perspective he was the ‘millennial’ of his time, however it is very difficult to imagine a modern millenial facing the hardship, morality, bravery and sacrifice that this – the ‘greatest generation’ – faced.
No similar such acknowledgements or symbols of remembrance to Percy Burton exist in South Africa today, it’s also very possible that almost no South Africans even know of his existence or the brave action that nearly earned him the Victoria Cross – and he is not alone, the South Africans who took part in the Battle of Britain remain obscured and his story is one of many. Their stories left to the wayside after 1948 as seismic political forces over-shadowed these brave South Africans fighting to preserve a liberated world in the sky over England during the Battle of Britain in the summer of 1940.
In our small way, The Observation Post hopes to keep this history alive, knowing in the full grace of time that these South African men and their very brave deeds are captured and not forgotten. The Observation Post salutes and remembers you Flight Officer Percival Ross-Frames Burton.
There are pilots, and then there are ‘Hurricat’ pilots – they are truly a breed apart, and as usual in a mustering of elite pilots we find a South African. So what’s a ‘Hurricat’? Even to many of the most ardent South African aviation fans, these pilots and this aircraft nickname and type would be relatively unknown. Well, during World War 2, a ‘Hurricat’ was a Hawker ‘Sea’ Hurricane fighter which was specifically adapted to be catapulted off a ship with RAM boost, hence the combination of ‘Hurricane’ and ‘Catapult’ – Hurricat.’
So why so special? Simply put this concept of protecting ships with a singular Sea Hurricane fighter came about when there was an urgent need for convoy protection from the air, but the problem was there were usually no places to land them once launched, no handy aircraft carrier deck around and nowhere near a shore and a nice strait landing strip – once catapulted off the ship in a blaze of rocket charge the Hurricat fighter pilot found himself alone, without vast fighter support or wingmen to take on the enemy, and if he survived that singular suicide mission – he then had to find his back to his fleet with the limited navigation aids available to him. If he made it that far, there was more hazard to come, he then had to ditch his aircraft in the ocean (crash it in effect) to be hopefully safely found and plucked out.
Big seas breaking over the catapult aircraft of a catapult armed merchant (CAM) ship as seen from the bridge. Specially strengthened Hawker Sea Hurricanes are used.
These men are truly special, men of extreme bravery and there are very few of them, and one South African Hurricat pilot stands out – Flight-Lieutenant Alistair James Hay DFC. Now not too many South Africans have heard of him, and they should, this is one very remarkable South African, with bravery in buckets – this is his story.
Background
Alistair Hay was born in Johannesburg on the 13 September 1921, son of Frederick John Gordon Hay and Catherine, nee Metherell. Alistair was educated at Christian Brothers’ College in Pretoria. As a young man he was also a member of Boys Naval Brigade. At the onset of World War 2 joined up and was part of the General Botha Cadet Draft and attended the SATS General Botha from 1937-8 (Number 928).
The South African Training Ship (SATS) General Botha (named after General Louis Botha, the first Prime Minister of the Union of South Africa) started out as River Class Cruiser the HMS Thames and was donated to South Africa by T B Davis, a philanthropist extraordinary, as a full-time institution for the sea training of South African Naval Cadets.
After leaving the SATS General Botha, Alistair James Hay joined the Union-Castle Company, in which he remained until 1940. Like Sailor Malan who followed a similar path before him on the SATS General Botha, he also enlisted with the Royal Air Force in 1942 as a Volunteer Reservist. He joined the RAF initially as a Sergeant and was promoted as Commissioned Officer (Pilot Officer) on 18th May 1942, eventually becoming a Flight-Lieutenant on 18th May 1943.
He then signed up for what was one of the most dangerous jobs around, and because of his nautical background on the SATS General Botha he found himself seconded to the Navy again in service as a RAF fighter pilot on a Catapult Armed Merchantman (in short a ‘CAM’).
CAM
During the Second World War, German U Boats nearly won the war all on their own sinking merchant and fighting ships at a phenomenal rate starving the Allies of troops and supplies, and in a desperate attempt to close the gap in the Atlantic Ocean and the North Sea that could not be covered by British aircraft flying from England i.e over the U-Boat hunting fields due to range, the concept of the Auxiliary Fighter Catapult Ships (FCS) under the White Ensign, and the Catapult Armed Merchantmen (CAM ships) sailing under the Red Duster was conceived and born.
The Hawker Sea Hurricane being catapulted from the catapult armed merchant (CAM) ship at Greenock. Note the long flame from the rocket assistors.
The idea was simple, one of the ships in the Merchant Fleet had an aircraft to protect the convoy. The CAMs were equipped with a single fighter aircraft, and had no flight deck with a single catapult structure fitted to the ship’s bow. To take off the catapult consisted of a girder framework and a trolley, connected by wire ropes and pulleys to the ram of a cylinder. The cylinder was connected by a pipe to the chamber in which a charge was exploded, causing the ram to push the aircraft forward in a blaze of charge and with sufficient velocity to make it air-borne at the end of its very short take-off run.
The merchantmen CAMs were allocated 50 Hawker Hurricane fighters with specially trained RAF crews. However launching a ‘Hurricat’ usually meant the fighter did not return, it would be ‘lost’ – either be shot down by the attacking enemy or it would be lost to sea when the pilot ditched it, they were a one way and very costly mission. In spite of the inevitable early heavy losses and the sheer waste of perfectly good aircraft, the catapult ships remained in vital service until 1943. By 1943 large numbers of Allied aircraft carriers had been built and they in turn took up the role of closing the air cover gap to protect merchantmen at sea.
A Hawker Sea Hurricane Mk IA on the catapult of a CAM [Catapult Armed Merchant] Ship at Greenock.
Back to our hero, an article was later published in the “South Africa” newspaper on 14 March 1942 relates just what a special pilot Alistair Hay was:
“The hazards of the sea are apparently not enough for the young gentleman trained in the S.A.T.S. General Botha. pilot-officer A.J. Hay, Royal Air Force, from Pretoria, just back from a successful cruise, tells me that his special duty is to be ‘loaded’ into a catapult that will shoot him and his fighter plane from the deck of the ship as soon as his services are needed to attack enemy aircraft. he describes the sensation as thrilling ‘until you are accustomed to it”
The HMS Empire Lawrence
P/O Alistair Hay, on the 27th May 1942, found himself serving as the ‘Hurricat’ Catapult Pilot aboard the CAM, HMS “Empire Lawrence”, little did he know that by the end of the day he would be a decorated hero. The HMS Empire Lawrence was the CAM ship forming part of the Russian PQ16 convoy to Murmansk just east of Bear Island (the southernmost island of the Norwegian Svalbard Archipelago) when the convoy was attacked by German seaplanes.
To fight off the attack, Pilot Officer Hay jumped into his Sea Hurricane and was blasted off the ship to take the approaching formation of German aircraft head on singlehandedly. The approaching attack was made up of a formation of six German Heinkel 111 and 115. These Heinkel aircraft were adapted seaplanes for long-range patrolling and whose mission was to sink Merchantmen using torpedos which they dropped in low flight bombing runs.
HMS EMPIRE LAWRENCE, circa 1941. Note the catapult and Sea Hurricane on the bow
Alistair Hay’s mission was to disrupt the torpedo bombing runs and destroy as many enemy aircraft as possible. He diverted the attack and in the process destroyed one German aircraft and damaged a second one. In a six against one attack it was inevitable that he would come under extreme fire, and as a result he was severely wounded in the attack, shot in the thigh and bleeding heavily he had to bale out of his aircraft.
The action in the air was recounted by an eyewitness, a naval officer – Neil Hulse, who had been smoking with Alistair Hay on the bridge as the attack unfolded, he recalled:
“He (Hay) butted out his cigarette and put it in his flying jacket. He had no hope of landing on friendly territory. We watched as he took off and remained in communication with him. On the speaker we could hear him going in, and hear his cannon fire in the cockpit of the plane. He got one and there was smoke trailing from the other. Then we heard his cry that he had been hit.”
Spotting his parachute, he was picked up from the icy waters within ten minutes by one of the convoy’s escort ships, the HMS Volunteer, who came to his rescue, and funnily enough the Commander of HMS Volunteer was none other than another South African and fellow SATS General Botha graduate – Lieutenant-Commander Arthur Shubrook Pomeroy. The rescue itself was also very dramatic as the HMS Volunteer also came under attack whilst they were hoisting Alistair Hay aboard and HMS Volunteer had to make some dramatic evasive manoeuvres.
HMS Volunteer underway – Imperial War Museum
Lt/Cmdr Arthur Pomeroy recalled the incident of reusing his fellow South African when he wrote:
“Let me tell you how I met him (Alistair Hay) in the Arctic. Our station was on the port bow of the leading ship of the port column, the ‘Empire Lawrence’, which was fully loaded with explosives and ammunition. Mounted on her forecastle was a catapult with a Hurricane fighter aircraft piloted by Alastair hay. On the first day of intense bombing, he was shot off into the air to engage single-handed the squadrons of Heinkel III and Junkers 88s.
Eventually, wounded, he had to bale out, as there was no carrier to land on. I lowered a boat to pick him up, and just as the boat’s falls were hooked on again for hoisting, two torpedo-bombers came at us low down from the North. With the boat still only a few inches out of the water and my hair standing on end, I ordered Full Ahead and Hard-a-Starboard to steady course to comb the tracks of the torpedoes, which we could see, one on each quarter.
This took us on an exact collision course with the ‘Empire Lawrence’ . There was just time to alter to port ahead of the port torpedo, and then both of them struck her and she disintegrated in an immense explosion, just a grating and a few bits of wood left floating”
Nazi Luftwaffe Heinkel He 115 in flight
DFC
For his gallant actions P/O Alistair Hay was subsequently awarded the Distinguished Flying Cross (DFC) and his citation (Supplement to the London Gazette, vol 35605 pg 2756) reads:
“Pilot Officer Hay was pilot of the Hurricane on board a ship fitted with a catapult. On the approach of enemy aircraft he was catapulted off and immediately proceeded to attack and drive off a formation of six Heinkel 111’s and 115’s which were preparing to deliver a torpedo attack on the port bow of the convoy; not only did this prevent synchronisation with an attack which developed from the starboard bow, but he destroyed one Heinkel 111 and slightly damaged another. Pilot Officer Hay was himself wounded and he then baled out and was picked up by one of His Majesty’s ships of the convoy escort. He showed great gallantry and his spirited attack was a great encouragement to all the convoy and escorts, and cannot but have been a great discomfort and surprise to the enemy.”
The Battle of the Falaise Gap
Alistair Hay DFC recovered from his bullet wound, and there was still more fight in him. He was to join Royal Air Force No. 182 Squadron to take part in the liberation of Europe flying Typhoon 1b’s.
Flying Typhoons was particularly dangerous at this phase of the war, they almost always operated at low altitude “on the deck” mainly employed to attack targets such as armour, anti-aircraft installations, specific buildings, transports and enemy personnel. As a result they were frequently subjected to intense ground fire, for this reason alone, flying in a Typhoon squadron was very high risk.
RAF Typhoon Mk1b
During the Normandy invasion, the defending German were surrounded on three sides into a pocket called the ‘Falaise Gap’, trapped in the pocket they chose to fight their way out with a staggering loss of personnel and equipment, it was a desperate battle as the only way the German forces in Europe could remain in contention was to retreat from the trap and reform – which they ultimately managed to do.
The Falaise Gap was ideal territory for Typhoons as they strafed and rocketed the high congestions of German personnel, trucks, armour, artillery and tanks trying to escape the pocket, but also highly dangerous as they came up against a very desperate defence.
Flight-Lieutenant Alistair James Hay DFC was tragically killed on the 18 August 1944 whilst taking part in the Battle of the Falaise Gap flying RAF Typhoon, serial number JP427 and he encountered flak near Vimoutiers and was shot down.
He lies today in France at the St Desir War Cemetery in Calvodos, near Caen, Grave reference V.D.4. should anyone want to visit and salute one very brave son of South Africa.
In Conclusion
So why don’t South Africans know much about these remarkably brave ‘Hurricat’ pilots, their aircraft and their near suicide missions, why has someone like Flight-Lieutenant Alistair James Hay DFC and his rescue by his fellow SATS General Botha fraternity not entered our realm of standout South African military heroes or even into our general discourse and understanding of World War 2 and South Africa’s involvement?
His story like many others is just confined to the SATS General Botha old boys fraternity, his name on their Honour Roll. We all know the reason as its politics as usual, Smuts sending South Africans to war was bad enough for the Afrikaner nationalists, serving in the ‘hated’ British Armed services was akin to treason in their eyes. This history was buried after the nationalists came to power and it remains relatively buried to this day as more seismic political forces have over-taken it.
In a small way, we hope to keep this history alive, knowing in the full grace of time that these men and their very brave deeds are captured and not forgotten. The Observation Post salutes and remembers you Flight-Lieutenant Alistair James Hay DFC – one of our bravest, lest we forget.
Llarge extracts and references from The Southern African History Musings of Ross Dix-Peek – Alistair James Hay. Hurricane Catapult Pilot from the Transvaal June 19th 2013. Reference for Lieutenant-Commander Arthur Shubrook Pomeroy’s memories – published in General Botha’s Old Boy Association newsletter, May 2005, Part Two. Also referenced is the History of 182 Squadron on-line and The South African War Graves Project. Images – copyright Imperial War Museum where indicated. Colourised image on the header by Deviant Art.
This beautiful war-bird turned 75 years old recently, hitting the 75th milestone in August 2018, still airworthy she’s been a regular on the Battle of Britain Heritage Flight line ups and air-shows for decades, she’s even a movie star, she made her most famous film appearance in what is regarded as the best WW2 film ever made ‘A Bridge Too Far’, where she flies over the young Dutch boy on a bicycle and waggles her wings.
Supermarine Spitfire IX – MH434 in flight
But little known to the tens of thousands of admiring fans in Britain that have seen her flying overhead in countless commemorations is her remarkable South African wartime heritage, she’s the Spitfire which saw one very brave South African fighter ace fly her into combat.
Little known to many South Africans, who do not have an airworthy Spitfire in any collection in South Africa anymore, is that there is in fact a South African’s Spitfire still flying today – they can take some comfort in that.
Royal Air Force Spitfire MH434 is arguably one of the most famous flying Spitfires around, she was built in 1943 at Vickers, Castle Bromwich. What’s remarkable about her? She is remarkably original, having never been subject to a re-build and still flying in her original paint scheme. For her inaugural flight in August 1943 was also noteworthy, MH434 was air tested by the legendary Alex Henshaw – a record-breaking pilot from pre-war days and Chief Test Pilot for Supermarine.
But what is more remarkable is her first war-time pilot, South African – Henry ‘Pat’ Lardner-Burke DFC & Bar and the Squadron she cut her teeth in – the Royal Air Force’s 222 Squadron – the ‘Natal Squadron’.
Flight Lieutenant Laurie of No. 222 (Natal) Squadron, Royal Air Force starting up Supermarine Spitfire Mark V, BM202 ‘ZD-H’ “Flying Scotsman”, at North Weald, Essex during WW2
222 (Natal) Squadron
Formed during WW1, 222 Squadron was reformed at the onset of WW2 at Duxford on 5 October 1939 and in March 1940 the squadron re-equipped with Spitfires. It initially took part in the Dunkirk evacuation and the Battle of Britain. Later in the war it would participate in Overlord and the D-Day landings as well as Operation Market Garden.
The Natal Squadron is named as such as it was regarded as the Natal Province ‘gift’ Squadron to the Royal Air Force. During the war funds were raised to ‘sponsor’ Spitfires in Natal and equip this squadron. As a representative of the South African province and old British colony, the squadron emblem consisted of wildebeest which is Natal’s official animal and was represented in the Natal province emblem. The squadron motto was ‘Pambili Bo’ (Go straight ahead). The wildebeest also symbolises speed.
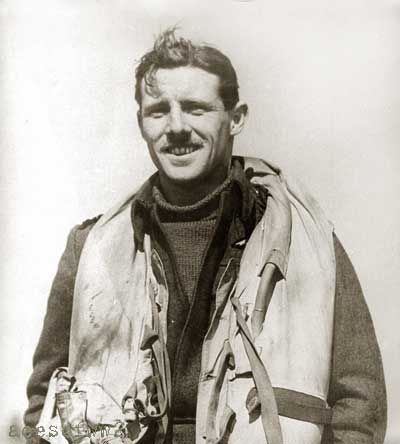
Flt Lt Henry ‘Pat’ Lardner-Burke DFC & Bar
Now, MH434’s first combat pilot was truly special, Pat Lardner-Burke was born on 27 June 1916 in Harrismith, Orange Free State, South Africa. He joined the Royal Air Force at the onset of the war in spring 1940.
Pat Lardner-Burke was posted to No.19 Squadron in early 1941 where he flew Spitfires and thereafter Hurricanes with No. 46 squadron. In June the Hurricane Squadron left the UK for Malta forming No.126 Squadron. In the extensive combat and defence of Malta, Pat would see considerable action in the air, mainly against Axis force Italian Regia Aeronautica bombers as they attempted to bomb Malta into submission.
On the 19th August 1941, flying his Hurricane high above Malta Pat sighted enemy aircraft flying at 23,000 feet, turning in to attack the formation of 12 Italian Macchi 200 fighters, Pat fired a short burst which saw one Macchi go down. Pat climbed out of the attack and engaged another Macchi shooting it down in addition to the first.
A week later Pat would destroy another Macchi 200 near Sicily, when the Italian fighter broke off from the its main formation and he pursued it in a steep dive towards the coast of Sicily, shooting it down.
Then on the 4th September 1941 he would claim another as nine Hurricanes met approximately 16 Macchi 200 fighters flying at 22,000 feet to the east of Malta. He spotted an enemy Macchi on the tail of a fellow Hurricane pilot in hot pursuit of another Macchi and destroyed it – effectively saving his colleague’s life.
Royal Air Force Hurricanes – Malta 1941
Bravery and survival in the extreme
On the 8th November 1941, Pat became an ‘Ace’ (which requires a tally of 5 enemy aircraft to qualify), but it came with a most extraordinary act of bravery and nearly killed him.
Pat’s Squadron was involved in one of the biggest dogfights seen over Malta. 18 Italian Macchi were intercepted whilst they were escorting their bombers bound for Malta. Flying Hurricane BD789 he engaged and shot down a Macchi 202 near Dingli, but as he was engaging the Macchi another one engaged him from behind. The result was a 12.7 mm bullet from the Italian fighter which penetrated his seat armour and passed out of his chest.
With a punctured lung and bleeding heavily, Pat drew on all his skill and managed to land his Hurricane at his aerodrome on Malta. A fellow officer, Tom Neil witnessed his landing, ran to the aircraft and pulled Pat free from the damaged Hurricane, he remarked later;
“The pilot still had his face mask attached but I recognised him immediately as Pat Lardner-Burke. I heard myself shouting, ‘Are you all right?’ – then knew immediately that he wasn’t. Pat’s head was bowed and his shoulders slumped”.
Pat was laid onto a stretcher, an ambulance took him to hospital. Tom Neil then took time to inspect Pat’s hurricane, several bullets that had hit the side of the aircraft behind the cockpit. However Tom was shocked as he noted one had punched a hole in the armour-plate and penetrated the back of the seat, where it had passed right through Pat and carried on through the cockpit’s dashboard and then through some more armour-plate in front. Neil and the other pilots in the squadron were literally shaken by the knowledge that the Italian’s were using some very powerful ammunition.
Pat survived and received the Distinguished Flying Cross, his citation reads;
Distinguished Flying Cross
Pilot Officer Henry Patrick LARDNER-BURKE (87449), RAFVR, No. 126 Squadron.
In November 1941, this officer was the pilot of one of 4 aircraft which engaged a force of 18 hostile aircraft over Malta and destroyed 3 and seriously damaged 2 of the enemy’s aircraft. During the combat Pilot Officer Lardner-Burke, who destroyed 1 of the enemy’s aircraft, was wounded in the chest and his aircraft was badly damaged. Despite this, he skillfully evaded his opponents and made a safe landing on the aerodrome; he then collapsed. Throughout the engagement, this officer displayed leadership and courage of a high order. He has destroyed 5 enemy aircraft over Malta.
Back in the fight
Fully recovered from his wounds in England by May 1942, Pat went strait back into the fight, initially as instructor in the Gunnery Instruction Training Wing.
Pat Lardner-Burke’s combat record in MH434
By August 1943, Pat Lardner-Burke DFC & Bar had transferred to 222 (Natal) Squadron as a temporary Squadron Leader and was allocated MH434 code letters ‘ZD-B’ as his regular mount. MH434 first took to the sky in anger on the 7th August 1943.
On the 27 August in the St Omar area over France, Squadron Leader Pat Lardner-Burke, flying in our heroine ‘Spitfire MH434’ clocked up her first kill, flying high escort cover he shot down a German Focke-Wulf FW-190 and damaged a second during a mission escorting USAAF B-17 bombers on their way to bomb the St. Omer Marshalling Yards.
During the mission, 13 Spitfires of No.222 Squadron and 13 Spitfires of No.129 Squadron spotted nine German Focke-Wulf 190s dive on the American B-17 Fortresses and engaged them. Pat shook a FW 190 off his bomber attack damaging it on the starboard wing and tail. Pat then turned onto another FW 190, and at close range he engaged it, shooting it down.
On the 5 September 1943, Pat again shot down another FW-190 in the Nieuport area, on this mission 222 (Natal) Squadron’s Spitfires were acting as high escort to 72 B-26 Marauders which were to bomb the Marshalling Yards at Ghent/Meirelbeke.
On completing the bombing run, the Marauders were attacked by approximately 20 German Focke-Wulf (FW) 190s. Pat climbed to head off half of the FW 190 fighters, one German FW 190 turned in front of his Spitfire’s nose and he promptly shot it down in flames and it went into the ground in an uncontrollable spin.
S/L Ernest “Cass” Cassidy, F/L Philip VK “Phil” Tripe and F/L Henry P “Pat” Lardner-Burke (left to right) of No 222 Squadron RAF and their ‘Natal’ squadron scoreboard
Again on the 8 September 1943 Pat claimed a half share in the downing of a Messerschmitt Bf-109G in Northern France. On this mission 25 Spitfires of 222 (Natal) squadron were flying as high cover to a formation of Allied bombers that were detailed to attack targets in the Boulogne area in France. They spotted and engaged 12 German Messerschmitt 109Fs, two of which dived away from their formation. F/Lt. Pat Lardner-Burke and his wing-man F/O. O. Smik dived down on the leading enemy aircraft taking turns firing on it until the starboard wing tip fell off and it dived straight into the ground.
Give the man a bar!
For his actions and bravery flying in 222 (Natal) Squadron – flying our heroine MH434, Acting Squadron Leader Henry ‘Pat’ Lardner-Burke DFC received a DFC Bar to his existing DFC decoration. His citation reads;
This officer continues to display a high degree of courage and resolution in his attacks on the enemy. Recently, he has led the squadron on many missions in the Ruhr area and throughout has displayed great skill and tenacity. Squadron Leader Lardner-Burke has destroyed seven enemy aircraft in air fighting. He has also most effectively attacked enemy targets on the ground.
Pat Lardner-Burke DFC & Bar received a new posting to Fighter Command’s Head Quarters, at Stanmore, serving with Group Captain Bobby Oxspring, DFC and two Bars, who said of his new South African recruit’s typical South African demeanour;
“The third desk was the domain of Pat Lardner-Burke, a rugged South African who, with Hornchurch sweeps and Malta behind him, displayed a refreshingly irreverent attitude to all senior officers with whom he disagreed”.
In April 1944 Pat took command of the Royal Air Force’s No.1 Squadron, and finally taking command of RAF Horsham St Faith airfield and then RAF Church Fenton as a Wing Commander.
Give the man another ‘bar’
After the war this remarkable South African fighter ace settled on the Isle of Man with his wife, Mylcraine, where they ran a pub (an English ‘Bar’). Pat tragically died at a relatively young age on the 4th February 1970 of renal failure.
MH434’s career after Pat Lardner-Burke DFC & Bar
In 1944 MH434 was transferred to 350 Sqn. Hornchurch, before being returned to 222 Sqn. Pat Lardner-Burke had by now been posted on, and the aircraft was next assigned to Flt Sgt Alfred ‘Bill’ Burge. He flew another 12 operational sorties in the aircraft before the Squadron’s existing Mk IXs were exchanged for a modified variant that could carry rockets. After over 80 operational sorties, MH434 was stood down in March 1945.
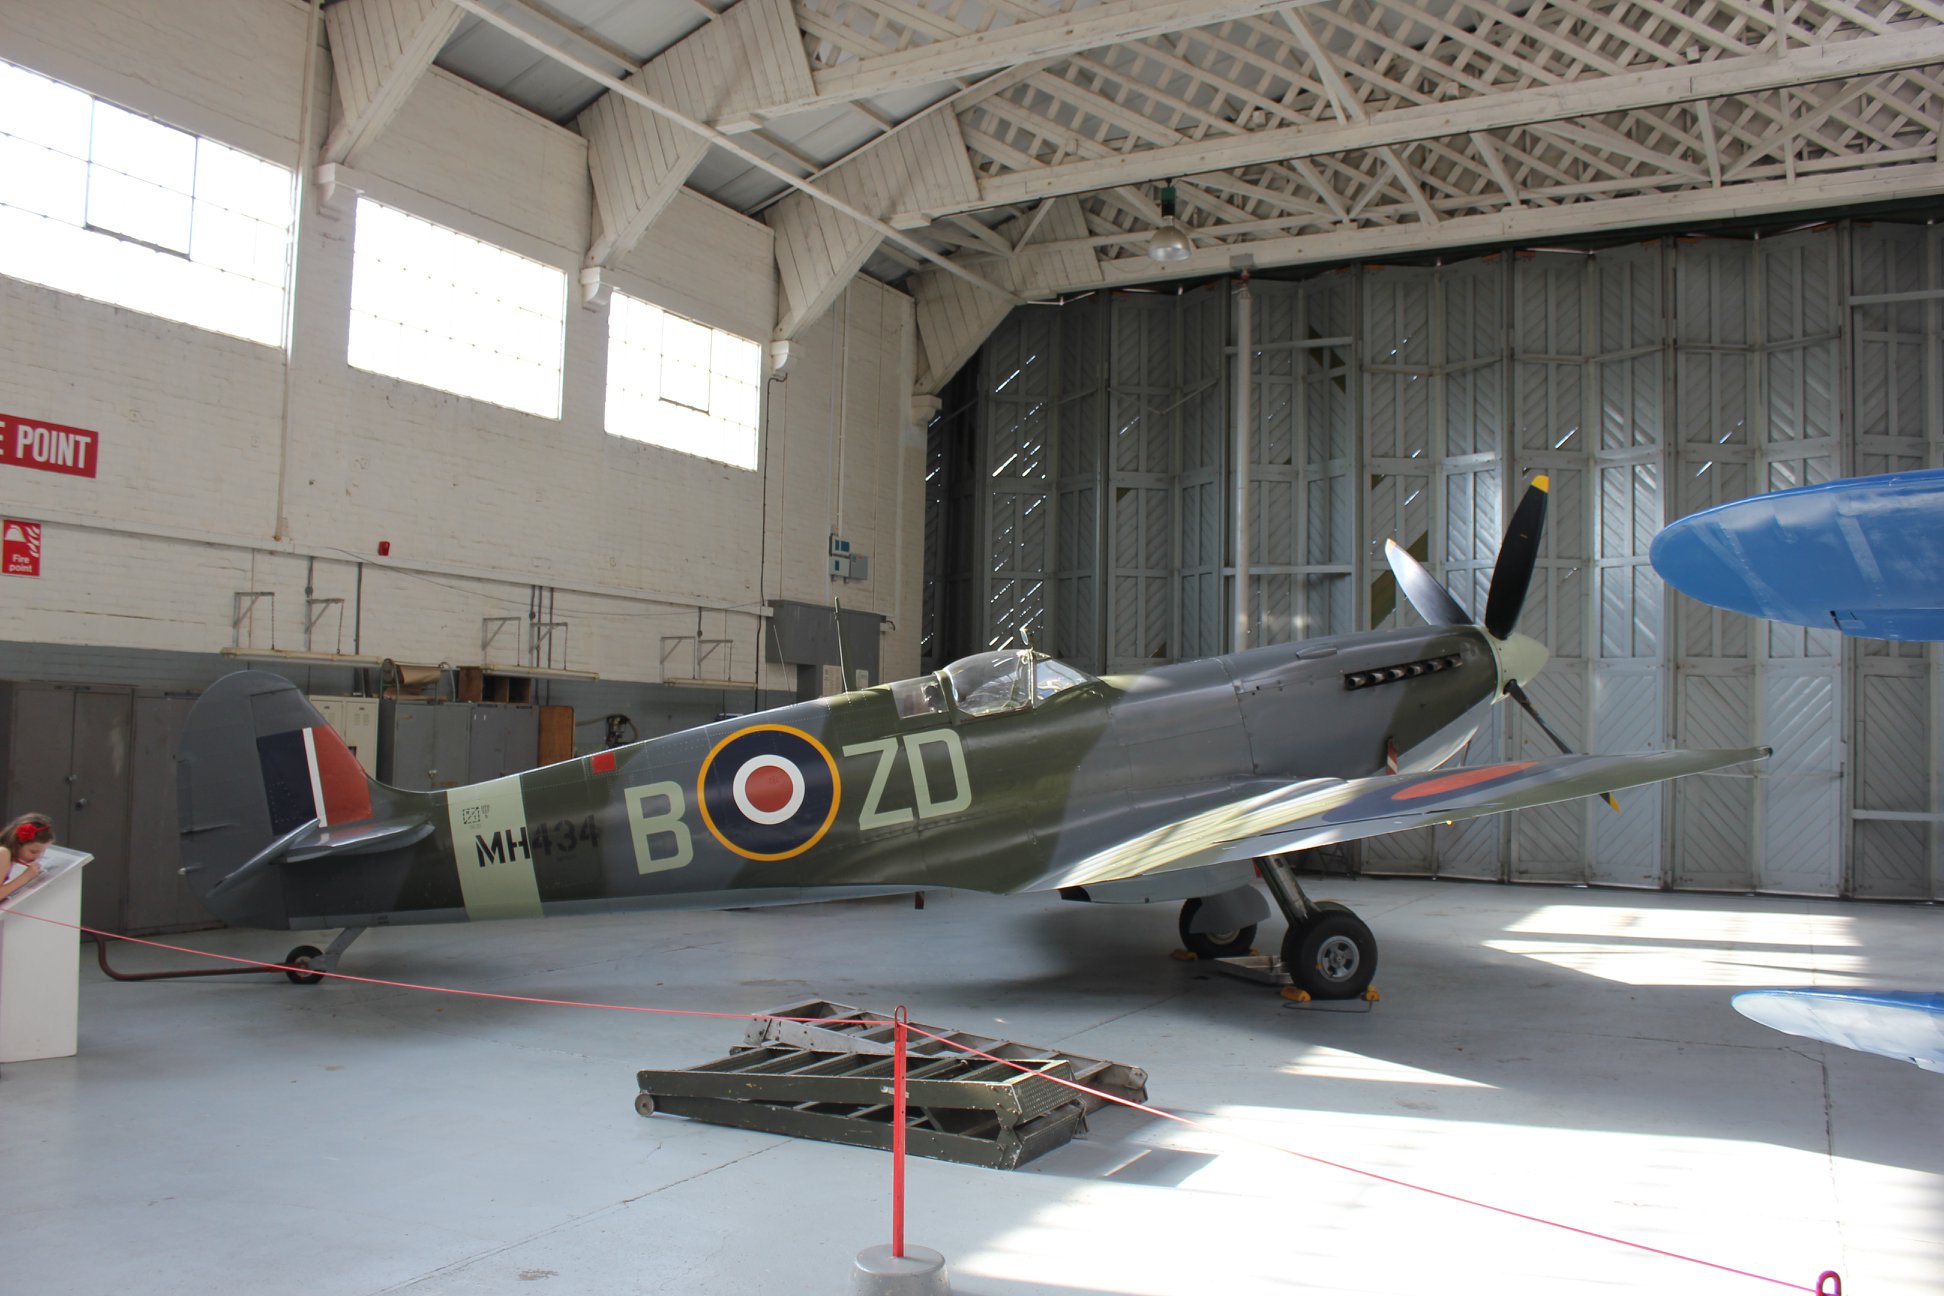
MH434 in a hangar at Imperial War Museum Duxford
Post War Movie Star
After the Second World War, Spitfire MH434 was transferred to the Royal Netherlands Air Force in 1947. After a crash-landing in Semarang, Java she spent some time in storage, repaired she flew again in Holland on the 10 March 1953.
The Belgian Air Force became the next owner of this Spitfire, on the 26 March 1956 MH434 was put up for sale and bought and brought back to Britain by airline pilot Tim Davies. Overhauled the aircraft was flown purely for pleasure and took part in its first movie role, Operation Crossbow.
November 1967 saw MH434 join the motion picture airforce of Spitfire Productions Ltd, where she starred in the ‘Battle of Britain’ in 1968. At the end of the movie MH434 was sold again to Sir Adrian Swire, Chairman of Cathay Pacific Airways, had the Spitfire painted in 1944 camouflage colour scheme with his initials AC-S, as squadron codes.
There were several film and television appearances during this period, including her iconic role in ‘A Bridge Too Far.’
The opening of a Bridge Too Far sees a young Dutch boy cycling along a road when MH434 does an extremely low fly over after reconnoitring a German Panzer (tank) placement nearby. To the entertainment of the young Dutchman she waggles her wings in acknowledgment of his waving . It’s an iconic firm history moment as to the boy the Spitfire symbolises liberty from German occupation – it’s his first sighting of ‘freedom’ and it arrives with its Merlin engine in full song – if you’ve not seen the movie here’s the clip:
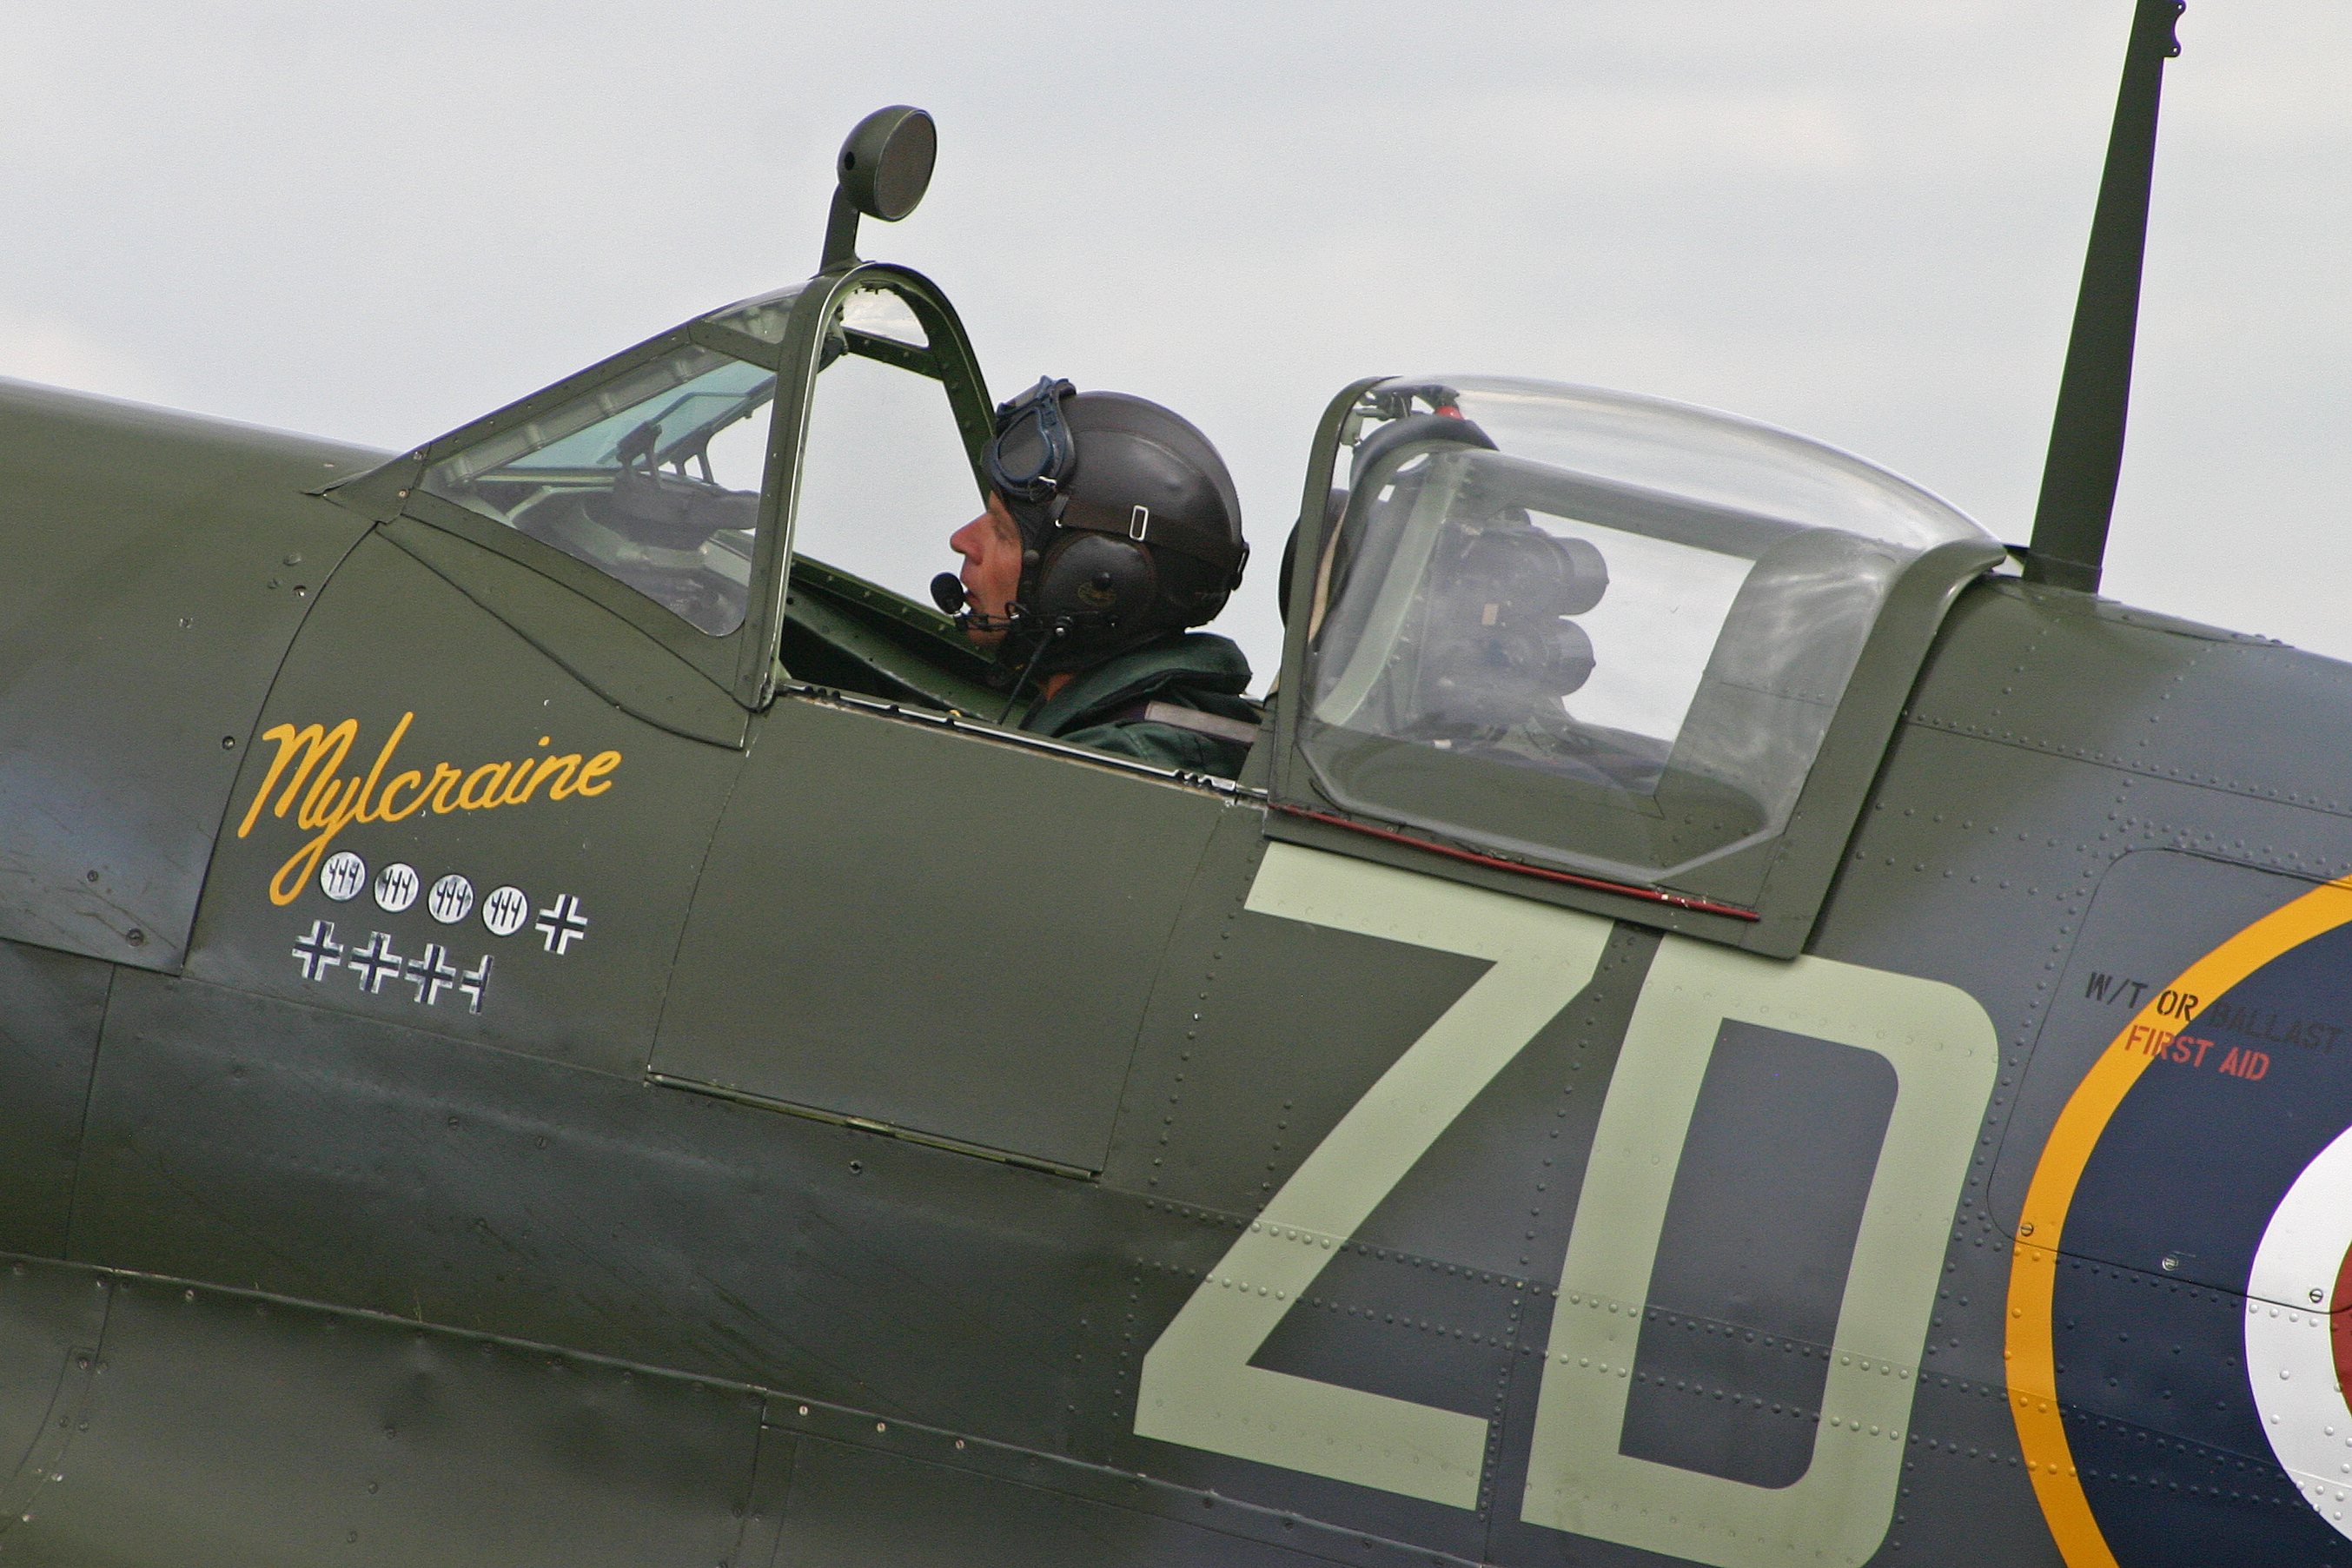
In April 1983 MH434 was sold at auction to it’s most illustrious owner, Ray Hanna (Nalfire Aviation Ltd). MH434 has become a regular movie co-star and airshow performer and when not in make up for a role she is now flown in the authentic 222 (Natal) Sqn, with the Codes ZD-B, Squadron Leader Pat Lardner-Burke’s call sign.
A lasting legacy
Today Spitfire MH434 is located at the Duxford Imperial War Museum near Cambridge. MH434 is still painted in No.222 ‘Natal’ Squadron markings with the code letters ‘ZD-B’. The name ‘Mylcraine’ which Squadron Leader Pat Lardner-Burke christened her in August 1943 (named after his wife) is still painted on her, so too is Pat Lardner-Burke’s personal ‘scoreboard’ which have been painted on the port side of the cockpit – all to replicate this South African’s markings in 1943.
His victories, in all Pat Lardner-Black shot down five Italian MC200’s, two MC 202’s, three German FW 190’s and one German Me109 achieving the status of ‘fighter ace’. – one of a handful of South Africans to achieve this.
RAF Supermarine Spitfire Mk IX MH434 is and remains one of the most beautiful aircraft ever built, and we hope it continues bringing entertainment, joy and awe to thousands of admirers, but more importantly we remember her very proud South African legacy and a very remarkable South African hero whose soul lives on in her.
Researched by Peter Dickens, with additional assistance from Sandy Evan Hanes.
Related Work and Links – South Africans in the RAF
References include; Man and Machine by Christopher Yeoman 2011. Clip from ‘A Bridge Too Far” Joseph E. Levine Productions, United Artists. The Old Flying Machine Company – Supermarine Spitfire IX MH434, history on-line. Photo copyrights include Imperial War Museum and John Dibbs.
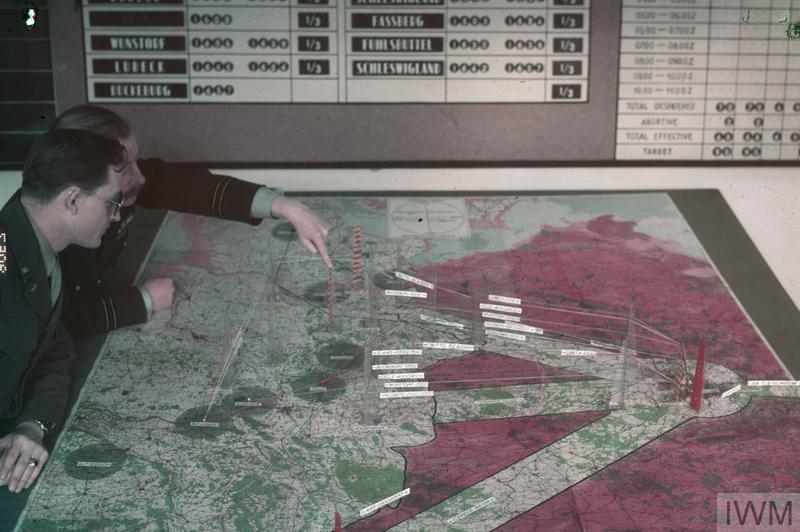
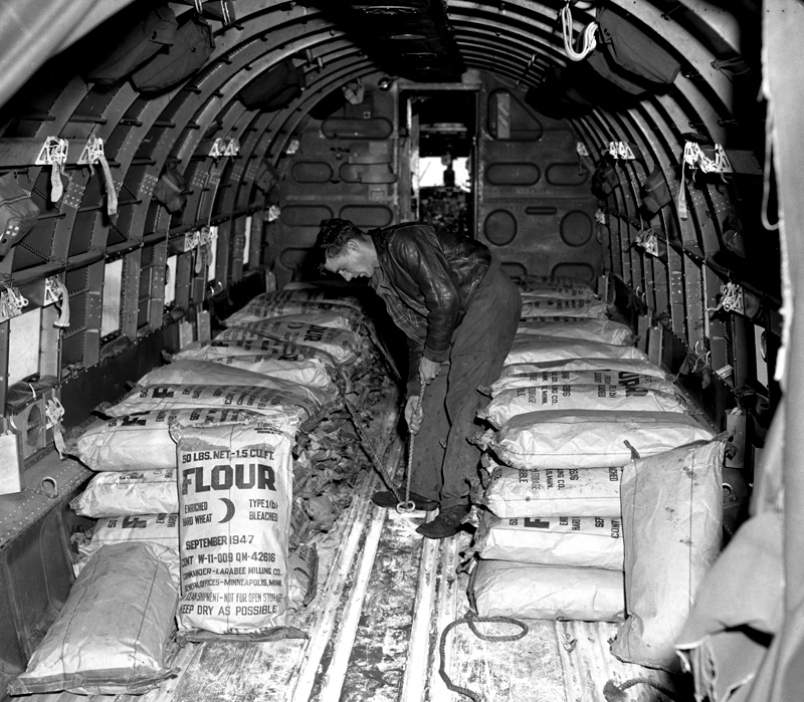
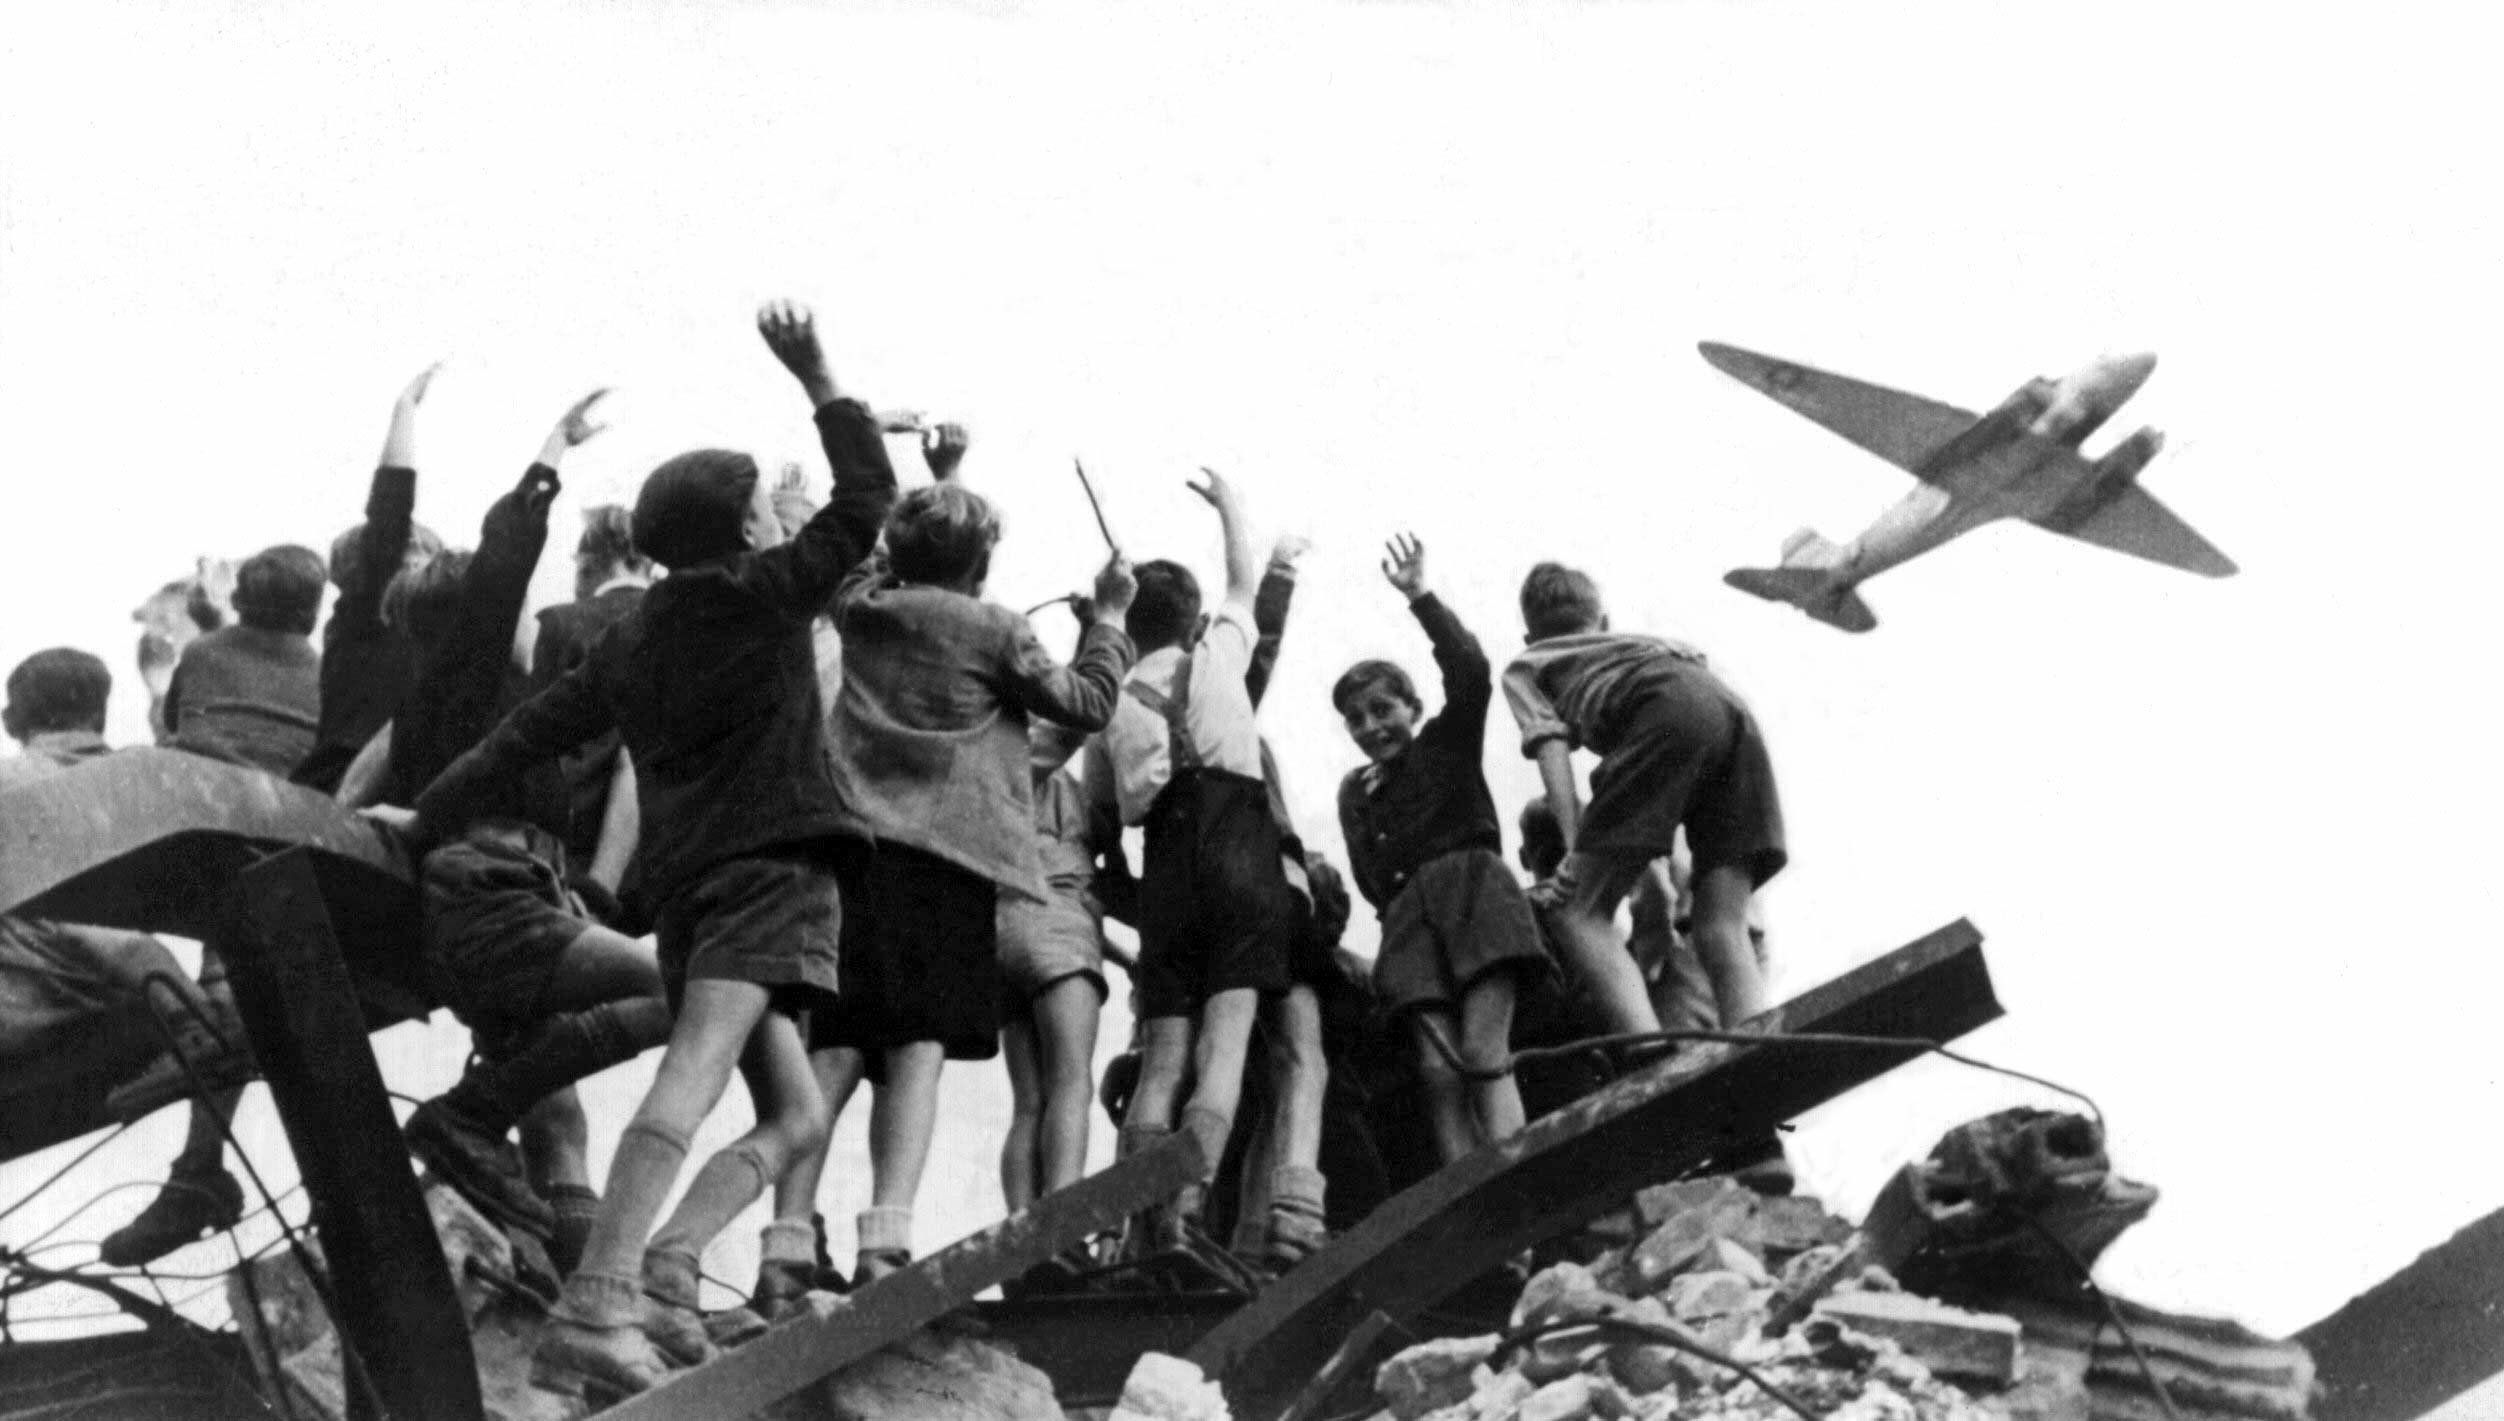
Currently the 70th anniversary of The Berlin Airlift is in full swing, but did you know that as South Africans we can also hold our collective heads high, having played a key role in saving the civilians of war-torn Berlin from starvation and death after the Communist ‘Iron-Curtain’ descended?
For those unaware of what The Berlin Air Lift was, and why it was so important as the saviour of West Berlin’s civilians from certain starvation and death, and even how South Africa played a role of in averting this humanitarian crisis, here’s a quick overview.
Background to the ‘Berlin Air Lift’
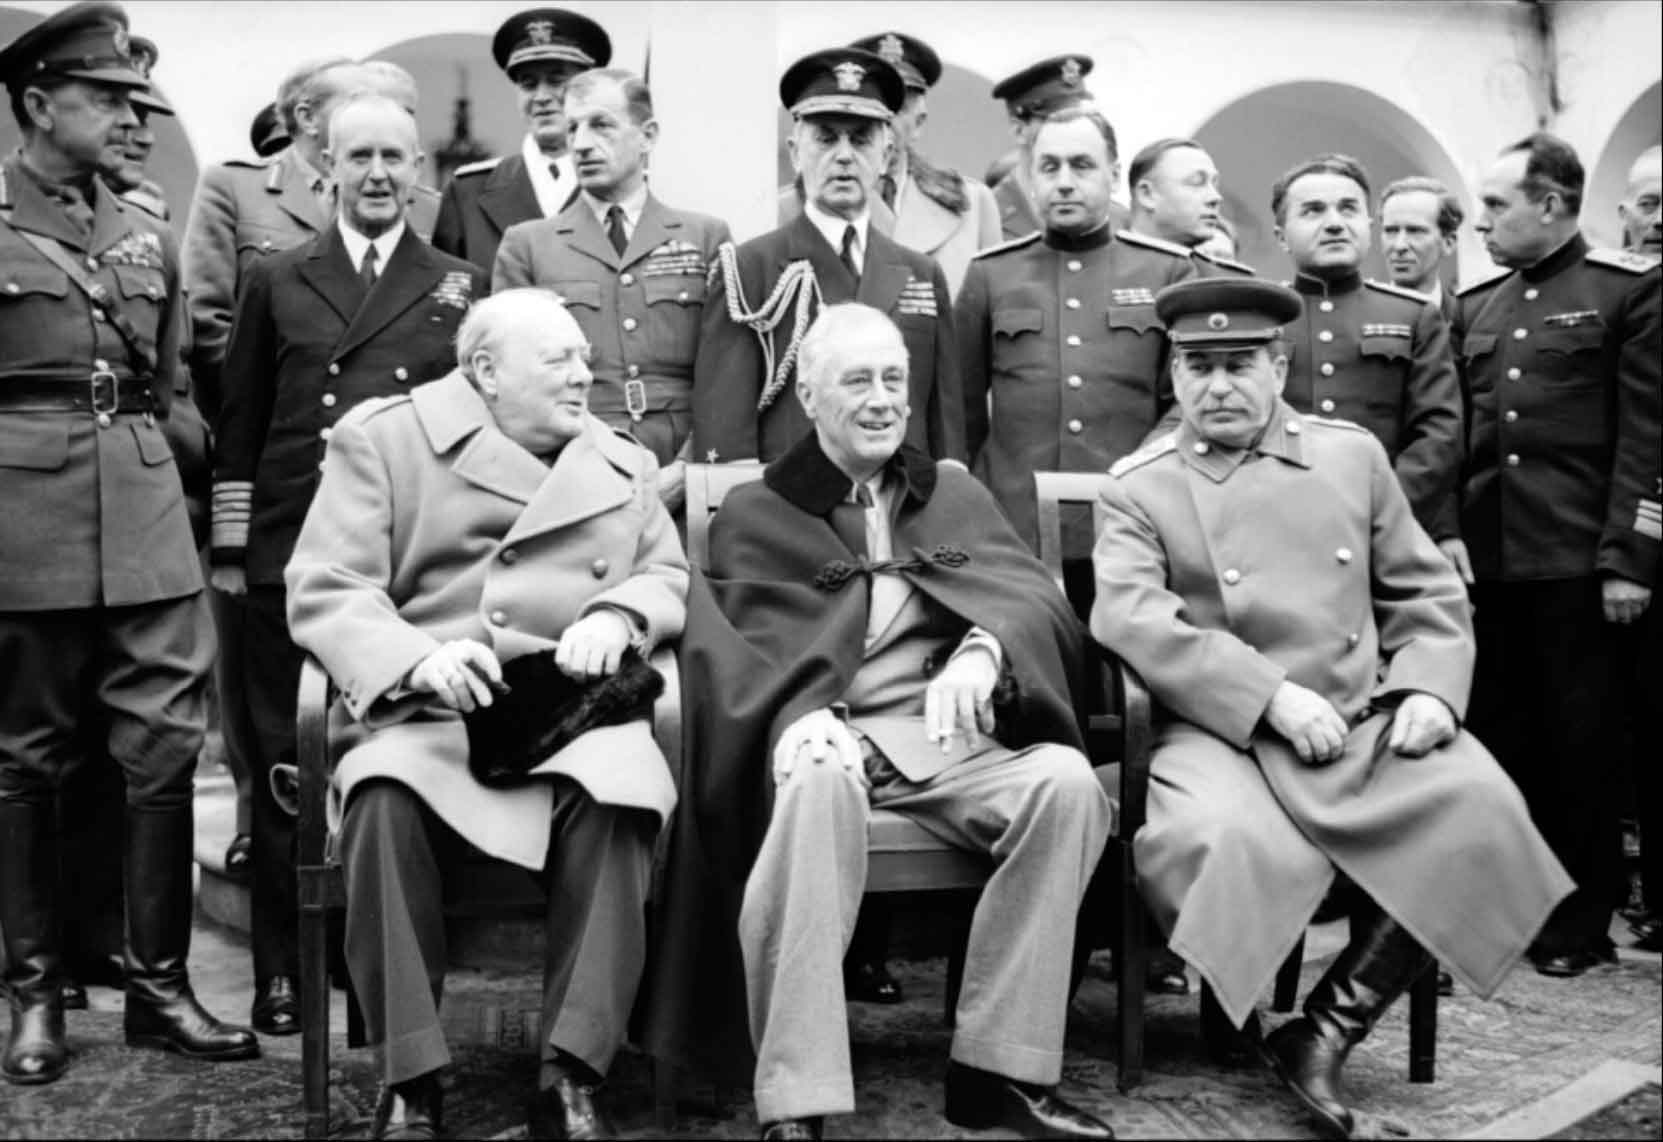
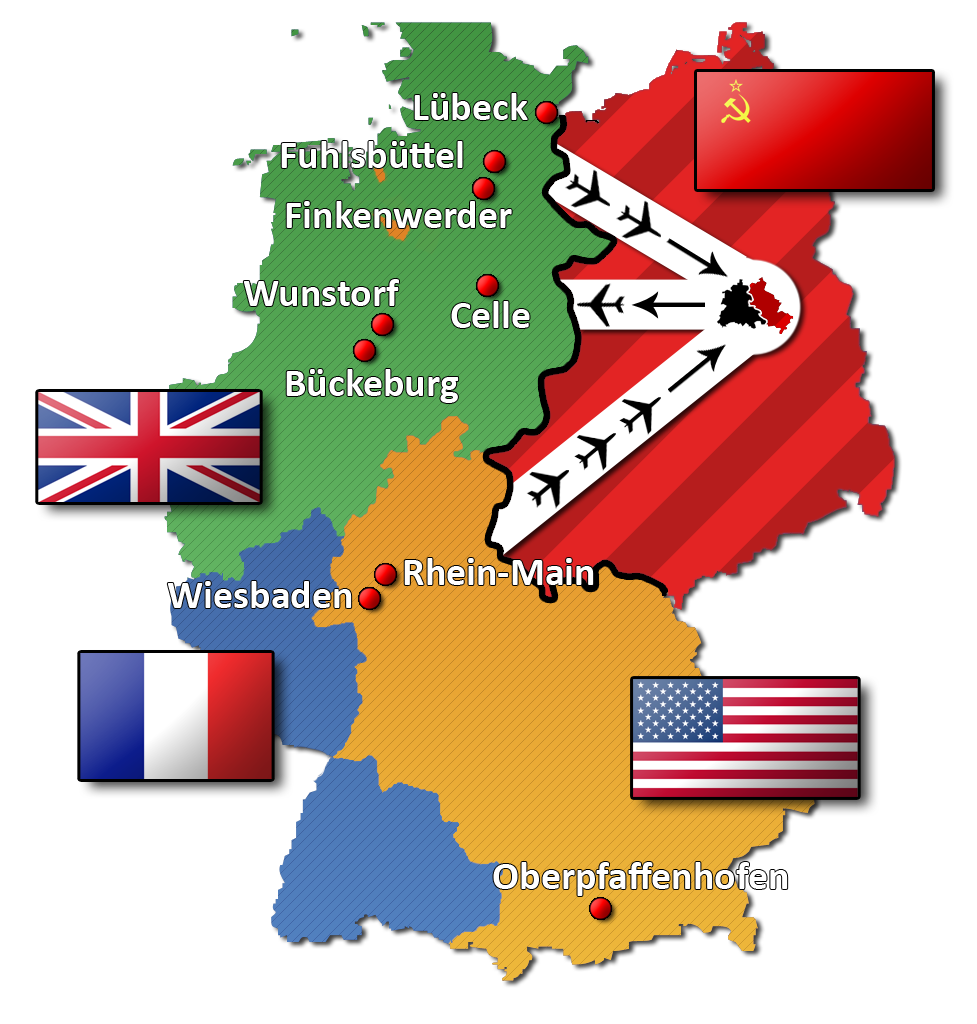
After the Second World War ended in 1945, Germany was divided into control zones by the victorious Allied armies so as to prevent Germany from ever re-starting another world war, however, the very act of dividing Germany did start another world war, this time “The Cold War” – and this ideological and economic war to be fought between ‘Eastern’ Communism and ‘Western’ Capitalist Democracy.
The Cold War is misunderstood to many today, as they see it as an ideological one and not a deadly one, a ‘war’ as such was never declared – and by the time the millennium came around the new generation could not understand why such a big deal was made of it.
However truth be told – The Cold War was very deadly and was to be fought in proxy wars all over the planet, and it resulted in the greatest stand-off of mutually assured nuclear annihilation ever seen – with zero dialogue or even a simple telephone line between the main belligerents – Russia (and it’s bloc Allies) one the one side and the United States of America (and its bloc Allies) on the other. The epicentre of the ‘Cold War’ began with the act of the Berlin blockade in 1948 and subsequent Airlift, and the very first casualties of the Cold War in terms of sacrifice of members of statute forces – also began with the Berlin Airlift.
So what’s with the divide?
Simple put, at the conference on the 5th February 1945 towards the end of World War 2 between the ‘Big Three’ (The US, UK and Russia) at Yalta, Stalin made it clear to America and Britain that Russia was never to exposed to an attack from ‘the west’ again, they had endured the French when Napoleon invaded Russia and then endured the Germans when Hitler invaded Russia, with a massive bloodletting. In fact Russian bloodletting and sacrifice in World War 2 exceeds the British & Commonwealth, the French and American bloodletting all combined. Simply put, Stalin wanted a ‘buffer’ between Russia and Europe and everything East of Germany would become a satellite communist state to provide exactly that – with Moscow calling the shots.
The Big Three’: Winston Churchill, Franklin D Roosevelt and Joseph Stalin sit for photographs during the Yalta Conference in February 1945.
With that the independent Parliaments, Kingdoms and Democracies of ‘liberated’ small states like Czechoslovakia (now Czech Republic), Bulgaria, Hungary, Croatia and Poland all but disappeared into a block of ‘puppet’ Communist satellite states.
In dividing up Germany to manage it post war, the ‘Western’ coalition of British, French and American Zones effectively made up what was to become ‘West Germany’ and the ‘Eastern’ Russian coalition zone (the Soviet Union) made up what was to eventually become ‘East Germany’. The capital of Germany – Berlin, was strategically important to Germany itself and although it was located well inside the ‘Soviet’ bloc it also needed to be divided into ‘West’ and ‘East’ in a similar way.
So Berlin itself had a Western sector which was divided into control zones by the Western allies – The United Kingdom, France and the United States of America, and an Eastern sector which was controlled by the Russian coalition the USSR – The Soviet Union. As Berlin was 100 miles into ‘Communist’ territory it was fed by a secured road and rail corridor which stretched from West Germany well into East Germany.
Berlin’s zones as defined after the end of WW2
Berlin, with its ‘western sectors’ was a ‘blot’ in the middle of Stalin’s ‘buffer’, it undermined his complete communist barrier splitting Europe in half (a barrier Churchill tagged very aptly as ‘The Iron Curtain’). Berlin was an island of Capitalism in the middle of a sea of Communism, a beacon of Western democracy contrasting to the ideals of socialist conformity – it simply had to go.
The ‘Trigger’
In June 1948, Britain, France and America united their zones into a new country, West Germany. On 23 June 1948, they introduced a new currency – the Deutschmark, which they said would help trade and aid West Germany’s war debt repayments by pulling it out of recession and the ‘cigarette economy’ it was in.
The Soviets, however, hoping to continue the German recession, refused to accept the new currency, in favor of the over-circulated Soviet Reichsmark. By doing so, the Soviets believed they could foster a communist uprising in postwar Germany through civil unrest. By March 1948 it was evident that no agreements could be reached on a unified currency or quadripartite control of Germany. Both sides waited for the other to make a move.
The Soviets, trying to push the west out of Berlin, countered this move by requiring that all Western convoys bound for Berlin travelling through Soviet Germany be searched. The “Trizone” government (Britain, France and the USA), recognising the threat, refused the right of the Soviets to search their cargo. The Soviets then cut all surface traffic to West Berlin on June 27. American ambassador to Britain, John Winnant, stated the accepted Western view when he said that he believed “that the right to be in Berlin carried with it the right of access.” The Soviets, however, did not agree. Shipments by rail and the autobahn came to a halt. A desperate Berlin, faced with starvation and in need of vital supplies, looked to the West for help.
The Soviet Union’s unprecedented move to prevent the introduction of the new currency and cut off East Germany from West Germany by way of a blockade – was the ‘trigger’ and less so the ’cause’, the much-anticipated Soviet Communist ‘Iron Curtain’ finally fell dividing the whole Europe.
As Berlin sat in East Germany, the blockade isolated the western half of the city from supply of vital coal and fuel (for heating and transport) and food. The Western Allies saw this blockade as an aggressive and ‘illegal’ Soviet move to absorb West Berlin into the Soviet Union, and the precursor to starting a 3rd World War with the Western Allies (the Cold War had begun in effect).
The Plan
The restrictions prevented the supply of food and materials by road from the British, American and French occupation zones in West Germany to their zones in West Berlin. So the Western Allies overcame the problem by creating an air bridge instead and came up with a very ambitious plan to ferry in supplies using transport aircraft – the air-space over East Germany to Berlin was not contested, and the Allies gambled that the Soviet Union would not make the error of initiating an act of war against the West by shooting one down.
British and American air force officers consult an operations plan giving routes and heights of all aircraft in and out of the Berlin area during the Airlift.
An airlift on this scale had never been attempted before (and has never been achieved again). It required military transport aircraft to fly into Berlin round the clock for weeks on end, until the Soviet resolve was broken. It was also critical, the city of Berlin had been destroyed during the Second World War, many of its citizens living hand to mouth.
Logistics
Nothing short of a logistics miracle to heat and feed West Berlin by air and during the around-the-clock airlift (in the end some 277,000 flights were made), many at 3 minute intervals, flying in an average of 5,000 tons of food and fuel each day.
Air corridor map to Berlin from the Western Allied controlled part of Germany to the Berlin in the Soviet controlled part of Germany.
The American military government, based on a minimum daily ration of 1,990 kilocalories (July 1948), a total of daily supplies needed at 646 tons of flour and wheat, 125 tons of cereal, 64 tons of fat, 109 tons of meat and fish, 180 tons of dehydrated potatoes, 180 tons of sugar, 11 tons of coffee, 19 tons of powdered milk, 5 tons of whole milk for children, 3 tons of fresh yeast for baking, 144 tons of dehydrated vegetables, 38 tons of salt and 10 tons of cheese. In all, 1,534 tons were required each day to sustain the over two million people of Berlin. Additionally, for heat and power, 3,475 tons of coal, diesel and petrol were also required daily.
To complete the task the Western Allied Command turned to the Royal Air Force (RAF), Royal Australian Air Force (RAAF), Royal New Zealand Air Force (RNZAF), Royal Canadian Air Force (RCAF) and South African Air Force (SAAF) for the ‘British’ contribution, the French Air Force (FAR) for the ‘French’ contribution and the United States Air Force (USAF) for the American contribution.
This would be the greatest humanitarian mission ever implemented, and South African pilots, navigators and other air-crew were right at the centre of it.
The Airlift
Operations began on 24 June 1948. The order to begin supplying West Berlin by air was approved by U.S. General Lucius Clay on June 27 with USAF AC-47s lifting off for Berlin hauling 80 tons of cargo, including milk, flour, and medicine. When the blockade first started, the city of Berlin had around 36 days worth of food.
The first British aircraft flew on 28 June 1948. At that time, the airlift was expected to last three weeks. Nothing would be further from the truth, the Airlift was to progress through a very cold winter to come.
Short Sunderland GR Mark 5 of No 201 Squadron, Royal Air Force, moored on Lake Havel in Berlin, Germany. Lake Havel was used by Coastal Command Sunderlands from July until mid-December 1948, when the threat of winter ice suspended further use.
President Truman, wishing to avoid war or a humiliating retreat, continually supported the air campaign. Surviving the normally harsh German winter, the airlift carried over two million tons of supplies in 277,000 flights, and would continue well into the new year, only to finally officially end in September 1949.
To keep the aircraft coming in at the rate of supply needed, fast turnaround was expected on the ground in Berlin. Pilots and crews generally did not leave their aircraft and were provided with snacks and meals. The German civilian population got into ensuring the airlift was a success and to make up for shortages in manpower. Crews unloading and making airfield repairs at the Berlin airports were made up of almost entirely by local civilians, who were given additional rations in return for their assistance.
USAF Dakota transport with a cargo of flour during the Berlin Airlift
As the crews experience increased, the times for unloading continued to fall, with a record set for the unloading of an entire 10-ton shipment of coal from a C-54 in ten minutes, later beaten when a twelve-man crew unloaded the same quantity in five minutes and 45 seconds.
The Candy Bombers
At the very beginning of the air-lift Gail Halvorsen, and American pilot arrived at Tempelhof on 17 July 1948 on one of the C-54s and walked over to a crowd of children who had gathered at the end of the runway to watch the aircraft and handed out his only two sticks of Wrigley’s Doublemint Gum to the children.
The children quickly divided up the pieces as best they could, even passing around the wrapper for others to smell. He was so impressed by their gratitude and that they didn’t fight over them, that he promised the next time he returned he would drop off more. Before he left them, a child asked him how they would know it was him flying over. He replied, “I’ll wiggle my wings.”
The next day on his approach to Berlin, he rocked the aircraft and dropped some chocolate bars attached to a handkerchief parachute to the children waiting below. Every day after that, the number of children increased and he made several more drops. Soon, there was a stack of mail in Base Ops addressed to “Uncle Wiggly Wings”, “The Chocolate Uncle” and “The Chocolate Flier”.
The Allied Command was so impressed by this gesture of goodwill and its ‘public relations’ value that the mission was expanded into “Operation Little Vittles”. Up to this point the children of Berlin only knew that American and British aircraft brought bombs, fire, death and destruction. Now, in a pure expression of humanity the aircraft would bring happiness to children in what was to them a break and traumatized time, the Western Allies would now drop candy instead of bombs.
Children of Berlin wave to a ‘Candy Bomber’ to get the attention of the air crew.
The other air-lift pilots joined in, and when news reached the United States, children all over the country sent in their own candy to help out. Soon, major candy manufacturers joined in. In the end, over twenty-three tons of candy were dropped on Berlin the “operation” became a major propaganda success. German children christened the candy-dropping aircraft “raisin bombers”.
On December 20, 1948 “Operation Santa Claus” was also flown from Fassberg, with gifts for 10,000 children.
Sacrifice
The airlift was not without its hazards, with that many aircraft on that type of complex operation flying in all sorts of conditions – instrument and visual, and weather, so there we bound to be accidents.
There were 101 fatalities recorded during the Airlift. The number includes 40 British and Commonwealth air-crew and 31 American air-crew. The majority died as a result of accidents resulting from hazardous weather conditions or mechanical failures. The remainder is composed of civilians who perished on the ground while providing support for the operation or who lost their lives when aircraft accidents destroyed their homes. As aircraft losses go 17 American and 8 British aircraft crashed during the Berlin Airlift.
In honor of the pilots and aircrews who were lost the Berlin Airlift Monument was created from a fund established by the former Federal Republic of Germany and private donations. It was dedicated in 1951. All together there are three matching monuments: at Rhein-Main Air Base near Frankfurt, at Wietzenbruch near the former British airbase Celle, and at the Luftbruckenplatz (Airbridge Place) Berlin-Tempelhof airfield. The base of the monument at Tempelhof reads, “They gave their lives for the freedom of Berlin in service for the Berlin Airlift 1984/1949.” The location at Tempelhof is presently being considered as a UNESCO World Heritage site.
South African service personnel in the airlift
The full list of South African pilots and aircrew is hard to come by as the commitment of South Africans in the Berlin Airlift is not generally part of the South African national consciousness anymore – whereas in countries like the United States of America, the United Kingdom, Australia, New Zealand and Canada it is.
On the 27th September 1948, Union government of South Africa committed 50 South African Air Force (SAAF) crew to the Berlin Airlift, in all the SAAF would provide two contingents of air-crew to the air-lift, most seconded to RAF Transport Command and even one SAAF registered C-47A Dakota transport aircraft (No. 6841) made its way to Berlin to be put into service.
South Africans known to us at the moment who took part in the Berlin Airlift include Steve Stevens, who participated in WW2 as a SAAF Beaufighter pilot, Albie Gotze who participated in WW2 as a seconded SAAF pilot in RAF Typhoons and Spitfires. Joe Hurst, John Clifford Bolitho, Duncan Ralston, Jenks Jenkins, Pat Clulow, Tom Condon, Johnnie Eloff, Mickey Lamb, “Shadow” Atkinson, Jannie Blaauw, Piet Gotze, Wilhelm Steytler, Vic de Villiers, Mike Pretorius, Nic Nicholas, Jack Davis, Dormie Barlow, Tienie van der Kaay ‘Porky’ Rich, Ian Bergh (flying Sunderlands in the RAF) are all South African and SAAF pilots and air-crew recorded as taking part.
In addition SAAF pilot Joe Joubert also took part and was even commemorated for his actions during the Berlin Airlift. Joe Joubert flew as a navigator in the Berlin Airlift and on the 9th July 1949 he and the radio operator were ordered to jettison 63 sacks of coal as the aircraft could not gain height in a severe thunderstorm. This was achieved in a remarkable six and a half minutes and he received a commendation for this remarkable act. This act was certainly helped by the fact that in his spare time Joe practiced weight lifting.
Joe Joubert (right) – a SAAF pilot in the Berlin Airlift to earn a special commendation
Flt Officer Kenneth Reeves is South Africa’s only casualty during the Berlin Airlift, and he symbolises the greatest sacrifice we as a nation can give. Kenneth was a navigator on board a RAF CD-3 (Dakota) which crashed in the Soviet Zone near Lübeck, killing all the crew.
Light at the end of the tunnel
By the spring of 1949, the airlift was clearly succeeding, and by April it was delivering more cargo than had previously been transported into the city by rail. On 12 May 1949, the Soviet Union finally realised the futility of the road and rail blockade of West Berlin and lifted it, however tensions remained.
Air crew of the Royal Air Force (RAF), Royal Australian Air Force (RAAF), Royal New Zealand Air Force (RNZAF) and South African Air Force (SAAF) enjoy an off-duty drink in the officers’ bar at RAF Lubeck. IWM Copyright.
The airlift however continued until 30th September 1949, at a total cost of $224 million and after delivery of 2,323,738 tons of food, fuel, machinery, and other supplies. The end to the blockade was brought about because of countermeasures imposed by the Allies on the Soviet blockade by way of the airlift and because of a subsequent Western embargo placed on all strategic exports from the Eastern bloc. As a result of the blockade and airlift, Berlin became a symbol of the Allies’ willingness to oppose further Soviet expansion in Europe.
In conclusion
There can be little doubt that the Airlift was a success on many levels. It saved millions of lives and preserved the freedom of the city of Berlin. Veterans’ groups world over still celebrate the victory by gathering around the bases of the monuments and laying wreathes and flowers in memorial for those who paid the ultimate cost. This act of remembrance made even more important on the 70th Anniversary.
However little recognition is given to the Berlin Airlift in South Africa, These are truly “unsung” heroes of South Africa we can be very proud of and not to be forgotten. The South Africans who took part in the Berlin Airlift are icons in Germany, and hardly known in South Africa, such is the strange politics we as South Africans tend to weave.
The Berlin Airlift marks South Africa’s first sacrifice in the ‘Cold War’ – further sacrifice was to come in the other future ‘Cold War’ proxy wars – fought by South African statute forces against Soviet Allies in Korea, Namibia, Angola and Mozambique.
To many of the South African air-crew and SAAF members who took part in this momentous period in world history, the saving of a city from near starvation, the Capital City of a former enemy now vanquished by the war, with this act of sheer human philanthropy and benevolence was to really end South Africa’s “war” on a very humane high.
We leave the Cold War where it started and in one fitting epitaph the last British pilot to leave Berlin had chalked on the side of his aircraft the words, “Positively the last flight…Psalm 21, Verse 11” That psalm reads:
“If they plan evil against you, if they devise mischief, they will not succeed.”
Here is a another fantastic colourised photograph of a South African WW2 hero with an extraordinary tale of heroism. Lieutenant Albert Sachs – a member of the South African Air Force (SAAF) who was seconded to No. 92 Squadron of the Royal Air Force. Here he is seen sitting on his Supermarine Spitfire Mark VIII at Canne in Italy.
This very heroic South African, known as ‘Bertie’ to his friends is best explained in his own Sortie Reports and Squadron Reports:
30 November 1943
‘I was flying Yellow 3. At 0935 I saw 10+ 109s and 190s which we had been warned of by Control, bombing along the secondary road parallel with the Sangro River towards the River mouth.
I dived on them and as I approached they turned and began straffing the road towards the mountains. I closed in on a 190 and fired several bursts from quarter astern and astern from 250 – 50 yds. He dived N.W. along the side of the mountain and after seeing strikes on the cockpit I saw the A/C (aircraft) half roll and it crashed in the vicinity of H.1898.
German FW 190
I then broke slightly up as a Warhawk was on the (Me) 190s No 2s tail. The Warhawk fired several shots none of which hit the E/A. He then broke up and I closed in on the 190 and fired a burst at quarter astern from 100 yds. getting strikes on the wing roots, as I was firing the Warhawk flew through my sights so I broke away and then lost sight of the 190. I then rejoined the Patrol.
I claim One F.W 190 destroyed. One F.W 190 damaged.’
Editors Note: the Warhawk referred to here is another Allied aircraft – the Curtiss P-40 – see below, the variants flown by the RAF and Commonwealth forces knew it as a ‘Kittyhawk’ (some variants also became knows as ‘Tomahawks’), the United States Air Force and other US armed forces called it a ‘Warhawk’ – see below.
American Curtiss P40 Warhawk
5 December 1943
On the 5th of December 1943 Lt. Albert Sachs scored the 99th and 100th victories for his Squadron when he shot down two Focke Wulf Fw 190s near Pescara, before colliding with a third Fw 190 and being forced to bale out.
The Officer Record Brief entry for 92 Squadron provides the following, detailed insight into this engagement:
‘Lt. Sachs destroyed two FW 190s and probably destroyed another. His story is an epic. He positioned himself behind the twelve-plus fighter-bombers while two others attacked the fighter cover. After destroying an FW 190 with a one-second burst, Lt. Sachs saw another on the tail of a Spitfire, so he turned into it, firing a 30-degree deflection shot, then fired again from point-blank range astern.
The aircraft blew up, and portions hit Sachs’ windscreen, smashing it, while another large piece struck his starboard wing.
FW 190s were then diving on him from both sides and one shell exploded on his tail plane, blowing off his starboard elevator. He turned toward another FW 190 which as attacking him at point-blank range on his port side, and felt a jar as he collided with it. The enemy aircraft dived away out of control minus its fin and rudder.
The attack continued and finally, after his elevator and aileron control were useless, Lt. Sachs was forced to bail out. He landed safely in his own lines within 60 yards of the wreckage of his Spitfire.’
Royal Air Force Spitfire Mk VIII
He was discovered by ‘friendly’ Italians and was able to return to his Squadron to fight another day. After a period as a flying instructor in the United Kingdom, Sachs, now a Major, returned to Italy to command No. 93 Squadron RAF from September 1944 to February 1945.
In September 1944 No.93 Squadron was moved from operations covering the D-Day (Operation Overlord) forces and moved to Italy, where it operated as a fighter-bomber squadron until the end of the war. At the end of the war the squadron took part in the occupation of Austria, before being disbanded in September 1945. Albert Sachs was awarded the Distinguished Flying Cross (DFC).
Here pilots from No. 93 Squadron RAF Detachment under Albert Sachs command leave their dugout for a scramble at Nettuno, Italy. Leading the way, from left to right, are: Flying Officer E Stewart of Ipswich, Suffolk; Lieutenant J Marais SAAF of Johannesburg, South Africa, and Sergeant D Karck of Cockerham, Lancashire.
Salute to ‘Bertie’ Sachs, another very notable, brave and successful South African Air Force pilot of World War 2.
Researched by Peter Dickens. Photographer: Flying Officer B. Bridge B, Royal Air Force official photographer. Image and caption courtesy of the Imperial War Museum, image and affectional caption work obtained from Colourising World War 2.


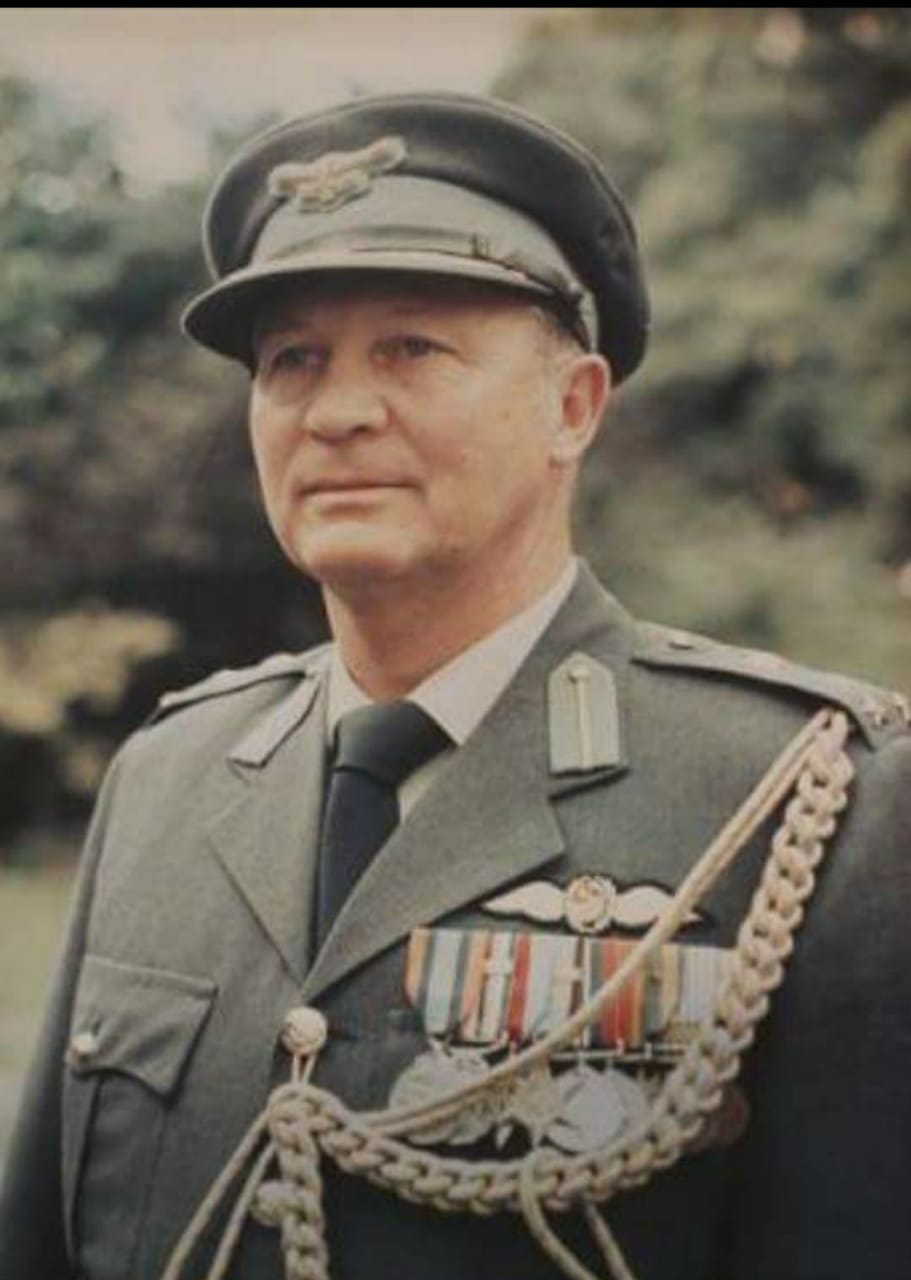

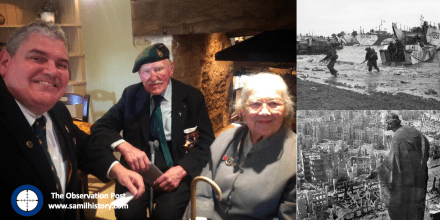
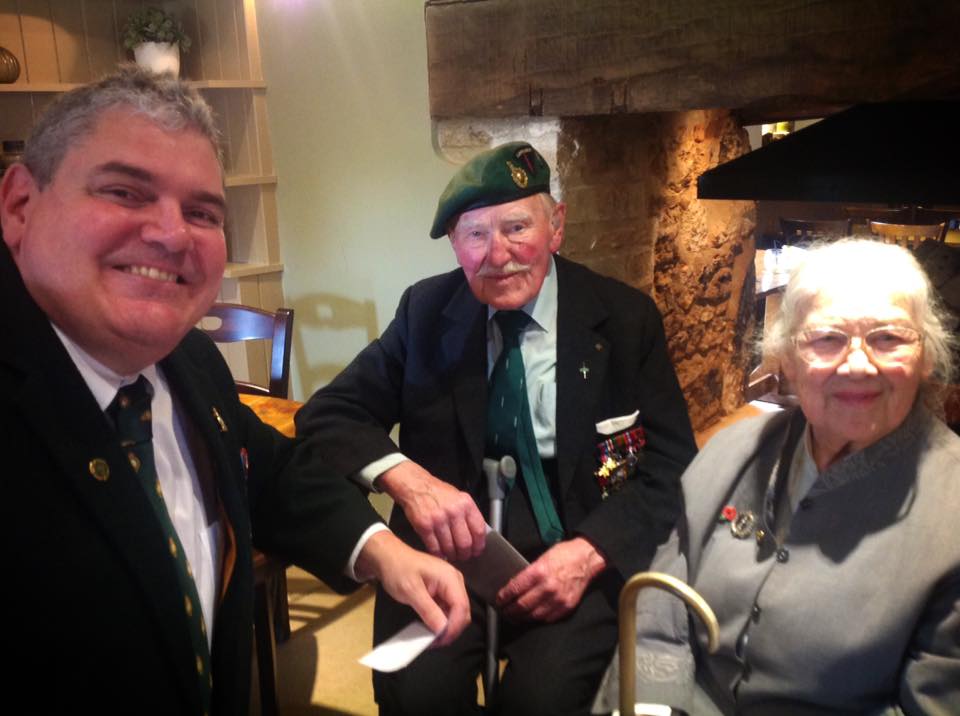
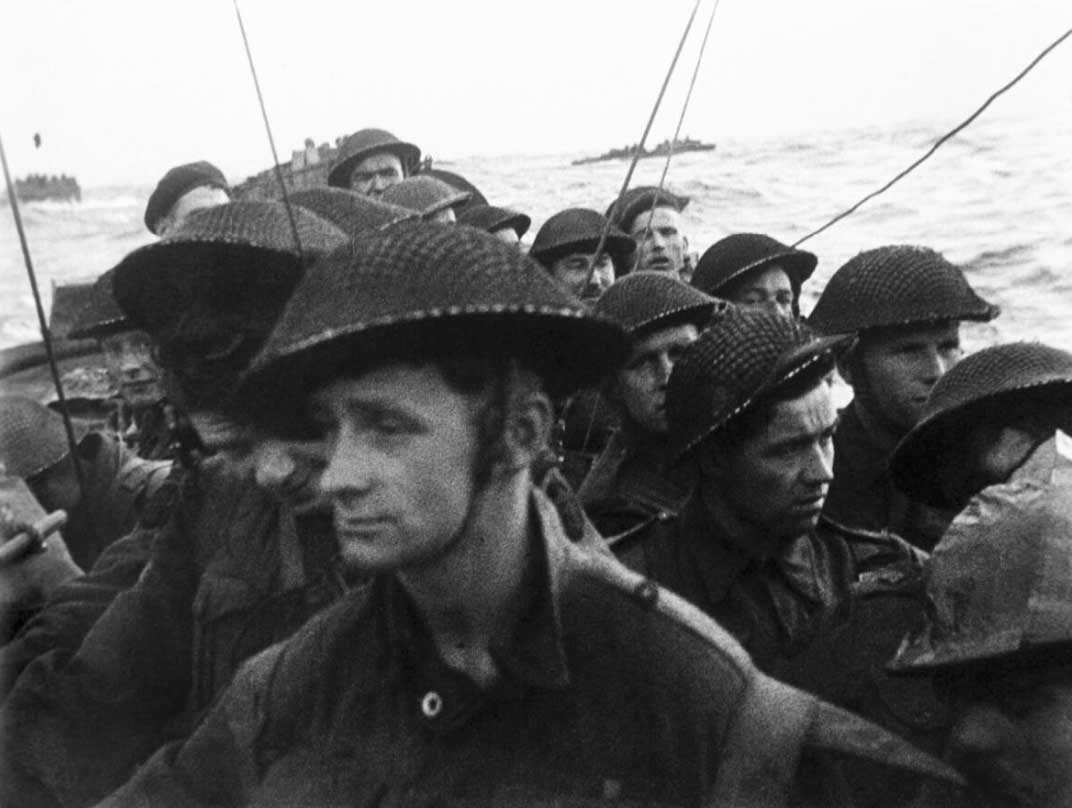


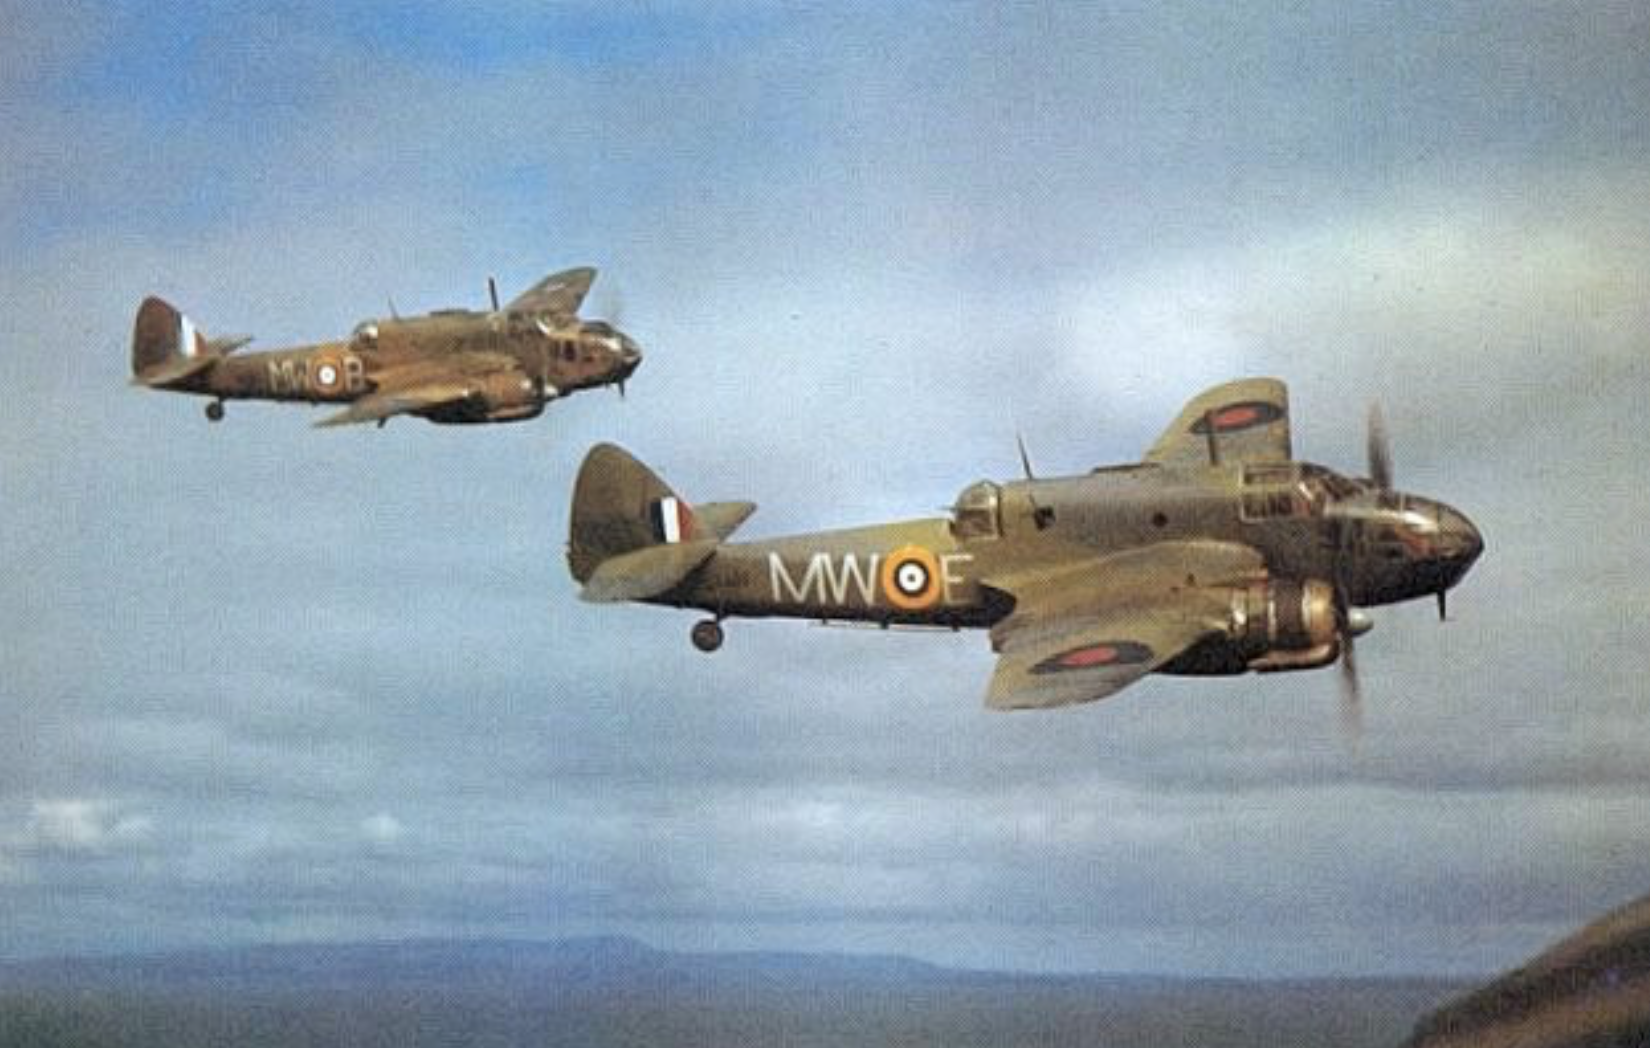
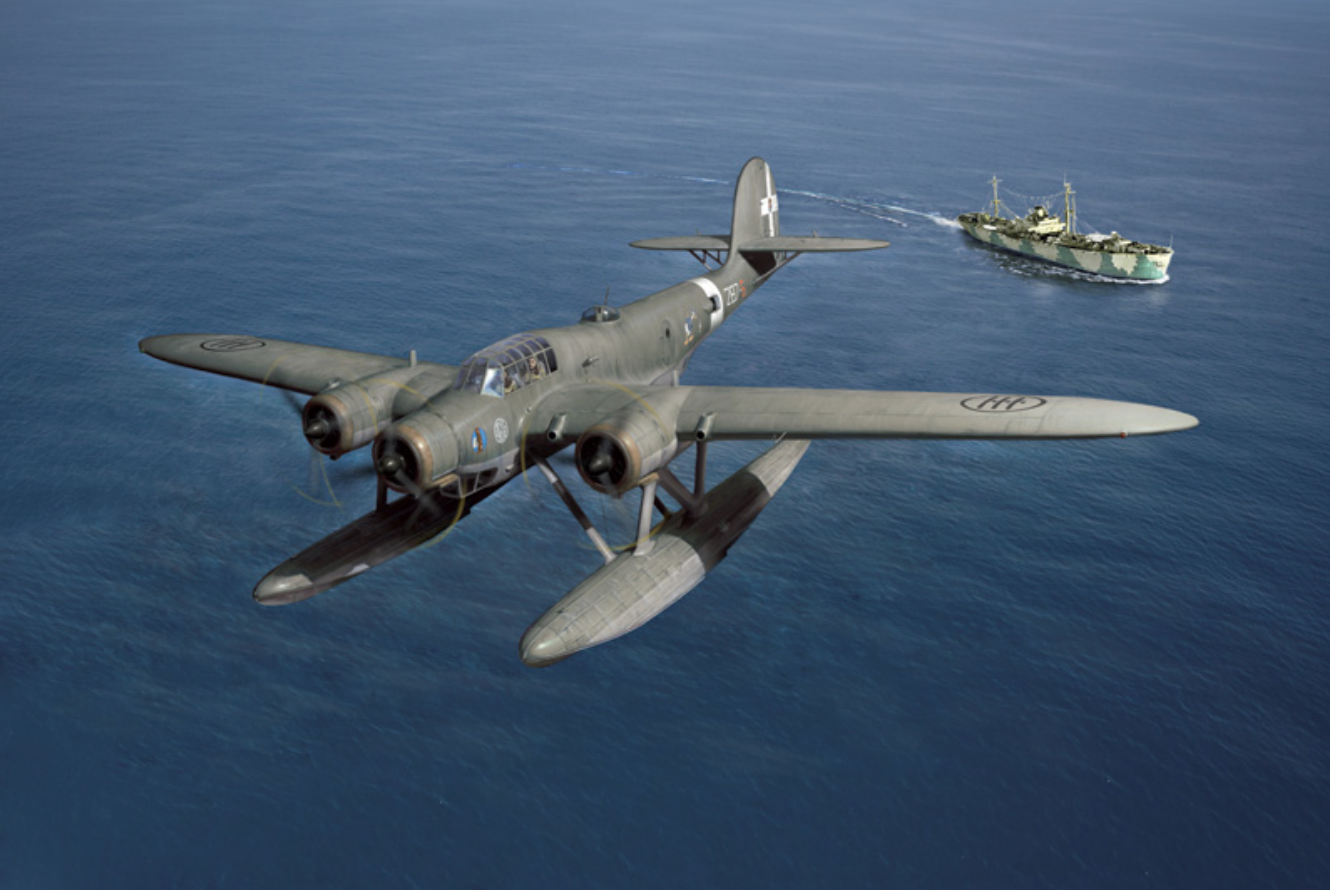

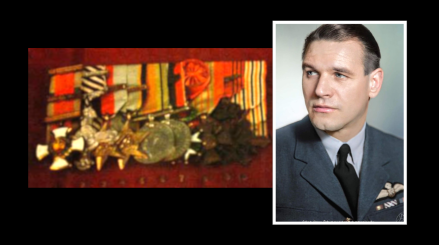
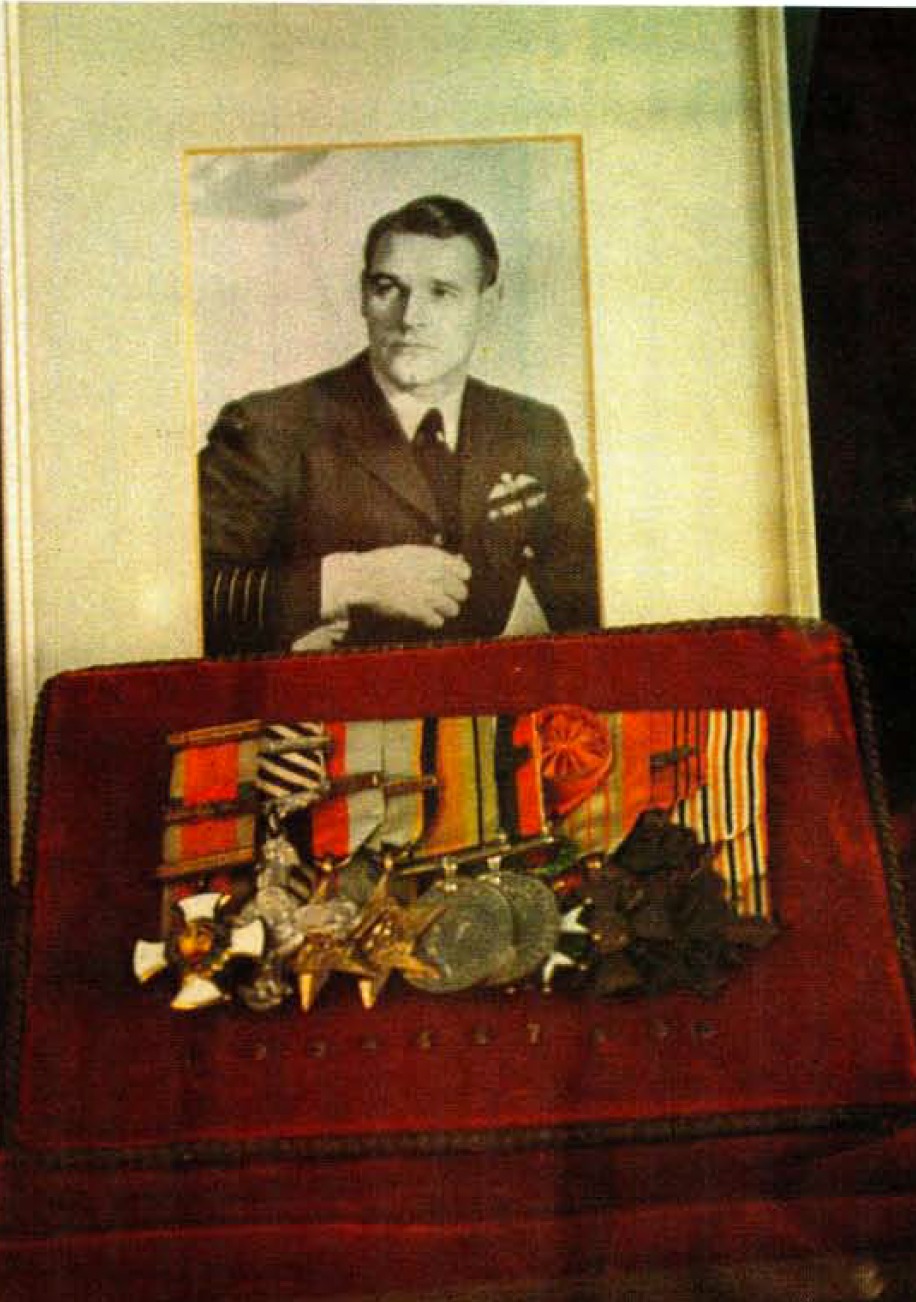
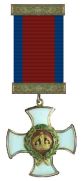

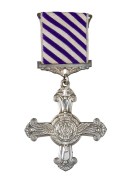


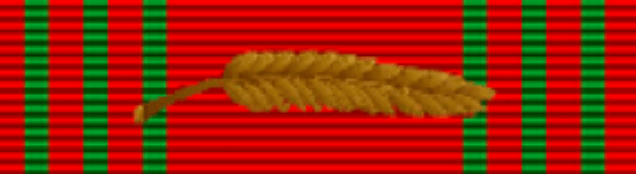
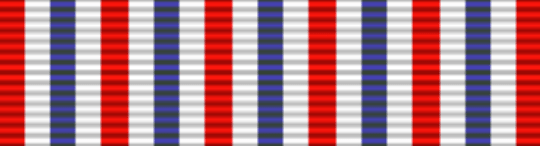
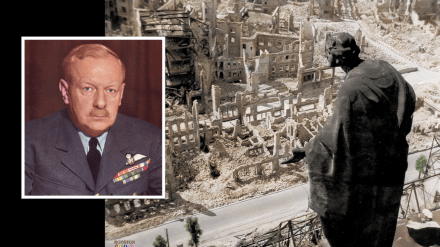


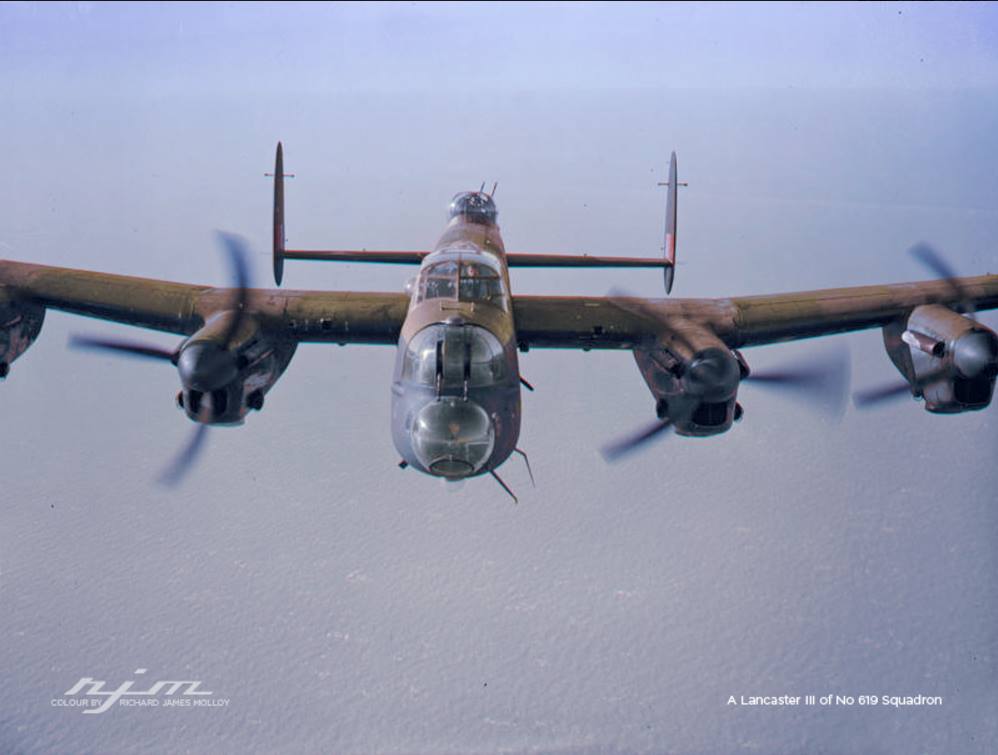


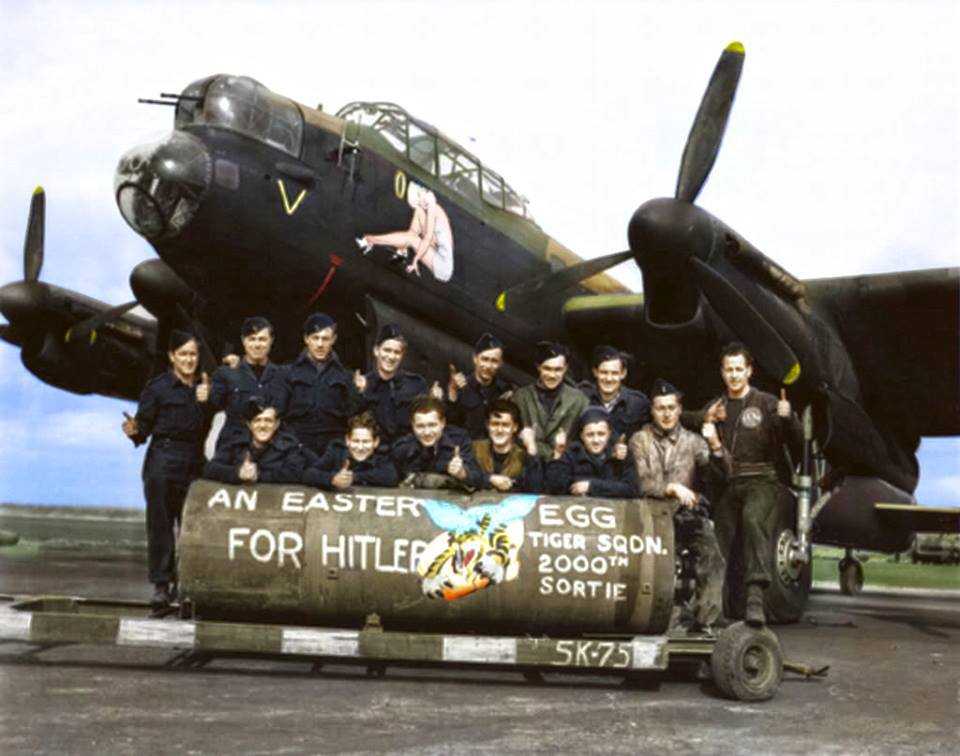

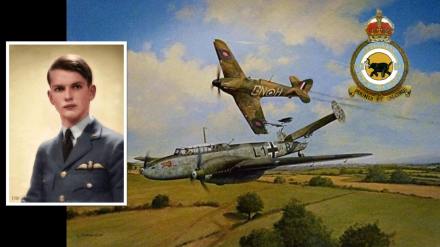
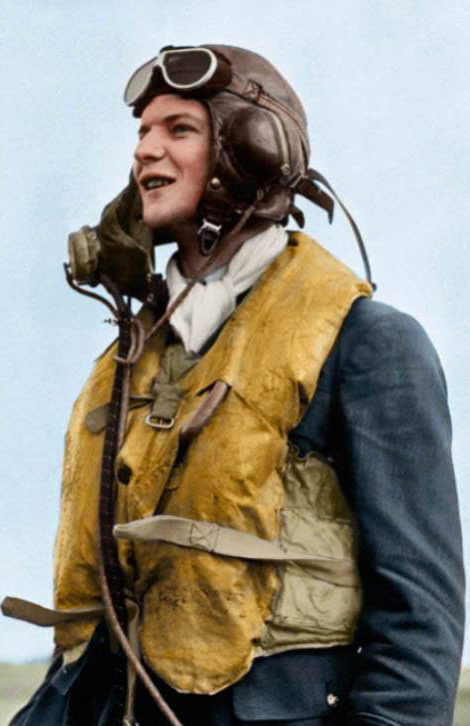
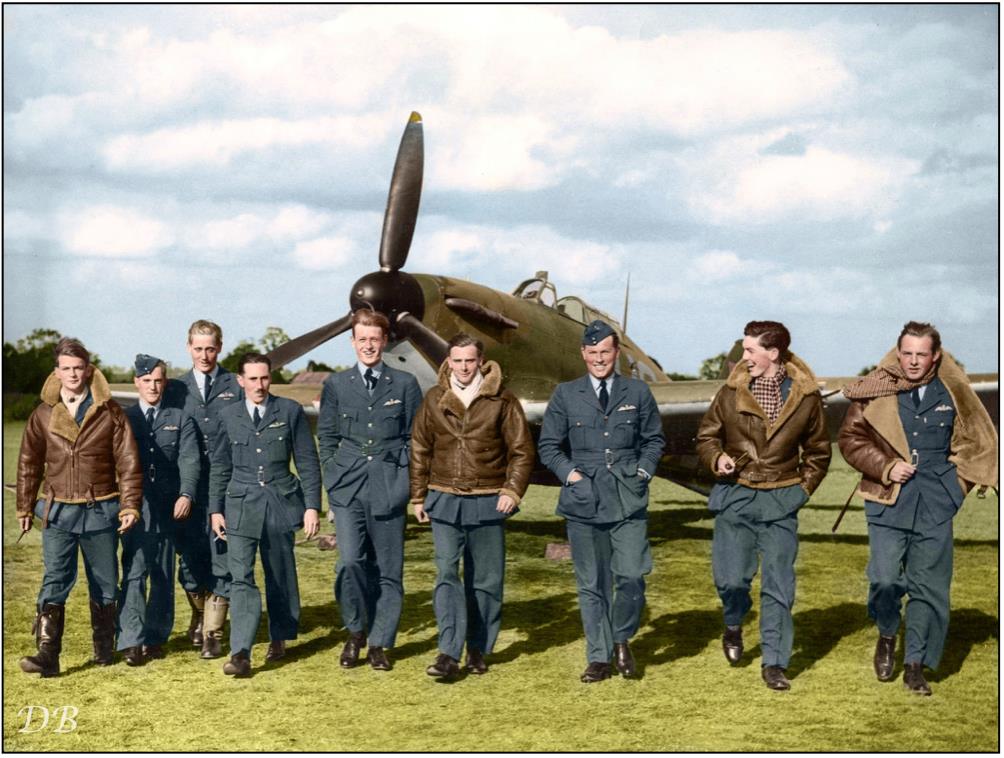

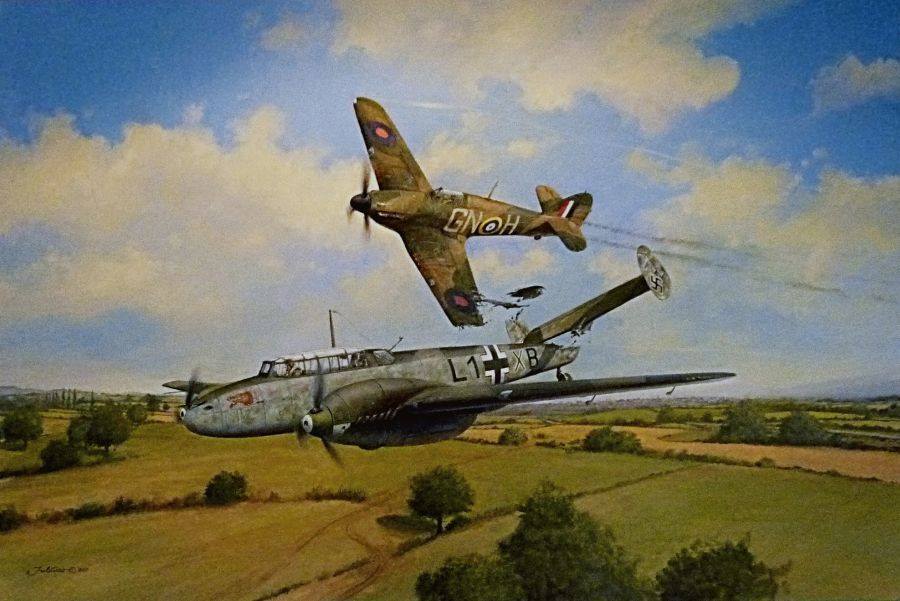
 As all the eye-witness reports indicate strongly that Percy Burton deliberately rammed the Bf 110 in an act of sacrifice. In a letter from Fighter Command to the Hailsham ARP Chief, Percy Burton was recommended that for this action, bravery and sacrifice at Hailsham that he receive a posthumous Victoria Cross.
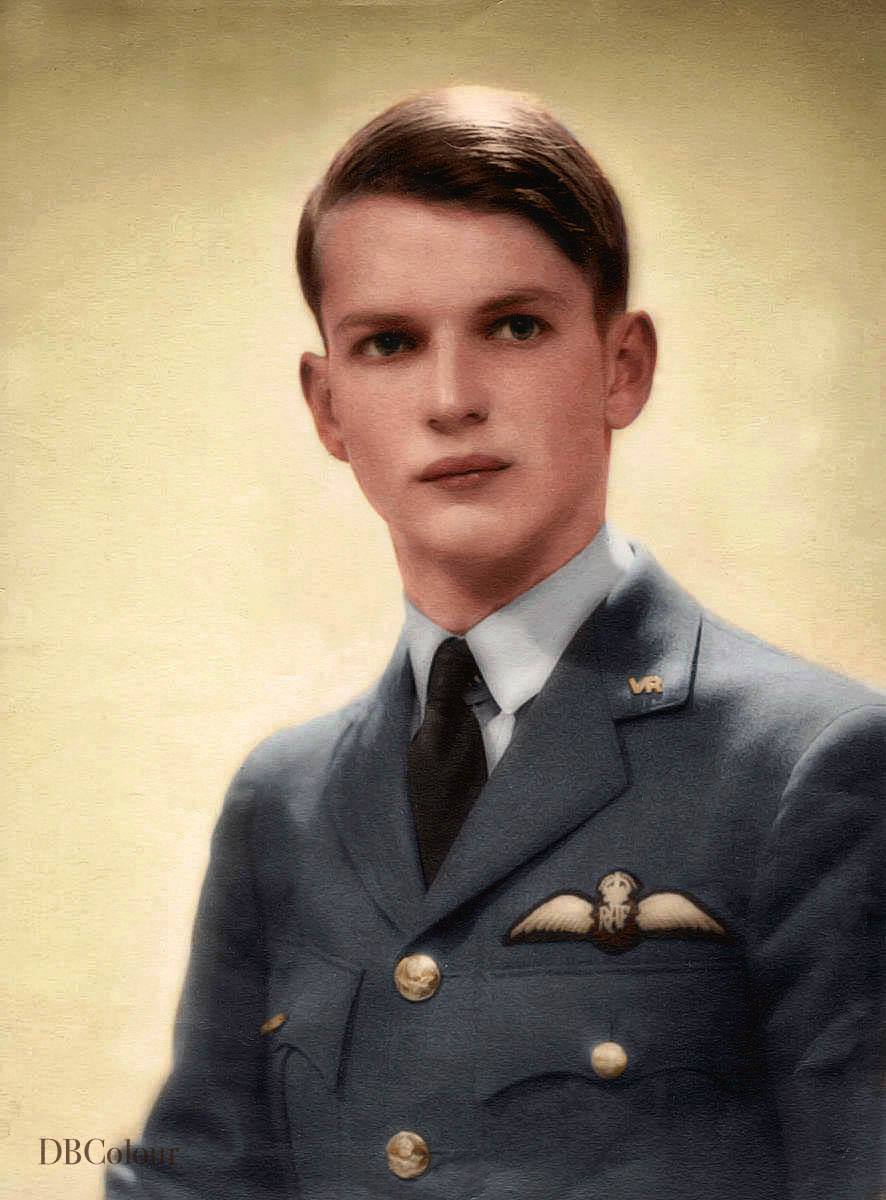 Looking at this recently colourised image of Percy Burton by Doug, we are reminded of just how young these brave men were, Percy Burton was just 23 years old when he boldly sacrificed his life. In perspective he was the ‘millennial’ of his time, however it is very difficult to imagine a modern millenial facing the hardship, morality, bravery and sacrifice that this – the ‘greatest generation’ – faced.
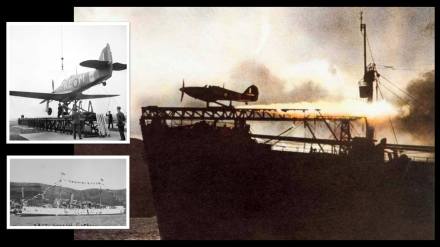


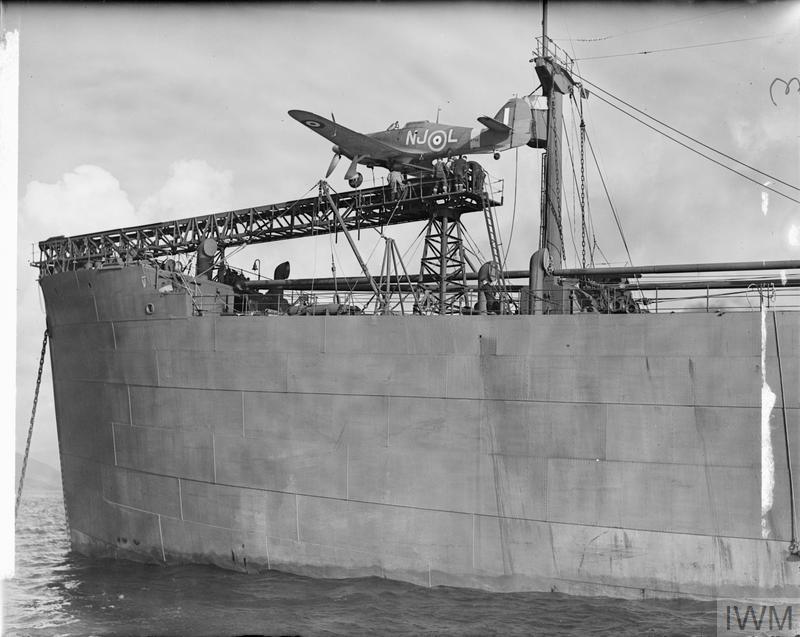
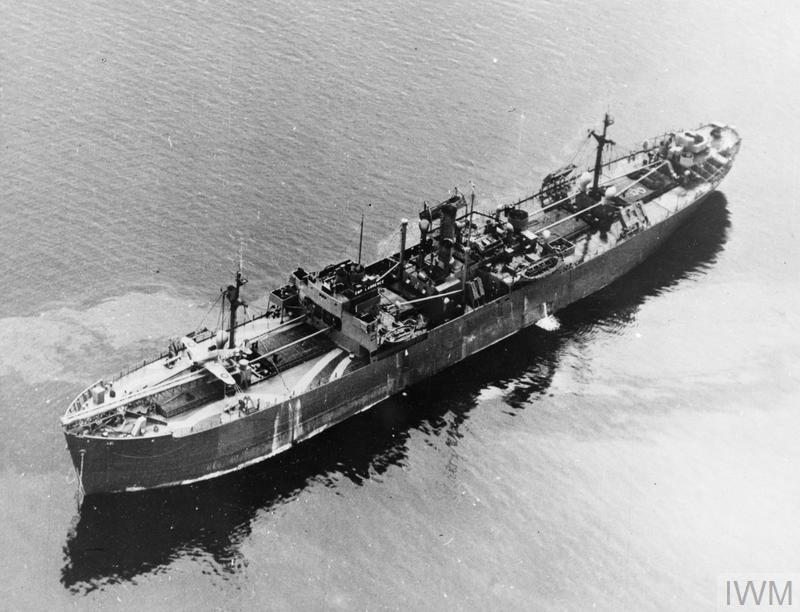
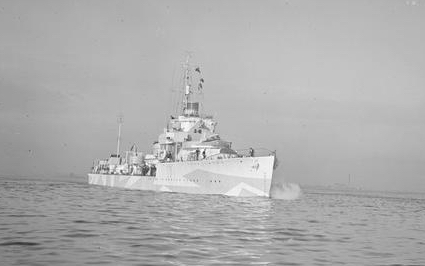

 “Pilot Officer Hay was pilot of the Hurricane on board a ship fitted with a catapult. On the approach of enemy aircraft he was catapulted off and immediately proceeded to attack and drive off a formation of six Heinkel 111’s and 115’s which were preparing to deliver a torpedo attack on the port bow of the convoy; not only did this prevent synchronisation with an attack which developed from the starboard bow, but he destroyed one Heinkel 111 and slightly damaged another. Pilot Officer Hay was himself wounded and he then baled out and was picked up by one of His Majesty’s ships of the convoy escort. He showed great gallantry and his spirited attack was a great encouragement to all the convoy and escorts, and cannot but have been a great discomfort and surprise to the enemy.”
 Flight-Lieutenant Alistair James Hay DFC was tragically killed on the 18 August 1944 whilst taking part in the Battle of the Falaise Gap flying RAF Typhoon, serial number JP427 and he encountered flak near Vimoutiers and was shot down.
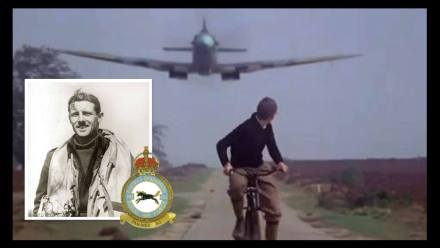
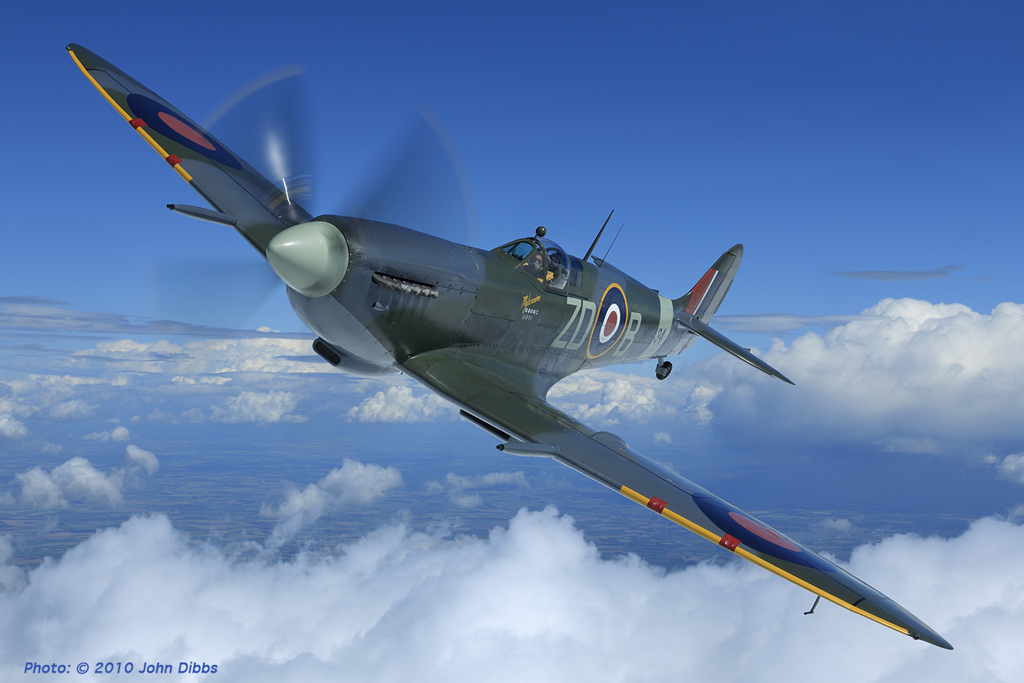

 Formed during WW1, 222 Squadron was reformed at the onset of WW2 at Duxford on 5 October 1939 and in March 1940 the squadron re-equipped with Spitfires. It initially took part in the Dunkirk evacuation and the Battle of Britain. Later in the war it would participate in Overlord and the D-Day landings as well as Operation Market Garden.