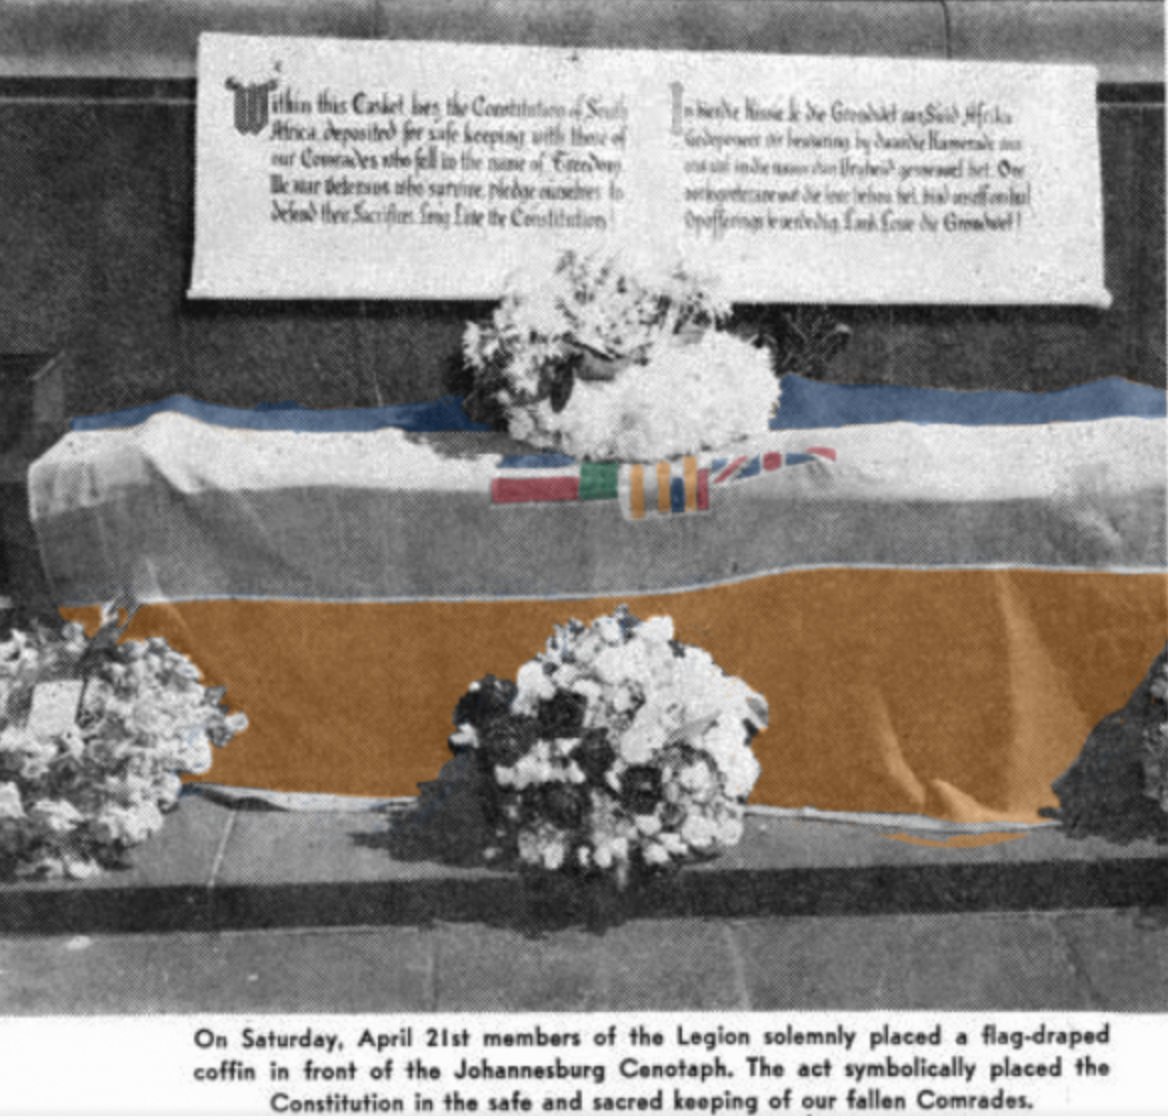
Torch Commando Series – Part 1
Apartheid’s ‘lost’ cousin
One of the key reasons the Torch Commando’s leadership was somewhat sidelined and even gagged by the National Party, eventually resulting in the suppression of its legacy and removal from the general consciousness of South Africans is this …. the underpinning of Afrikaner Christian Nationalism with German National Socialism.
To view history in its correct context, one must see the characters in their time, see things from their view – see what issues of the day are driving their actions and thoughts and NOT to see them in the context of 21st Century social constructs and opinions. What this history will show us is that Nazism is not central to Afrikanerdom in any way, shape or form, it manifests itself on the ‘rump’ of Afrikanerdom in a small group of Afrikaner Republican zealots bent on supporting of Germany through all its manifestations from its brand of Imperialism to Nazism.
Exactly as Nazism did in Germany, it’s a cancer and it could come to infect and destroy the liberal and moderate political constructs of Afrikaner politics and eventually destroy the pillars of democracy inherent in ‘white’ politics as a whole. Furthermore, using the same Nazi dogma of oppression, this minority of nationalist zealots would gerrymander and even violently consolidate themselves into an unassailable position verging on a one-party tyrannical state.
To the Torch Commando members and to other returning South African World War 2 veterans in various political parties and veteran associations, the accent of the National Party to power in 1948 was not so much that their policies of Apartheid sought to repress South African blacks and deny them the franchise – that was secondary to their cause, the major issue presenting itself to these war veterans was that The National Party constituted a Nazi and Fascist threat to South Africa.
This Nazi and Fascist threat globally was a threat that had just been to war against – in 1945, just three years previously to the National Party coming into power, Adolf Hitler and Benito Mussolini were both dead and 11,023 South Africans died in the process of making that happen – all of them comrades in arms. To say these war veterans had no tolerance for Nazism or Fascism would be an understatement, to say they feared it would be an absolute truism.
Almost to a man, the National Party leadership and elite had either flirted with Nazism or had become full-blown National Socialists in support of Nazi Germany prior to and during the Second World War. Consider the amount of pro-Nazi and Neo-Nazi organisations that formed on the far right of white Afrikanerdom prior to and during the war, they were:
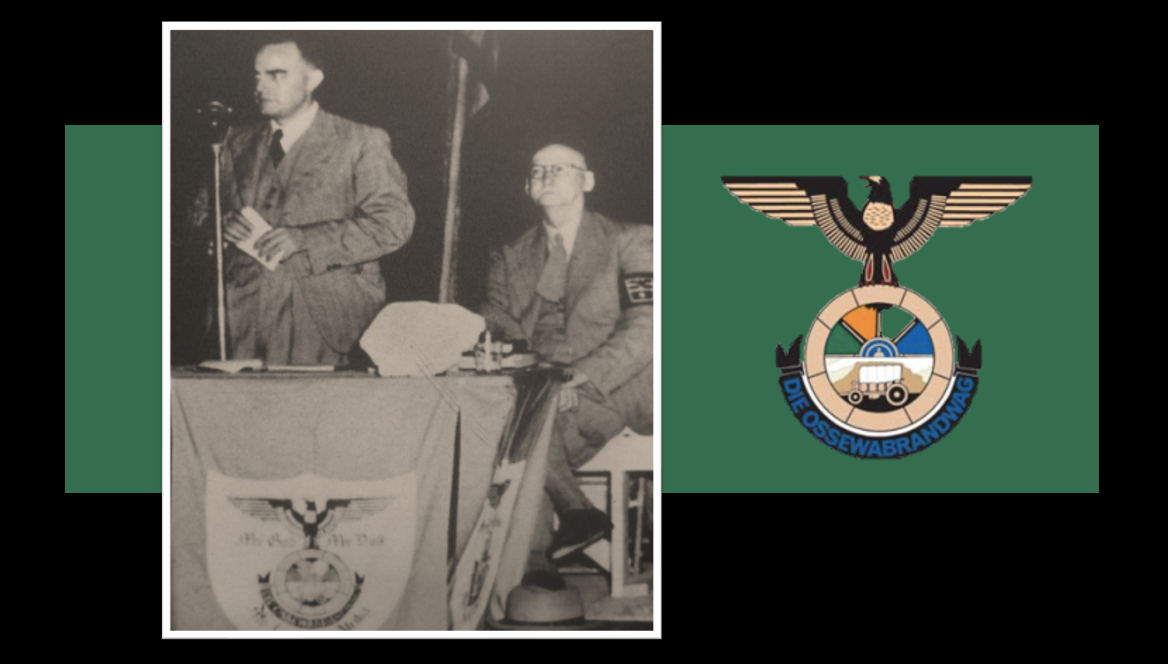
- The ‘Ossewabrandwag’ (Ox Wagon Sentinel) – led by Dr. Hans van Rensburg.
- The ‘Grey-shirts’ – The South African Christian National Socialist Party (SANP) – led by Louis Weichardt.
- The ‘Democratic Movement’ – led by Manie Wessels and Chris Havemann.
- The ‘Broederbond’ (Afrikaner Brotherhood) – led by Dr. Nico Diedericks.
- The ‘New Order’ – led by Oswald Pirow.
- The ‘Black-shirts’ – the Volksbeweging (People’s Movement) or ‘African Gentile Organisation’ led by H.S. Terblanche.
- The ‘Brown-shirts’ – The ‘Bond van Nasionale Werkers’ (National Workers Union) led by Johannes Bruwer.
- The National Socialist Rebels – led by Robey Leibbrandt.
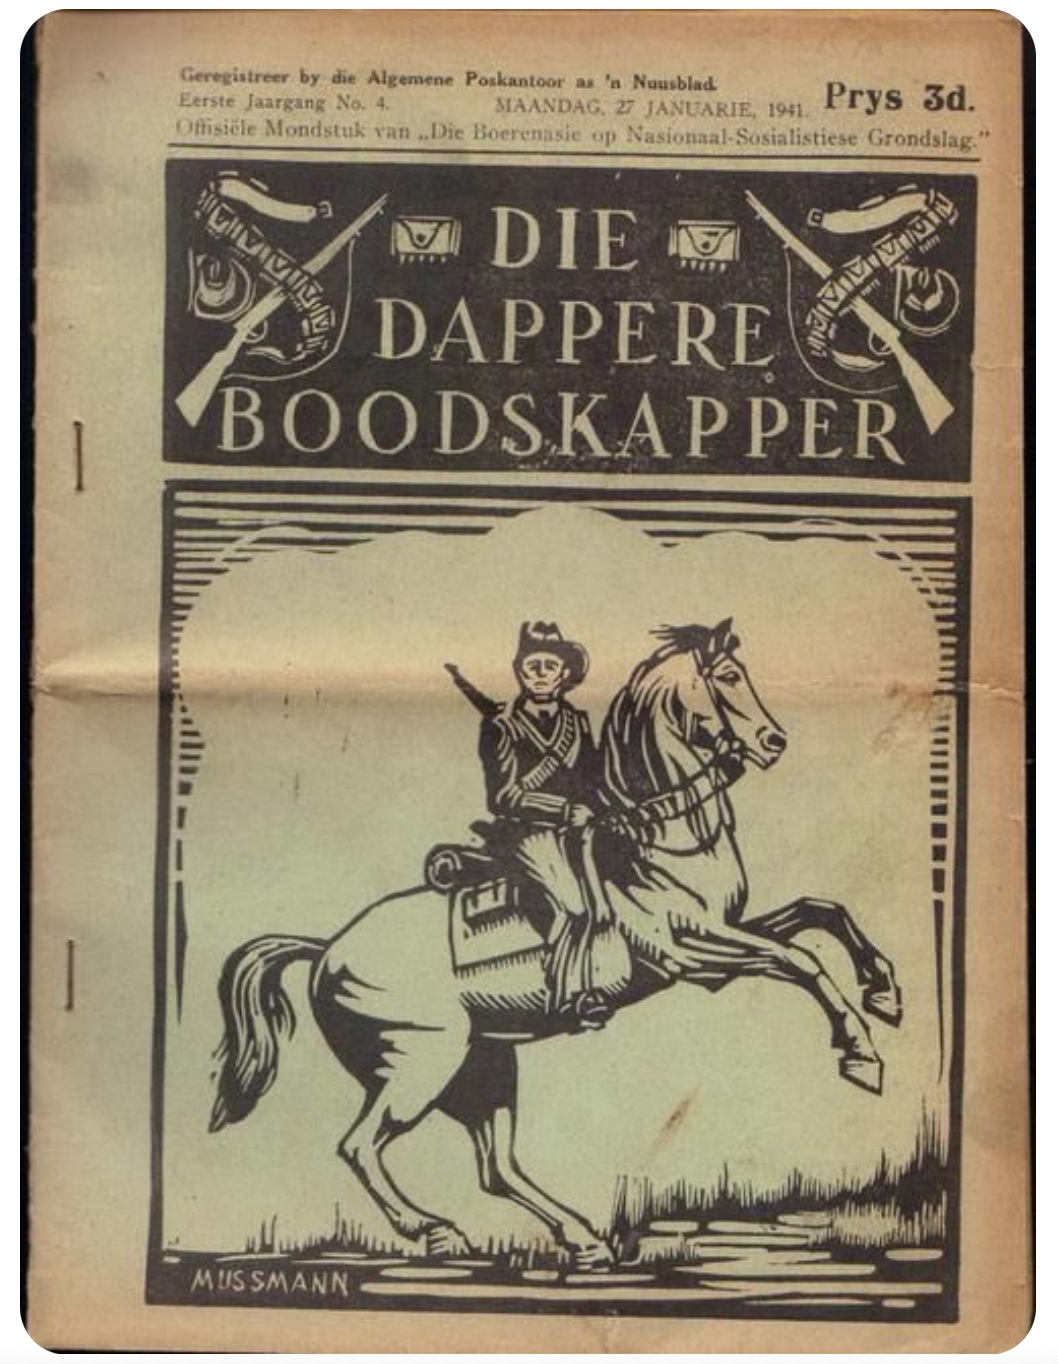
- The Boerenasie (Boer Nation) movement – led by Manie Maritz.
All these movements and parties were folded into the National Party after the war in one way or another, with many of their members taking up key positions in the National Party in government and related state organs and parastatals.
With the global condemnation of Nazism and the establishment of the United Nations in the wake of the war to prevent such an ideology threatening mankind again, the National Party were very quick to bury this past – they would choose to identify their resistance to Jan Smuts’ call to arms against Nazi Germany as an ‘anti-British’ one and not a pro-Nazi one (a hangover of hatred for Britain from the Boer War). Nazism in 1948 was political hot potato, in fact it was sheer political suicide and the Nationalists needed to bury their Nazi past and fast.
To do this, in July 1948, mere months after the National Party won the election. The National Party’s new head of Defence – F.C. Erasmus walked into Colonel Charles Powell’s office at the National Intelligence archive, he promptly dismissed Colonel Powell on the spot with 24 hours’ notice. He then proceeded to remove “two lorries” worth of wartime Broederbond and Ossewabrandwag intelligence documentation linking them to Nazism – never to be seen again.
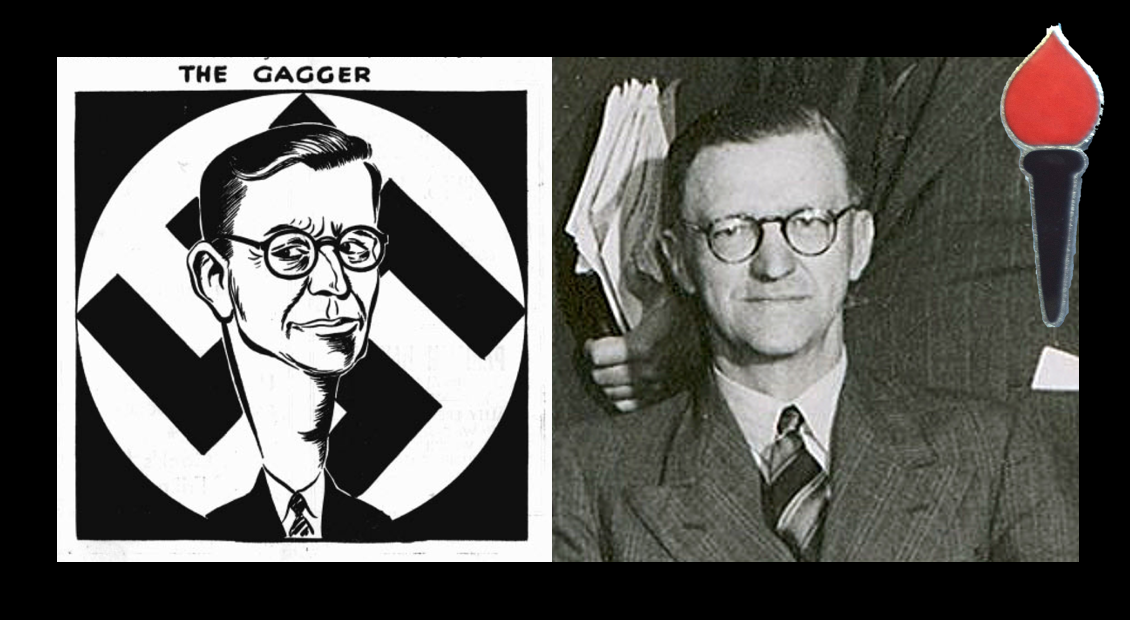
Formal complaints to the new Minister of Justice to reinstate the military intelligence archive were just ignored. Later, to the continued amazement of all, whenever there was a press conference and B.J. Vorster taken to task on any of his Nazi or Broederbond past he would often smugly turn around to any young whippersnapper journalist trying to set a record straight and simply say “prove it”.
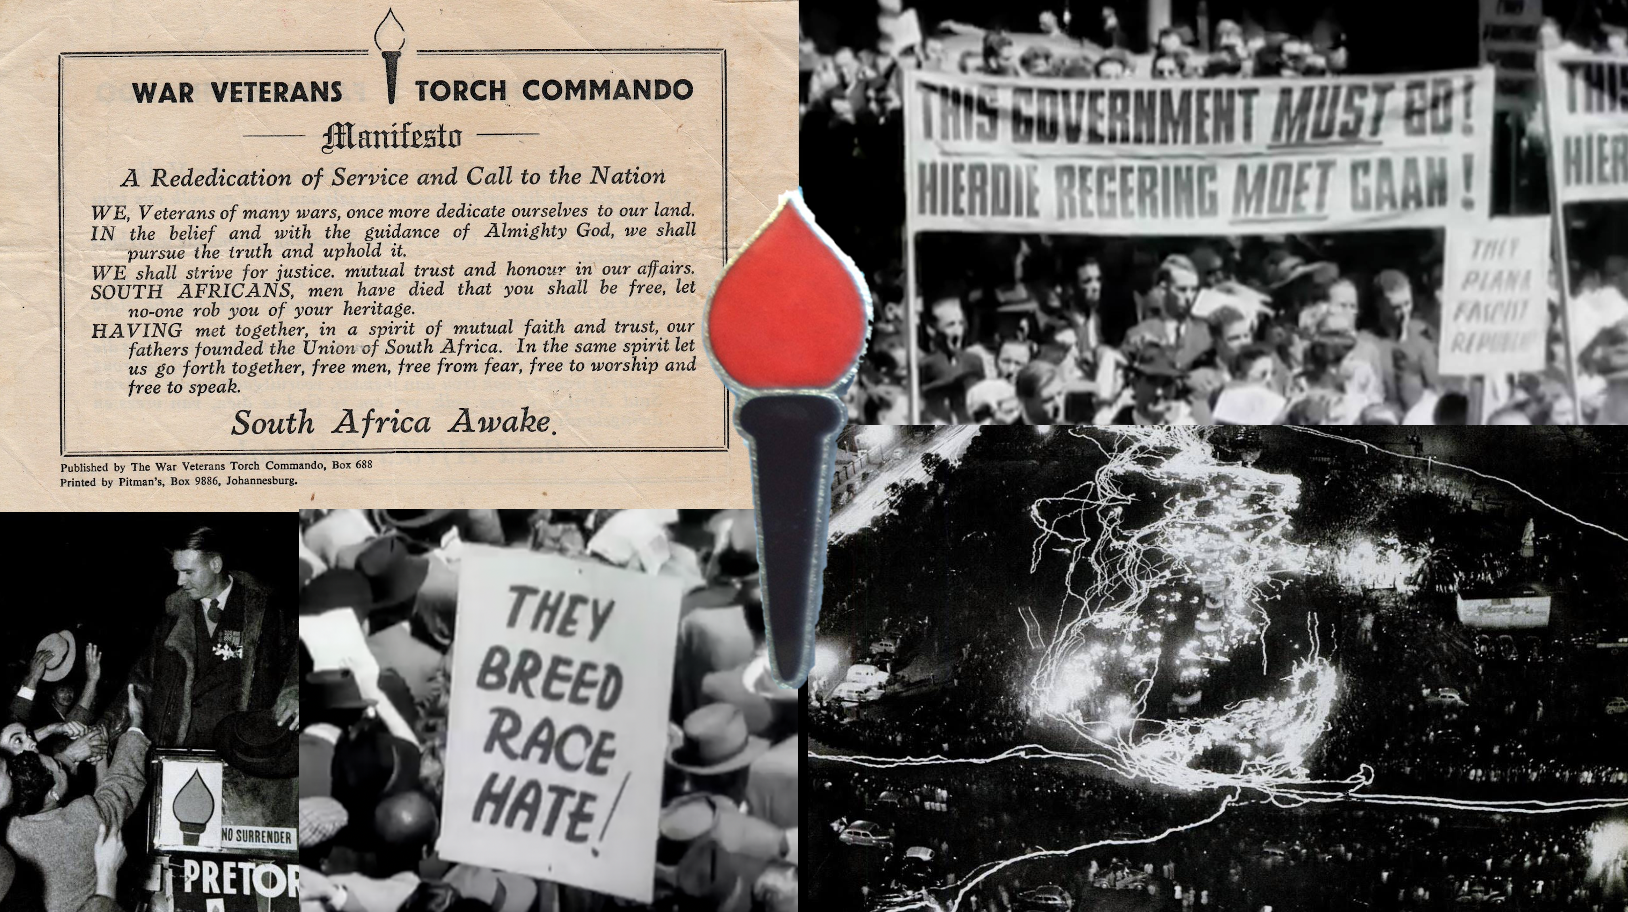
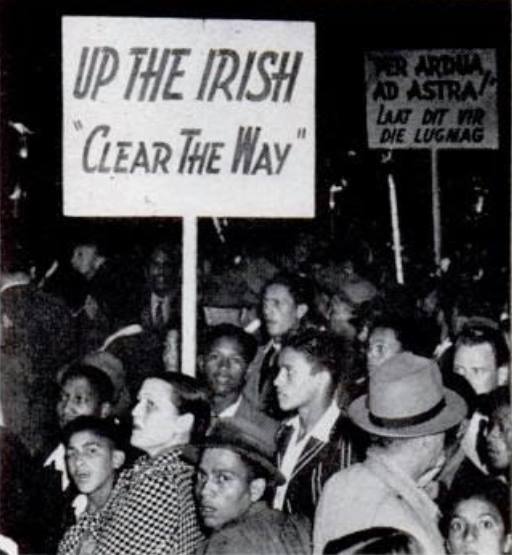
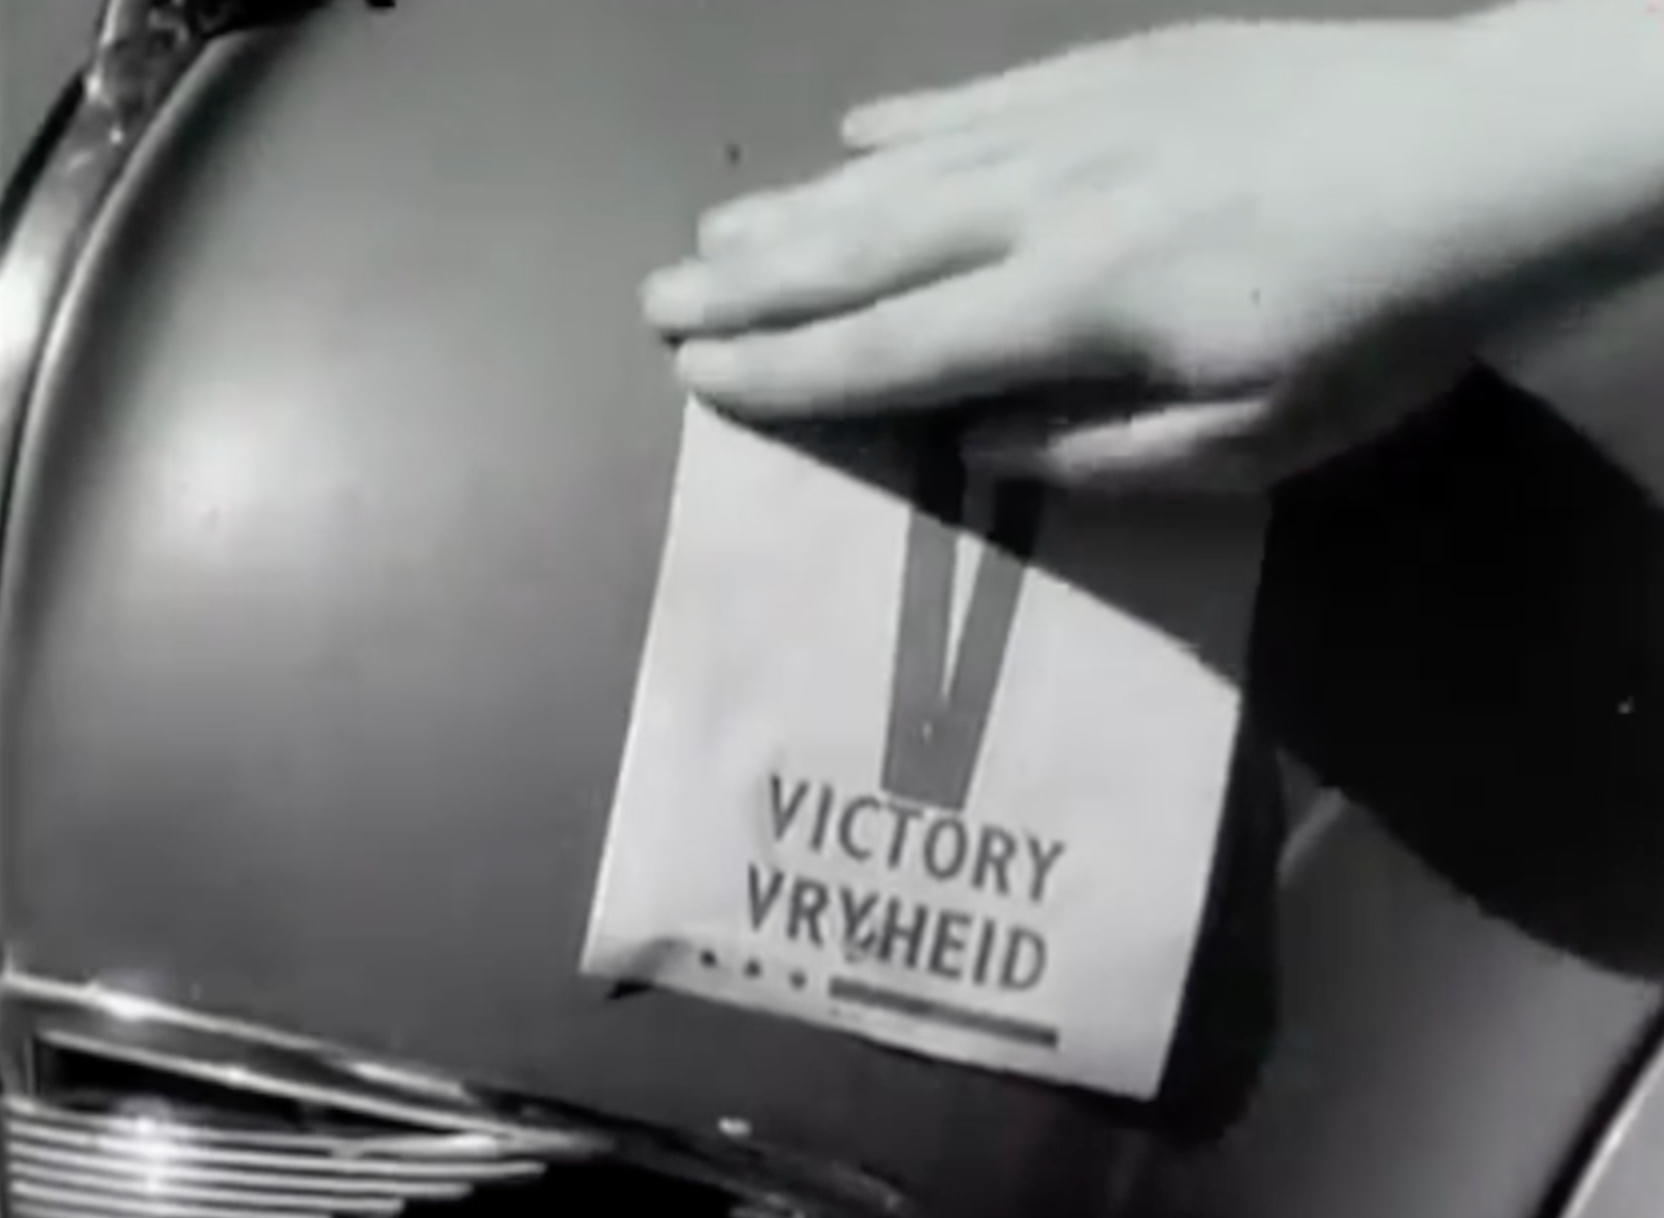
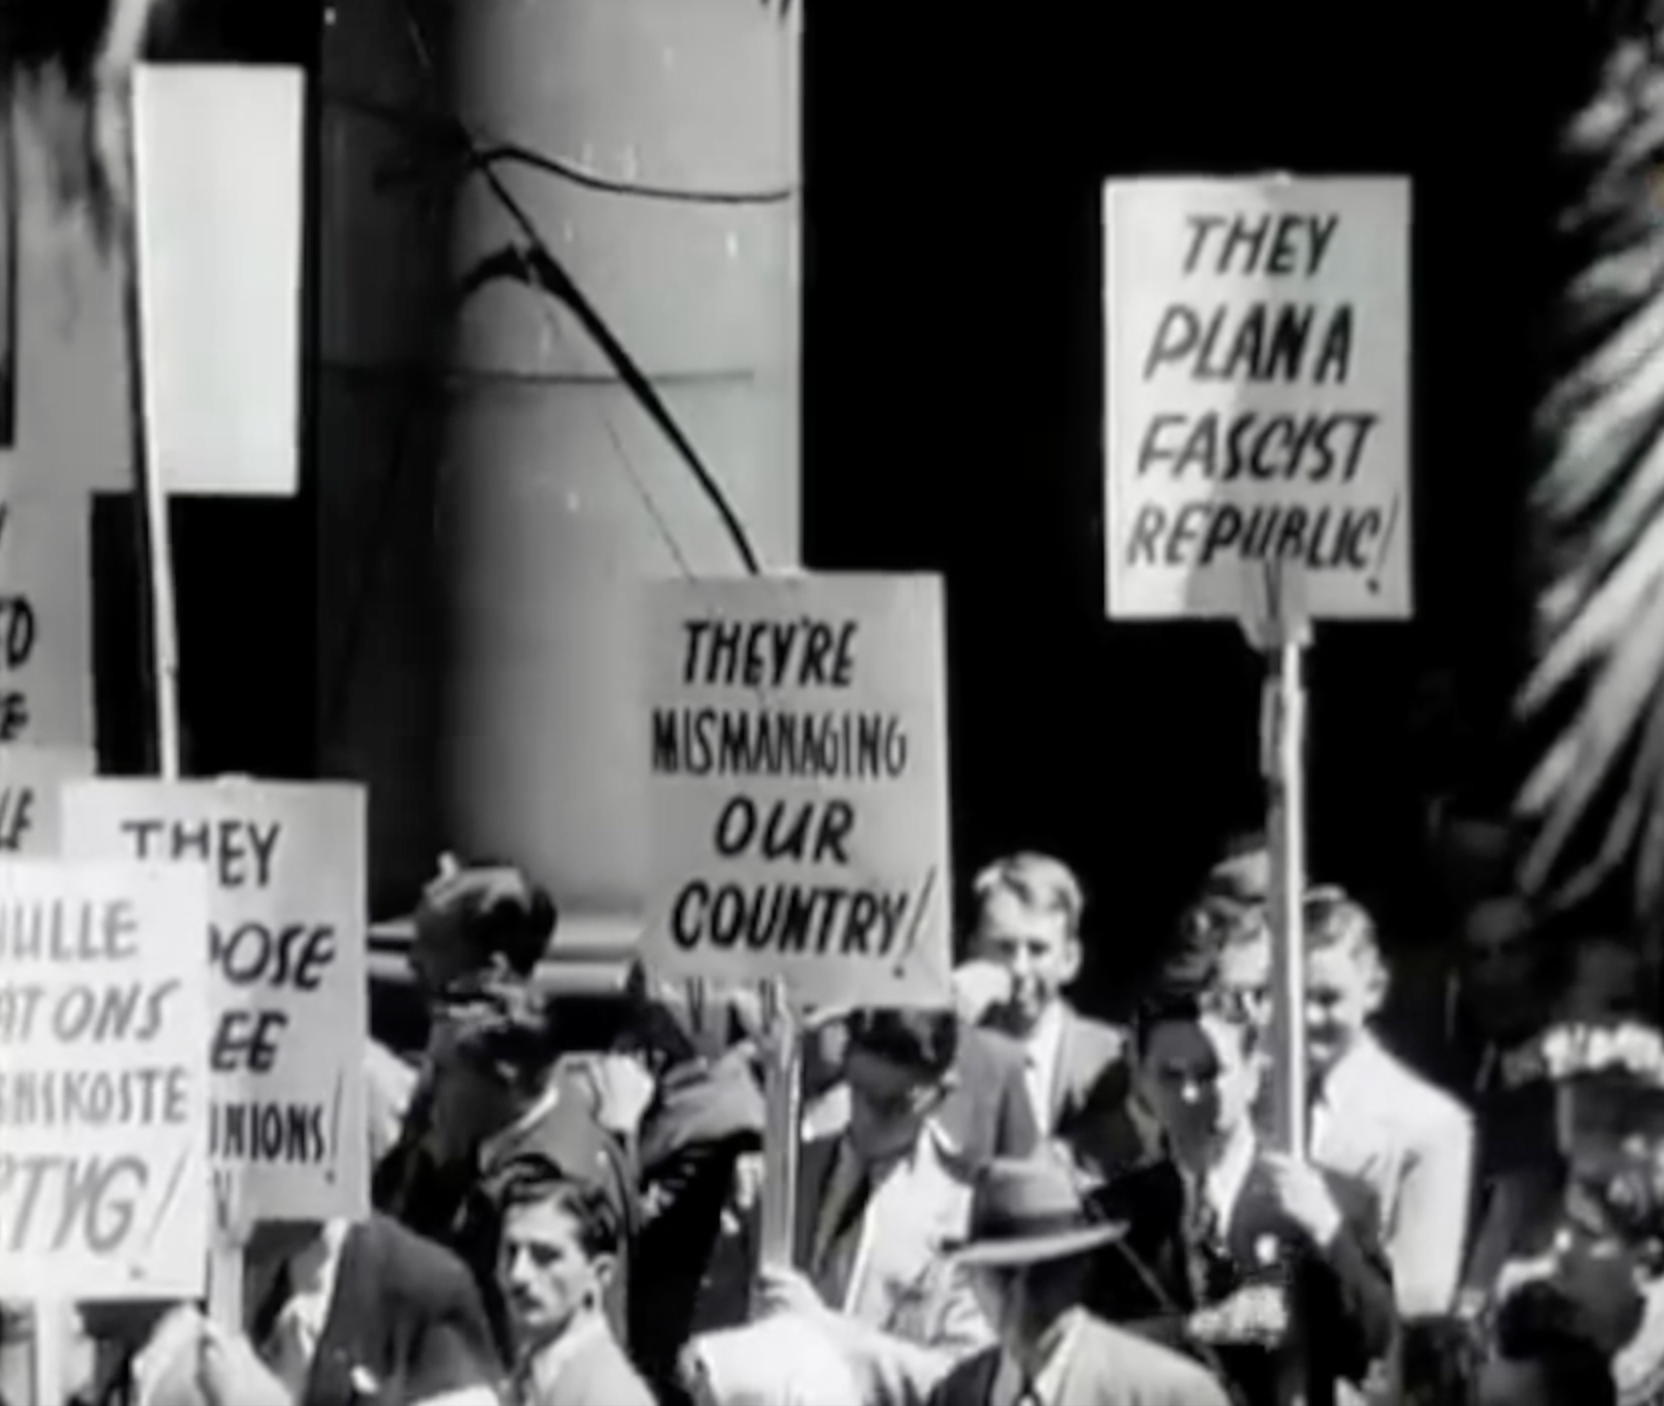
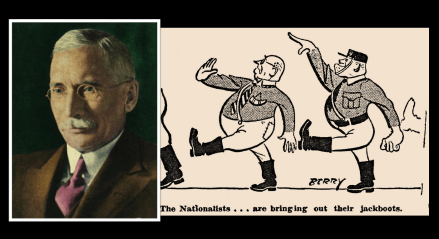
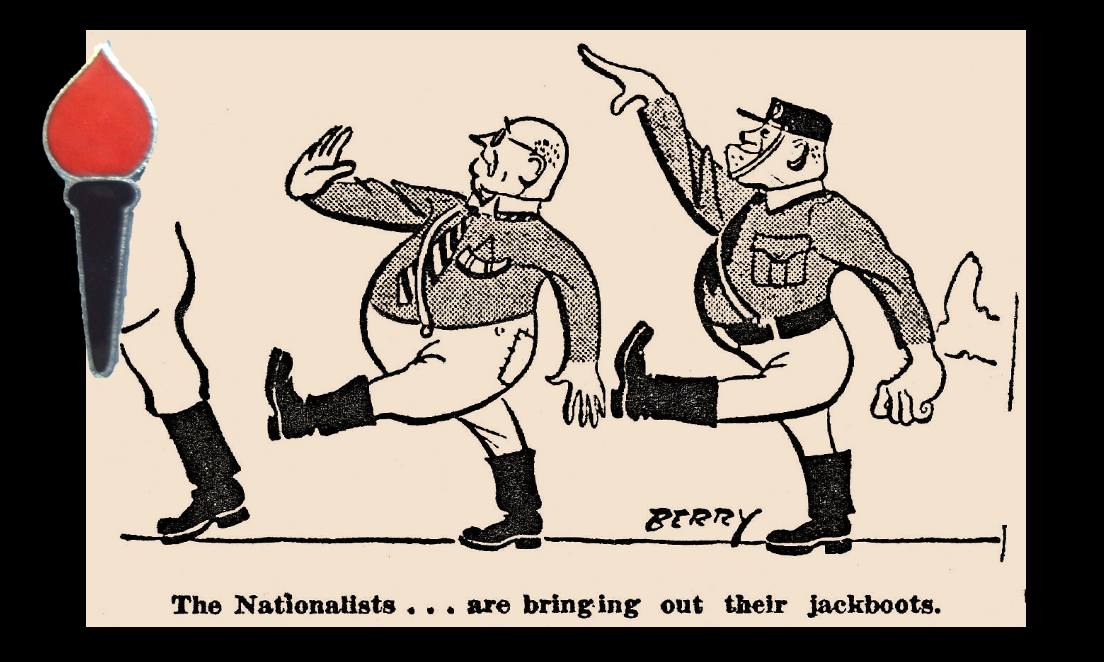
The problem was an organisation called ‘The Torch Commando’ and the war veterans themselves, they were very aware of who in the National Party cabal had been in support of Nazi Germany and its ideology, and in all of their own press, The Springbok Legions’ newsletter ‘Advance’, the Torch Commando’s newsletter ‘Blikfakkel’ and other ‘English’ medium mainstream press, constantly published articles, opinions, letters and cartoons linking Afrikaner Nationalism to Nazism. When in the ’English liberal’ newspaper media whenever Torch Commando leaders were interviewed, they consistently highlighted the National Party’s Nazi root and called them out.
So, where there’s smoke there is fire, let’s have a holistic and complete view of how Nazism as an ideology has played a role in the establishment of Christian Nationalism and Apartheid and who are the personalities who are in the National Party who have flirted or adopted the edicts of Nazism into their politics and policies.
The split in the Afrikaner diaspora
The Afrikaner right wing political romance with Germany starts with the South African War (1899-1902) i.e., Boer War 2 and it starts with the Zuid-Afrikaansche Republiek (ZAR or Transvaal Republic) and Orange Free State (OFS) Republican Afrikaners – and as an Afrikaner whole they are a minority population – as Afrikaners go the Boer Republics’ Afrikaners combined do not reflect Afrikanerdom nor the views for the majority of Afrikaners in Southern Africa.
The population of South Africa in 1899 was approximately 4.7 million persons with 3.5 million Black Africans making up 74% of the total. Whites, numbering 830,000 made up only 18% of the entire population. Asians and Coloureds total 400,000 or 8%. In total 480,000 are Afrikaans-speaking whites and they total 58% of the white population.
The Transvaal’s Afrikaners made up only 31% of the total number of Afrikaners in South Africa, with the Orange Free State having 15%. This total of 46% (approximately 219,000 people) shows that when war broke out, less than half of the total Afrikaners in South Africa were in the two republics that declared war on Great Britain. The British Cape Colony and Natal Colony, containing 54% of the Afrikaners, or 260,000 persons never rose up and declared war against the British (Cape Rebels accounted only about 10,000 persons).
The underpinning reality is that the Republics Boer Generals planning the war and the Republics Boer politicians claiming “Africa for the Afrikaner” failed to appreciate that many of the Cape Afrikaners were pretty happy under British administration for the near 100 years they are subjected to it, contented with the Cape franchise, many of them urbanised middle class and well to do and of the landed class many were very wealthy – as a demographic they are fundamentally different to their isolated and struggling frontier farming (Boer) Afrikaner brethren ‘up north’.
Poverty, famine and hardship was not an overarching issue in the British Colonies for many ‘whites’ (Boer and Brit) in 1899 – nor does it seem that there was any fundamental discontent with their governance, representation and political disposition – and many simply did not view the ZAR’s “Krugerism” as a viable ideology or system of governance for Southern Africa – in fact Prime Minister William Schreiner, John X. Merriman and Jacobus Sauer had moved many in the Cape Colony’s branch of the Afrikaner Bond and Afrikaners in the Cape Colony in general closer to the British way of thinking.
After the Boer War ends in 1902, one of the peace terms is that independence will be guaranteed for the old republics under a British realm of influence, so in 1910, the Union of South Africa is declared as an independent country (a Dominion) with the old Boer ‘Bittereinder’ leadership – Louis Botha and Jan Smuts at the helm. This key split of Afrikaners however remains – many of the Cape, Natal and many Transvaal urbanised Afrikaners relatively happy with the idea of a ‘Union’ – the fusion of British and Afrikaner interests (and they now constitute the majority), however, here is a minority who remain Anglophobes because of the Boer War and are determined to return to the ideals of Republicanism and covert the old ZAR ‘Krugerism’ ideology.
This schism in white Afrikanerdom is important to the eventual rise of the Broederbond, Ossewabrandwag and the National Party as they try to bring the ‘Cape Afrikaner’ and ‘Boer Afrikaner’ together into a singular identity under a Christian Nationalist banner using a white Voortrekker and Boer hegemony, all underpinned with a cocktail of Weimar Eugenics and National Socialism. This schism runs throughout Afrikaner history until 1948 and it is the key differential which The Torch Commando tries to influence through the vote in 1952.
The Adulterous Romance
The Afrikaner romance with Germany has three key points, the first is a minority of Afrikaners have German Heritage – the majority have a Dutch, Flemish or French heritage, and the German free-burgers are seen as part of the hereditary make-up and culture of white Afrikanerdom. The second is a simple telegram and the third is a rifle.
The telegram is related to the Boer War, its reputed to have been sent to President Kruger by Kaiser Wilhelm II congratulating him on dealing with the Jameson Raid in 1896 – the telegram read:
“I express to you my sincere congratulations that you and your people, without appealing to the help of friendly powers, have succeeded, by your own energetic action against the armed bands which invaded your country as disturbers of the peace, in restoring peace and in maintaining the independence of the country against attack from without.”
President Kruger then published the telegram far and wide as proof positive that Germany was in support of the Boer Republic and its claims that Britain intended to invade it. It would give the Boers the confidence and leverage in their many conflicting areas they had with the super-power Great Britain, in the belief that if there was to be an inevitable war, Germany as another super-power, will come to the aid of the Boer Republics.

In truth, Kaiser Wilhelm II would deny personally sending the telegram, and claimed it was part of internal plot and political intrigue, he was also very angry with Kruger’s promotion of the telegram as some sort of treatise for military support, denying that he ever had intentions of establishing relations with the ZAR and he had no malice to Britain and would never support the ZAR in any war against them (see: Secret History of To-Day by Allen Upward).
The rifle is the German manufactured MAUSER model 1895 and 1896 carbine rifle (they also used the Norwegian made Krag-Jorgensen rifle). The Mauser Model 1896 became the icon it was a bolt-action rifle that fired 7x57mm rounds and was equipped with a five-round magazine. It was regarded as a more superior rifle to the British Lee-Metford rifle of the time.
In the months before the start of the Boer War in October 1899, the Boer Republics purchased 30,000 Mauser rifles, and 1,000,000 rounds of smokeless ammunition for it. Other weapons, including modern field guns and automatic weapons were purchased from the German armaments manufacturer Krupp. The rally call for Boer Republican troops became “Through God and the Mauser”.
To the average Republican mounted infantryman, this overwhelming supply of German weaponry left a legacy that Germany was their key ally, in truth German armaments manufactures, Mauser and Krupp were happy to receive orders of this magnitude, they made a lot of money from the two Boer Republics. Not one single German weapon sold to the Boer republics qualified as a subsidy or gift, and the German government made no effort to finance any of these weapons for the Boer cause.

Germany was just happy to sell them the weapons, as inconvenient truth goes, British arms manufacturers also sold weapons to the Boer Republics – the ZAR was minted with taxation from gold and made for a very profitable customer.
In so far as adulterous this relationship goes, for all the benefit Germany was getting from selling arms to the Boers, they give all their support to Britain instead. Germany would even go as far as lending its military strategising to the British to help them win the Boer war – and as inconvenient truths go the strategy devised for the British by Kaiser Wilhelm II and his planners includes scorched earth and concentration camp policies (see: John C.G. Röhl: The Kaiser and England during the Boer War).
As to manpower only a handful of Germans in their private capacity (local and foreign), 500 or so, volunteered join Boer Commando’s during the war – no assistance in fighting manpower was afforded the Boers by the German government in any way.
In fact, Kaiser Wilhelm II flatly refused to entertain any Boer delegation sent to Germany. Boer delegations did raise a little money from private donators, but that’s it – there was never any official public contribution by the German government to the Boer cause – ever. Germany wanted to avoid conflict with Britain – who by convention and legal treatise at the time held suzerainty limitations over the two Boer Republics preventing them from engaging in foreign policies and entering into foreign treaties (see: the London Convention 1881). That … and to the Kaiser, the British Royal family were all his blood relatives – it was a family matter.
The Boer Revolt
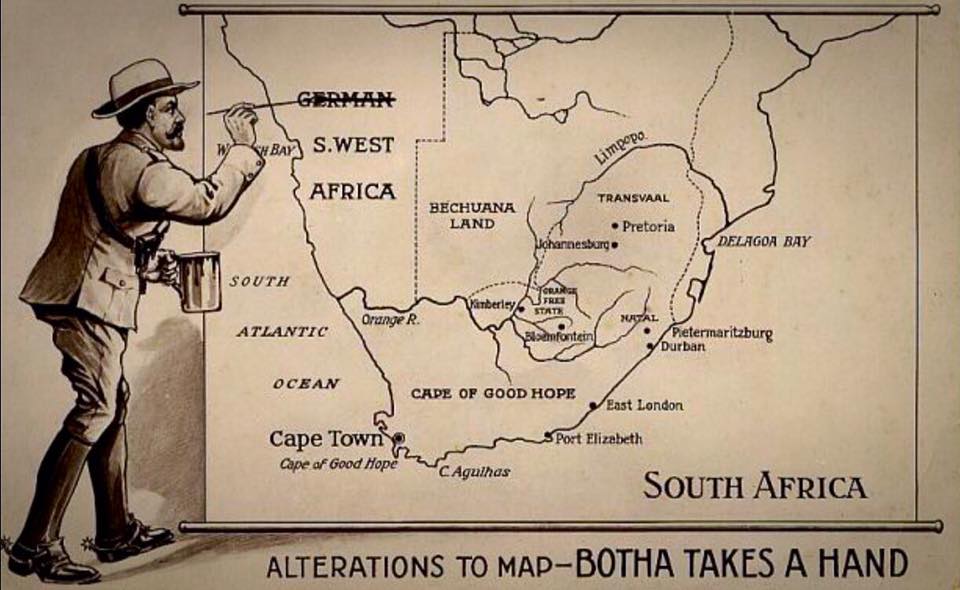
However, all this adultery still did not resonate with many in the Boer community who almost illogically saw Germany as an Ally. This would re-materialise when the First World War 1914 – 1918 swings into action, and the newly formed South African Union declares war against Germany, not in the service of the British Empire, but in the service of South Africa’s own territorial expansions as agreed between the British and Boer delegations at the Union Conference of 1909 – the Parliamentary vote is a landslide in favour of The South African Party’s (SAP) proposal to invade German South West Africa (GSWA) and declare war on Germany. The SAP is the ‘Afrikaner’ party – it’s made up of all the old Boer War ‘Bittereinder’ Generals and the old Afrikaner Bond politicians – the opposition Imperial Party (the ‘English’ party) – also overwhelmingly in favour of it.

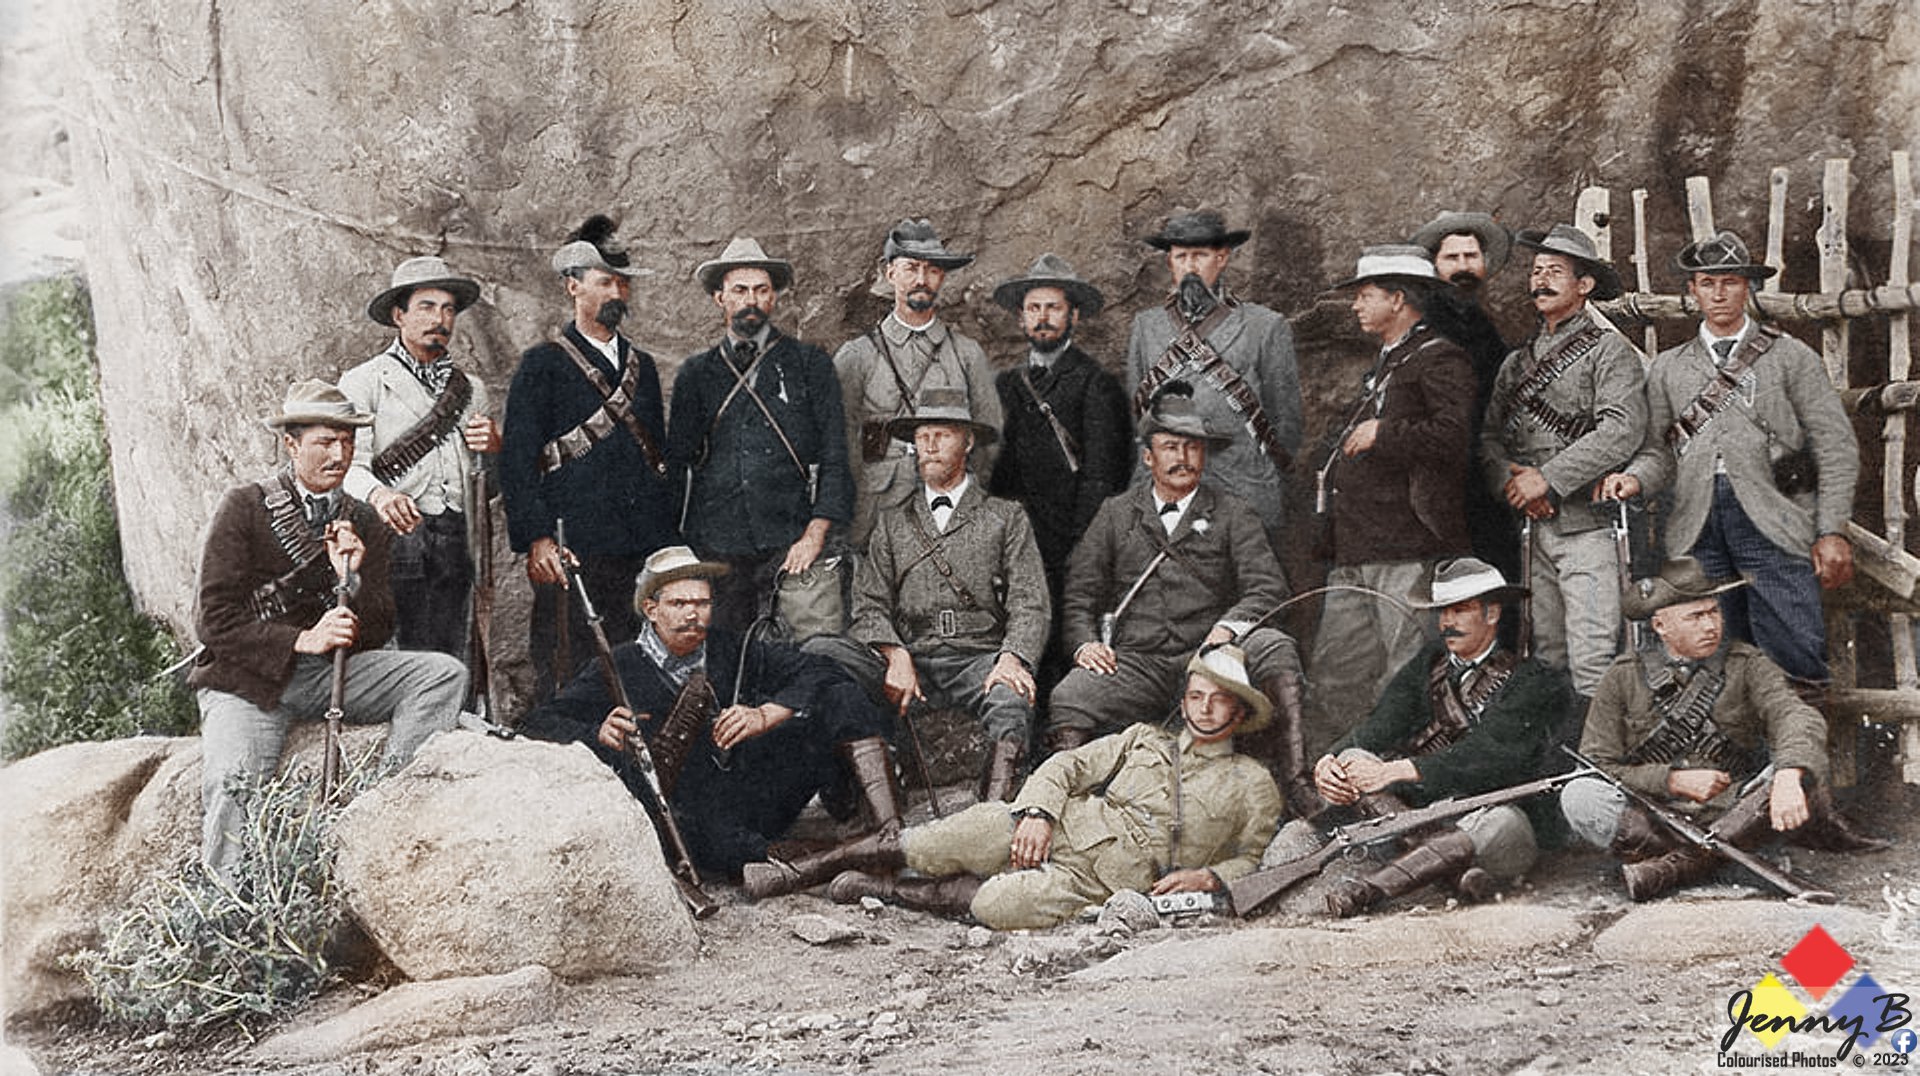
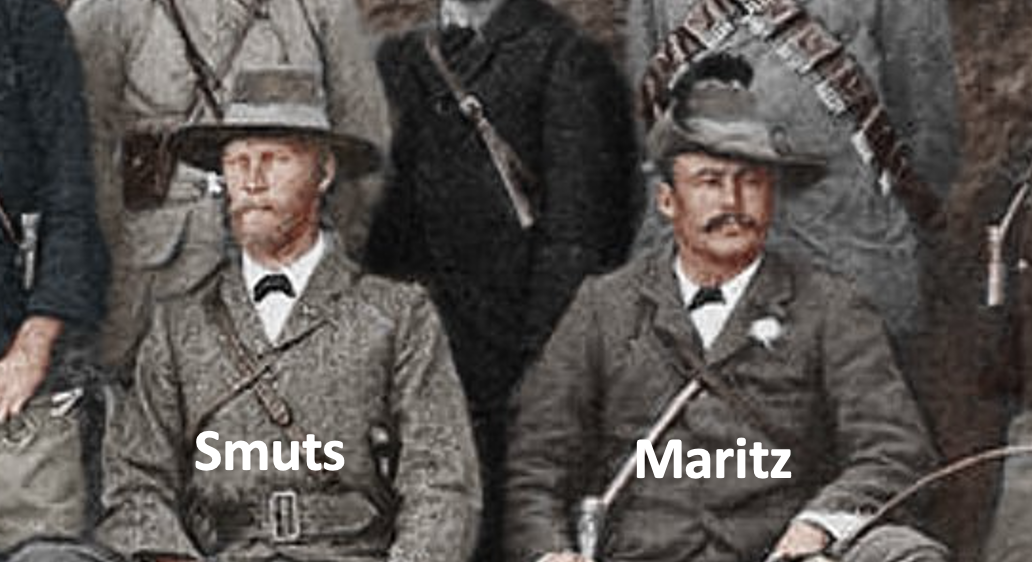
The vote is 92 = For invasion of German South West Africa (GSWA) and 12 = Against. Of these 12 SAP individuals (or 18% of the SAP), only 3 of them are notable and become highly vocal anti-war campaigners demanding that South Africa remain neutral – Ministers Barry Hertzog, Koos de la Rey and Christiaan de Wet.
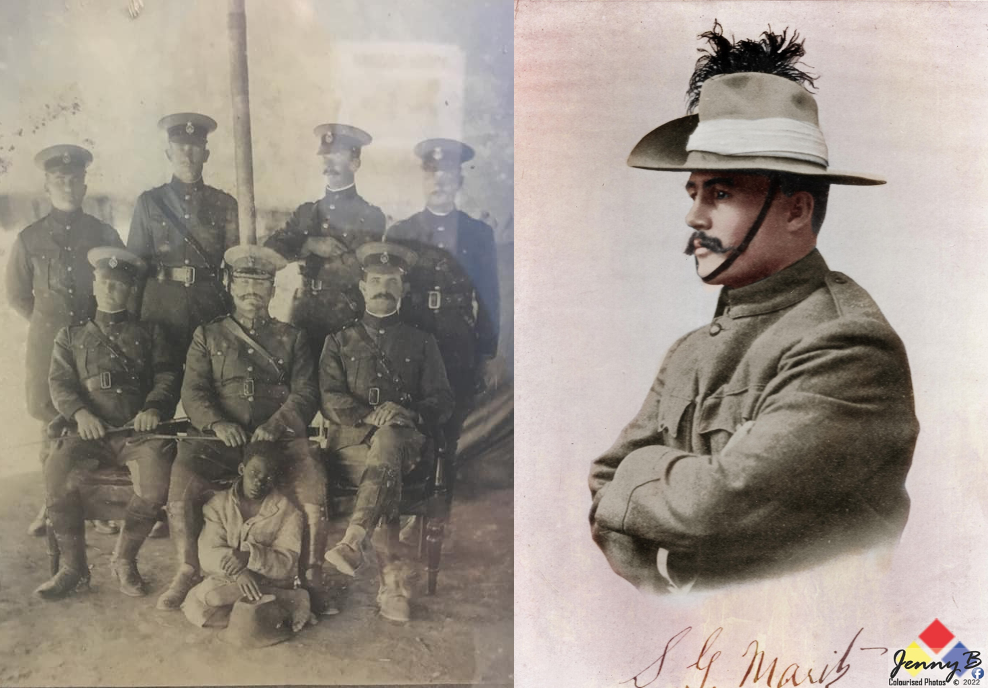
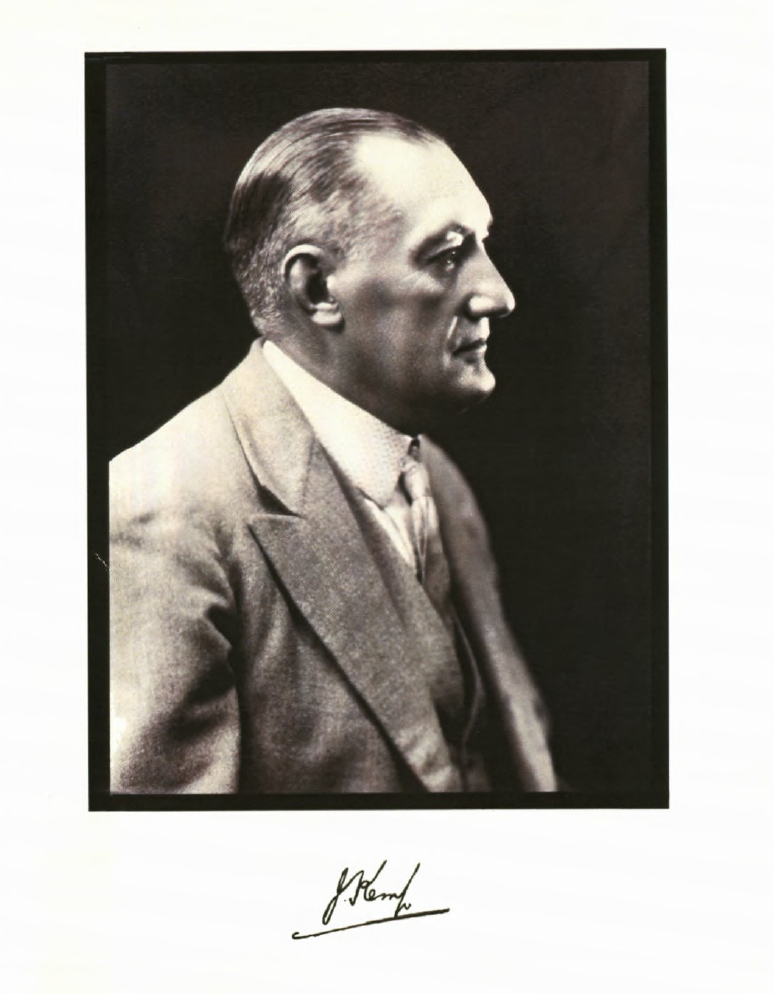
In trying to raise resignations from the South African Union Defence Force in protest, Koos de la Rey would be tragically killed in a road-block misunderstanding. General Christiaan de Wet would however join up with UDF officers – Major Jan Kemp, General Beyers and a rogue UDF commander on the GSWA border with intense pro-German, pro-white supremacy and anti-sematic sentiments by the name of Lt. Col Manie Martiz, all three would go into open sedition trying to evoke a coup d’etat using promised GSWA troops in support of their Boer Commandos.

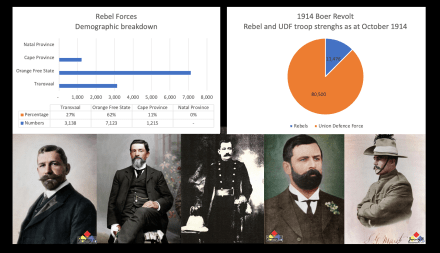
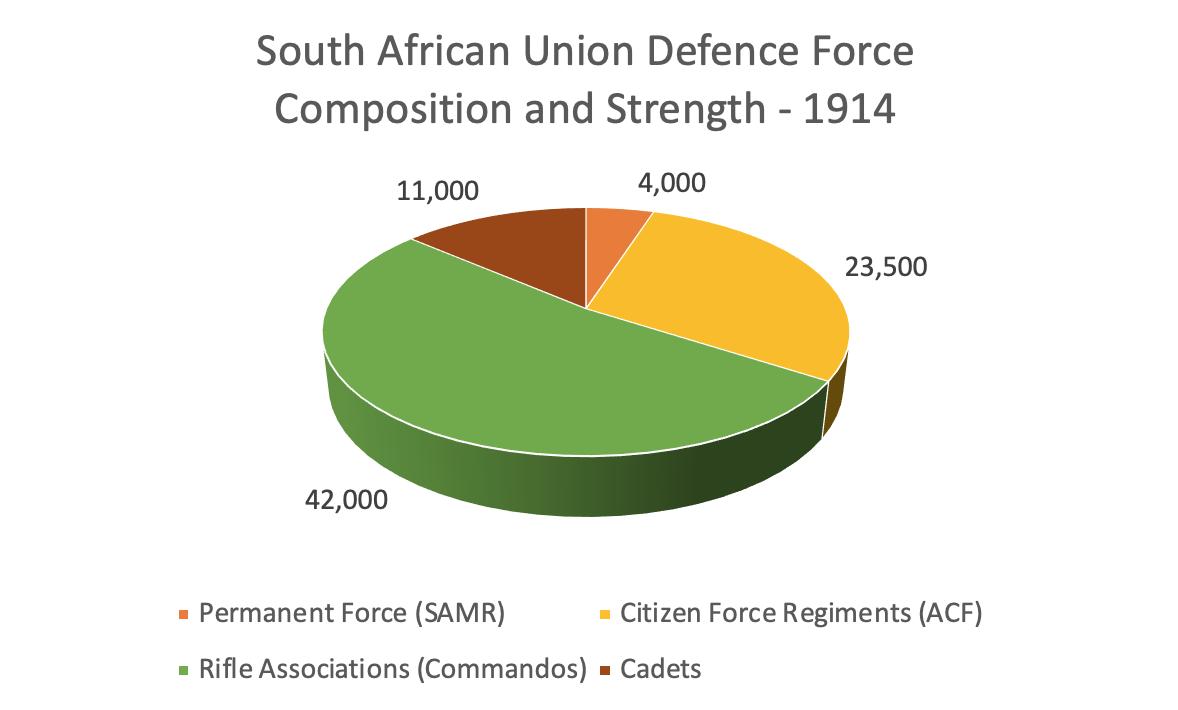
The Boer Revolt of 1914 was poorly planned and poorly executed, it managed to raise only 11,476 Boers who were poorly armed infantrymen against 80,500 well-armed UDF personnel (the rebels are outnumbered 8 to 1 in effect) and the Revolt drew no significant support from the Afrikaner community in the Transvaal, and virtually no support whatsoever from the Afrikaner communities in the Cape Province and Natal Province. It also drew no support from the Union Defence Force Afrikaners – who made up 60% of the force. It also gained no traction whatsoever with the ‘English’ white population (who made up 40% of the white demographic) and it drew absolutely no support from the real majority – the coloured, Indian and Black people of South Africa.
Without support from either the broader Afrikaner diaspora or the South African population as a whole and without good military doctrine and planning backing them, the rebels were quickly crushed by the Union’s Defence Force and the revolt only lasted a couple of months.
The Boer Revolt and its impact on Afrikaner Nationalism
Albeit small and insignificant to the outcome of WW1 and the invasion of German South West Africa, the 1914 Boer Revolt is important in the evolution of the Afrikaner Nationalist right wing for four reasons.
Upfront is one of the primary political ramifications, of the few 18 odd very pro-Germany and pro-neutrality South African Party (SAP) Ministers of Parliament – General Barry Hertzog does not go with the sedition of his peers in revolt – instead he decides to leave the SAP and form his own political party in opposition to Botha and Smuts in the SAP, he goes mainstream and establishes the ‘National Party’.

Secondly, where the 1914 Boer Revolt did take traction was in the Orange Free State. The 11,500 strong Boer rebels were primarily made up of destitute Orange Free State Boers, 7,123 or 62% of the total force – many having come through a drought and agricultural reforms on the back of the devastation of their farms during Boer War 2 (see Sandra Swart Desperate Men: The 1914 Rebellion and the Polities of Poverty). They were simply desperate ‘Bywoners’ (landless farmers or sharecroppers) promised a better life if the rebellion was successful.
In the very next year’s General Election – the 1915 Election held during WW1, the National Party entered the political sphere for the first time, of the 130 available seats, the National Party won 26 of them, the majority of them from the Orange Free State where they dominated, winning 16 or the 17 available seats. It must be noted here, the ‘Afrikaner’ voting block is only partly split (about one third) – the SAP, the moderate Afrikaners under Botha and Smuts in support of Union and Imperialism, hold the lion’s share of seats – 54 in total, and are able to remain the governing party. Right wing Afrikaner Nationalism, in support of Republicanism, is still a minority and even have fewer seats than the official opposition – the ‘English’ Unionist Party.
Thirdly, of the 4 main remaining rebel leaders (General Beyers drowned in action), 2 of them – ‘General’ Jan kemp and ‘General’ Manie Martiz went into Nationalist politics. Jan Kemp spent 10 months in prison for treason, then Botha and Smuts agreed to release him on the condition that he may not participate in any politics – a promise Kemp almost immediately broke entering politics as a National Party MP under Hertzog in 1920, by 1940, in opposition to South Africa entering WW2 against Nazi Germany, he joined the Reunited National Party under Dr. D.F. Malan. ‘General’ Manie Maritz, the Rebellion’s ringleader spent a couple of months in jail for treason, thereafter he was released on an amnesty given by Hertzog, he would enter politics as the leader of an antisemitic, one-party state, National Socialist (Nazi) inspired ‘Boerenasie’ party prior to World War 2 (more on this later).
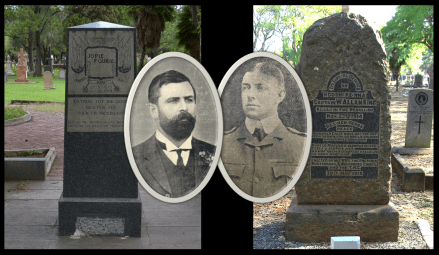
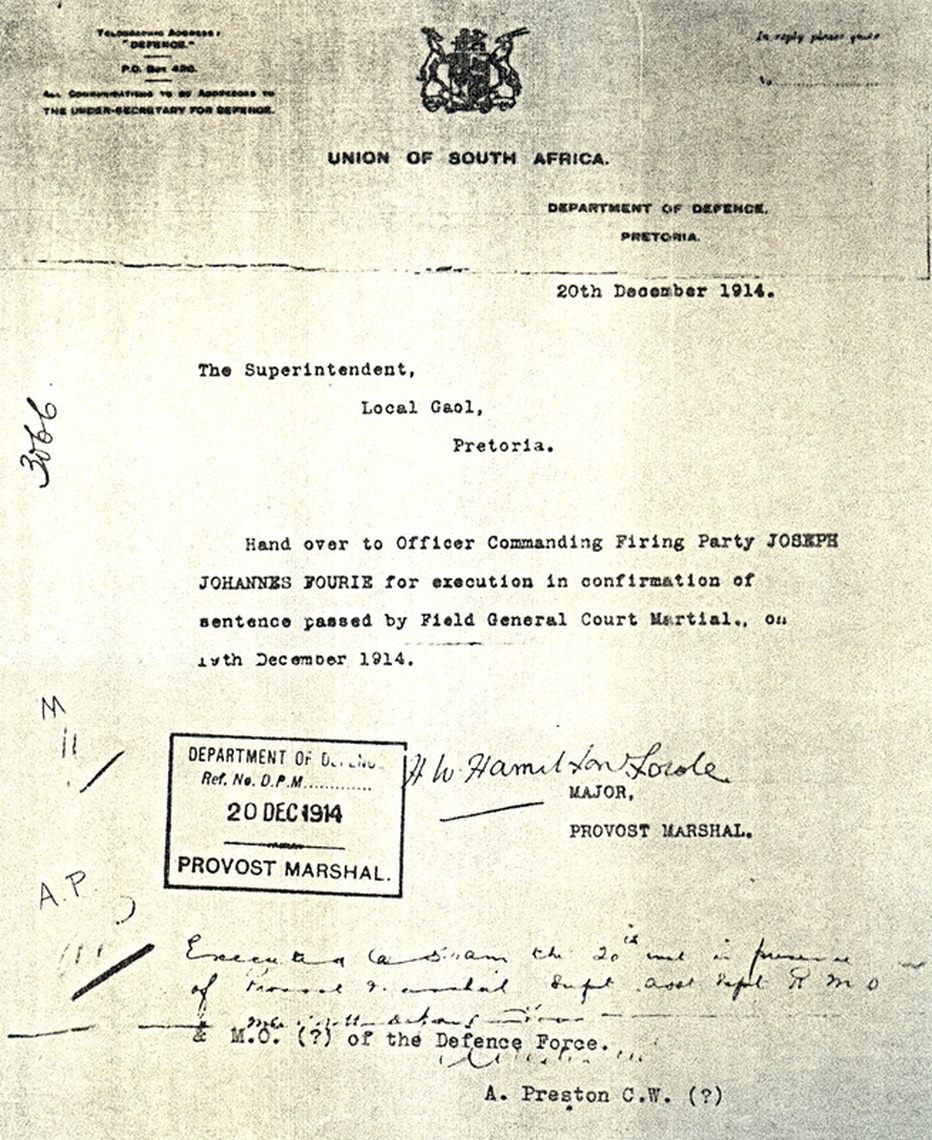
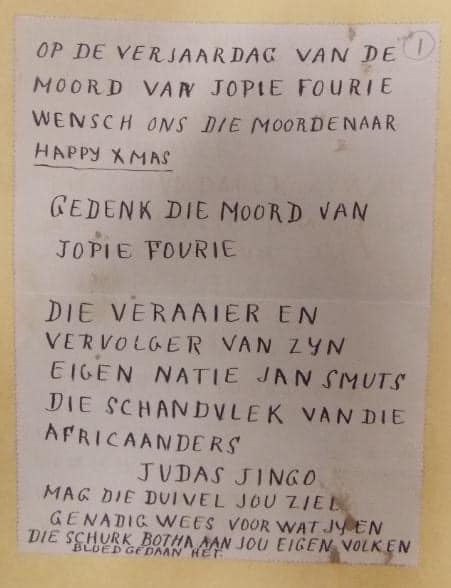
Finally, Jopie Fourie, who was sentenced to death for High Treason as he had not taken the precaution of resigning his Union Defence Force (UDF) commission before embarking on an armed revolt and was captured still wearing his UDF uniform. After his execution, Jopie Fourie would become the central martyr of the Afrikaner Nationalist cause, he would be politically pitched as the ‘true’ Afrikaner and in a bizarre twist on the definition of treason, the real traitors (Smuts and his Afrikaner cabal) had executed the hero of Afrikanerdom. Fourie’s spilled blood on his home soil would nurture Afrikaner identity and bring the Nazi creed of ‘Blut und Boden’ (Blood and Soil) into Christian Nationalism.
His final letter would become Nationalist’s rally call, he wrote:
“The tree which has been planted and which is wetted with my blood will grow large and bear delightful fruit”.
True Afrikaner ‘volk’ were to be demarcated as different to the treasonous Afrikaner ‘volk’ – to be a true Afrikaner was to be an avowed Afrikaner Nationalist. Jopie Fourie, British rule and the concentration camps of Boer War 2 would also become central to ‘the politics of pain’ on which the entire premise of Christian Nationalism would be established.
The establishment of the National Party
The Nazification of Afrikaner right-wing politics, starts in earnest with the establishment of the National Party (NP) in 1914, General Hertzog’s break-away. The National Party’s founding was also rooted in disagreements of ‘Union’ among South African Party politicians, particularly because Prime Minister Louis Botha sought a ‘unitary’ Unionist state with singular purpose called ‘one-stream’ and General Hertzog who sought a ‘two-stream’ state which separated English and Afrikaners completely. Incorporated into the ‘Two-Stream’ ideology was the fierce adherence to ‘Krugerism’ – ‘Krugerism’ has the old ZAR ‘grondwet’ constitution at its centre.
The racial separation and ideological purpose of the old Zuid-Afrikaanse Republic (ZAR) separating not just Afrikaner and English but also all the ‘Bantu’ (Black Africans) in addition. With an oligarchy philosophy underpinning it, and the sense of ‘Boer’ Nationalism ahead of all other races in servitude to a Boer hegemony, the religious reincorporation of the white Boer nation as the ‘Chosen People’, racially superior and with a divine right to rule all South Africa. The idea is an ‘oligarchy’ devolved from a ‘theocracy’ (not secular at all – State and Church are very linked) whose focus was on cultural prejudice (not acculturation).
Krugerism’s oligarchy system of government would ensure no real political emancipation for non-whites, essentially Anglophobe in nature and with a discrimination outlook on minority groups – Jews in particular. The National Party’s stated aim is also the upliftment of Afrikaners, especially those dispossessed or marginalised as a result of the South African War (1899-1902) i.e., Boer War 2.
The ‘Politics of Pain’ also factored into the Nationalist ideology – i.e., the need to preserve Afrikaner identity by what was defined as a century long British tyranny, which ultimately manifested itself in the destruction of Boer farms and families during the 2nd Boer War. In essence it generated a victim mentality, and this preservation of Boer Nationalism and identity was paramount to the survival of the ‘Boer’ race – and if that required the subjugation by force of all other races and cultures threatening its ‘survival’, then so be it.
Apartheid as an ideology had not fully taken shape at this stage, the Nationalists were pretty loose in defining exactly how they intended to implement ‘Krugerism’. They were thrust into the pound seats as the ruling party in a pact government running South Africa after the Miners’ Strike in 1922. To become the ruling party Hertzog did not have enough votes, they were still a minority party – so he had to go in coalition with the Labour Party, an ‘English’ constituted socialist party – mainly ‘Communists’ in effect representing a white working proletariat – the Labour Party’s popularity had also surged after the 1922 Miner’s Strike riding on the resentment of working-class whites of Smuts’ heavy-handed tactics when dealing with it.
From 1924, they were able to define and tighten legislation around segregation, implement labour legislation in favour of whites and they managed to cap immigration of Jews in particular to South Africa, however they were tempered somewhat by their coalition partners. These ‘moderate’ politicians in coalition prevented the Nationalists from tampering with the constitution too much, so they found themselves supporting British Dominion and ‘Union’ and having to tolerate The Cape Franchise (Cape coloureds on the common voters roll).
To hold onto power, Hertzog would even go into ‘Fusion’ with Smuts’ SAP and form a new entity called the United Party in 1934. This caused a breakaway called the ‘Purified National Party’ on the 5th July 1935 which stood to the far right politically, under the leadership of Dr D.F. Malan (a doctor in Divinity and a minister of the NG Church) – and it stood in abject rejection of the ideals of Union and Britain, it stood on the Krugerism ideal that God had ordained the white Afrikaner as a ‘chosen people’ to rule all of South Africa – and sought the return to Republicanism under an Afrikaner hegemony along with clearer ideologies on racial segregation. It was also a very small party at this stage. Of the 153 seats in Parliament, they won only 27 as a new entrant in the 1938 General Elections.
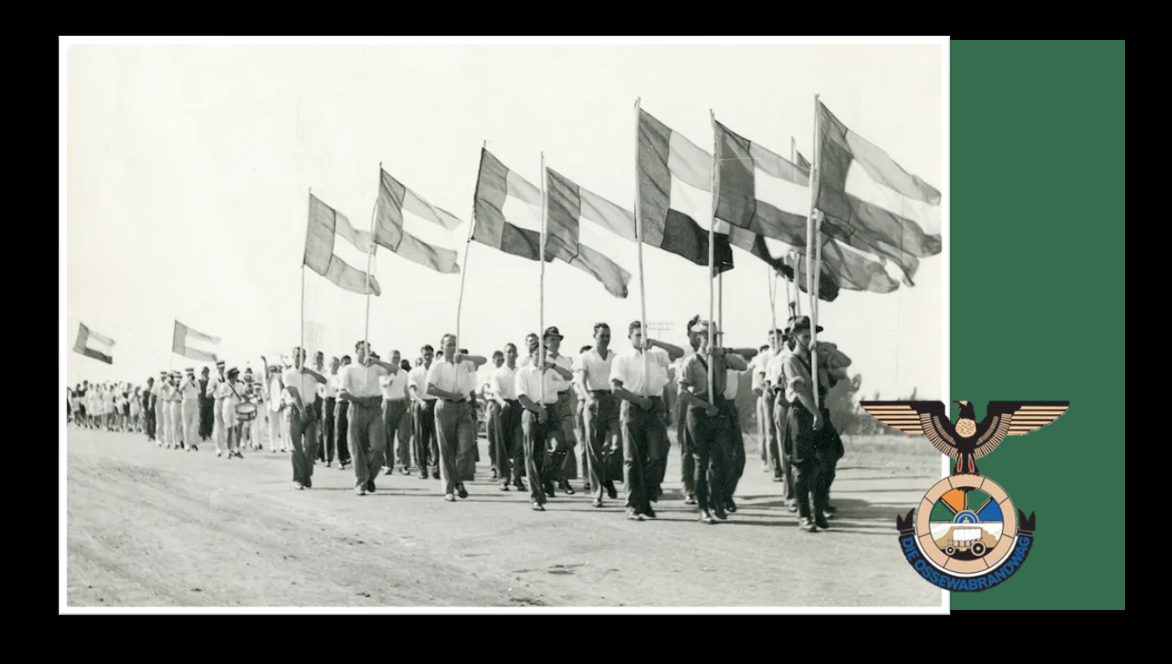
The 1938 Great Trek Centennial – a sacred happening
In the mid 1930’s in Europe, Nazism and Fascism were also taking hold as popular movements, in South Africa fringe Nazi movements on the far right of Afrikanerdom were also taking shape. Also operating in this sphere was a secret society called the Broederbond concerned with Afrikaner ‘advancement’, these ideologies would come together in 1938 during the 100 year centenary celebration of the Great Trek, and from it would stem political and cultural movements which would all come into conflict with a future democratic South Africa.
The Broederbond itself would fledge a ‘Christian Nationalism’ ideology using the Centennial and so too out of it would come the very right leaning, anti-British and Nazi Germany supporting Ossewabrandwag (Ox Wagon Sentinel). It would also see a polarisation of what was defined as ‘Afrikanerdom’ along racial purity lines.

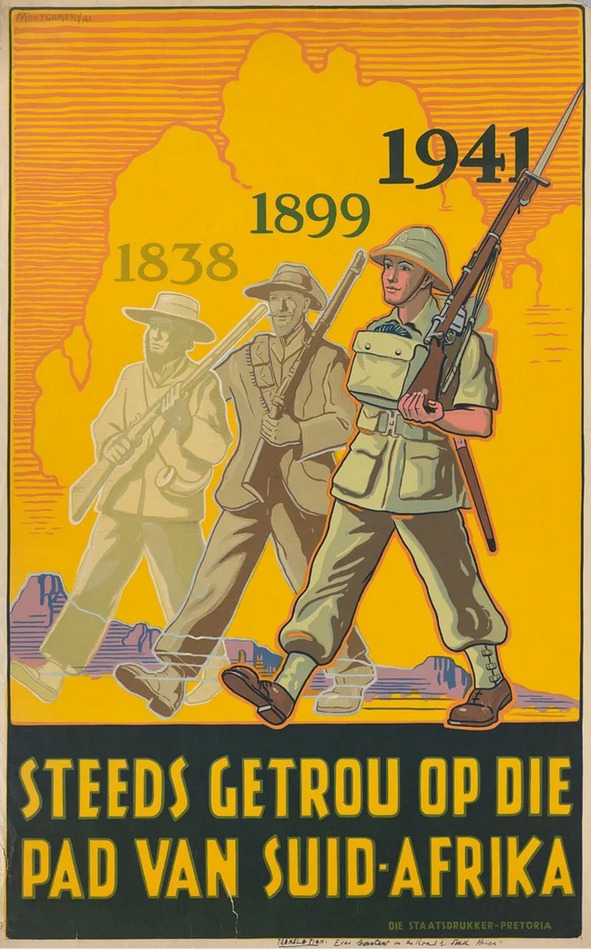
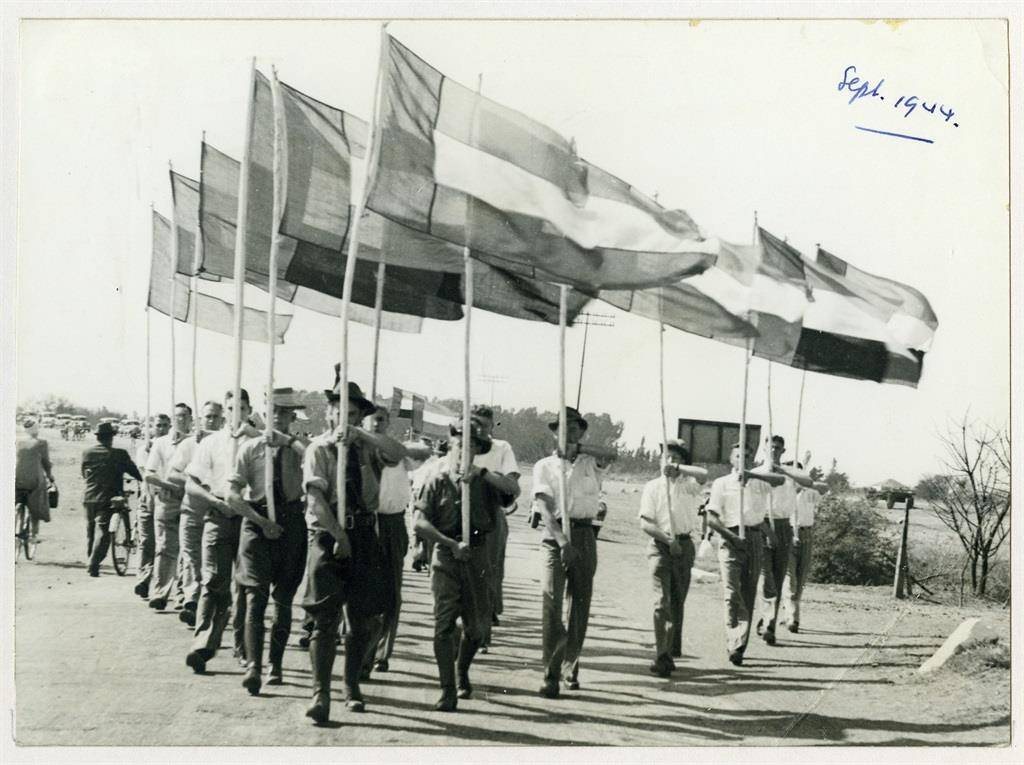
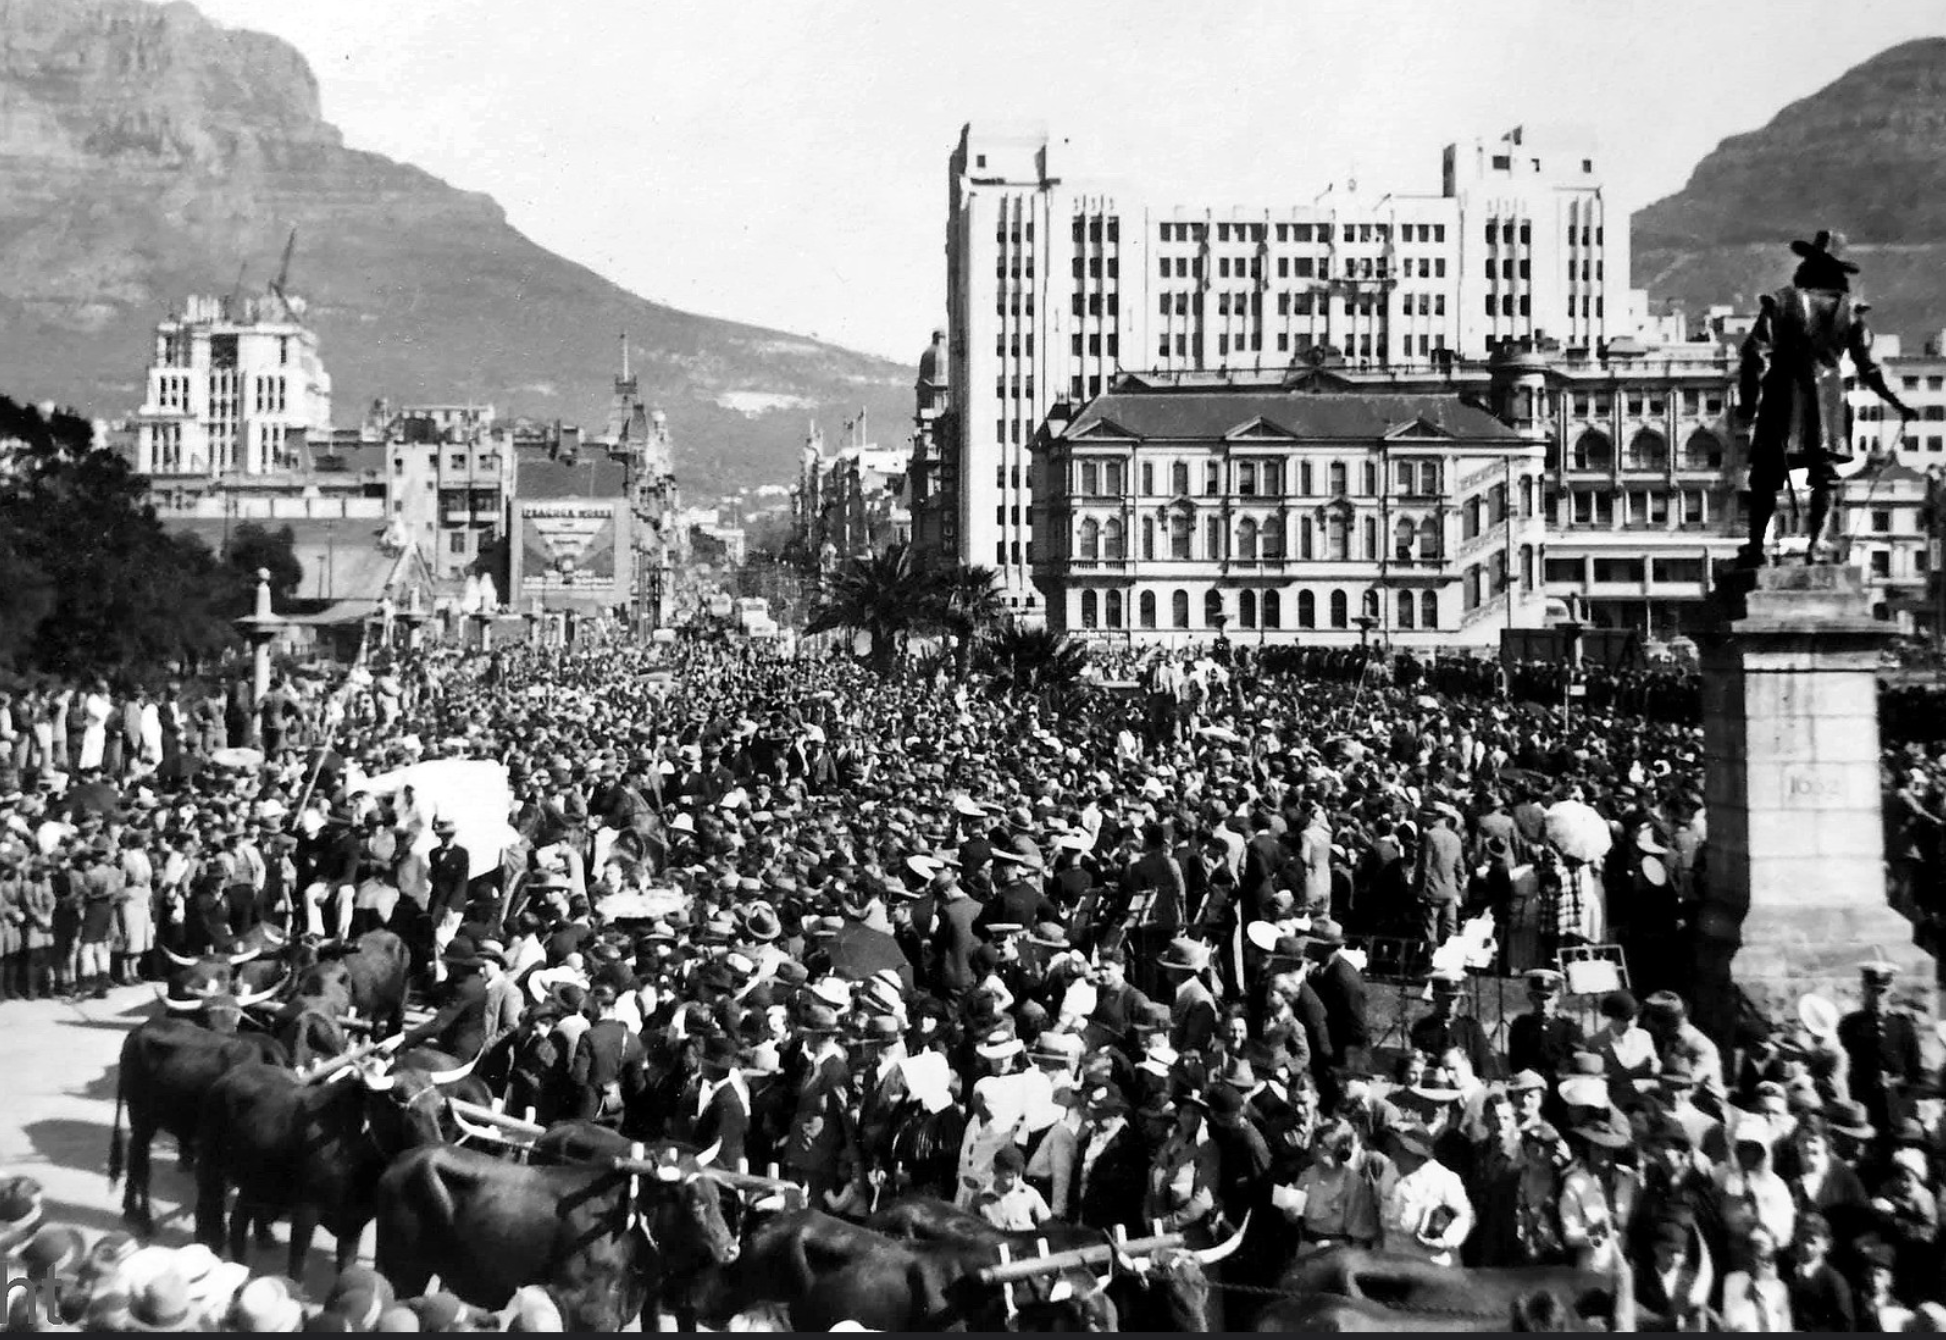
So, here’s some background on the centenary trek itself. On the 8th August 1938, Henning Klopper’s two Ox Wagons called the Piet Retief’ and the ‘Andries Pretorius’, stood at the foot of Jan van Riebeeck’s statue in Cape Town. As the ox-teams were harnessed a huge crowd of over 100,000 people gathered. The wagons were to replicate the ‘Great Trek’ and were to be joined by more wagons and people as it passed through towns on a trek to inaugurate the planned Voortrekker Monument outside Pretoria for a massive celebration on the one hundredth anniversary of the Battle of Blood River. The Broederbond, doing what it did so well, co-ordinated the ideas and concepts behind the Centennial Trek which would follow “Die Pad van Suid-Afrika”, a symbolic ‘road to South Africa’s nationhood’ taken by the Voortrekkers.

Image: “Die Pad van Suid-Afrika”, a symbolic ‘road to South Africa’s nationhood’ becomes an emotive call to nationhood by the Ossewabrandwag on the back of the 1938 Centenary trek
In this way the Broederbond hoped to (and did) bastardise history along Afrikaner nationalist principles – they would literally use the Great trek as the central reason for South Africa’s raison d’être’ and ignore the histories of all the other population groups and their role in establishing South Africa. They would go one step further and bastardise the Great Trek as a ‘white’ only Afrikaner exercise, and thereby ignore Afrikaner roots in the ‘brown’ (slave and Xhoi Xhoi) cultures of South Africa, it would also ignore the ‘coloured’ workers and servants who accompanied the trekkers (some references give this as a 1:1 ratio – one trekker to one African or black servant/labourer) and split Afrikanerdom along racial lines alienating it from its actual roots and history.
To put perspective on the political hyperbole and artificial segregation offered by the Broederbond. The real history of the Afrikaner, Afrikaans and the Afrikaner culture is a critical part of South African history, the true roots of it lie in a conjoint merger of various cultures – white, slave and indigenous peoples – starting way back in the old Cape Dutch Colony – Afrikanerdom’ and the Afrikaans language has a shared heritage – Black and White, it certainly is not a Broederbond/National Party interpretation of the history; a romantic tale of a ‘all-white’ trek to freedom, flavoured with a Nationalist ideology and readily mixed with heady concoction of eugenics and religion.
Henning Klopper, would say;
“We ask the entire Afrikanerdom to take part in the festival celebration in this spirit. We long that nothing shall hinder the Afrikaner people as a whole from taking part. This movement is born from the People; may the People carry it in their hearts all the way to Pretoria and Blood River. Let us build up a monument for Afrikaner hearts. May this simple trek bind together in love those Afrikaner hearts which do not yet beat together. We dedicate these wagons to our People and to our God.”
By that he hoped to combine the ‘Cape white Afrikaners’ with the ‘Boer white Afrikaners’ in the symbology of the Great Trek under a fabricated Nationalist ideal and only meant ‘White’ Afrikaners and not really the Afrikaner people as a ‘whole’ – certainly not coloured Afrikaners, black Afrikaners or even Jewish Afrikaners.
Klopper in a later interview went on to say;
“we never had a symbol before; the ox-wagon became that symbol” which is not altogether surprising as only a fraction of Afrikaners were proper Voortrekkers but the Ox Wagon (and the gunpowder horn) would now be the National symbology.
This symbology would later be adopted by the National Party as their logo.
Towns in all parts of the country vied for the privilege of a visit from one of the wagons. Several other treks besides Henning Klopper’s were organised. In the end six more wagons threaded their way to the capital from distant points; four others went to the site of the battle at Blood River for a commemoration service on the 16th December, stopping along the way to re-name street after street in countless towns and villages after one or another Voortrekker hero, and laying imprints of the wagons wheels in freshly laid cement at many halts (there are still ‘imprints’ at my hometown in Hermanus).

This image: titled “blanke skoonheid” or “white beauty’ encapsulates the Centenary Trek perfectly, here girls from the Voortrekker School in Pietermaritzburg celebrate the arrival of the ox wagons. The “blanke skoonheid” does not just refer to the white dresses and bonnets (or ‘kappies’) but also infers that this festival was about the further assertion of white power. (The photograph taken between 18 and 20 November 1938. By Henry Murray).
With overriding patriotism, born alongside the Centenary Trek was a new South African anthem “Die Stem van Suid-Afrika” (the voice of South Africa), the anthem now part of the South African official anthem, however when the song was amalgamated in the 90’s with Nkosi Sikelel’ iAfrika the “die kreun van ossewa” (the groan of Ox Wagons) bit was purposely omitted as it only reflected one culture’s history in South Africa and not the rest.

There were beards: The organizational committee of Koeberg also made their beards. “Many men grew their beards specifically for the 1938 Voortrekker Centenary as supposed proof of their masculinity as men who identified as Afrikaners.”
Thousands of men grew beards and women made Voortrekker bonnets and garb along the way, a cultural rise took place and when the procession arrived outside Pretoria, 200,000 people greeted them. Human teams, flanked by outriders, dragged the Ox-Wagons into places of honour. Three women descendants of Voortrekker leaders of Retief, Pretorius and Potgieter then laid the foundation stone of the Voortrekker Monument. ‘A sacred event’ had taken place.
Henning Klopper was so amazed at just how successful the 1938 Centenary Trek in ‘uniting’ white ‘Afrikanerdom’ under the banner of the Voortrekkers and creating a new national identity – he would call on divine providence and call it a “Sacred Happening” – God’s will that the white Afrikaner lead South Africa as the chosen people.
The Road to War
As noted previously, Prime Minister Barry Hertzog had merged his conservative ‘National Party’ with Jan Smuts’ more democratic ‘South African Party’ to form a “Fusion” party called the ‘United Party’, the two old Boer War Bittereinder Generals in coalition – General Hertzog remained Prime Minister and General Smuts his deputy. Dr. D.F. Malan had split from the Fusion coalition and formed the ‘Pure’ National Party to the right of Hertzog’s Afrikaner Nationalists in the United Party coalition. The ’Pure’ National Party would turn their vitriol against Hertzog, who they now regarded as traitorous as Smuts and a British puppet.
Within the United Party, by the late 1930’s things had started to come to a head between Hertzog and Smuts. One issue was South West Africa (Namibia), now under South African Union mandate, and part of Smuts’ and the Union’s vision for ‘Greater South Africa’.
Hertzog’s right hand-man, Oswald Pirow – the National Party’s Minister of Defence and a devout Nazi supporter and admirer of Adolf Hitler had been sent by Hertzog to the Nazi German state on a number of ‘unofficial’ state visits – in doing so Pirow would meet Hitler and assure him of Afrikaner support of the Reich and that should there be war against the British – South Africa would remain neutral and should Germany win they could re-claim their old colony of South West Africa as German (something Hitler re-iterated to Pirow as a fait accompli). More on Pirow later.
Things would really come to a full head when Britain and France declared war against Nazi Germany on the 3rd of September 1939 and it would throw this entire careful political balance out the window and polarise the Afrikaner political landscape completely.
South Africa, as a British dominion, would hold an emergency debate as to whether South Africa should remain neutral or also declare war against Hitler and Nazi Germany (as a Dominion it was free to make its own laws and free of Westminster’s laws, South Africa was not in servitude to Britain – so if South Africa wished to remain neutral by way of a Parliamentary majority – then Britain would uphold that decision).
The next day, 4th of September 1939, a three-way debate ensued primarily between the two factions in the United Party and the Pure Nationalists. As the United Party was loaded with Hertzog’s Nationalists and there was also Malan’s Nationalists in opposition, Hertzog was very confident he had the combined Afrikaner nationalist majority to carry his motion of neutrality. As was Hertzog’s position against Smuts in 1914 demanding South Africa neutrality in World War 1, siding with German’s cause, so too Hertzog’s position against the same man – Smuts, in 1939 demanding neutrality in the war against Nazi Germany in World War 2.
Prime Minister Hertzog would argue in his speech that Hitler’s invasion of Poland and annexations of Austria and Czechoslovakia was not an indication that Hitler aspired to world conquest, and Afrikaners well understood the Germans right to struggle for their own self-determination against the hostility of the outside world. Germany’s actions constituted no threat to South African security whatsoever and a policy of neutrality under these circumstances was the only logical policy to adopt.
General Smuts would reply in his speech that since the fate of South West Africa would depend on the outcome of the war, South Africa’s interests were virtually involved. Furthermore, South Africa was part of the Commonwealth whose fate now hung in the balance, to stand aside from the conflict would be to expose the whole civilised world to danger.
Smuts’ amendment to Hertzog’s Motion of Neutrality was carried by 80 votes to 67 votes on the 4th September 1939 and South Africa found itself at war against Nazi Germany.
Surprised at the outcome, Hertzog promptly resigned, leaving the South African Premiership and the leadership of the United Party to General Jan Smuts and both he and some of his supporters left the United Party.

On the 23rd November 1939 the National Party’s “Malanites” and “Hertzognites” met and tried to reconcile their differences, they could not, the stumbling block was Republicanism – the ‘Pure’ Malanite Nationalists wanted a Republic regardless, Hertzog felt that a break from Union and the declaration of Republic could only take place if both Afrikaner and English whites were in agreement with the idea.
To the ‘Malanite’ Nationalists, the UP’s decision to go to war had vindicated their intensive segregationist policies which they had been following since 1934, and that Hertzog’s flirtation with English speakers ‘rights’ was delusional (the Malanites classified English speakers as secondary citizens, albeit they made up around 40% of the white population).
Unable to reconcile, Dr. D.F. Malan seized the opportunity to take over leadership of all ‘Afrikanerdom’ and cast Hertzog out into the political wilderness. Hertzog tried again on 5th November 1940 at the National Party’s Convention to reaffirm his position on English-speakers rights, falling on deaf ears, he grabbed his hat and walked out of the National Party – forever.
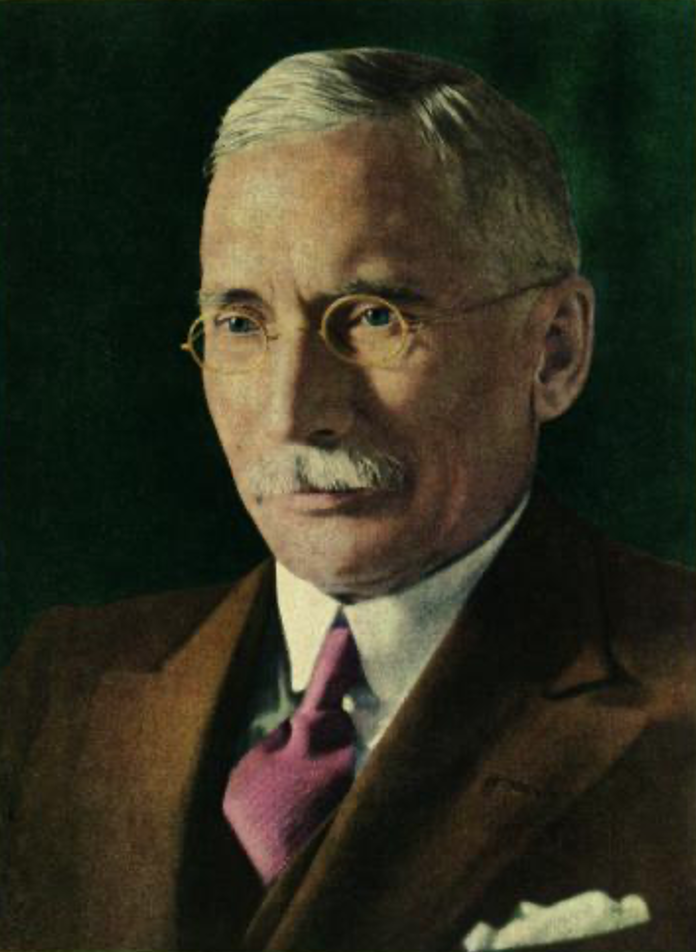
General Barry Hertzog’s U Turn to Nazism
In his retirement from politics, and in his private life, no longer walking ‘coalition’ and ‘fusion’ political tightropes and toeing UP party-political lines, General Hertzog felt confident to reveal his true colours. He performed an especially remarkable volte-face (U-Turn) when, just after leaving the National Party over his defence of English-speakers’ rights, he suddenly became a champion of full-blown National Socialism (Nazism).
Angered by his treatment by Dr D.F. Malan and the endless machinations of National party politicians, General Hertzog issued a press statement in October 1941 in which he excoriated “liberal capitalism” and the democratic party system, while praising National Socialism, as in keeping with the traditions of the Afrikaner, and as a system National Socialism simply had to be adapted to South African needs under the oversight of a one-party state dictatorship.
General Hertzog’s press release led to frenzied activity as the various Afrikaner pro-Nazi and anti-war factions tried to reunite. In the months following Hertzog’s pro-Nazi declaration Germany was joined by Japan, and the Axis forces won victory after victory. This was the point where Smuts was at his most perilous and the Smuts Government really feared that all could easily be lost. The National Party at this point even gave Dr. D.F. Malan dictatorial powers over his party to meet the Hertzog induced “crisis.”
According to Hertzog’s officially appointed biographer C.M. van den Heever, in his ‘General J.B.M Hertzog’ published in 1944; the following on Hertzog’s volte-face towards Nazism over this period is noted:
“Hertzog became “bitterly disappointed in the democratic system, with its capitalist foundations and press influence, for he had cause to know that the voice of the majority is not only the voice of wisdom … he was convinced that a new world order was on its way … after his retirement … he became more inclined towards National Socialism, by which he meant the adaption of the old Free State model republic to modern conditions, using the best from recent European experiments. … He regarded National Socialism as suited to the moral and religious outlook of the Afrikaner; indeed, he considered that the constitution of the old Free State Republic was based on it.”
It is also in General Hertzog’s private life that we find a compelling case as to Hertzog’s disposition to Nazism, and it’s a case of ‘like father like son’ and here we find General Hertzog’s son, Dr. Albert Hertzog who followed his fathers’ footsteps into politics.
Dr. Albert Hertzog was a key figure in the Afrikaner Broederbond, in 1948 he stood as a National Party candidate, becoming a Minister of Parliament. Dr. Albert Hertzog’s views were extreme, he wanted to nationalise the gold mines and as devout National Socialist he looked to reforming Afrikaner and white labour unions – especially the Afrikaner Bond of Mineworkers. He even advocated state control of the entire economy.
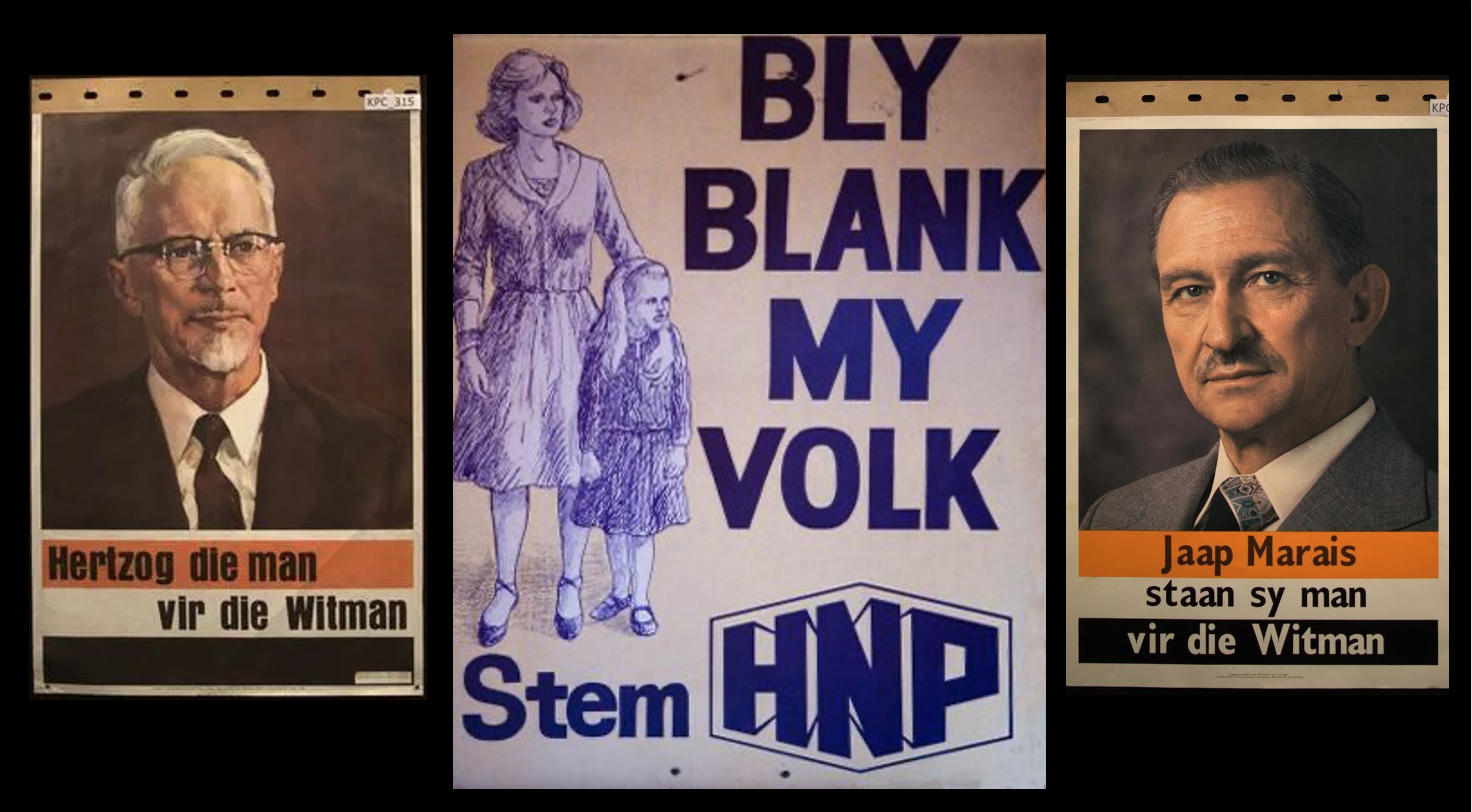
So extremely right wing in his views, Dr. Albert Hertzog eventually found the National Party too ‘liberal’ for his liking and came to loggerheads with them – he was removed from the party, and he moved to establish the Neo-Nazi Herstigte Nasionale Party (Reconstituted National Party) or HNP in 1969 and head it up as a breakaway to the extreme right of the NP. Joining him as his deputy was Jaap Marais, an ex-Ossewabrandwag stalwart and National Party Minister, who along with Dr Albert Hertzog harboured such extreme National Socialist views that he too was eventually removed from the National Party.
The Split in the Afrikaner diaspora – Part 2
As with the clear 60/40 split in the white Afrikaner diaspora prior to the South African War (1899-1902) a.k.a Boer War 2, between the ‘republican’ conservative Afrikaners (the minority) and the ‘Imperial’ moderate Afrikaners (the majority), a split carried through to Union in 1910 and then through World War 1 (1914-1918) – so too does this split remain highly apparent after Smuts declares war against Nazi Germany in 1939 to commence World War 2 (1939-1945).
In 1943 (mid-way into World War 2) whilst the conservative pro-Nazi (and pro-Republic) and the opposing moderate pro-Smuts movements (and pro-Union) within Afrikanerdom are at its peak a General Election is held. The result is surprising, as it reveals literally no change and an outpouring of majority support for Smuts and a war alongside Britain against Germany – from the ‘English’ and ‘Afrikaans’ population groups alike.
The United Party under Smuts and affiliated parties in support of Dominion and Union manage 509,000 odd votes and the Afrikaner Nationalist Party and its affiliated Afrikaner party in support of Republicanism achieves 337,000 votes. In terms of ‘seats’ the pro-Union moderates in support of Britain command 2/3 of the house – nearly 75% of the vote.
This is why the 1948 elections – a mere 5 years later is such a surprise. Mid way through Smuts’ second Prime Ministership he enjoys unprecedented support and the National Party is very much a minority with a fringe ideology and no real threat to the Union’s political construct. So, what’s going on?
Hitler’s Afrikaner Nationalist propaganda campaign
On another continent Adolf Hitler and his propaganda ministry are making strong overtones to connect Nazism to Afrikaner Nationalism and tapping into Boer War mythology using just about every medium and propaganda tool available to them.
Hitler would record in his book ‘Mein Kampf’ that in his youth;
“The Boer War came, like a glow of lightning on the far horizon. Day after day I used to gaze intently at the newspapers, and I almost ‘devoured’ the telegrams and communiqués, overjoyed to think that I could witness that heroic struggle, even from so great a distance…”
Then on the 30th January 1940, with Nazi Germany at the height of its influence and popularity, Adolf Hitler gave a speech at the Sportspalast and stated the following on The Boer War;
“They (Britain) waged war for gold mines and mastery over diamond mines”
Hitler then went on in the same speech to say of the Boer War:
“After all, this entire blockade warfare is nothing other than a war against women and children just as once was the case in the Boer War … It was then that the concentration camps were invented. England locked up women and children in these camps. Over 20,000 Boer women (and children) died wretchedly at the time.”
Just about every sentence Hitler is uttering here is either pure falsehood or a half truth – blaming the British for “inventing” the “Konzentrationslager”, painting the camps as “locked” prisons, and implying the British wage genocide and not war. This ‘Pro-Boer’ Nationalism morphs into an entire Nazi propaganda campaign surrounding the Boer’s struggle against Britain – one which is regarded as the most influential and successful Nazi propaganda campaigns ever devised.

What Hitler is also doing in his speech is using his intense ‘fame’, peaking in 1940, across Germany, Western Europe and the globe in many respects. With this statement he achieves three things:
Firstly, he demonises the British (the only real “enemy” he has left in 1940) as an enemy of the German people, but also – most importantly – an enemy to Europeans at large – and he uses the Boer War for this purpose as it is in living memory for many Europeans, this deflects the focus on Germany as the enemy to Britain as the true enemy of Europe.
Nazism and the concept of the 3rd Reich was a lot more popular in Europe in the lead up to World War 2 than most people would believe now. In fact its position as “anti-bolshevist” (anti-Communist) and as “anti-Judeo Capital” found vast popular appeal in right wing and conservative parties across Europe – especially in France, the Netherlands and Belgium, these people would see Nazi Germany as liberators – not invaders.
Secondly, Hitler is reinforcing Anglophobia and Republicanism in South Africa through propaganda and he is giving re-assurance to the Afrikaner nationalist cause from Berlin. To the home grown South African pro-Nazi movements like the Ossewabrandwag, the Broederbond and Afrikaner nationalists this is manna from heaven – to all these South African Hitler admirers and their followers, Hitler’s assurance that the British committed a Boer ‘Genocide’ is music to their ears. They all attested to the concept that the British had tried to ethnically cleanse South Africa of the Boer nation during the war – and here one of the world’s greatest leaders, a 20th Century iconoclast who agreed with them, and whose not to believe Adolf Hitler? He is a European powerhouse, he’s at the helm of a super-power like Britain and now he’s standing up to Britain and telling it as it is – if it comes from Hitler it’s a truism, the British committed Boer Genocide and stole the Boer’s gold … and it does not end there, Hitler goes further … much further.
During a press interview Hermann Göring (the spokesperson on behalf of Adolf Hitler), took a leaf out his Führer’s leader’s book on the Boer War when he deflected a challenge from Sir Nevile Henderson, the British ambassador to Berlin who protested about the German government’s use of concentration camps for the political ‘re-education’ of German’s dissonant non-believers in Nazism and opposition in 1935, and using a ‘press stunt’ Göring dramatically sprung up, walked over to a bookcase and like a thespian actor, grabbed a German encyclopedia opening it at “Konzentratinslager” he read out loud,
“First used by the British, in the South African War”.
Although factually incorrect – the Spanish (not the British) first used concentration camps in the Cuban civil war in 1896, his action served as a skilful stroke of deflection of which Hermann Göring was a past master.
Dr. Joseph Goebbels was a propaganda mastermind, he was also a rabid, almost insane follower of his Führer, Adolf Hitler and a devout Nazi, and he would kick this affiliation between Nazism and Afrikaner nationalism up a gear.
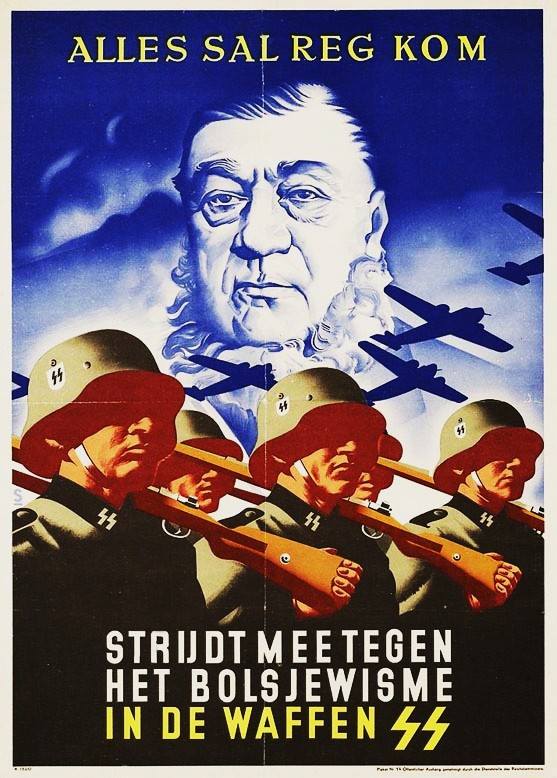
In printed media, the German propaganda machine would go even further on the back of Hitler’s speeches and use an image of Paul Kruger and the Boer War on propaganda posters to recruit Waffen SS troops in the Netherlands and Belgium, with whom these countries had an affinity for the Boer War. Both these countries proved highly fruitful in recruiting Waffen SS troops as they feared Bolshevism more than Nazism and for these conservative sections of the populations Nazism had an appeal (not to be confused with the SS, the Waffen SS also comprised ‘non-German’ and ‘foreign’ battalions – and later in the war they proved to be ferocious and devout combatants).
Next up in Goebbels’ propaganda arsenal was radio. Joseph Goebbels made this radio address on 19 April 1940, on the eve of Adolph Hitler’s birthday and said:
“On 3 September last year (1939), two hours after English plutocracy declared war on the German Reich, the British Prime Minister Chamberlain gave a radio speech …The point of the speech was that England had no intention of waging war against the German people … get rid of the Führer or so-called Hitlerism …. At the beginning of the war, however, they sang the same old song …. Its melody was dull and worn out. British plutocracy had tried to persuade the Boers during the South African war of the same thing. Britain was only fighting Krugerism. As is well known, that did not stop them from allowing countless thousands of women and children to starve in English concentration camps”.
Radio Zeesen was also part of Goebbels’ arsenal, it was a Nazi German ‘International’ propaganda service radio station broadcasting in short wave in eighteen different foreign languages including Afrikaans, it broadcasted both Hitler’s speeches and Goebbels’ messages – and eagerly picked by devout Afrikaner Nationalists in South Africa.

Also, Goebbels loved, literally adored movies and the moving picture industry, he regarded this industry as his single most powerful propaganda tool, and he made a number of propaganda movies that came to define the Nazi legacy. However only four of his movies won the much-converted Reich Propaganda Ministry’s “Film of the Nation” rating. Movies deemed critical viewing for national identity in Nazi Germany – Heimkhehr (1941) – an anti-Polish movie, Der große König (1942) – a movie about Frederick the Great of Prussia, Die Entlassung (1942) – a movie about the dismissal of Otto von Bismarck and finally …… Ohm Krüger (1941), a movie about Paul Kruger and the Boer War. So, in forging a German national identity, the Boer War and the plight of the Afrikaner take centre stage.
Ohm Krüger (Uncle Kruger ) is a propaganda masterpiece from beginning to end. Although the plot has nothing to do with Germany, the story centres around a character which the Germans could admire, “Uncle” Paul Kruger – a man the Propaganda Minister wants to draw parallels to Adolf Hitler, who he deems is also a man with a common touch, from a simple background and one who is thrust into extraordinary circumstances due to international aggression and a conspiracy of greedy ‘foreigners’.
The film highlights Boer Nationalism on the pillars of liberty and freedom, Boer Republicanism, Boer racial superiority over ‘treacherous’ black natives, it portrays the British as underhanded and murderous, stealing Boer gold, prepared to hang Boer patriots in concentration camps, they starve Boer women to death and line up British troops to mow down innocent Boer women in their hundreds, shooting them in the back as they flee the British onslaught – you get the picture.. to see Ohm Krüger in full – with English sub titles, here is the YouTube link:
So how does this propaganda fare?
It’s a massive success, a propagandistic blockbuster, it’s by far the most expensive film produced in Nazi Germany up to that time with a 5.5 million Reich Marks budget and a massive film lot outside Berlin that resembles a mini-South Africa with 100 Longhorn cattle and African huts. Ohm Krüger offers plenty of entertainment – ‘wild west’ frontier grit alongside its vivid battle scenes, as if John Ford’s Monument Valley had been transposed onto South Africa’s Transvaal region.
It is first screened on 4th April 1941 in Germany, and it’s rolled out across Europe – it opens in Italy in September 1941, France on the 1st October 1941, Hungary on the 19th December 1941, Finland on the 15th March 1942 and it even makes it to Japan on the 2nd September 1943. It makes it way right across Europe – Bulgaria, Austria, Netherlands, Belgium etc.
Both locally and internationally, it is received to rapturous applause. It is pitched as the European cinema equivalent to ‘Gone with the wind’ and it’s a winner – literally, not only the first movie to win the converted ‘Film of the Nation’ and the award for ‘Film of Special Value in terms of state policy and art’, but importantly – it also wins the Mussolini Cup for the Best Foreign Film at the 1941 Venice Film Festival.
The movie is so popular, the Nazi propaganda machine even decided to re-release it in 1944. In the end – millions of people see it, today it is regarded as Nazi propaganda master stroke. However, as irony goes the Nazi propaganda machine ‘Bans’ the movie in 1945, not because it’s a great yarn, entertaining and an outstanding propaganda piece – but because they are concerned that the graphic massacre of Boer women at the end of the movie would upset the female population of Germany concerned about their treatment at the hands of the counter-attacking and invading Soviet Union and other Allied armies at the end of the war.
The Broederbond’s influence
As noted previously, the guiding force behind the rebirth of all his Christian Nationalist spirit in South Africa was the Afrikaner Broederbond (Association of Brothers or Afrikaner Brotherhood), as a secret society it gradually come to assume a dominant position in the affairs of the Afrikaner ‘volk’. The ‘Broederbond’ formally adopted Christian Nationalism as its basic ideology in their manifesto.
General Jan Smuts and the Broederbond where diametrically opposed to one another, later during the Second World War he would correctly summarise the Broederbond when he banned public servants in 1944 from joining it and called it out as
“A dangerous, cunning, political Fascist organization.”
Prior to the war and sitting in the wings of the Broederbond was Dr. Hendrik Verwoerd (the Architect of Apartheid), he was a predominant Broederbond member, National Party leader and would become a future Prime Minister of South Africa. Dutch by birth, he honed his studies in sociology and psychology in Germany and there is no doubt he was exposed to German politics and the rise of Nazism at the time. Verwoerd showed his colours early on when, the South African Nazi ‘Black shirts’ (more on them later) held a large rally and protested the arrival of the S.S. Stuttgart in Cape Town on the 27th October 1936 with 600 Jewish refugees on board.

The Nationalists joined hands with the Blackshirts in support of their protest and a few days later on 4 November, Dr Theophilus E. Dönges (future NP Acting Prime Minister) would nail the Nationalists colours to the mast and said:
“The Jew is an insoluble element in every national life.”
They were joined by Dr Verwoerd and five fellow professors from Stellenbosch University who all went in deputation to the government to protest against the immigration of Jews from Nazi Germany. Frans Erasmus (the future National Party Minister of Defence) would go further on the matter and even officially thank the Blackshirts on behalf of The National Party for bringing the attention of the “Jewish problem to the Afrikaner ‘volk’.”
Dr Verwoerd, although he had not joined a Nazi grouping or Nazi styled resistance movement like the Ossewabrandwag during the war, was also found compliant in promoting the aims of Nazi Germany and Nazi philosophy whilst he was editor of ‘Die Transvaaler’ prior to and during the war in a landmark legal case. Justice Millin, in a 25,000-word judgement concluded that:
“Dr Verwoerd caused to be published a large body of matter which was on the same general lines as matter coming to the Union in the Afrikaans transmissions from Zeesen (a Nazi radio mouthpiece broadcasting in Afrikaans) and which was calculated to make the Germans look upon Die Transvaler as a most useful adjunct to this propaganda service”.
Another admirer on Nazism in the wings was Dr Nico Diedericks, the Chairman of the Broederbond during the war, a future NP State President who had studied in Nazi Germany and was reputed to have attended the Nazi’s Anti-Communist training school in Berlin whilst there. Piet Meyer, another head of the Broederbond and Ossewabrandwag General (and future Head of the SABC) so admired Nazi Germany he befriended Hitler’s chief of staff, Rudolf Hess, who even taught him to ski.
The use of media to promote the aims of Nazism to the Afrikaner ‘volk’ did not stop there.
Alongside Verwoerd as the editor of ‘Die Transvaaler’ is ‘Die Burger’ which was established by the Nationalists as their official mouthpiece in 1915 and Dr D.F. Malan (also a Broederbond member) as its first editor – an ‘anti-Smuts’ paper it was going to be from the get-go. By the mid 1930’s it had become popular in right leaning European newspapers in countries like Germany to target Jews with what is now known as “the great Jewish Capitalist conspiracy lie” – Jews were demonised as ‘fat cats’ using capital exploitation to the detriment of ‘ordinary’ non-Jewish folk and this image and symbology found itself into all visual media – including (and especially) political cartoons.
In South Africa, this trend for demonising Jews in political cartooning found favour in publications like the Die Burger, and especially in the works of D.C. Boonzaier, himself an anti-imperialist, pro-republican, pro-nationalism and anti-capitalist. He created a caricature figure called Hoggenheimer specifically for Die Burger – a derogatory figure designed to depict a fat and bloated Jewish capitalist with a play on ‘hog” or pig, the character made a number of appearances and also served to lampoon Ernest Oppenheimer, the German Jewish Mining Industrialist who made South Africa his home.
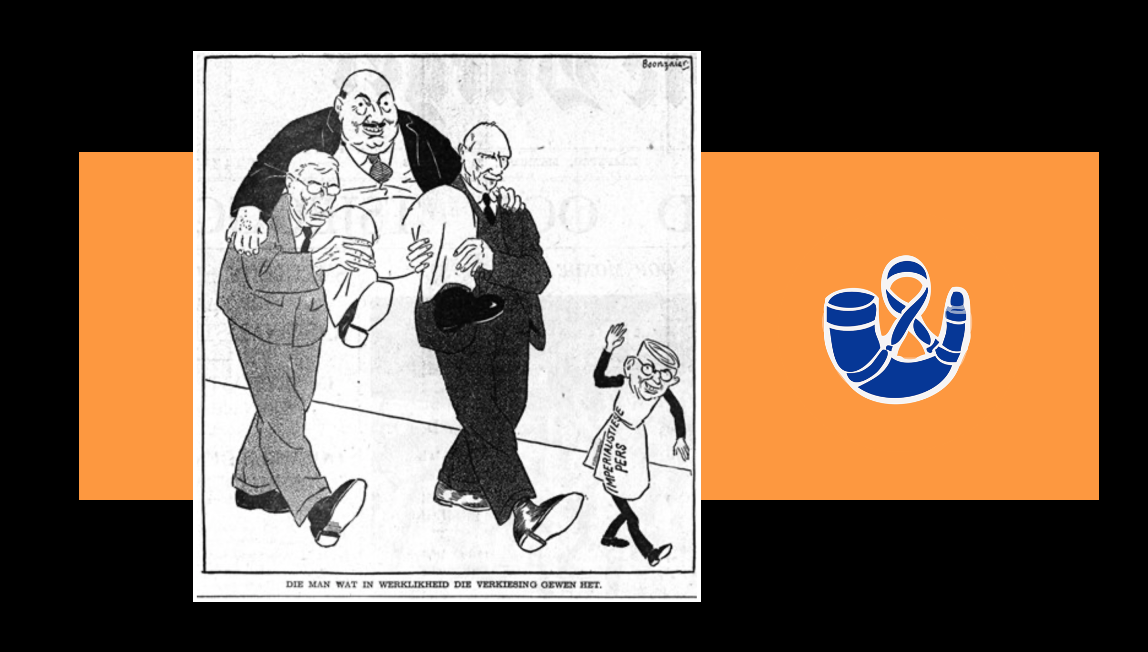
Image: This cartoon by D.C. Boonzaier was published in Die Burger, 23 May, 1938. The bloated caricature Hoggenheimer is been carried on the shoulders of JBM Hertzog and Jan Smuts following the United Party’s landslide victory over the ‘purified’ Nationalists. The caption alludes to ‘Jewish Capital’ as the real winners and the United Party was a puppet in servitude to its Jewish master.
It remains ironic, Julius Streicher, the infamous Nazi propagandist is the only German civilian executed by hanging for war times after the Nuremberg Trials, precisely for “vitriolic antisemitic propaganda” which “incited genocide” whist he was the publisher of the Newspaper ‘Der Stürmer’ – whereas no such fate awaited Dr.Hendrick Verwoerd and Albertus Lourens Geyer who published similar sentiment in ‘Die Transvaaler’ and ‘Die Burger’ nor did the publishers and editors of ‘Die Waarheid’ (the SANP mouthpiece), Die O.B. (the Ossewanbrandwag mouthpiece) and ‘Die Dappere Boodskapper’ (the Boerenasie mouthpiece) who all also published antisemitic and pro-Nazi rhetoric, instead many of them are promoted to high offices in The National Party after the war and richly rewarded for their efforts, much to the bewilderment of the Jewish community.

On the education front, using a similar tactic used by Hitler and his Nazi propaganda ministry, the Broederbond made it an aim of theirs to ‘re-educate’ the Afrikaner nation along the ideals of Afrikaner Christian Nationalism. An example of this occurred during the war when on the morning of the 13th of December 1943 a small group of military intelligence officers infiltrated the Afrikaner Teachers Training College in Bloemfontein. They placed microphones and eavesdropped on an Afrikaner educationalists congress taking place in Bloemfontein – intelligence revealed it was a front for a Broederbond meeting intent on mapping South Africa’s future under the ideology of Christian Nationalism – and outlining how they would infiltrate the education system to do it. They traced vehicle registrations of many in attendance to known Broederbond members and highlighted Albert Hertzog, Nico Diederichs, Hendrick Verwoerd and Henning Klopper as the ringleaders (a line-up of some significant heavy-weight National Party leaders).
From both inside and out the Nationalists were making a mark promoting Nazism, and none more so than the following affiliated organisations, let’s start with the biggest one – The Ossewabrandwag.
The Ossewabrandwag (OB)
The Ossewabrandwag (OB) was officially established in 1938 to commemorate the centennial of the Great Trek as devised by Henning Klopper and the Broederbond. It was intended to be a ‘cultural’ organisation on which to spread the white Afrikaner nationalist message and idealised Afrikaner hegemony proposed by the Broederbond. Its name – meaning “Ox Wagon Sentinel” was derived from the idea that Afrikaner Nationalism and Voortrekker symbology and identity would spread like a wildfire from Afrikaner heart to Afrikaner heart. The OB is set up in parallel to the National Party – in fact they are both joined at the hip.
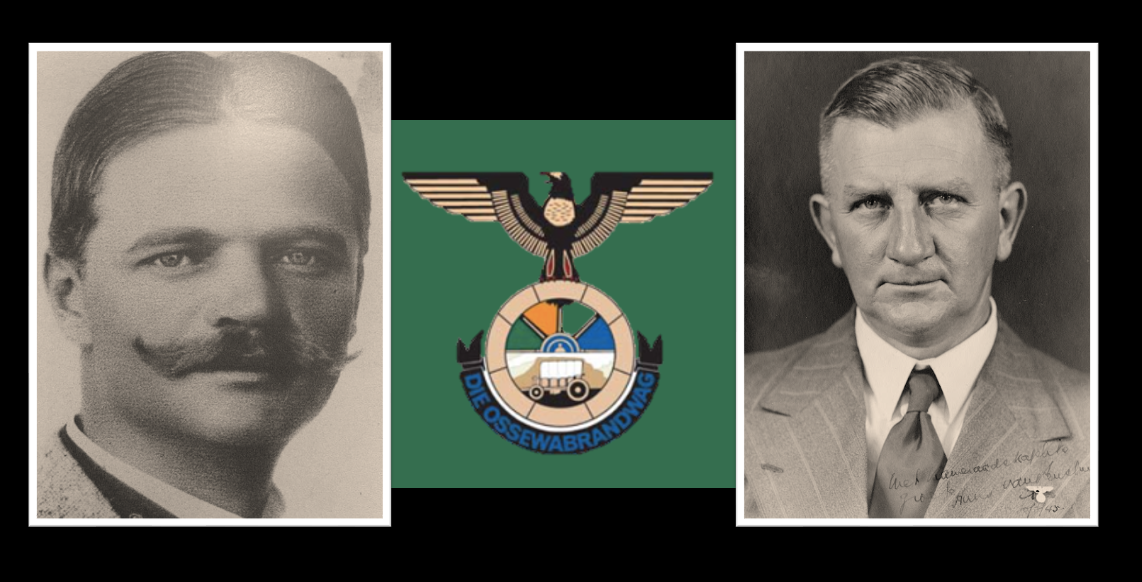
The OB is initially led by Colonel J.C.C. Laas – a Union Defence Force (UDF) officer with who held the ideals of National Socialism in high regard, so much so he would go on enter main-stream politics and establish a Neo-Nazi party called the Boerenasie, which Manie Maritz would eventually take over (more on this later).
Taking part in the 1938 Ox Wagon Centennial, leading one of the groups was Dr Johannes (Hans) van Rensburg, a lawyer who served in the Union Defence Force was the Union’s Secretary of Justice, in 1933 he had been to Germany in his capacity as Secretary and met both Hitler and Goering as well as other Nazi officials, he was deeply impressed with both the leadership and discipline offered by Nazism and became an admirer.
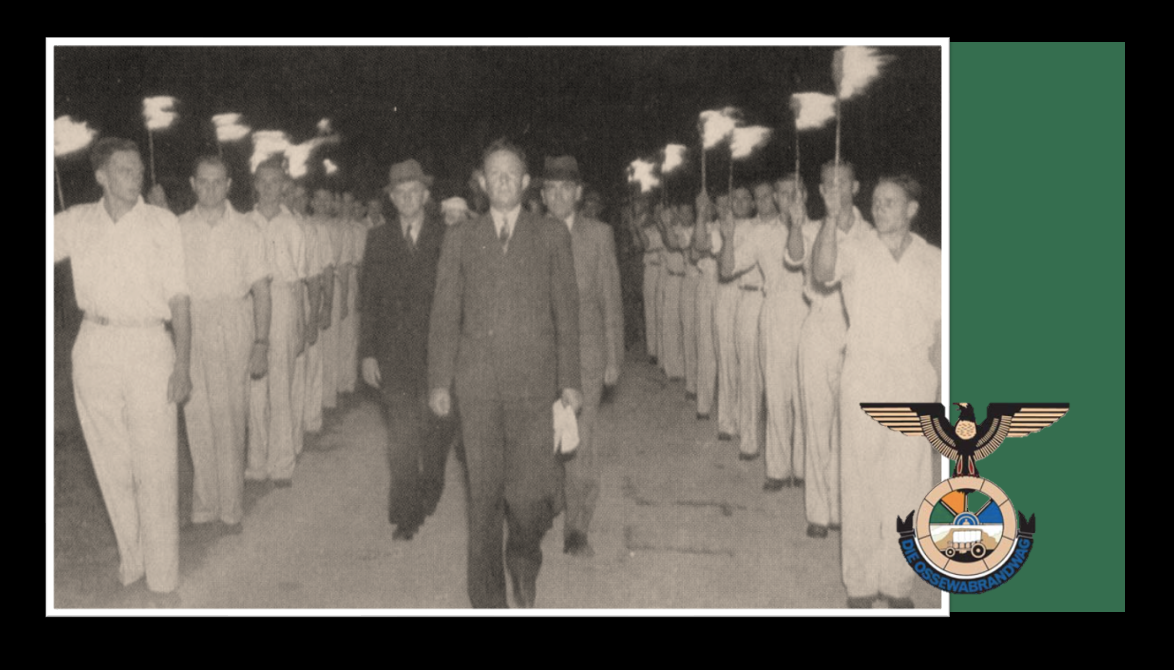
Dr. van Rensburg took over the OB from Col. Laas, and under Dr. van Rensburg the OB saw unprecedented growth – by the start of World War 2 it was a massive organisation of some 300,000 members, it had evolved away from being a mere ‘cultural movement’ forwarding Nationalist Afrikaner identity, to an active domestic para-military movement with strong Nazi overtones and open channels to Nazi Germany to aid their submarine activities around South Africa.
When it was established relations between the National Party and the Ossewabrandwag were cordial, with most members of the Ossewabrandwag belonging to the party as well. At the higher levels, National Party leaders like P.O. Sauer and F. Erasmus. Three future National Party South African Prime Ministers/State Presidents held key leadership positions in the Ossewabrandwag. ‘Generals’ like C.R. Swart (later South Africa’s first State President) was a member of the Groot Raad (Chief Council) of the Ossewabrandwag, B.J. Vorster (later to become Prime Minister of South Africa) was a keynote OB leader and formed the OB’s Cape Branch and even PW Botha (future South African State President) joined the Ossewabrandwag and worked with Vorster to establish the OB’s Cape branch.
Other National Party stalwarts where also prominent in the Ossewabrandwag organisation, Eric Louw, for example – who later to become the National Party’s Foreign Minister. To say the National Party and the Ossewabrandwag were, to coin a phrase, “two peas in the same pod” is an absolute truism.
The relationship between the Ossewabrandwag and National Party at first was very well-defined and D.F. Malan even met with OB leaders in Bloemfontein which resulted in declaration known as the ‘Cradock Agreement’. It specified the two operating spheres of the two respective organizations. They undertook not to meddle in each other’s affairs and the National Party endeavoured to focus on Afrikanerdom in the party-political sphere, while the Ossewabrandwag was to operate on the other fronts of the ‘volk’ (white Afrikaans people’s).
Dr Van Rensburg, having now resigned his commission as an officer in the UDF, had always professed to be a National Socialist, as an open admirer of Nazi Germany and Adolph Hitler, and the ideas, uniforms and rituals of membership adopted by the OB had a distinctive Nazi leaning as a result.

In terms of OB political thinking, Afrikaans would be the only official language in a free, independent, Christian-Nationalist Republic. The English-speaking South Africans, regarded as an “un-national” element, would be condemned to an inferior status. Anti-Communism was an important backbone of OB policy in line with Nazi aggression toward Communism.
The emphasis of the OB was also on race and racial purity. Members were exhorted to “think with your blood”, and the Nazi creed of “Blut und Boden” (Blood and Soil) was promoted as an OB value. The Ossewabrandwag’s newsletter O.B. would state this clearly on 28 October 1942 when it said:
“Family, blood, and native soil’ – that is, next to our religion and our love of freedom, our greatest and our most sacred national heritage”.
The OB always displayed an exaggerated interest in physical culture and the need for dictatorial discipline. Dr. van Rensburg would write:
“Give us a master! Give us bonds which tie us to a stable way of life”.
On issues of family value, the leaders of the OB proclaimed that the duty of the man was to work and fight and the duty of the woman to create and tend the home and family. In essence the OB was based on the Führer principle, fighting against the British Empire, anti-capitalist in nature – they called for the removal and expropriation of “British-Jewish” controlled capital, the communists, the Jews and the system of parliamentarism. All based on the principles of National Socialism (Nazism).

In 1940, as South Africa was fighting in the North African theatre of operations on the side of the Allies, the OB created an elite organization known as the Stormjaers – the storm troopers of Afrikanerdom. The formation of the Stormjaers (English meaning: Assault troops) was in essence a paramilitary wing of the OB. The nature of the Stormjaers was drawn upon the lines of Nazi Germany’s army ‘Storm troopers’, as were the Nazi and fascist rituals and salutes, this is evidenced by the oath sworn in a by new recruits (in some instances a firearm was levelled at them whilst they read the oath):
“If I retreat, kill me. If I die, avenge me. If I advance, follow me.”
The Stormjaers were deployed in variety of military operations ranging from the defence of Nationalist political platforms to pure sabotage, they dynamited post offices and railway lines and cut telephone wires. Dr. van Rensburg even wrote:
“The Ossewabrandwag regards itself as the soldiery of the (South African) Republic . . . the Ossewabrandwag is the political action front of Afrikanerdom.”
The ideologies of the Nazis were penetrating deep into right-wing Afrikaner political identity. In 1940, directly after Nazi German decisive victories in Europe, Otto du Plessis (later to become Administrator of the Cape under the National Party) published a pamphlet – The Revolution of the Twentieth Century – in which he openly espoused the Ossewabrandwag’s policy of totalitarianism.
One very predominant leader of the Ossewabrandwag was Balthazar Johannes (B.J.) Vorster, South Africa’s future Prime Minister. Along with like-minded OB colleagues he regarded the war as an opportunity to get rid of the hated domination of the United Kingdom of South Africa and welcomed the Nazis as allies in their fight.
The firebrand nature of the Ossewabrandwag appealed to Vorster more than the National Party, so while South African troops were helping to make the world safe from Hitler’s National Socialism, Vorster was appointed as a ‘General’ in the Ossewabrandwag for the Port Elizabeth district to promote the National Socialism doctrine back home. On his politics he famously announced the Ossewabrandwag’s position on Nazism and said in 1942:
‘We stand for Christian Nationalism which is an ally of National Socialism. You can call this anti-democratic principle dictatorship if you wish. In Italy it is called Fascism, in Germany National Socialism (Nazism) and in South Africa, Christian Nationalism.”
B.J. Vorster was eventually arrested under the emergency regulations in September 1942, he immediately went on hunger strike and after two months was transferred to Koffiefontein internment camp as prisoner No. 2229/42 in Hut 48, Camp 1. B.J. Vorster was eventually released on parole in January 1944 and placed under house arrest.
Interned alongside BJ Vorster was another Ossewabrandwag member Hendrik Johan van den Bergh who eventually went on to become the founder of the Bureau of State Security (B.O.S.S.), an intelligence agency created under the National Party on 16 May 1969 as a Nazi SS styled jackboot agency to enforce Apartheid. Van den Bergh was to become known as the “tall assassin” given his physical height.
The Rev. Koot Vorster (B.J. Vorster’s brother), a Dutch Reformed Church minister, and like his brother was also a predominant Ossewabrandwag leader, crystalised this idea of Afrikaner totalitarianism when he summed up the pro-Hitler and Pro-Nazi standpoint of the OBW during an address to a student group on September 15, 1940 and said:
“Hitler’s ‘Mein Kampf’ shows the way to greatness – the path of South Africa. Hitler gave the Germans a calling. He gave them a fanaticism which causes them to stand back for no one. We must follow this example because only by such holy fanaticism can the Afrikaner nation achieve its calling.”
Kowie Marais, an OB member, years later recalled in an interview the admiration he and his friends held for Hitler:
“We thought he (Hitler) might rejuvenate western civilization…against the communist-socialist trends that were creeping in from the east. We thought it was the dawn of a new era.”
The Ossewabrandwag WW2 Insurgency campaign
The ‘subversion’ activities of the OB were not exactly irrelevant and they were not that of a ‘cultural organisation’. From the outset of the war a series of violent incidents took place between statutory force South African soldiers and the Ossewabrandwag.
This was to cumulate on Friday 31 January 1941, when van Rensburg was due to hold a meeting at the Johannesburg City Hall when a riot broke out between OB Stormjaers and South African Union Defence Force soldiers who were determined not to allow van Rensburg to have a platform for his support of Nazi Germany – with whom they were now at war with. The battle raged in downtown Johannesburg for two days. Armoured cars were brought in to eventually quell the violence.

Other OB insurgency operations included a series of explosions over a large area of mines at Klerksdorp, Vereeniging, Delmas and in Potchefstroom the OB blew up power lines on the 29th January 1942. All telegraph and telephone communication between Bloemfontein and the rest of South Africa were dislocated in one attack in February 1942. Railway, telegraph, and telephone lines in various parts of the Free State were destroyed in February 1942. Fifty-eight Stormjaers were eventually charged with high treason, and a quantity of hand grenades were found. Stormjaers also blew up two telephone poles behind the Pretoria Central Jail but were never captured.
Two other Stormjaers, Visser and van Blerk were convicted of a bombing at the Benoni Post Office, as a result of which an innocent bystander was killed, they were both sentenced to death (The sentence was commuted to life imprisonment). A few members of the OB were shot while trying to escape from internment camps or jails, the most known was the dramatic pursuit OB General, Johannes van der Walt, who was shot while on the run near Krugersdorp.
Very central to OB activities during World War 2 was also the co-ordination of spy networks and spy insurgents sent to South Africa, the most notorious of which where Hans Rooseboom – codename Peters and Lothar Sittig – codename Felix. OB members actively participated in setting up of radio broadcast stations for these spies and provided them with a network of OB members focused primarily on shipping in and out of South African ports. The information radioed to the German Abwehr (the German military-intelligence service) who in turn relayed the intelligence to the hunter submarine packs operating off South Africa’s coastline. It is not known exactly how much tonnage sunk and lives lost are attributed to the OB directly, but what is certain is that they are also responsible for it and played a role directly in Italy’s and Germany’s war efforts.

The Nazi German wartime propaganda machine even returned the favour to the OB, viewing the activities of the Ossewabrandwag as a very positive contribution to their fight and Dr. Van Rensburg was even played up over Radio Zeesen as the real leader of the Afrikaner people.
The National Party even came out in direct support of the OB’s insurgency when the Smuts’ government resolved to detain and ban members of the OB, Dr D.F. Malan defended the OB in a speech on 5 March 1941, saying:
“The Ossewabrandwag has been accused of lending itself to subversive activities and also of encouraging them. Now I say: Carry out your threat. Ban it. Prevent it and prevent its meetings. If the Ossewabrandwag decides to be passively disobedient and refuses to be dissolved . . . I shall share the consequences with the Ossewabrandwag. At this stage I am prepared to say to you that if the government decides upon that act and the Ossewabrandwag decides not to submit, I shall keep my pledge”.
It was a clear message to Smuts’ government that the unity in the ranks of the two Afrikanerdom movements – the NP on the ‘Political’ front and the ‘OB’ on the ‘cultural’ front remained as strong as ever, even during wartime.
Operation Weissdorn and the National Socialist Rebels
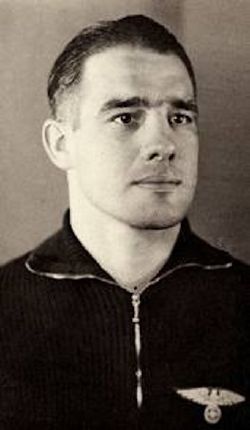
During the war, in Nazi Germany a plan is hatched with the idea of inserting a German military trained South African National Socialist zealot by the name of Sidney Robey Leibbrandt, with the expressed objective to work with the Ossewabrandwag and its Stormjaers to over-throw Smuts’ Union government through an Afrikaner Nationalist armed revolt.
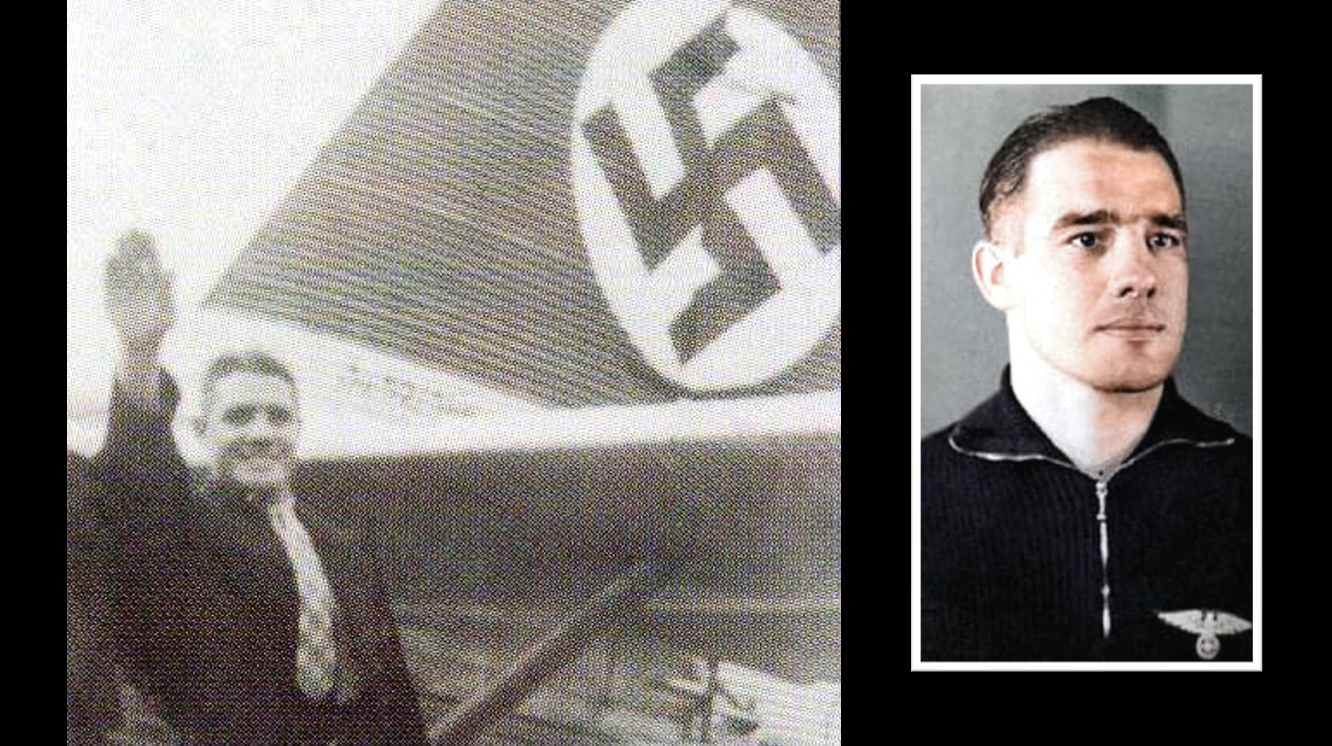
Born in Potchefstroom Leibbrandt was an Afrikaner Nationalist of both German and Irish decent. He was also a South African Olympic boxer, Leibbrandt went to Germany in 1938 to study at the Reich Academy for Gymnastics, and stayed on when war broke out. He joined the German Army, where he became the first South African to be trained as a Fallschirmjäger (paratrooper) and glider pilot. Leibbrandt was trained with the Comrades of the Brandenburgers at a sabotage training course of Abwehr II (Abwehrschool “Quenzgut”) near Brandenburg an der Havel, west of Berlin.
The German Admiral Wilhelm Canaris ordered “Operation Weissdorn” a plan for a coup d’état to overthrow the South African government of General Jan Smuts and assassinate Smuts. Central to the plan was Leibbrandt, who left Germany on 5 April 1941 to lead and execute it.
“The signal for the coup d’ etat will shake South Africa to its very foundations. The whole world will understand it. The gigantic leading figure of General Smuts will be felled like a heavy oak tree at the psychological moment. I will commit this deed on my own. It will happen without help or support.”
Robey Leibbrandt (Berlin, March 20, 1941)
In June 1941, under the code name Walter Kempf, Leibbrandt was dropped on the Namaqualand coast north of Cape Town (Mitchell’s Bay) by a confiscated French sailboat (the Kyloe). Such was his megalomania, thuggery and aggression that even the radio operator who was earmarked to come ashore with him refused to do so, citing fear for his life and remained on-board the yacht instead (the Captain and crew were also relieved to get rid of Leibbrandt such an annoyance he had become).
His mission was to make contact with the Ossewabrandwag, meet with Dr. van Rensburg in his role as Kommandant General of the Ossewabrandwag and inform him that Germany desired he take over OB military operations expand the OB ‘Stormjaers’ ranks. He made his way to Pretoria and meet with Dr. van Rensburg. The equally megalomaniac van Rensburg would have none of it and refused to recognise Robey Leibbrandt outright, a row broke out and the two became irreconcilable.
Robey Leibbrandt would find within the Ossewabrandwag supporters who staunchly followed National Socialism, start his own organisation and he would overcome the leadership crisis by getting them to swear alliance to him in person – in blood. Taking a leaf out of his hero’s book, Adolf Hitler who used a similar oath to get the German military establishment to swear sole allegiance to him as the sole and legitimate leader of the German Volk by name, so too did Robey Leibbrandt get his followers to swear allegiance to him as the only legitimate Afrikaner leader, by name.
The blood signature oath read as follows:
“I stand before God and swear this sacred oath that I, as an Afrikaner, will faithfully serve my Volk and Vaderland with my whole heart, body, soul and mind, along the lines indicated to me by the leader of the National Socialist Rebels in the person of Robey Leibbrandt and no one else, from now until death. The deep seriousness with which I recognise myself as a National Socialist Rebel finds expression in the blood with which I forever bind my person through the medium of my signature. I am nothing. My Volk is all. God be with us. The Vierkleur on High.”
Not to miss out on the legitimacy of Adolf Hitler as the supreme leader, the blood oath also partly read as follows:
“All my fight and striving is for the freedom and independence of the Afrikaner people of South Africa and for the building up of a National Socialist State in accordance with the ideas of Adolf Hitler.”
Leibbrandt’s small group of National Socialist Rebels kept the South African government on high alert by committing various sabotage acts. However, the quiet truce between Leibbrandt and van Rensburg quickly developed into open hostility. Leibbrandt, disappointed that the OB did not officially support his mission and its resultant failure began to openly attack Dr van Rensburg as an ‘agent’ of Smuts. This sealed his fate.
Posing a significant threat to the Ossewabrandwag – both in terms of drawing members, ideology and in leadership and overall control of the Afrikaner right-wing, the Ossewabrandwag would engage the tired old philosophy of the ‘enemy of my enemy is my friend’ and sell out the National Socialist Rebels and Robey Leibbrandt to the British. British Intelligence documents uncovered in the British National Archives in 2005, revealed that Hans van Rensburg sold out Robey Leibbrandt’s base of operations to the British SIS (Secret Intelligence Service) who in turn tipped off General Jan Smuts, which in turn led to Leibbrandt’s capture by the Union of South Africa’s security forces on Christmas Eve, 1941. Ironically the arresting officer was Claude Sterley, a fellow Springbok boxer and friend.
Charged and found guilty of High Treason, Robey Leibbrandt was sentenced to death on the 11 March 1943. Although Leibbrandt refused to give evidence at any stage in the trial, he claimed that he had acted “for Volk and Führer” and gave the German Salute (Hitler Salute) when he first entered the court, to which several spectators responded and calling “Sieg Heil”. After being sentenced to death, Leibbrandt shouted loudly and clearly “I greet death”.
His sentence was commuted to life in prison by General Jan Smuts, the South African premier, some sources say it was because Smuts and Leibbrandt’s father served together during the South African War (1899-1902) and Smuts had a high regard for Leibbrand’s Dad, other sources point to Smuts not wanting the blood of yet another Jopie Fourie martyr on his hands. In any event, when the National Party government came to power in 1948, Leibbrandt was officially pardoned and walked out a free man – much to the disgust of the hundreds of thousands of South African’s who had fought against Nazism and his ilk during the war.
Leibbrandt became politically active in his later life on the far right of the political spectrum, founding the organisation Anti-Kommunistiese Beskermingsfront (Anti-Communist Protection Front) in 1962, and producing a series of pamphlets titled Ontwaak Suid-Afrika (Wake up South Africa). His son, Izan (Nazi spelled backwards) became a senior officer in the South African Defence Force.
The New Order
Oswald Pirow over his period in office under General Barry Hertzog in the South African Union holds three portfolios, he starts as the Minister of Justice, then he’s appointed Minister of Railways and Harbours, and from 1933 to 1939 he was Minister of Defence.
He is an Afrikaner Nationalist of strong German heritage (in fact at home he only uses German as a mother tongue). As Defence Minister he was sent on official visits on behalf of the Hertzog government to both Nazi Germany and Fascist Italy. His mission was one of appeasement, to meet with Hitler, Ribbentrop and Goering and try to establish Anglo-German rapprochement as well as assure them of South Africa’s neutrality under the Hertzog government. In discussions with Hitler, he also assures him that a Afrikaner Nationalist would be a sympathetic government to Nazi Germany’s claim to return her previous colony of German South West Africa (Namibia). He is also after German aircraft as he was very involved in establishing South African Airways, under his watch both Heinkel bombers and Junkers transport aircraft enter South African Air Force and South African Airways fleets respectively.
Pirow’s solution to easing British and German tension prior to the war, which he proposed to Hitler, was for the British to agree with the Nazi policy of “Drang nach Osten” (meaning yearning or ‘thrust’ towards the East for ‘living space’ as Hitler put it in his book ‘Mein Kampf’) and in return Hitler should allow all the Jewish people living in Germany to leave. In reality this offer would never have happened as it would have required Britain, by way of a parliamentary agreement, to renege on its commitment to Poland as an ally. However, Pirow also had another mission, that of building a South African partnership for a post war Nazi world.

In 1936 Pirow attended the Olympic Games in National Socialist (Nazi) Germany and in 1938 again visited Europe, including Spain, Portugal and Germany. These visits confirmed his admiration for this new style of government in Europe and, in particular, for National Socialism (Nazism). A vehement anti-communist – Pirow vowed to legislate communism out of existence, he also became an admirer of Adolf Hitler – especially after his meeting with him.
During this tours he also met Benito Mussolini, António de Oliveira Salazar and Francisco Franco and became convinced that a European war was imminent, with a resounding Nazi victory assured. The future Pirow predicted was one of global Nazism.
When General Jan Smuts committed South Africa to war against Nazi Germany, Pirow found his position in government as a Minister of Parliament and his position in the ‘Fusion’ United Party untenable. He had given his support in 1939 to Hertzog’s neutrality policy. He then resigned along with Hertzog and took no part in Smuts’ reformatted war-time government. Instead Pirow launched the South African version of the “New Order” within the D.F. Malan’s breakaway National Party, backing the idea of a Nazi style one-party state dictatorship.
His new political grouping took its name from his 1940 ‘New Order in South Africa’ pamphlet in which Pirow embraced the ideology of Nazi globalisation. To understand what the concept of the “New Order” was – the New Order (German: Neuordnung) was the political order which Nazi Germany wanted to impose on the conquered areas under its dominion, it entailed the creation of a pan-German racial state structured according to Nazi ideology to ensure the supremacy of an Aryan-Nordic master race along with territorial expansion and colonisation.
Hitler’s ‘New Order’ concept is important as it would guide Pirow’s thinking after the war, because although Hitler focussed primarily on Eastern Europe ‘Lebensraum’ (‘living space’) his plan also extend to Asia, India, South America and North America in ‘post war’ fascist dominated world, and like any plan for globalisation, Africa also played a role in the New Order.

Hitler’s overall intentions for the future organisation of Africa was based on a plan which divided the continent into three big parts. The northern third of Africa was to be assigned to Germany’s Axis partner – Italy. The central part of Africa would fall under German rule. The remaining southern sector would be controlled by a pro-Nazi Afrikaner state built along racial grounds.
German Foreign Minister Ribbentrop had communicated this plan with South African leaders sympathetic to Nazism, and a key channel for this communication were his meetings with Oswald Pirow whilst he was on his visits to Nazi Germany on behalf of the Hertzog government. Ribbentrop informed the Afrikaner Nationalist leaders that once Germany had won the war, Germany was to reclaim its former colony of German South-West Africa (now Namibia), then a mandate would be given to an Afrikaner Nationalist led South Africa as a sort of ‘war compensation’ which would include the territorial acquisitions of the British protectorates of Swaziland, Basutoland (Lesotho), Bechuanaland (Botswana) and the colony of Southern Rhodesia (Zimbabwe).
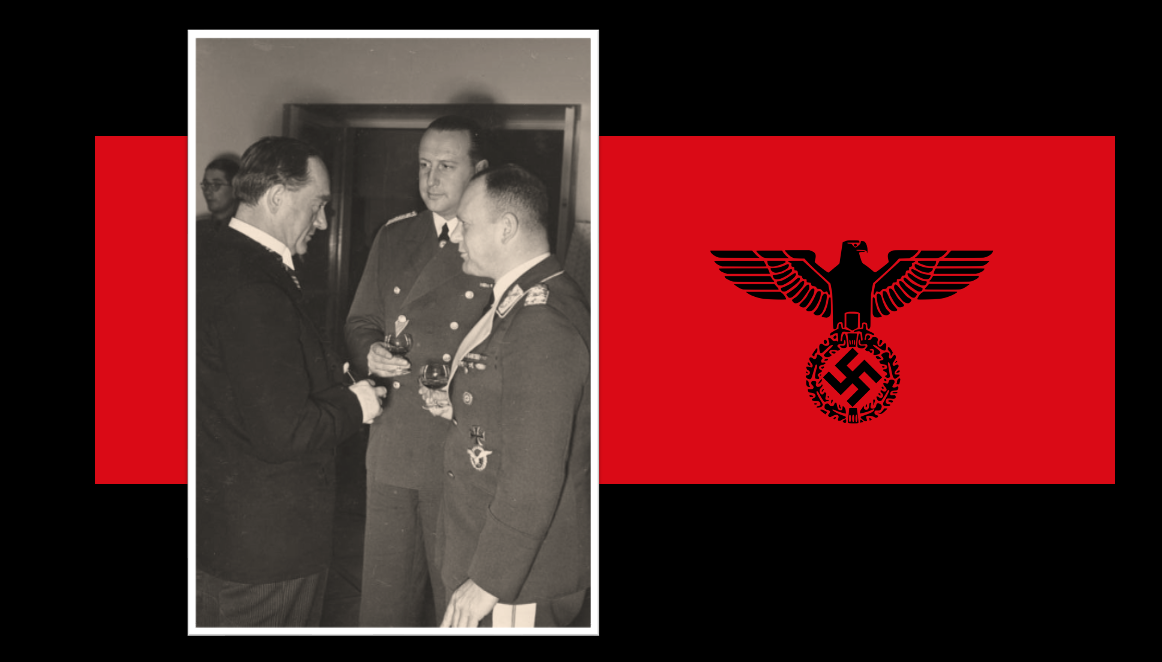
Dr. Malan initially tolerated the actions of Oswald Pirow’s South African adaption of the 3rd Reich’s ‘New Order’ however very soon Malan came to realise what the extreme ideology of The New Order was about, and he immediately saw it as a divisive influence on the Afrikaner nationalist movement. Fearful of a split in Afrikaner nationalism over support for extreme Nazism at the Nationalists Transvaal party congress of August 1941, Malan forced through a motion ending the New Order’s propaganda activities, particularly their insistence on a one-party state on a ‘Führer’ principle.
Although restricted by Dr. Malan, the New Order continued to exist and Pirow and 17 of his New Order supporters continued to be associated with the National Party and continued to attend their caucus meetings. The New Order finally broke from the National Party altogether in 1942, after both D.F. Malan and J.G. Strijdom realising the tide of war was turning against Nazi Germany publicly rejected Nazism.
Pirow returned to his legal practice, and after the war formulated a partnership with Sir Oswald Mosley. Mosley was an ex-British MP and an infamous British Nazi, he led the British Union of Fascists (BUF), a Neo-Nazi British organisation following the edicts of the ‘New Order’ in the United Kingdom. Mosley was imprisoned at the outbreak of World War 2 in 1940 for his extreme views in support of the enemy (Nazi Germany) and the BUF was outlawed. He was released in 1943.
Oswald Pirow and Mosley collaborated together in earnest when they met in London in April 1948 and they developed an idea for the division of Africa into exclusively black and white areas and the founding an anti-communist group to be known as the ‘enemies of the Soviet Union’. The two Oswalds came up with what were known as the Mosley-Pirow Proposals, which advocated the extension of the South African National Party’s Apartheid ideology and concept to include the entire continent of Africa.
The idea they came up with was that two-thirds of sub saharan Africa would be advocated for ‘Black States’ and one-third would be for ‘White states’. Where the two of them differed on their concept of ‘Eurafrica’ (which they conjointly coined), Pirow felt that ‘sweated labour’ would need to be forced whereas Mosley felt that unskilled Labour, needed in the ‘white states,’ was to be traded for from the ‘black states’ in return for technical assistance at some ‘later stage’.
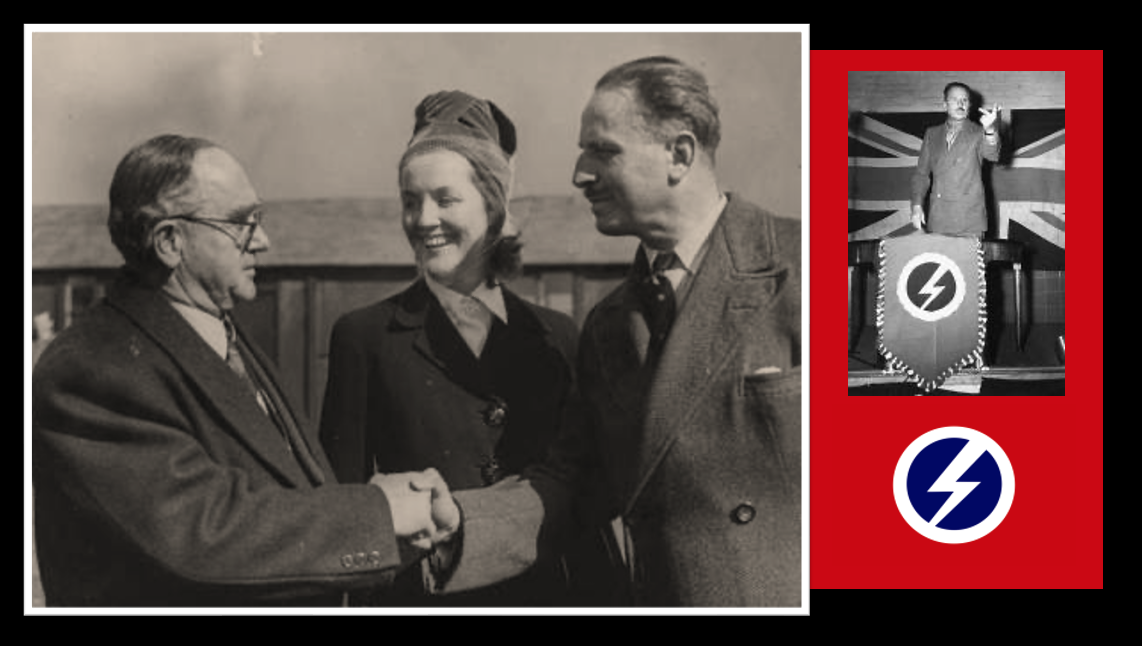
The relationship with Pirow and Mosley started to break down after their ‘Eurafrica proposals’ were launched. Pirow came to realise that virtually nobody took Mosley seriously, people generally dismissed both him and his economic and political treatise out of hand as an extreme oddity.
Very famously Pirow, back in his legal guise, acted as the public prosecutor on behalf of the Apartheid State during the Treason Trial of 1956. The Treason Trial was a trial in which 156 people, including Nelson Mandela, were arrested in a raid and accused of treason in South Africa in 1956, an unsuccessful trial in the end they were found not guilty of treason (the Rivonia trial came later).
Oswald Pirow’s influence in South African politics and Apartheid is far-reaching. The Tomlinson Commission – which investigated the validity of the idea Apartheid was not a new creation, and its findings were based in part on findings made by the Native Economic Commission in 1932 and on preparatory work done by Oswald Pirow.
The South African National Socialist Movement (SANP) and ‘the shirts’.
Now we come to the various ‘shirt’ movements of which the most significant is The South African Christian National Socialist Movement also referenced as the South African Gentile National Socialist Movement or SANP. More commonly they were also known at the time as the ‘Gryshemde’ in Afrikaans and ‘Grey-shirts’ in English.
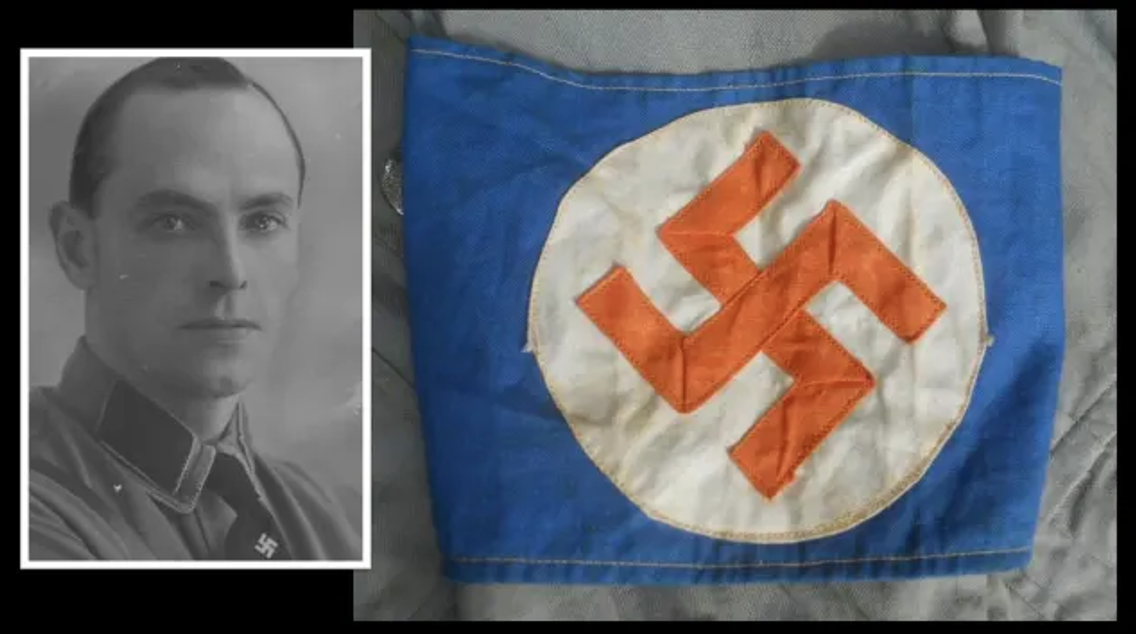
Led by Louis Theodor Weichardt, a native of Paarl in the Western Cape and of German descent, the organisation is established on the 26thOctober 1933, he founded South Africa’s Nazi party equivalent – The South African Christian National Socialist Movement (SANP) with a paramilitary section, modelled on Nazi Germany’s brown-shirted Sturmabteilung) called the ‘Gryshemde’ (Grey shirts).
Their uniform, insignia and flags were distinctively Nazi with the swastika front and forward. Of interest, is the use of Orange, Blue and White in the Nazi swastika configuration – this was intentionally done to reflect the national colours of the South African flag at the time, the ‘Oranje-blanje-blou’ (Orange, White and Blue).

Other ‘shirt’ organisations form in parallel to the Grey-shirts albeit a little smaller, they include the equally devout and Nazi ‘Black-shirts’ – the Volksbeweging (People’s Movement) or ‘African Gentile Organisation’ which is led by H.S. Terblanche. In addition, the ‘Brown-shirts’ – The ‘Bond van Nasionale Werkers’ (National Workers Union) led by Johannes Bruwer.
Central to their cause in the late 1930’s where Jewish immigrants escaping Nazi Germany to South Africa, and their numbers were growing significantly over the decade – in response the SANP launched a campaign calling for an end to Jewish immigration and arranged mass protests. Their primary communication mouthpiece was a newspaper called “Die Waarheid” (the truth) which was nothing more than a vehicle to spread Nazi doctrine in South Africa. Die Waarheid held a Nazi swastika on its masthead.

The nature of the movement was clearly seen in March 1934 when the SANP held a rally in Aberdeen in the Eastern Cape, Harry Victor Inch – one of the Greyshirt leaders – announced that he had in his possession a ‘stolen’ document from a Port Elizabeth synagogue – signed by its Rabbi – which outlined a secret plot by the Jews to destroy the Christian religion and civilisation.
The Rabbi in question, Rabbi Abraham Levy, took the SANP Greyshirts to court in Grahamstown and in a landmark case the document was scrutinised legally, it was found to be a complete falsehood and fabricated by the SANP. As a result three Greyshirt leaders were fined and Harry Victor Inch was found guilty of perjury and was sentenced to serve six years and three months in prison for forging documents defaming the Jewish race and swearing under oath that those documents were genuine. Inch and his fellow defendants, David Hermanus Olivier and Johannes Strauss von Moltke faced other charges which grew out of the Grahamstown trial.

The result has been widely hailed here as a complete vindication of the Jewish people and of Rabbi Abraham Levy who brought the lawsuit against the Grey Shirt leaders. As the leader of the SANP, Weichardt was arrested and imprisoned during World War II at Koffiefontein detention barracks by the Smuts’ government as an ‘enemy of the state’ – along with all the other far right pro-Nazi Germany, anti-British militants and held there for the duration of the war.
Weichardt disbanded his Nazi party in 1948 and closely worked with Oswald Pirow’s ‘New Order’. Moving on, Weichardt then gave his full attention and allegiance to D.F. Malan and the National Party (NP) itself. He had a very successful political career with the NP and went on to become the National Party’s senator from Natal Province from 1956 to 1970.
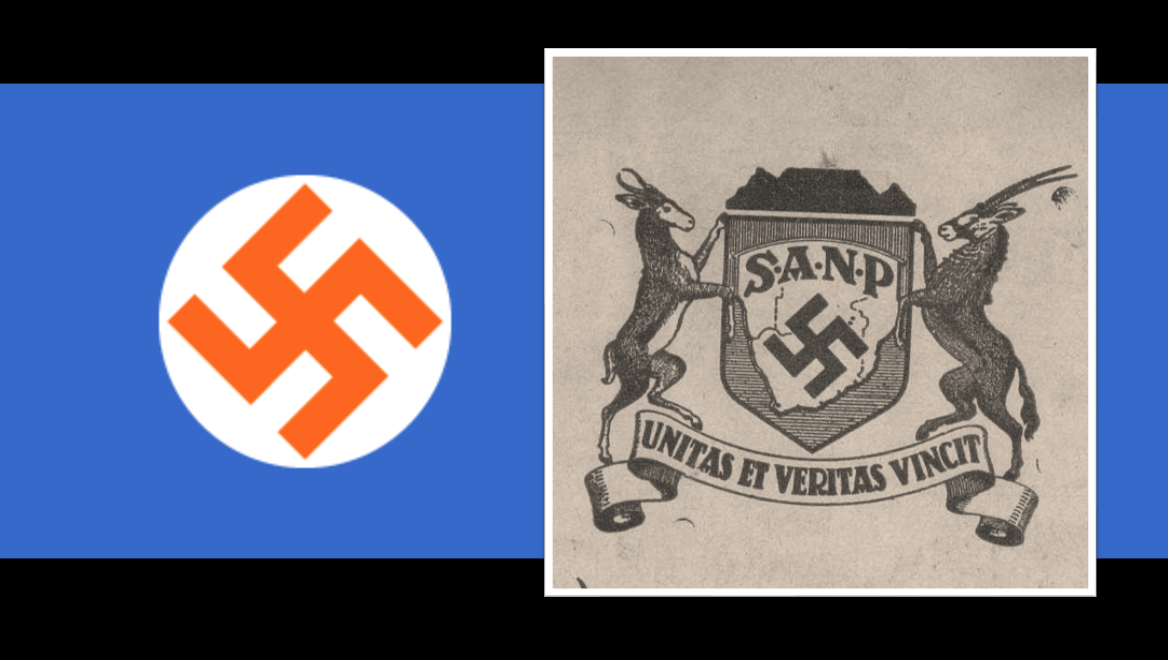
The folding in of SANP leadership into the National Party’s political sphere would have a resounding impact on the future of not only the majority of ‘Black’ South Africans (who were viewed as ‘inferior’ peoples by these hard liners), but also minority white ethnic groups like South Africa’s very large Jewish community. The arrogance of this underpinning politics is seen with Louis Weichardt himself, who, on becoming an elected National Party Parliamentarian quickly covered up his dubious history as a full-blown card-carrying Nazi, and rather infamously declared that he had never been against the ‘Jewish race’ but only against the actions of certain ‘Jewish communists’. Not a single Jew, in his ‘opinion’ had suffered through his actions.
The Boerenasie (Boer Nation) movement
As noted earlier, the Afrikaner nationalist hero and leader of the Boer Revolt in 1914, ‘General’ Manie Maritz decided to end his self-imposed exile after the 1st World War ended and returned to the Union of South Africa in 1923. The Smuts government treating him very kindly by way of reconciliation, and all things considered for a crime as serious as treason he received a short imprisonment of three years. Luckily for Maritz, Hertzog’s National party won the 1924 election and Maritz was granted full amnesty and walked free having only served three months.
Maritz took to farming, but came under the influence of National Socialism (Nazism) in 1936 and founded a ‘anti-parliamentary’(dictatorship led) party called the Volksparty (People’s Party) in 1940. Maritz also took control of another ultra-right, national socialist, pro-Nazi movement initially set up by Colonel J.C. Laas. According to Brian Bunting in the Rise of the Afrikaner Reich, Colonel J.C Laas was a cloak-and-dagger character who surrounded his activities with an atmosphere of mystery and proved himself to be unable to satisfy either his friends or his enemies. In October 1940 he was relieved of his command in the Ossewabrandwag and replaced Dr. Hans van Rensburg. Colonel Laas later established Die Boerenasie, but after a while he also abandoned it.
The “Boerenasie” (The Boer Nation) party, was then merged the Manie Maritz’ Volksparty and it continued as a merger under Die Boerenasie banner with Maritz at the helm. Maritz became known as a very outspoken proponent of The Third Reich and admirer of Adolf Hitler. During this time, he had also developed a theory about the alleged Jewish conspiracy and interference in South African and world politics and became a fanatical Antisemite.
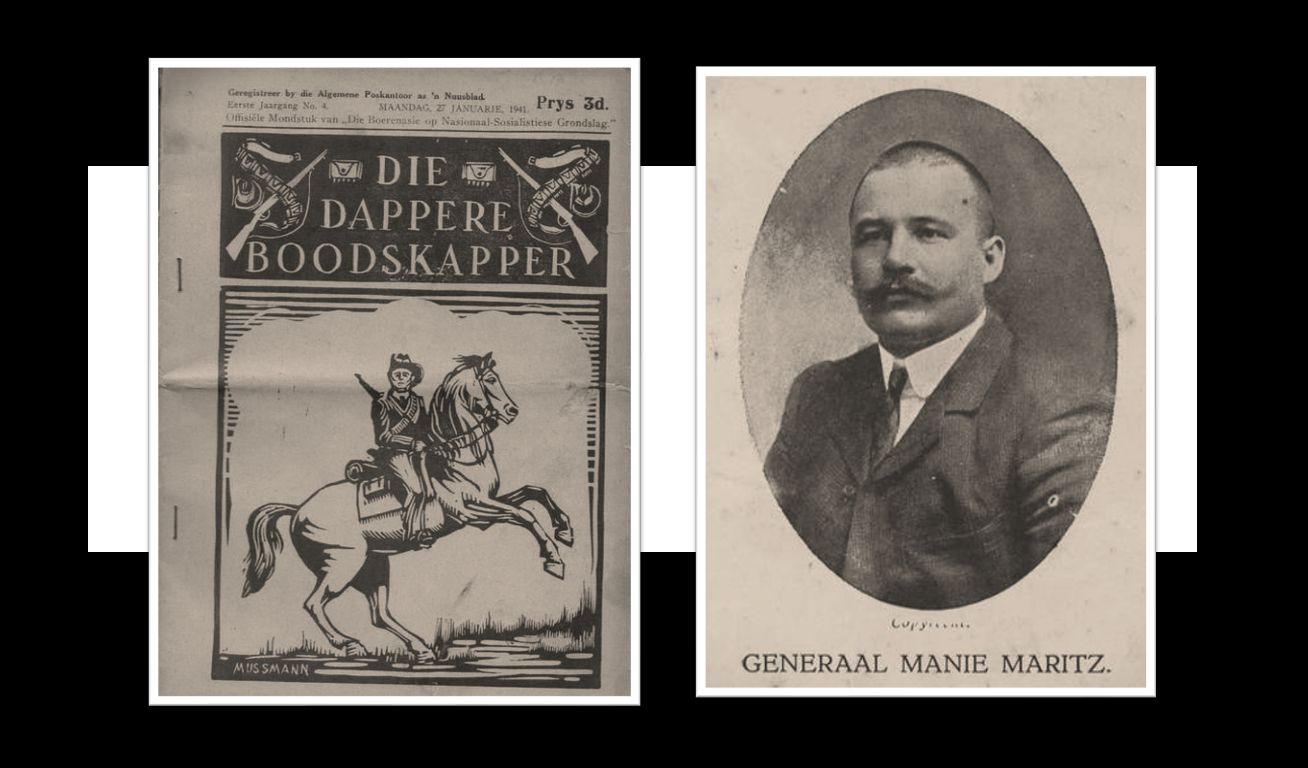
Maritz would detail his Antisemitic and National Socialist views in his autobiography ‘My Lewe en Strewe’ (My life and Aspiration) which he published in 1939, a book regarded as lacking in objectivity, inciting racial hatred and like his hero Adolf Hitler’s book ‘Mein Kampf’ (My Struggle) Maritz’ book was full of emotional and racially driven rhetoric. He was even taken to court over all the anti-Semitic statements he made in his book, found guilty of fomenting racial hatred and he was fined £75.
Manie Maritz had served under Jan Smuts in the South African War (1899-1902) i.e Boer War 2, Maritz playing a leading role in Smuts’ Commando. At the centre of ‘Bittereinder’ war heroes, one could not find a more vastly differing view than that of Smuts’ and Maritz’. Smuts was extremely wary of the dangers of Nazism and Adolf Hitler, who he accused of being a “false messiah” and whose Nazi symbology of the swastika Smuts called “the crooked cross” in reference to it being a corruption of true Christianity.
On antisemitism, Maritz held a polarising opposite view to Smuts, Jan Smuts was a devout Zionist, Smuts believed in the establishment of Israel as nation state, supported Jewish immigration and refugees (even controversially as Prime Minister he was involved in rescuing 200 Jewish orphans from the ‘Pogroms’ in the Ukraine in 1921, bringing them to safety in South Africa). Smuts supported the ‘Balfour Agreement’ which gave rise to Israel, he was also a personal friend of Chaim Weizmann, the President of the Zionist Organization. Weizmann went on to become the first President of Israel. Smuts is so loved and honoured in Israel that even today a kibbutz in Ramat Yohanan is named in his honour.
It is however difficult to say if Smuts would have interned Maritz again for his Nazi sympathies along with the other strong proponents of Nazism during the 2nd World War as Maritz’ life ended tragically and very early on in the war, he died in a car accident in Pretoria on the 20th December 1940. Probably, had he lived, Smuts and Maritz would have been at extreme loggerheads and Maritz back on the warpath with the Union – and very possibly back in jail.
Die Boerenasie continued after Maritz died under the leadership of S.K. Rudman, from Natal, who was known for his frenetic pronouncements on racial affairs in the columns of various Sunday Press newspapers.
The split in the Afrikaner diaspora – part 3
A mere 3 years after WW2 ended, the National Party found itself in power and there was no doubt that their wartime sympathies and even direct support of Nazi Germany and their National Socialist (Nazi) styled ‘Christian Nationalism’ philosophy was influencing National Party government policy.
Of the 1,000,000-adult voters in the 1948 General Election (the full actual vote count is 1,065,971 voters) – more or less as numbers go – 550,000 voted against Apartheid (for Jan Smuts’ United Party and their more liberal parties – The Labour Party etc.) as opposed to 450,000 who voted in favour of Apartheid (for the Afrikaner Nationalists – the re-united National Party and Afrikaner Party coalition). The ‘coloured’ vote – the Cape Franchise has within it approximately 50,000 voters and these have almost exclusively gone with the United Party and its partners (one of the National Party’s intended aims is to remove their franchise), so we can deduce that about 500,000 whites and 50,000 coloureds have voted against Apartheid.
Coming into government in 1948 was a ‘minority’ party winning on constitutional grounds and not a popular one – the Afrikaner voting diaspora is still split over the issue of Apartheid and the majority of whites (and Coloureds) did not vote for the National Party, they voted for Smuts’ United Party. The National Party by 1948 had honed their political philosophy, Dr. Verwoerd had packaged it into legalise and called it ‘Apartheid’ and it was an intoxicating cocktail of Krugerism, Christian Nationalism, Nazism and Weimar Eugenics.
Like the German National Socialist Party in Germany, the Afrikaner National Party had also come to power as a minority in South Africa with a flawed and unwanted ideology, and like Hitler who could not believe his luck in the July of 1932, Dr. Malan could not believe his luck in May 1948. Like the Nazi party had to do from 1933 to stay in power using repressive legislation, gerrymandering, loaded referendums to reconstruct the constitution, immediate banning of Communism (and liberal resistance), re-educate the masses to the nationalist doctrine, mould the Police and Military in their own image, and then use there powerful military and police tools of state to violently suppress opposition and political dissent under the banner of “national interests” – so too the Afrikaner Nationalists would have to do (and history shows us they would emulate their Nazi heroes perfectly).
By the early 1950’s the South African National Party (NP) government was littered with men, who, prior to the war and during the war where strongly sympathetic to the Nazi cause, and had actually declared themselves as full-blown National Socialists during the war as members of the following organisations, the Ossewabrandwag (OB) and its ‘Stormjaers’ (Storm Troopers) military wing, the Nazi Party of South Africa – the South African Christian National Socialist Movement (SANP) – Grey, Black and Brownshirts and the Nazi world expansionist order in South Africa – The New Order (NO) and the Boernasie Party.
Men like, B.J. Vorster (Broederdond, OB ‘General’ and future NP Prime Minister and President of South Africa), Oswald Pirow (Founder of the NO – NP Cabinet Minister and future National Prosecutor), Hendrik van den Bergh (OB – future NP head of State Security), Johannes von Moltke (leader and founder of the SANP and now NP Minister and the NP leader in SWA), P.O. Sauer (OB ‘General’ – now NP Cabinet Minister), Frans Erasmus (OB ‘General’ – now NP Cabinet Minister), Dr Hendrik Verwoerd (Broederbond and future Prime Minister), C.R. Swart (OB member – future NP State President), P.W. Botha (Broederbond, OB member – and future President of South Africa), Eric Louw (OB – future NP Cabinet Minister), Dr Nico Diedericks (Broederbond and future NP State President), Jaap Marais (OB – now NP Cabinet Minister and future co-founder of the ultra-right Herstigte Nasionale Party), Dr Albert Hertzog (now a NP minister and future co-founder of the ultra-right Herstigte Nasionale Party) and Louis Weichardt (Founder of the SANP and now a NP Minister), Piet Meyer (Broederbond, OB General and future head of SABC) to name just a few.
This was the very philosophy the returning South African servicemen and women had been fighting against, the “war for freedom” against the anti-Judea/Christian “crooked cross” (swastika) philosophy and its false messiah as Smuts had called Germany’s National Socialism doctrine and Adolph Hitler. To the returned South African war veterans, by 1951, this flirtation with Nazim by the National Party was unforgiveable and something had to be done.
In Conclusion
The result would be the formation of the ‘War Veterans Action Committee’ (WVAC), it’s the beginning of the Torch Commando and it’s a coming together of the old ‘Smuts men’ who answered the call to go to war currently in firebrand veterans organisations like the Springbok Legion, sedate veterans organisations like the South African Legion and Memorable Order of Tin Hats (MOTH) and the military veterans who found themselves in mainstream politics in the United Party and the Labour Party after the war.
They are all concerned veterans, the ‘Nazification’ of South African politics is something they dread and fear. With the co-ordination of Vic Clapham Jr., who had served in the SA Tank Corps in WW2 as a Lieutenant (he was also the son of the famous World War 1 veteran who started the Comrades Marathon, also Vic Clapham). Vic Clapham Jr. was an ex-Springbok Legionnaire and now United Party stalwart, these primary two groups of concerned veterans i.e., those from the Springbok Legion and those from the United Party decided to join hands and consolidated in April 1951 to form the ‘War Veteran’s Action Committee – WVAC’ (the WVAC was to evolve into The Torch Commando).
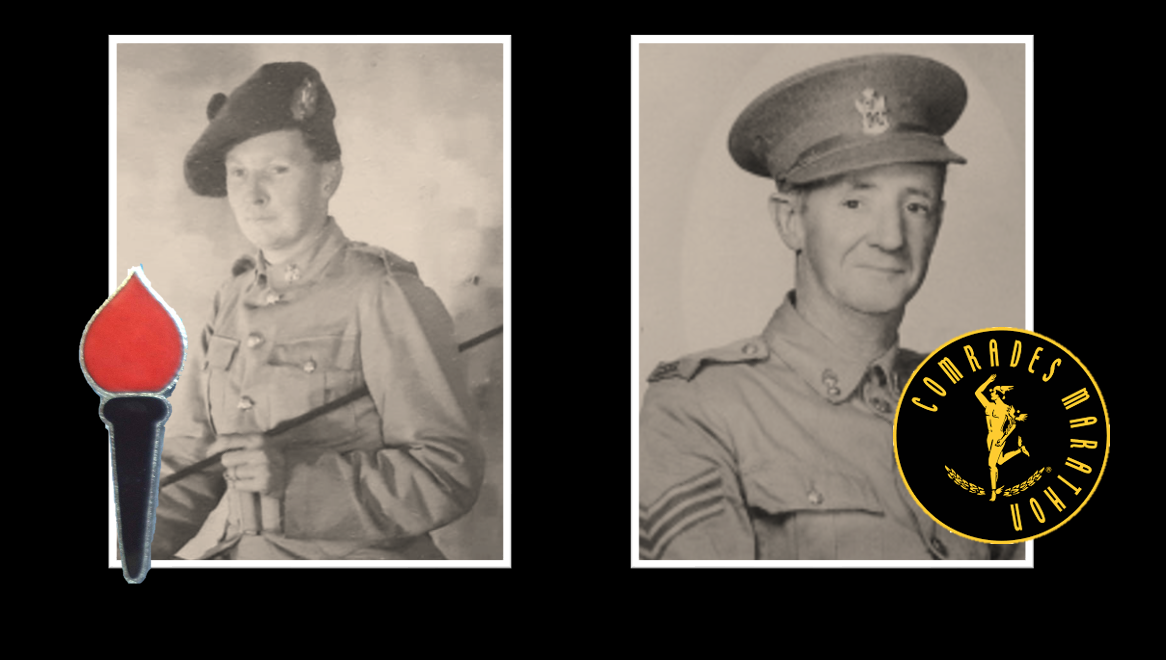
The leadership team of the WVAC was made up of veterans perceived as ‘moderate’ (as opposed to the more firebrand ‘Communists’ in the Springbok Legion) to present a broader appeal across the political spectrum. It’s also a balanced committee between ‘English’ and ‘Afrikaners’ – designed to address the polarisation in Afrikaner politics and bring Afrikaner voters who had served in the military during WW2 back to mainstream and moderate politics.
The leaders appointed were Group Captain Adolph ‘Sailor’ Malan, Major Louis Kane- Berman, Major Ralph Parrott, Major Jacob Pretorius (ex-SAAF) and Major Doreen Dunning – who during the war was the Officer Commanding the South African Women’s Auxiliary Air Force (SAWAAF). Harry Oppenheimer, the patron and financier of the committee, pushed for Sailor Malan (Oppenheimer’s former Private Secretary) to take the role as the leader of the WVAC. Sailor Malan agreed only on the proviso that his internal principles were adhered to. These been the political injustices suffered by people of colour in South Africa and resisting the government’s anti-constitutionalism and their drift towards a local brand of Nazism.
To see what happens next – follow this link:
The Torch Commando – Part 2 The War Veterans’ Action Committee,
thereafter follow this link
The Torch Commando – Part 3 The Steel Commando
Editor’s note
Look out for the next instalments of The Torch Commando – which will cover their rise and fall from 1951 to 1953, the political fall-out they create and what these ‘Torchmen’ do after the Sharpeville Massacre in 1960 – in both armed resistance movements and mainstream political resistance.
As this research field includes the ‘racial constructs’ of Krugerism leading up and including Boer War 2 (1899-1902) and as an ideology and its role in establishing The National Party (and the onset of ‘Apartheid’) from 1914. In addition it also includes the ‘Nazification of the Afrikaner Right’ from 1936 and the political awakening of returning Afrikaner World War 2 veterans from 1950 because of it – the Observation Post often gets comments on both the blog and social media that it is somehow biased to the ‘British’ and ‘Afrikaner bashing’ or ‘Boer bashing’ – it is neither.
What the Observation Post elects to highlight are the actual demographics, the economic history and not the political history peddled for political gain. It elects to highlight the progressive political deeds of Afrikaner military heroes like Dolf de la Rey and Sailor Malan, and all the Afrikaner military men in the Torch Commando whose legacies were buried by the Afrikaner Nationalists for decades and men whose truth must now ‘out’.
Given the current political assault on Afrikanerdom in modern South Africa this is key to understanding Afrikanerdom in its proper historical context – sans the National Party and now the African National Congress’ interpretation of it.
The Torch Commando – next instalment
What follows next is called ‘The War Veterans Action Committee’ – please click through to this Observation Post link which covers this phase in depth.
The Torch Commando – Part 2, The War Veterans’ Action Committee
Written and Researched by Peter Dickens
References:
The Torch Commando & The Politics of White Opposition. South Africa 1951-1953, a Seminar Paper submission to Wits University – 1976 by Michael Fridjhon.
The South African Parliamentary Opposition 1948 – 1953, a Doctorate submission to Natal University – 1989 by William Barry White.
The influence of Second World War military service on prominent White South African veterans in opposition politics 1939 – 1961. A Masters submission to Stellenbosch University – 2021 by Graeme Wesley Plint
The Rise and Fall of The Torch Commando – Politicsweb 2018 by John Kane-Berman
The White Armed Struggle against Apartheid – a Seminar Paper submission to The South African Military History Society – 10th Oct 2019 by Peter Dickens
Not for ourselves – a history of the South African Legion by Arthur Blake
Echoes of David Irving – The Greyshirt Trial of 1934” by David M. Scher.
Dr. Evert Kleynhans – Hitler’s Spies, Secret agents and the intelligence war in South Africa, 1939-1945. Published 2021
Dr. Garth Benneyworth – Sol Plaatje University – Correspondence 16/2/2023
Sailor Malan fights his greatest Battle: Albert Flick 1952.
Sailor Malan – By Oliver Walker 1953.
Lazerson, Whites in the Struggle Against Apartheid.
Pro-Nazi Subversion in South Africa, 1939-1941: By Patrick J. Furlong.
The Rise of the South African Reich: 1964: By Brian Bunting
The White Tribe of Africa: 1981: By David Harrison
National Socialism and Nazism in South Africa: The case of L.T. Weichardt and his Greyshirt movements, 1933-1946: By Werner Bouwer
Ordinary Springboks: White Servicemen and Social Justice in South Africa, 1939-1961. By Neil Roos.
The Final Prize: The Broederbond by Norman Levy: South African History On-line (SAHO) War and the formation of Afrikaner nationalism: By Anne Samson: Great War in Africa Association.
Volk and Fuhrer. By Hans Strydom.
Kaapse rebelle van die Hantam-karoo. By Eben Nel
General Jan Smuts and his First World War in Africa 1914 -1917. By Dr David Katz
Desperate Men: The 1914 Rebellion and the Polities of Poverty. By Sandra Swart
John Bottomly; ‘The Orange Free State and the Rebellion of 1914: the influence of industrialisation, poverty and poor whitism’
André Wessels; Afrikaner (Boer) Rebellion (Union of South Africa) 2018.
The Kaiser and England during the Boer War. By John C.G. Röhl
Chapter XXIII The Boer Rebellion. By Sol Plaatje
The Issac Ochberg Story on-line website by Lionel Slier 07/18/201
Sailor Malan fights his greatest Battle: By Albert Flick 1952.
Kimberley Calls and Recalls. Life Magazine, 25 June 1951.
‘Very Deeply Dyed in Black’ Sir Oswald Mosley and the Resurrection of British Fascism After 1945. By Graham Macklin. NSDAP Office of Colonial Policy.
Ribbontrop’s proposals to South Africa, The Rise and Fall of the Third Reich. By William Shirer, 1974 edition.
Ohm Kruger/Uncle Kruger: The notorious of Nazi Germany’s Anti-British Statements. By Blaine Taylor
Related Work
Kruger, the man the mystery and the movie Oom Kruger, the man, the movie, the myth!
Oswald Pirow South Africa’s Nazi ‘Neuordnung’ and Oswald Pirow
Greyshirts South Africa’s Nazi Party; The ‘Gryshemde’
Boer Revolt Boer War 3 and beyond!
Jopie Fourie What about Jopie?
Ossewabrandwag “Mein Kampf shows the way to greatness for South Africa” – The Ossewabrandwag
Torch Commando – Steel Commando The Steel Commando
Broederbond and media Just whistling an innocent ‘toon’
Truth Legion A search for the … Truth … Legion!
Torch Commando – ‘New’ rare footage of The Torch Commando in action, the first mass protests against Apartheid by WW2 veterans.
Sailor Malan ‘Freedom Fighter’ Sailor Malan; Fighter Ace & Freedom Fighter!
The Torch Commando Series
The Smoking Gun of the White Struggle against Apartheid!
The Observation Post published 5 articles on the The Torch Commando outlining the history of the movement, this was done ahead of the 60th anniversary of the death of Sailor Malan and Yvonne Malan’ commemorative lecture on him “I fear no man”. To easily access all the key links and the respective content here they are in sequence.
In part 1, we outlined the Nazification of the Afrikaner right prior to and during World War 2 and their ascent to power in a shock election win in 1948 as the Afrikaner National Party – creating the groundswell of indignation and protest from the returning war veterans, whose entire raison d’etre for going to war was to get rid of Nazism.
For the in-depth article follow this link: The Nazification of the Afrikaner Right
In part 2, in response to National Party’s plans to amend the constitution to make way for Apartheid legislation, we outlined the political nature of the military veterans’ associations and parties and the formation of the War Veterans Action Committee (WVAC) under the leadership of Battle of Britain hero – Group Captain Sailor Malan in opposition to it. Essentially bringing together firebrand Springbok Legionnaires and the United Party’s military veteran leaders into a moderate and centre-line steering committee with broad popular appeal across the entire veteran voting bloc.
For the in-depth article follow this link: The War Veterans’ Action Committee
In Part 3, we cover the opening salvo of WVAC in a protest in April 1951 at the War Cenotaph in Johannesburg followed by the ratification of four demands at two mass rallies in May 1951. They take these demands to Nationalists in Parliament in a ‘Steel Commando’ convoy converging on Cape Town. Led by Group Captain Sailor Malan and another Afrikaner – Commandant Dolf de la Rey, a South African War (1899-1902) veteran of high standing their purpose is to raise support from Afrikaner and English veterans alike and they converge with a ‘Torchlight’ rally of 60,000 protestors and hand their demands to parliament.
For the in-depth article follow this link: The Steel Commando
In Part 4, in response to the success of The Steel Commando Cape Town protest, we then look at the rise of the Torch Commando as South Africa’s largest and most significant mass protest movement in the early 1950’s pre-dating the ANC’s defiance campaign. Political dynamics within the Torch see its loyalties stretched across the South African opposition politics landscape, the Torch eventually aiding the United Party’s (UP) grassroots campaigning whilst at the same time caught up in Federal breakaway parties and the Natal issue. The introduction of the ‘Swart Bills’ in addition to ‘coloured vote constitutional crisis’ going ahead despite ineffectual protests causes a crisis within the Torch. This and the UP’s losses in by-elections in the lead up to and the 1953 General Election itself spurs the eventual demise of The Torch Commando.
For the in-depth article follow this link: The ‘Rise and Fall’ of the Torch Commando
In Part 5, we conclude the Series on The Torch Commando with ‘The Smoking Gun’. The Smoking Gun traces what the Torch Commando members do after the movement collapses, significantly two political parties spin out the Torch Commando – the Liberal Party of South Africa and the Union Federal Party. The Torch also significantly impacts the United Party and the formation of the breakaway Progressive Party who embark on formal party political resistance to Apartheid and are the precursor of the modern day Democratic Alliance. The Torch’s Communists party members take a leading role in the ANC’s armed wing MK, and the Torch’s liberals spin off the NCL and ARM armed resistance movements from the Liberal Party. We conclude with CODESA.
For an in-depth article follow this link: The Smoking Gun