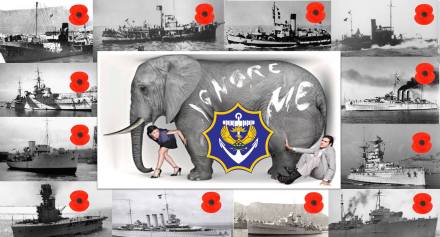
There is a very big elephant in the room when it comes to the South African Naval fraternity’s commemoration and remembrance undertakings. Very often in the veteran fraternity and South African Navy circles there’s a raging argument – why does the South African Navy and SANDF only commemorate the sinking of the SS Mendi during World War 1 when scant attention is given to the sinking of the SAS President Kruger? It’s ‘political’ is the universal chant of disbelief and failed honour, a travesty of the African National Congress’ (ANC) rhetoric of constantly vanquishing the ‘old’ navy and SADF statutory forces.
But they are ignoring a very big ‘elephant’, something that began as a travesty long before the ANC came to power in 1994. It’s an elephant that sits squarely at the door of the old Apartheid Nationalist government and is entirely their doing. When they came to power they began vanquishing anyone who supported ‘Britain’ during World War 2 as some sort of traitor, made worse because the South African Navy was so intrinsically tied to the Royal Navy via the Simonstown agreement that they never really instituted memorials or commemorations to honour them. To the old Afrikaner nationalists, especially when it came to the Navy, this was ‘Britain’s problem’ to remember any sacrifice prior to 1948 or even prior to 1957 for that matter when the naval base at Simonstown was formally handed over by Britain to South Africa.
As a result the scope of our World War 2 sacrifice barely gets a mention in the ‘Mendi vs. President Kruger’ argument. In fact the scope, the size of this sacrifice will come as a surprise to many South Africans – including our Naval veterans fraternity and current Navy personnel.

The ‘elephant’ of sacrifice
To give you an idea of just how BIG this ‘elephant in the room is, lets cover the Honour Roll – it far outstrips any South African Naval sacrifice in the post world war era. Yet the South African Navy and the current government gives absolutely no attention to it, not at all – not one single official South African Navy (SAN) parade or ceremony. Not even a dedicated Naval memorial is given to these men.
We start with South Africa’s own ship’s lost in World War 2, all of them minesweepers. (Note on the honour roll when reading it SANF means the member was part of the ‘South African Naval Forces’ and MPK means ‘Missing Presumed Killed’).
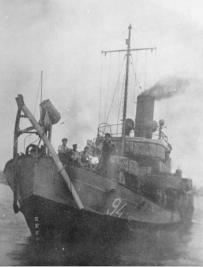
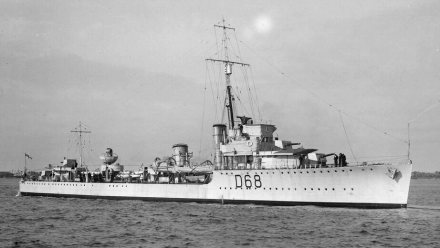
The first South African ship lost in the Mediterranean near Tobruk was the HMSAS Southern Floe with its remarkable tale of a single survivor (see this link for a full story – click here: The HMSAS Southern Floe was the SA Navy’s first ship loss & it carries with it a remarkable tale of survival.).
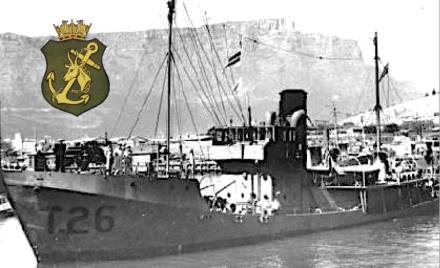
HMSAS Southern Floe
The Honour Roll of sacrifice on the HMSAS Southern Floe as follows:
ANDERS, John, Steward, 69637 (SANF), MPK
BOWER, Robert, Stoker 1c, 69935 (SANF), MPK
BRAND, Leslie A, Able Seaman, 69828 (SANF), MPK
CAULFIELD, Patrick, Steward, 69802 (SANF), MPK
CHANDLER, Charles R D, Cook (S), 69613 (SANF), MPK
CHENOWETH, Richard, Stoker 1c, 67420 (SANF), MPK
FAIRLEY, Alexander E, Sub Lieutenant SANF, MPK
FRIEDLANDER, Cecil A, Able Seaman, 114703 (SANF), MPK
GARDINER, Elliott, Able Seaman, 67260 (SANF), MPK
GREENACRE, John H, Leading Seaman, 69677 (SANF), MPK
HEASMAN, Gratwicke E E, Engine Room Artificer 4c, 69784 (SANF), MPK
HOGG, Roy S, Sub Lieutenant, SANF, MPK
INNES, Ian Mck, Sub Lieutenant, SANF, MPK
LEWIS, John Edward Joseph, :Lieutenant, 70019 (SANF), MPK
MARSH, Reginald H Y, Able Seaman, 69911 (SANF), MPK
MITCHELL, William N, Able Seaman, 69787 (SANF), MPK
NEL, Eloff R, Able Seaman, 69635 (SANF), MPK
NICHOLSON, Douglas O, Able Seaman, 66833 (SANF), MPK
PUGH, John R, Able Seaman, 66877 (SANF), MPK
RYALL, David R, Able Seaman, 69999 (SANF), MPK
SHIMMIN, William, Leading Stoker, 69661 (SANF), MPK
SIENI, Joseph F, Able Seaman, 69788 (SANF), MPK
SNELL, Harold W, Leading Telegraphist, 69827 (SANF), MPK
STANLEY, Gordon J, Able Seaman, 66963 (SANF), MPK
WALTON, Dudley N, Sub Lieutenant, SANF, MPK
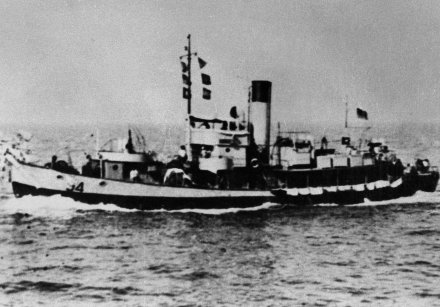
The second ship lost was the HMSAS Parktown, which went down fighting during the Fall of Tobruk in Libya, with the HMSAS Bever fighting at her side out the port (see this link for a full story – click here: The feisty South African minesweeper that went down fighting – HMSAS Parktown).
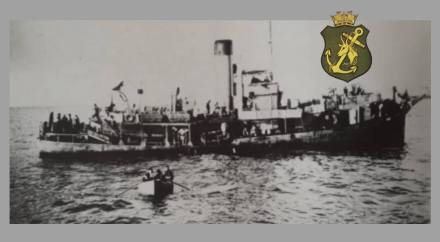
HMSAS Parktown
The Honour Roll of sacrifice when the HMSAS Parktown sank on 21 June 1942 as follows:
BROCKLEHURST, Peter S, Able Seaman, 70457 (SANF), MPK
COOK, John A, Stoker 1c, 70256 (SANF), MPK
JAGGER, Leslie J, Lieutenant SANF, 70016 (SANF), MPK
MCEWAN, William A, Steward, 69686 (SANF), MPK
TREAMER, Arthur P, Petty Officer, 71109 (SANF), MPK
The third ship to be lost was the HMSAS Parktown’s sister ship, the HMSAS Bever which went down later in the war during the liberation of Greece when it struck a mine, and carries with its story a tale of miraculous survivors (see this link for a full story – click here“Under a hail of shells”; Recounting the bravery and loss of HMSAS Bever).
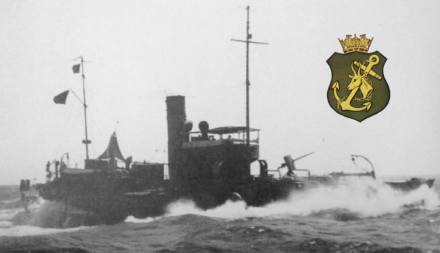
HMSAS Bever
The Honour Roll of sacrifice on 30 November 1944 when the HMSAS Bever sank as follows:
ARMERANTIS, Sideris, Stoker 1c, 282953 V (SANF), MPK
DE PACE, Luigi S, Petty Officer, 66539 V (SANF), MPK
DE REUCK, Leslie B, Telegraphist, 75320 V (SANF), MPK
DREYER, Peter, Leading Cook (S), 585236 V (SANF), MPK
HIGGS, George E, Stoker 1c, 562712 V (SANF), MPK
HUSBAND, Charles A, Stoker 1c, 280098 V (SANF), MPK
KETTLES, John D, Engine Room Artificer 3c, 562458 (SANF), MPK
LAWLOR, Robert J, Act/Chief Motor Mechanic 4c, P/KX 127225, MPK
LINDE, Carl M, Able Seaman, 71194 V (SANF), MPK
LYALL, John D R, Stoker 1c, 562179 V (SANF), MPK
MATTHEWS, William R, Leading Wireman, 562794 V (SANF), killed
PHILLIPSON, Joseph H, Signalman, 181160 V (SANF), MPK
RODDA, Harold J, Stoker 1c, 70451 V (SANF), (served as Harold J Andresen), MPK
SCRIMGEOUR, Quintin, Petty Officer, 69691 (SANF), MPK
TRUSCOTT, E (initial only) W, Able Seaman, 585184 V (SANF), MPK
WHITE, Claude, Leading Seaman, 586420 V (SANF), MPK
WILLIAMS, Desmond, Able Seaman, 70433 V (SANF), killed
The final minesweeper to be lost was the HMSAS Treern, it was tragically lost right at the end of the war with only one single survivor, and it remains the last South African vessel to be lost in action, even to this day, yet hardly anyone is aware of her history (see this link for a full story – click hereThe last South African Navy ship to be lost in action; HMSAS Treern).
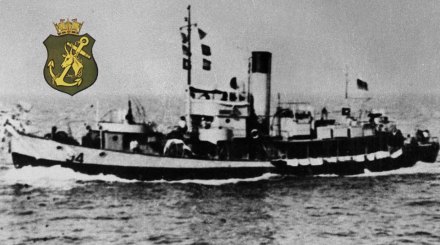
HMSAS Treern
The Honour Roll of sacrifice on the 12 January 1945 when HMSAS Treern sank follows:
ANDERSON, Robert D, Engine Room Artificer 2c, 71067 V (SANF), MPK
BARKER, Ronald E, Sub Lieutenant, SANF, MPK
BLAKE, Robert E, Petty Officer, P 6572 (SANF), MPK
BROWN, Ian H, Able Seaman, 71719 V (SANF), MPK
BYRNE, Patrick, Lieutenant, SANF, MPK
DAVIE, William, Stoker 1c, 70681 V (SANF), MPK
ENGELBEEN, Leslie C, Able Seaman, 562235 V (SANF), MPK
JACOBZ, Frank H, Stoker 1c, 70374 V (SANF), MPK
MATTHEWS, George A, Stoker 1c, 70728 V (SANF), MPK
MCINTYRE, William G, Cook (S), 585360 (SANF), MPK
MCLARTY, William D, Leading Stoker, 562246 V (SANF), MPK
MCLEAN, Godfrey, Able Seaman, 562455 V (SANF), MPK
NILAND, St John E, Able Seaman, 209905 (SANF), MPK
PERRY, Desmond A, Petty Officer, 71211 (SANF), MPK
REID, Kenneth H, Signalman, 562143 V (SANF), MPK
SALCOMBE, Francis R, Stoker 1c, 58589 V (SANF), MPK
STAPELBERG, Willem J, Steward, 562221 V (SANF), MPK
SUTTON, Donald A, Able Seaman, 70426 (SANF), MPK
SUTTON, George A M, Leading Seaman, 586403 V (SANF), MPK
TRAFFORD, William O, Able Seaman, 71222 V (SANF), MPK
VILJOEN, Dennis A, Telegraphist, 70984 V (SANF), MPK
WHITE, Charles W, Petty Officer, 562200 V (SANF), MPK
WULFF, Emil F, Leading Seaman, 562466 V (SANF), MPK
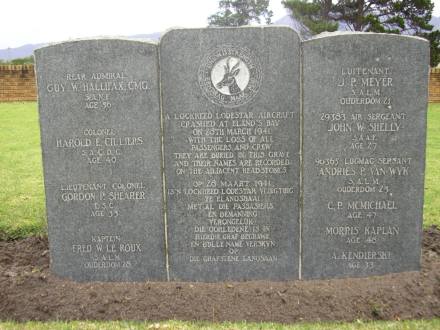
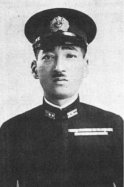
Then there is the loss of Rear Admiral Guy Hallifax, the most senior South African Naval Officer to be lost during World War 2, he counts himself as one of the founders of the modern South African Navy and yet he is hardly remembered at all. (see this link for a full story Guy Hallifax, the most senior African Naval officer lost during WW2). He is recorded here:
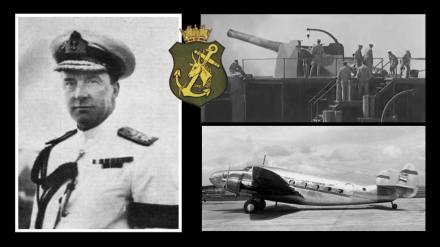
Director of South African Forces
HALLIFAX, Guy W, Rear Admiral, SANF, air accident, killed
Then, consider these South African Naval Force casualties on other South Africa ships and in other South African operations during the war:
LUCAS, E W R, Chief Engineman, 66756 (SANF), died 4 October 1939
NICOLSON, Andrew, Cook, 63827 (SANF), died 13 October 1939
BESTER, A T, Leading Stoker, 6640 (SANF), died on the HMSAS Africana
HUGHES, T J, Stoker, 71383 (SANF), died 10 May 1941
CASSON, William, Able Seaman, 252935 V (SANF), died on the HMSAS Tordonn
HOLT, Albert E, Telegraphist, 69576 (SANF), killed on the HMSAS Southern Maid
VAN NOIE, Norman, Able Seaman, CN/72134 (SANF), died 20 September 1941
ST CLAIR-WHICKER, Willie H, Able Seaman, 67292 (SANF), died on 21 September 1941
SMITH, P, Able Seaman, CN/72263 (SANF), died 7 April 1942
RUITERS, Walter, Stoker, CN/72081 (SANF), died 21 July 1942
MURPHY, J, Able Seaman, CN/72256 (SANF), died 16 August 1942
FROST, M L, Able Seaman, CN/71804 (SANF), died on the HMSAS Receiffe
PETERSON, W J, Able Seaman, CN/72184 (SANF), died 4 September 1942
REHR, Cecil, Able Seaman, 69877 (SANF), died on the HMSAS Roodepoort
CARLELSE, Frederick, Able Seaman, CN/72004 (SANF), died on the HMSAS Soetvlei
PETERS, Norman, Leading Stoker, 66847 (SANF), died 3 January 1943
DELL, Rodney, Able Seaman, 68866 (SANF), killed 24 March 1943
HENDERSON, Alexander P, Chief Engine Room Artificer, 562099 (SANF), killed at Benghazi, Libya
JAMES, H, Steward, CN/72252 (SANF), died 9 May 1943
ORGILL, C B, Able Seaman, CN/71947 (SANF), died 14 May 1943
LA CHARD, Edwin, Lieutenant Commander, SANF, died 20 May 1943
LUCAS, A W, Able Seaman, 152875 (SANF), died 28 May 1943
BATEMAN, T, Chief Engine Room Artificer, 71627 (SANF), died 30 June 1943
ROBBERTS, Kaspar, Petty Officer, P/5285 (SANF), died 1 July 1943
BOSHOFF, Christofel J, Able Seaman, 70339 (SANF), killed on HMSAS Blaauwberg
LENZ, William, Able Seaman, 69544 (SANF), died on 29 August 1943
BESTEL, Emmanuel A N M, Lieutenant, SANF, died on 21 September 1943
HARLE, Paul A, Petty Officer, 71796 (SANF), died on 3 October 1943
STEELE, Ewen, Able Seaman, 71272 V (SANF), killed on HMSAS Southern Sea
BETTS, Robert, Able Seaman, 68900 (SANF), died 18 November 1943
PAGE, Robert, Sub Lieutenant, SANF, died 29 November 1943
MCLEAN, Richard, Stoker, 562567 (SANF), died 29 November 1943
HARRIS, R H, Telegraphist, 330488 (SANF), died 16 December 1943
NICHOLLS, John, Yeoman of Signals, 66824 V (SANF), died 19 December 1943
FLORENCE, John, Stoker, CN/71982 V (SANF), died 18 January 1944
DANIELS, Adam, Stoker, 72034 (SANF), died 28 January 1944
RAVENS, Albert, Able Seaman, CN/72213 V (SANF), died 31 March 1944
DE KLERK, John, Ordinary Seaman, 585868 V (SANF), died 4 May 1944
BOTHA, Herkulas, Cook, 562093 V (SANF), died 8 May 1944
BISSETT, Alexander, Lieutenant, SANF, died 16 June 1944
JENKINS, Edward G, Engine Room Artificer, 66720 V (SANF), died 14 September 1944
KEMP, Thomas, Able Seaman, CN/71015 V (SANF), died 20 September 1944
WATSON, George, Lieutenant, SANF, died 15 October 1944
BOSWELL, Louis F W, Chief Engine Room Artificer, 69756V (SANF), MPK on the 14 November 1944 on the HMSAS Treern
ABRAHAMS, Henry, Able Seaman, CN/719204 (SANF), died 19 November 1944
BERMAN, Nicholas, Ordinary Seaman, 616728V (SANF), died 22 November 1944
DIXON, Robert, Able Seaman, CN/584276 (SANF), died on 11 January 1945
TREISMAN, Gerald, Steward, 584730 V (SANF), died on 10 February 1945
LAMONT, J, Steward, 71402 (SANF), died 24 February 1945
HORNE, P D, Chief Petty Officer, 66661 V (SANF), died 31 March 1945
POVEY, Leonard, Able Seaman, 71182 V (SANF), died 31 March 1945
PFAFF, C E, Petty Officer Stoker, 562721 V (SANF), died 20 April 1945
CHRISTIAN, J W, Able Seaman, CN/71965 (SANF), died 5 May 1945
SIMON, Frederick, Stoker, CN/72046 V (SANF), died 8 May 1945
VAN AARDT, S, Stoker, CN/721490 (SANF), died 22 May 1945
CLARE, Frederick W, Chief Petty Officer, 69599 V (SANF), died 3 June 1945
KEOWN, R J, Able Seaman, CN/71845 (SANF), died 9 June 1945
WELCOME, J J, Able Seaman, CN/72270 (SANF), died 19 July 1945
VAN WYNGAARDT, F A, Able Seaman, 585610 V (SANF), died 21 July 1945
HEARD, George A, Lieutenant, SANF, died on the HMSAS Good Hope
COOK, W, Leading Stoker, 70527 V (SANF), died 8 August 1945
As if the above loss of South African Navy personnel is not large enough and the lack of recognition by the Navy not bad enough, there is an even bigger ‘elephant in the room’, a key factor completely overlooked by the South African Naval fraternity and the Navy itself, and that’s the South African Navy personnel seconded to the British Royal Navy and lost in the Royal Navy’s ships and shore facilities during the Second World War.
South African Naval personnel were lost on the following significant British vessel losses. Consider this very big ‘elephant in the room’ for a minute, because its getting BIGGER. The losses of these Royal Navy ships carries long lists of South African sacrifice.
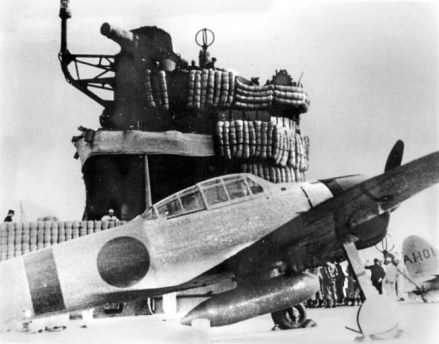
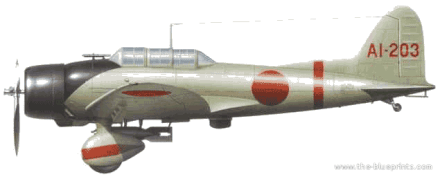
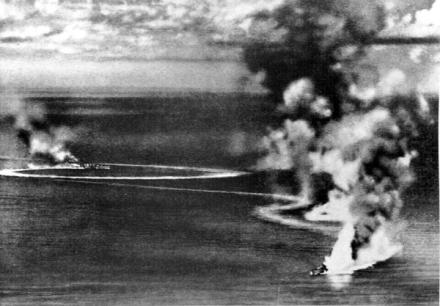
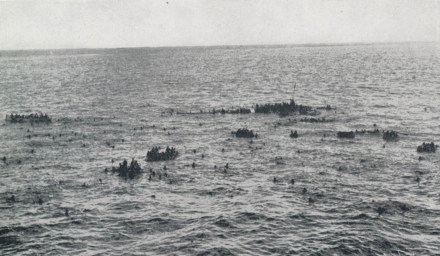
We start with all the ships containing South African Naval Forces personnel sunk during the Imperial Japanese Air Force ‘Easter Sunday’ raid on the British fleet in Colombo (this is regarded as the British ‘Peal Harbour’ just off modern day Sri Lanka) and it’s the darkest hour in terms of losses for South African Navy, yet it is neither recognised as such nor is it remembered. (See this link for more depth: The South African Navy’s ‘darkest hour’ is not recognised and not commemorated)
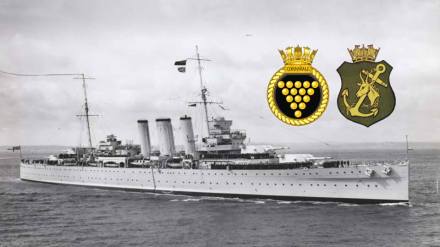
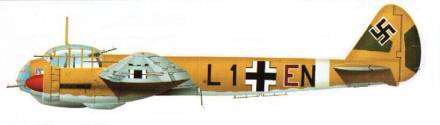
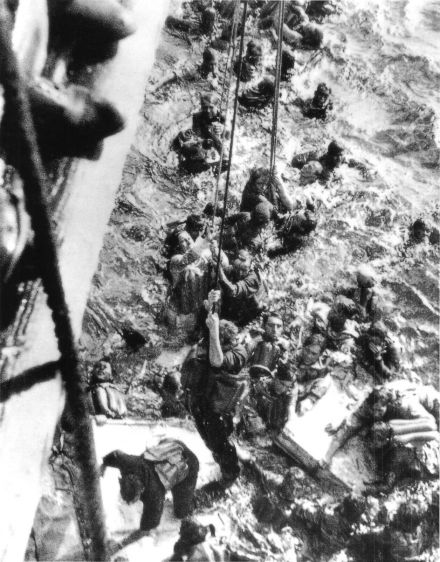
During this attack Japanese airman flying Japanese D3A-1 ‘VAL’ dive bombers flying from the Japanese Imperial fleet, dropped their bombs on the HMS Dorsetshire, who had a very large contingent of South African Naval personnel, she simply blew up when a detonated an ammunition magazine and contributed to her rapid sinking. Click here for a full Observation Post report on her sinking: “They machine gunned us in the water”; Recounting South African Sacrifice on the HMS Dorsetshire
HMS Dorsetshire
The Honour Roll of South African Naval sacrifice on the 5 April 1942 when HMS Dorsetshire sank follows:
BELL, Douglas S, Ty/Act/Leading Stoker, 67243 (SANF), MPK
BRUCE, Alexander M, Stoker 2c, 67907 (SANF), MPK
CONCANON, Harold Bernard, Surgeon Lieutenant (Doctor)
EVENPOEL, Albert, Stoker 2c, 67909 (SANF), MPK
GEFFEN, Sender, Stoker 1c, 68035 (SANF), MPK
HOWE, Horace G, Ordinary Seaman RNVR, 68680 (SANF), MPK
KENDRICK, George, Stoker 2c, 67910 (SANF), MPK
MCINTYRE, Norman G, Able Seaman, 67446 (SANF), MPK
MCLELLAN, Robert, Ordinary Telegraphist, 67897 (SANF), MPK
MILNE, Lawrence Victor, Able Seaman
MORROW, Douglas E, Able Seaman, 67989 (SANF), MPK
ORTON, Charles P, Able Seaman, 68009 (SANF), MPK
REDMAN, Roland A, Leading Stoker, 67406 (SANF), MPK
SCOTT, William J, Able Seaman, 68007 (SANF), MPK
SEVEL, Harry, Stoker 1c, 68100 (SANF), MPK
VAN ZYL, David Isak Stephanus, Stoker 1st Class
WILLETT, Amos A S, Stoker 1c, 67240 (SANF), MPK
WILLIAMSON, Walter N, Able Seaman, 67803 (SANF), MPK
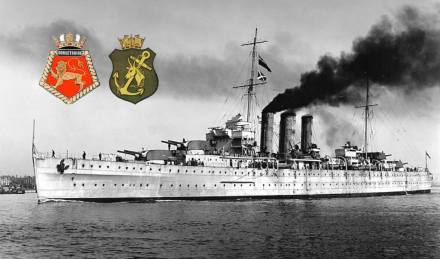
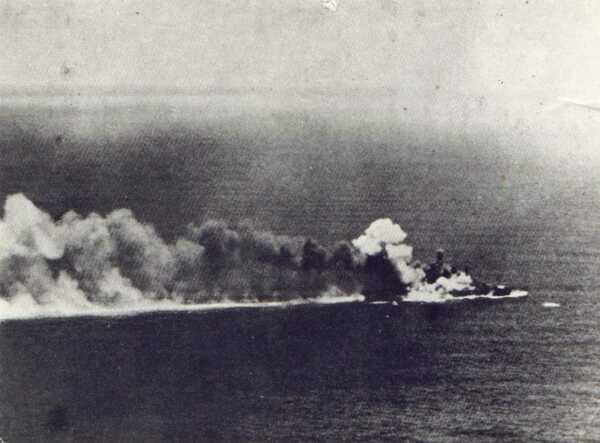
The second British ship in this particular Japanese air attack, on the same day and within range of one another was the HMS Cornwall, also stuffed full of South African Naval personnel seconded to her. The HMS Cornwall was hit eight times by the same dive bombers who sank the Dorsetshire and sank bow first in about ten minutes.
HMS Cornwall
The Honour Roll of South African Naval sacrifice on the 5 April 1942 when HMS Cornwall sank follows:
BESWETHERICK, Hedley C, Ordinary Seaman RNVR, 86671 (SANF), MPK
BOTES, John S, Stoker 2c RNVR, 68924 (SANF), MPK
COMMERFORD, Noel P, Able Seaman RNVR, 66493 (SANF), MPK
CRAWFORD, Cecil E, Act/Engine Room Artificer 4c RNVR, 67922 (SANF), MPK
DU PREEZ, Charles P H, Able Seaman, 68175 (SANF), MPK
DUTTON, Charles C, Stoker 2c RNVR, 68949 (SANF), MPK
HANSLO, Raymond F, Able Seaman RNVR, 68295 (SANF), MPK
KEITH, Kenneth I B, Able Seaman RNVR, 66742 (SANF), MPK
KENYON, Graeme A B, Able Seaman RNVR, 68002 (SANF), MPK
KIRSTEN, Monty G W, Able Seaman RNVR, 68917 (SANF), MPK
LAW, Edward, Act/Engine Room Artificer 4c RNVR, 66760 (SANF), MPK
MCDAVID, William K, Stoker 2c RNVR, 69138 (SANF), MPK
MITCHELL, William A, Stoker 1c RNVR, 68796 (SANF), MPK
PALMER, Walter A, Able Seaman RNVR, 68344 (SANF), (rescued, aboard HMS Enterprise), Died of Wounds
SPENCE, Noel W, Ordinary Seaman RNVR, 68732 (SANF), MPK
SQUIRES, John E, Ordinary Seaman RNVR, 68728 (SANF), MPK
STEPHEN, Eric B, Ordinary Seaman RNVR, 68861 (SANF), MPK
SWANN, Lawrence T, Stoker 1c RNVR, 68710 (SANF), MPK
THORPE, Maurice, Stoker 2c RNVR, 69140 (SANF), MPK
VERSFELD, Peter H S, Able Seaman RNVR, 68859 (SANF), MPK
VINK, Benjamin F, Ordinary Seaman RNVR, 68860 (SANF), MPK
WILLSON, Gerald F, Stoker 2c RNVR, 69006 (SANF), MPK
WRIGHT, Thomas H, Able Seaman RNVR, 68039 (SANF), MPK
In earlier incidents on HMS Cornwall two South Africans lost their lives they are also remembered here:
AINSLIE, Roy, Petty Officer, 66382 (SANF), died on 5 September 1940
HAWKINS, Reginald D, Able Seaman, 66700 (SANF), died of illness 4 March 1942
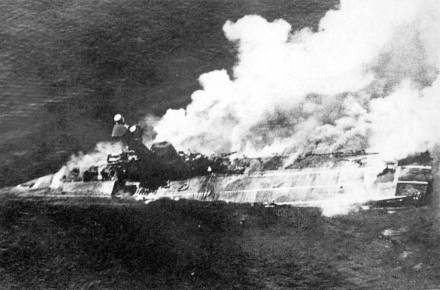
The Easter Raid later offered a great prize for the Japanese, an aircraft carrier, the HMS Hermes, this massive aircraft carrier was sunk a week later by the Japanese near Colombo (now Sri Lanka), the pride of the British Pacific fleet became an inferno after it was dived bombed a number of times. It too had a long association with South Africa and a very big contingent of South African Naval Personnel. (see this link for a in-depth article on the South African Navy sacrifice abound her “Dante’s Inferno”; Recounting South African sacrifice on the HMS Hermes).
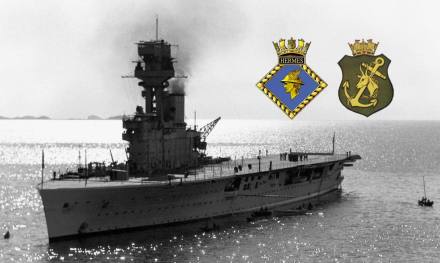
HMS Hermes
The Honour Roll of South African Naval sacrifice on the 9 April 1942 when HMS Hermes sank follows:
BRIGGS, Anthony Herbert Lindsay Sub-Lieutenant (Engineer) Royal Navy (South African national), MPK
BRYSON, Neil W, Ordinary Telegraphist, 69147 (SANF), MPK
BURNIE, Ian A, Able Seaman, 67786 (SANF), MPK
CLAYTON, Frederick H, Act/Engine Room Artificer 4c, 68102 (SANF), MPK
DE CASTRO, Alfred T, Stoker 1c, 67914 (SANF), MPK
KEENEY, Frederick W, Able Seaman, 67748 (SANF), MPK
KEYTEL, Roy, Able Seaman, 67296 (SANF), MPK
KIMBLE, Dennis C, Act/Engine Room Artificer 4c, 67600 (SANF), MPK
KRAUSE, Frederick E, Able Seaman, 68321 (SANF), MPK
RAPHAEL, Philip R, Able Seaman, 67841 (SANF), MPK
RICHARDSON, Ronald P, Able Seaman, 67494 (SANF), MPK
RILEY. Harry Air Mechanic 2nd Class, Fleet Air Arm, Royal Navy (South African national), MPK
TOMS, Ivanhoe S, Able Seaman, 67709 (SANF), MPK
VICKERS, Colin P, Able Seaman, 68296 (SANF), MPK
VORSTER, Jack P, Able Seaman, 67755 (SANF), MPK
WHITE, Edward G, Stoker, 68026 (SANF), MPK
WIBLIN, Eric R, Able Seaman, 67717 (SANF), MPK
YATES, Philip R, Supply Assistant, 67570 (SANF), MPK
Included is also a South African who served with the Royal Navy’s Fleet Air Arm on the HMS Hermes.
RILEY, H, Air Mechanic, Fleet Air Arm, HMS Hermes, died 9 April 1942
Next on the list of ships lost during the Easter Raid which contained a high number of South African Naval personnel on board was HMS Hollyhock, sunk on the same day as the HMS Hermes by the same Japanese Dive Bombers on the 9th of April. Click here for a full Observation Post report on her sinking “She immediately blew up”; Recounting South African sacrifice on the HMS Hollyhock

HMS Hollyhock
The Honour Roll of South African Naval sacrifice on the 9 April 1942 when HMS Hollyhock sank follows:
ANDERSON, Henry G, Able Seaman, 67501 (SANF), MPK
BASTON, Douglas T, Act/Engine Room Artificer 4c, 68600 (SANF), MPK
BUITENDACH, James M, Stoker 2c, 69223 (SANF), MPK
JUBY, Kenneth J, Ordinary Seaman, 69211 (SANF), MPK
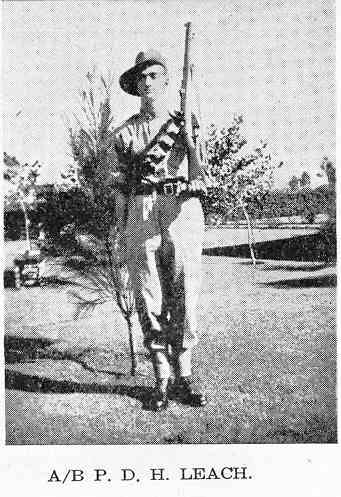
LEACH, Peter A D H, Stoker 2c, 69225 (SANF), MPK
It was not just the Japanese Imperial Fleet, the German Navy also took its toll on the Royal Navy, and once again we find South African Naval Personnel seconded to serve on these famous ships sunk during the war.
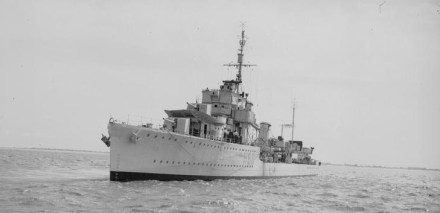
We start with the HMS Gloucester lost on the 22 May 1941 during action off Crete. They HMS Gloucester, along with HMS Greyhound and HMS Fiji were attacked by German “Stuka” Dive Bombers. The Greyhound was sunk and Gloucester was attacked and sunk while they attempted to rescue Greyhounds survivors in the water (see this link for a full story – click here A “grievous error”; Recounting South African Sacrifice on the HMS Gloucester).

HMS Gloucester
The Honour Roll of South African Naval sacrifice on the 22 May 1941 when HMS Gloucester sank follows:
ANGEL, Walter J H, Able Seaman, 67351 (SANF), MPK
AUSTIN-SMITH, John R, Ordinary Seaman, 67336 (SANF), MPK
BAGSHAW-SMITH, Philip R, Ordinary Seaman, 67337 (SANF), MPK
BAGSHAWE-SMITH, Sydney Q, Able Seaman, 68454 (SANF), MPK
BARBER, Edgar F, Able Seaman, 67302 (SANF), MPK
BRUCE, John, Able Seaman, 67355 (SANF), MPK
CARTER, Frederick G, Able Seaman, 67345 (SANF), MPK
CHILTON, Ronald H D, Ordinary Seaman, 67335 (SANF), MPK
EDWARDS, Ronald E, Ordinary Seaman, 67384 (SANF), MPK
ELLIOT, Edward R, Leading Seaman, 66584 (SANF), MPK
GERAGHTY, Herbert C, Able Seaman, 67338 (SANF), MPK
GROGAN, Graham B, Able Seaman, 67343 (SANF), MPK
JAMES, Victor F, Ordinary Seaman, 67303 (SANF), MPK
JENSEN, Niels P, Able Seaman, 67347 (SANF), MPK
MCCARTHY, Henry F, Ordinary Seaman, 67223 (SANF), MPK
MOORE, Albert, Able Seaman, 67416 (SANF), MPK
SLATER, Bryan M, Able Seaman, 67358 (SANF), MPK
SMITH, Matthew S, Able Seaman, 67359 (SANF), MPK
SONDERUP, Arthur W, Able Seaman, 67356 (SANF), MPK
STADLANDER, Rowland C, Stoker 1c, 67400 (SANF), MPK
STOKOE, Cyril A M, Act/Leading Seaman, 67264 V (SANF), MPK
SYMONS, Maurice M, Able Seaman, 68245 (SANF), MPK
THOMPSON, Walter E H, Able Seaman, 67360 (SANF), MPK
VAN DYK, Cecil H, Able Seaman, 67404 (SANF), MPK
WEBBER, Reginald, Able Seaman, 67361 (SANF), MPK
WILLIAMS, Dastrey S, Leading Seaman, 67047 (SANF), MPK
WRIGHT, Gerald V, Act/Ordnance Artificer 4, 67375 (SANF), MPK
The HMS Gloucester was involved in earlier combat on the 8 July 1940 when it was bombed, the South African casualties are remembered here:
ALLISON, Oswald H, Able Seaman RNVR, 67349 (SANF), killed
NOWLAN, Francis C, Able Seaman RNVR, 67409 (SANF), DOW
Tragedy struck the South African Naval Forces seconded to the HMS Barham when she was torpedoed by the German submarine U-331, Three torpedoes hit HMS Barham’s port side causing it to list heavily and spread fire towards the ammunition storages. Only 2 and a half minutes passed from the torpedo impact until the ship rolled onto its side and capsized as the aft magazine exploded in an almighty explosion (see this link for a full story – click here “She blew sky high”; Recounting South African sacrifice on the HMS Barham!)
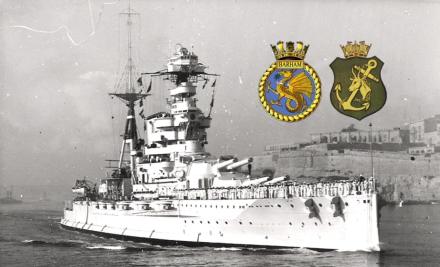
HMS Barham
The Honour Roll of South African Naval sacrifice on the 25 November 1941 when HMS Barham sank follows:
BAKER, Dennis E W, Ordinary Seaman, 68617 (SANF)
GLENN, Paul V, Ordinary Seaman, 68906 (SANF)
HAYES, Richard T, Ordinary Seaman, 68499 (SANF)
MORRIS, Cyril D, Ordinary Seaman, 68932 (SANF)
UNSWORTH, Owen P (also known as R K Jevon), Ordinary Seaman, 69089 (SANF)
WHYMARK, Vivian G, Ordinary Seaman, 69024 (SANF)
The Italians also took a toll of British shipping, again with ships with a South African contingent and this is brought to home on the 19 December 1941, when the HMS Neptune, struck four mines, part of a newly laid Italian minefield. Neptune quickly capsized (see this link for a full story – click here South African sacrifice on the HMS Neptune).
HMS Neptune
The Honour Roll of South African Naval sacrifice on the 19 December 1941 when HMS Neptune sank follows:
ADAMS, Thomas A, Able Seaman, 67953 (SANF), MPK
CALDER, Frank T, Ordinary Seaman, 67971 (SANF), MPK
CAMPBELL, Roy M, Able Seaman, 67318 (SANF), MPK
DIXON, Serfas, Able Seaman, 67743 (SANF), MPK
FEW, Jim, Able Seaman, 67744 (SANF), MPK
HAINES, Eric G, Able Seaman, 67697 (SANF), MPK
HOOK, Aubrey C, Able Seaman, 67862 (SANF), MPK
HOWARD, Harold D, Signalman, 67289 (SANF), MPK
HUBBARD, Wallace S, Able Seaman, 67960 (SANF), MPK
KEMACK, Brian N, Signalman, 67883 (SANF), MPK
MERRYWEATHER, John, Able Seaman, 67952 (SANF), MPK
MEYRICK, Walter, Ordinary Signalman, 68155 (SANF), MPK
MORRIS, Rodney, Ordinary Signalman, 68596 (SANF), MPK
RANKIN, Cecil R, Signalman, 67879 (SANF), MPK
THORP, Edward C, Signalman, 67852 (SANF), MPK
THORPE, Francis D, Able Seaman, 67462 (SANF), MPK
WILD, Ernest A, Able Seaman, 67929 (SANF), MPK
Other South Africans who had enlisted into the Royal Navy were also lost on HMS Neptune, these include (and by no means is this list definitive) the following:
OOSTERBERG, Leslie W, Stoker 1c, D/KX 96383, MPK
TOWNSEND, Henry C, Stoker 1c, D/KX 95146, MPK
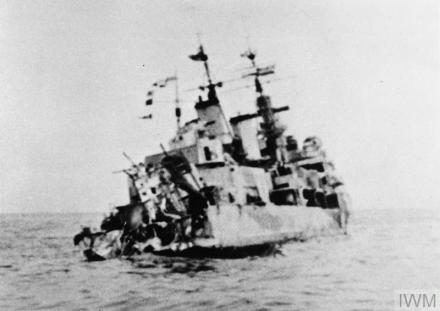
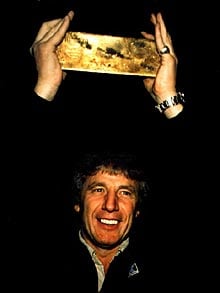
On the 30 April 1942, on her return leg from Murmansk, the HMS Edinburgh was escorting Convoy QP 11 when a German Submarine U-456 torpedoed into her. The Edinburgh was carrying gold in payment by the Soviets for war equipment and she is the subject of a remarkable gold salvage after the war. Again, she had a compliment of South African Naval Personnel (see this link for a full story – click here “Gold may shine; but it has no true light” South African sacrifice on the HMS Edinburgh).
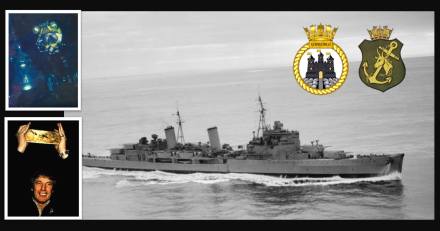
HMS Edinburgh
The Honour Roll of South African Naval sacrifice on the 30 April 1942 when HMS Edinburgh sank follows:
DRUMMOND, Valentine W, Able Seaman, 68043 (South African Naval Forces), Missing Presumed Killed
VAN DORDRECHT, William H, Able Seaman, 67851 (South African Naval Forces), Missing Presumed Killed
On the 12 November 1942, the HMS Hecla was torpedoed by a German submarine, U-515 hitting her in the engine room. The U-boat then hit the ship with three coups de grâce sinking the vessel west of Gibraltar. Again there is South African Naval casualty list (see this link for a full story – click here “Every man for himself” … South African sacrifice and the sinking of HMS Hecla).
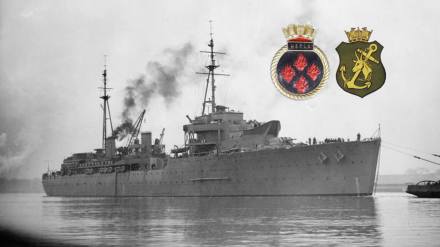
HMS Helca
The Honour Roll of South African Naval sacrifice on the 12 November1942 when HMS Helca sank follows:
BENNETT, John F, Act/Engine Room Artificer 4c, 330351 (SANF), MPK
LLOYD, George H, Act/Engine Room Artificer 4c, 330353 (SANF), MPK
PEERS, Charles V, Able Seaman, 562653 (SANF), MPK
SMITH, Ian R, Electrical Artificer 4c, 68478 (SANF), MPK
And there’s more …. many South Africans served on a variety of Royal Navy ships and many were lost, here’s an indication which just captures South African Naval Forces personnel alone, let alone those who volunteered directly for the Royal Navy, the Honour Roll follows:
ANDERSON, Richard W N, Able Seaman, 86082 (SANF), killed 21 May 1941 on HMS Syvern
WESTON, Grant E, Ordinary Seaman RNVR, 68498 (SANF), killed 27 August 1941 on HMS Phoebe
RASMUSSEN, Victor J S, Leading Telegraphist, 66920 (SANF), MPK 24 November 1941 on HMS Dunedin
ADAMSON, William D, Ordinary Seaman RNVR, 69001 (SANF), MPK 10 December 1941 on HMS Repulse
BECKER, Stanley H, Able Seaman, 67474 (SANF), road accident, killed 5 January 1942 on HMS Carnarvon Castle
DRURY, Frederick, Ordinary Seaman, 68315 (SANF), MPK 29 January 1942 on HMS Sotra
SCOTT, Clifford, Ordinary Telegraphist, 66973 (SANF), MPK 26 March 1942 on HMS Jaguar
BUCHANAN, Alexander, Able Seaman, 67934 (SANF), died 20 April 1942 on HMS Birmingham
COMMERFORD, Terence, Ordinary Seaman, 330258 (SANF), died 21 June 1942 on HMS Express
PRICE, David, Able Seaman RNVR, P/68529 (SANF), MP 6 July 1942 on HMS Niger
TROUT, A (initial only) N, Able Seaman, CN/72133 (SANF), died 4 August 1942 on HMS Stork
JOHNSTONE, Henry N, Lieutenant Commander (E), SANF, 66727, died 18 August 1942 on HMS Birmingham
BAWDEN, Wilfred R, Stoker 2c RNVR, 330425 (SANF), DOWS 16 September 1942 HMS Orion
NIGHTSCALES, Norman, Writer, 68148 (SANF), MPK 30 December 1942 on HMS Fidelity
GITTINS, Victor L, Ordinary Seaman, 69325 (SANF), died 27 January 1943 on HMS Assegai (training base)
PLATT, Ronald M, Petty Officer, 67160 V (SANF), accident, killed 26 February 1943 on HMS President III (shore establishment)
CROSSLEY, Alfred H, Sub Lieutenant, SANF, MPK 7 March 194 on HMS Saunders
DE KOCK, Victor P De C, Ty/Lieutenant, SANF, MPK7 March 194 on HMS Saunders
LOUW, Joseph, Stoker, CN 72175 (SANF), illness, died 2 December 1943 on HMS Stork
ATKIN, William B, Lieutenant SANF, illness, died 26 January 1944 on HMS Northern Duke
SHIELDS, Eric E M, Lieutenant, SANF, died 12 April 1944 on HMS Pembroke IV
HOWDEN, Russell K, Ty/Sub Lieutenant, SANF, MPK 4 January 1945 HMS ML 1163, Harbour Defence Motor Launch
CLARKE, Reginald E, Ty/Lieutenant Commander, SANF, air crash, MPK 24 July 1945 on HMS Adamant
LIDDLE, John, Lieutenant, SANF, MPK 8 August 1945 on HMS Barbrake
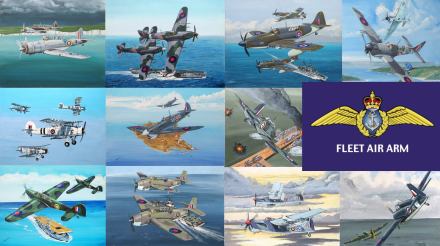
Then let’s consider the South African Naval Personnel serving in the Royal Navy’s Fleet Air Arm (the Royal Navy’s own Air Force separate to the Royal Air Force), and here the following South Africans are on the FAA Honour Roll (excluding Air Mechanic Riley from the Fleet Air Arm, recorded on the HMS Hermes loss). For a full story of these South Africans lost in the FAA see this link – click here South African sacrifice in the Royal Navy’s Fleet Air Arm
BOSTOCK, R S, Lieutenant, Royal Navy Fleet Air Arm 800 Squadron, HMS Ark Royal, died 13 June 1940
BROKENSHA, G W, Lieutenant, Royal Navy Fleet Air Arm 888 Squadron, HMS Formidable, died 11 August 1942
CHRISTELIS, C, Sub/Lieutenant, Royal Navy Reserve FAA 803 Squadron, HMS Formidable, died 1 August 1942
JUDD, F E C, Lieutenant Cmdr, Royal Navy Fleet Air Arm 880 Squadron, HMS Indomitable, died 12 August 1942
LA GRANGE, Antony M, Sub Lieutenant (A), SANF, Fleet Air Arm (Royal Navy)1772 Sqn HMS Indefatigable, air operations, MPK 28 July 1945
MACWHIRTER, Cecil J, Ty/Sub Lieutenant (A), Fleet Air Arm (Royal Navy) 851 Squadron HMS Shah, air crash, SANF, MPK 14 April 1944
O’BRYEN, W S, Sub/Lt Royal Navy Fleet Air Arm 762 Squadron, HMS Heron, died 26 November 1942
WAKE, Vivian H, Ty/Lieutenant (A), FAA Fleet Air Arm (Royal Navy) 815 Squadron HMS Landrail, air crash, SANF, MPK 28 March 1945
Finally there are South African Naval personnel found in the Merchant Navy, to which they were also seconded and again the Honour Roll lists:
SS Tunisia, ship loss
ADAMS, Douglas E H, Act/Able Seaman RNVR, 66378 (SANF), (President III, O/P), MPK
ST La Carriere, ship loss
DORE, Frank B, Act/Able Seaman RNVR, 67218 (SANF), (President III, O/P), MPK
SS Laconia, ship loss
ROSS, Robert, Stoker 2c, 69119 (SANF), (Victory, O/P), DOWS
SS Llandilo, ship loss
CRAGG, Ronald F, Able Seaman (DEMS), 66488 (SANF), (President III, O/P), MPK
SS Ceramic, ship loss
MOSCOS, John G, Leading Writer, 66786 (SANF), (SANF, O/P), MPK
SS Empress of Canada, ship loss
COCHRANE, Joseph, Engine Room Artificer 3c, P 68947 (SANF), (Pembroke, O/P), MPK
SS Empire Lake, ship loss
FLINT, John M, Act/Able Seaman (DEMS), P 562749 (SANF), (President III, O/P), MPK
More names…
![]() Now consider this, we have not even begun to scratch properly at the honour roll, this above list is still highly inaccurate with many names missing. We have no real idea of the thousands of South Africas who volunteered and died whilst serving in The Royal Navy Reserve and the Royal Navy itself, in fact we’ve barely got our heads around it. Fortunately a handful of South Africans are working on it, almost daily, but it’s a mammoth task as these names are found on Royal Navy honour rolls and it’s a matter of investigating the birthplace of each and every British casualty. The records of South African volunteers joining the Royal Navy lost to time really.
Now consider this, we have not even begun to scratch properly at the honour roll, this above list is still highly inaccurate with many names missing. We have no real idea of the thousands of South Africas who volunteered and died whilst serving in The Royal Navy Reserve and the Royal Navy itself, in fact we’ve barely got our heads around it. Fortunately a handful of South Africans are working on it, almost daily, but it’s a mammoth task as these names are found on Royal Navy honour rolls and it’s a matter of investigating the birthplace of each and every British casualty. The records of South African volunteers joining the Royal Navy lost to time really.
In conclusion
The only other ship the South African Navy has lost since the HMSAS Treern at the end of the Second World War in a more modern epoch was the SAS President Kruger, and unlike the Treern, whose loss was in combat, the Kruger’s loss was due to a tragic accident at sea (see “Out of the Storm came Courage” … the tragedy of the PK).
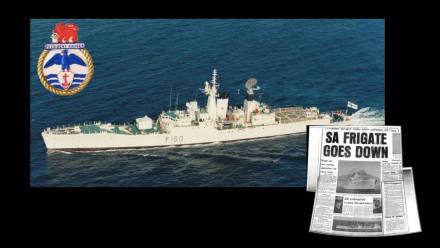
These combat losses were one thing, however the same erasing of history is currently happening with the accidental loss in more recent times of SAS President Kruger (the PK), the ‘old’ SADF were very embarrassed by the loss (in effect by tragedy and circumstance we sank our own flagship) and the SADF never really got around to undertake a National Parade to commemorate and remember it. Also in comparison to the bigger picture the loss of 16 South African Navy personnel on the PK is very small indeed, however no less important – and here’s the inconvenient truth, they were ‘swept under the rug’ by the old SADF and remain conveniently swept under the rug by the new SANDF.
On the World War 2 losses, the incoming ANC government from 1994 have fared no better than the old Nat government – they have merely lumped all the wartime combat losses of the HMSAS Southern Floe, the HMSAS Parktown, the HMSAS Bever and the HMSAS Treern into a ‘colonial’ issue not of their history or time, and as for the SAS President Kruger that was part of the ‘Apartheid’ forces in their minds, and as such to be vanquished.
The net result is the South African Navy simply does not have any national parades to commemorate or recognise any of its major losses at sea. The South African Army at least has the Delville Wood Parade (the South African Army’s biggest singular combat loss, a WW1 incident), the South African Air Force has the Alpine 44 Memorial Parade (the SAAF’s biggest tragedy, a WW2 incident), the South African Navy …. nothing!
Instead the South African Navy (SAN) focuses on the loss of the Mendi as a SAN Maritime loss, even though the Mendi was under commission to the Royal Navy, and rather inconveniently the South Africa Navy did not really exist in World War 1, it was only really created just before World War 2. Then again, the SS Mendi was also carrying South African Army troops in the form of the South African Labour Corps, not South African Navy personnel (the SAN didn’t exist in any event).

The Mendi is a both a wartime and political tragedy, The silence and subsequence recognition is a national healing one (see Let us die like brothers … the silent voices of the SS Mendi finally heard ). As such it’s now a National Memorial Parade, part of ‘Armed Forces Day’ and one for the entire SANDF to commemorate and remember – and rightly so. But is it a SA Navy specific commemoration – not really – no.
In all this the Navy still dogmatically refuses to host its own National Commemoration to its own naval actions and tragedies, it’s just too politically inconvenient, and wouldn’t it be nice if South African Navy can see past it and see its Naval sacrifice on its own ships, and those of SAN personnel on Royal Navy ships and finally just institute an ‘All at Sea’ Naval Memorial Parade in Remembrance or erect a full Naval memorial (similar to the erected by the Royal Navy in Portsmouth)?
Very small ‘All at Sea’ commemorations are done by the odd South Africa Legion branch and odd MOTH Shellhole, on a very local basis – driven by a tiny group of individuals. Nobel in their undertakings no doubt, but these remain very small private initiatives attended by only a handful and is it really enough?
As demonstrated, The South African Navy’s honour roll for World War 2 is a staggering and very long list – it’s an elephant, a very big one at that and it’s a growing elephant, even to this day. It’s well time we seriously look at ourselves, examine our values as to what constitutes sacrifice for the greater good of man and acknowledge it properly.
Written and Researched by Peter Dickens. The honour roll extracted from ‘Casualty Lists of the Royal Navy and Dominion Navies, World War 2’ by Don Kindell. Additional names gleaned from honour rolls published by Col Graham Du Toit (retired).
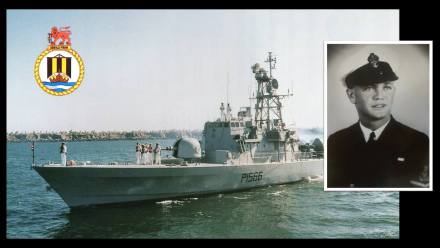

 Chief Petty Officer (Stoker) René Sethren CGM has a story which is simply jaw dropping to say the least. René Sethren left school after Std 7, a keen boxer and highly astute he joined South Africa’s fledgling navy as a stoker in 1940, rising in rank eventually to Chief Petty Officer (Stoker).
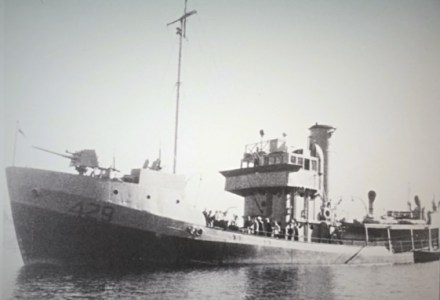
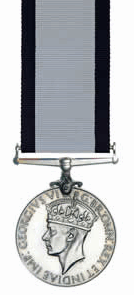 For his actions he is awarded the Conspicuous Gallantry Medal – the highest award won by a South African rating in World War 2, the only South African to be awarded this medal and one of only 243 men who had been awarded the medal prior to that day since its introduction in 1855.
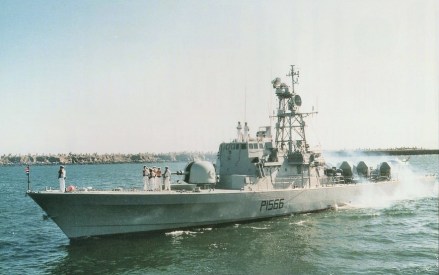

 MACWHIRTER, Cecil J, Ty/Sub Lieutenant (A), Fleet Air Arm (Royal Navy) 851 Squadron HMS Shah, air crash, SANF, MPK 14 April 1944
 WAKE, Vivian H, Ty/Lieutenant (A), FAA Fleet Air Arm (Royal Navy) 815 Squadron HMS Landrail, air crash, SANF, MPK 28 March 1945
 The best way to summarise the Fleet Air Arm, its commitment and sacrifice is in fact found in the forward of Derrick Dickens’ Stringbag to Shar’ written by none other than the Admiral of the Fleet, HRH Prince Philip, Duke of Edinburgh K.G., K.T., O.M., G.B.E.
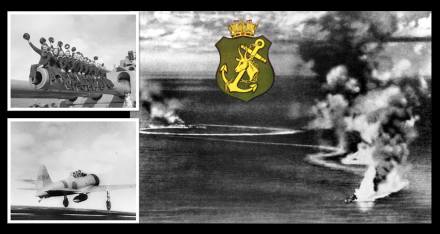
 Here’s a question for many, in what action did the South African Navy (SAN) experience its greatest single loss of personnel, the largest sacrifice of South African life in a single sea battle – in essence when and what was the South African Navy’s ‘darkest hour’?
 Most (actually the majority) of SAN officers and veterans would say it was the loss of the SAS President Kruger (16 souls) but that would also be very wrong, both in terms of scale and action, the SAS President Kruger loss was also an accident at sea and not a combat action.
 These are the HMSAS Southern Floe (24 souls) or the HMSAS Parktown (5 souls), or the HMSAS Bever (17 souls) or the HMSAS Treen (23 souls) – getting warm but that too would be wrong, as these did not happen over a defined period of the war that would warrant a ‘darkest hour’ in Churchill’s definition of the phrase (Churchill coined the term).


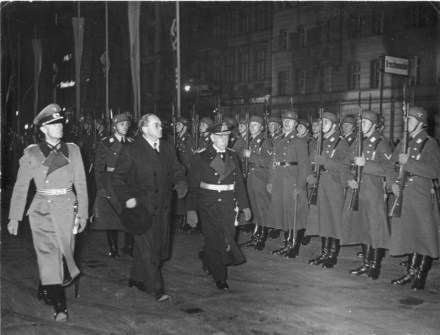
 This Easter we also remember Rear Admiral Guy Hallifax, the most senior South African Naval officer to lose his life during World War 2. His contribution to the Navy is significant as he literally is one of the founding fathers of the modern South African Navy as we know it.

 The HMS Dorsetshire was a heavy cruiser and after commissioning in 1930 became the flagship of the 2nd Cruiser Squadron Atlantic Home Fleet. Before the war, from 1933 until 1936, HMS Dorsetshire served on the Africa Station. Her first recorded docking in the Selborne dry dock at Simonstown, South Africa was on 5 January 1934.
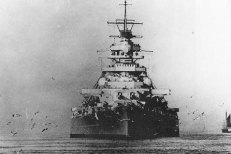

 BELL, Douglas S, Ty/Act/Leading Stoker, 67243 (SANF), MPK
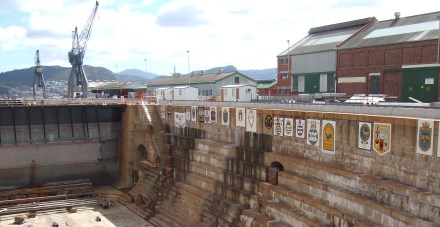 Their names have not been forgotten.
 HMS Cornwall was a heavy cruiser of the Kent-subclass of the County-class. When World War 2 began in September 1939, Cornwall was transferred from her pre-war China Seas operations to the Indian Ocean and joined Force I at Ceylon.

 ANDERSON, Robert D, Engine Room Artificer 2c, 71067 V (SANF), MPK
 “Gold may shine, but it has no true light” is a quote by Kristian Goldmund Aumann to mean that glittering gold is false when compared to the importance of spiritual light, and nothing is more true in this statement when reviewing the sacrifice and loss on the HMS Edinburgh – it is the subject of a multi-million dollar treasure hunt for gold and the subject of supreme wartime sacrifice, including South African life.
 South African Honour Roll – HMS Edinburgh
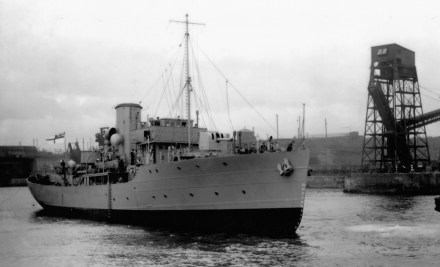

_off_Yantai_China_c1931")

 ANDERSON, Henry G, Able Seaman, 67501 (SANF), MPK (Missing Presumed Killed)