It’s a little known fact, one of Field Marshal Erwin Rommel’s key officers, a person in his ‘Inner Circle’ and his personal advisor and aide was in fact a South African. Very few South Africans joined the Nazi military forces during the Second World War, there are a number of South West Africans (now Namibia) who joined Nazi Germany’s armed forces whilst South West Africa was a South African Protectorate, which is understandable given South West Africa used to be a German colony prior to World War 1 and they were all of German heritage. A handful of South African Prisoners of War even joined or were coerced to join the Waffen SS during the war itself.
General Rommel (centre) briefing fellow officers
However there are two who served on General Rommel’s staff, the first is his driver, Lt. Hellmut von Liepzig who was a naturalised South West African and the second was Lt. Heinz Werner Schmidt, a naturalised South African. Let’s examine Schmidt:
Heinz Werner Schmidt
To be fair to Heinz Schmidt, he was born in South Africa to German parents, and at a very young age he moved around Africa with his family, classified as ‘volkdeutsche’ spending more of his formative years and completing his university education in Germany itself, becoming a dual national with a German citizenship in addition to his South African one. Leaving South Africa at the age of 4 he regarded himself as German above all and was swept up with the rest of the country in the euphoria of Nazism. When war broke out, he was in a unique position – he had a choice. He could choose to fighting for either South Africa and the Allied cause or Germany (as his dual citizenship allowed), he even had the choice of sitting the war out in South Africa (service was voluntary), he chose to his convictions to support the Nazi cause and became a German Army officer.
At one point in the war he found himself in command of Wehrmacht units directly engaging South African Army units and then, more ironically, with Europe and Germany devastated he engaged his South African birthright which gave him sanctuary in South Africa itself after the war. In fact he built two very successful South African companies and one is a well-known household brand.
So lets examine who Heinz Schmidt was and what he did. Born in South Africa, Lieutenant Heinz Schmidt served in North Africa as Erwin Rommel’s (“The Desert Fox”) personal aid and advisor – an aide-de-camp in military speak. As he was “South African-born” he was therefore considered, in line with military logic, an expert on Africa. Already a veteran of the Polish Campaign, Schmidt joined Rommel’s staff in March 1941 from Eritrea and was subsequently present during a number of battles in Egypt and later Tunisia, and was later to write a bestseller depicting his years with Rommel, namely “With Rommel in the Desert”.
Heinz Schmidt with General Rommel – Schmidt is third from the left.
Werner Schmidt by his own admission was surprised that General Rommel took him on as his advisor as he really did not have a depth knowledge of Africa, however been the only officer in Rommel’s inner circle of officers with a smattering of African heritage he found himself the only man for the job, and he happily took it on.
Lieutenant Heinz Werner Schmidt also had a sound combat record, just days before he was appointed as the aide-de-camp to General Erwin Rommel, he was commanding a heavy weapons company. In fact Schmidt played a key role in overrunning the South African positions on 23rd November 1941 during the Battle of Sidi Rezegh. He found himself in the thick of things with the German Wehrmacht’s 115 Rifle Regiment which lined up to attack the South African’s flank and over ran them.
Lieutenant Heinz Werner Schmidt described the scene as follows:
“We headed straight for the enemy tanks. I glanced back. Behind me was a fan of our vehicles—a curious assortment of all types—spread out as far as the eye could see. There were armoured troop carriers, cars of various kinds, caterpillars hauling mobile guns, heavy trucks with infantry, and motorized anti-aircraft units. Thus we roared on towards the enemy ‘barricade.’
“I stared at the front fascinated. Right ahead was the erect figure of the Colonel commanding the regiment. On the left close by and slightly to the rear of him was the Major’s car. Tank shells were whizzing through the air. The defenders (editors note: the South African Brigade) were firing from every muzzle of their 25-pounders and their little 2-pounder anti-tank guns. We raced on at a suicidal pace.”
Battle scene at Sidi Rezegh November 1941
So, here we have a very unique instance in South African military history a ‘South African’ commanding enemy troops in direct combat against his ‘countrymen’. In an action which devastated South African forces in defeat with the loss of many South African lives.
Lieutenant Heinz Werner Schmidt went on to have a very successful stint as Rommel’s advisor for the balance of the North African campaign, and his book on Rommel is regarded as one the most insightful works on Field Marshal Rommel.
Post War
What happened to Heinz Schmidt and in what actions he took part after the North African campaign is unclear, we know that he lived with Rommel and was even present at his 50th birthday on 15 November 1941. Heinz ended his book with the end of the African campaign – it was about Rommel after all, he did not elaborate on his movements and units in which he served, what his units did or on which front he served (Eastern, Western or Italian) after the Afrika Korps was defeated, and even after Rommel death.
What is clear is that Heinz Schmidt survived the war and like many Wehrmacht officers sought sanctuary outside wore torn Germany. Fortunately for Heinz the very Nazi sympathetic National Party came to power in South Africa in 1948, three short years after the end of World War 2. Heinz now chose to embrace his South African citizenship and return to his birthplace, South Africa to re-start his life.
He moved to a small German community in Natal called ‘New Germany’, located just inland from Durban. ‘New Germany’ was established well before World War 2 in 1848 by a party of 183 German immigrants. With the strong cultural ties to Germany, German social clubs and many German compatriots, this island of German heritage in South Africa proved ideal for Heinz Schmidt to start again, and he did so with great success.
He started two companies which are now household brands in South Africa, Pineware and Gedore tools, Pineware makes household appliances under its own brand, anyone who has bought a Pineware toaster, iron or electrical appliance will know it. Gedore tools makes the Wera line of tools. Pineware was sold to Lion Match.
By all accounts he was a friendly and charming man, he had many humorous stories of his time with Rommel and was regularly seen at Remembrance Parades in Durban. Heinz Schmidt died in Durban after a short illness, aged 90, in 2007. At the time his holding company business, H. W. Schmidt Industrials, was family owned.
In Conclusion
There you have it, another tale of a person highly sympathetic to the German cause who found success in post 1948 Nationalist South Africa. He unfortunately (rightly or wrongly) joins Robey Leibbrand and others who enjoyed political or business success in full sanctuary under the National Party government and as a result he was never held to account to his actions fighting against his own countrymen.
Treason is generally legally defined as citizen ‘taking up arms’ against the country of his of citizenship. In the case of dual citizenship (as was the case with Heinz Schmidt), if the person did not renounce his citizenship of the country he went to war against (which he did not) the usual practice during and after the war was to convict the person of treason, in the other Allied nations – especially the UK, USA and Australia many people like Heinz faced the same situation after the war, especially in the cases were their dual nationals and even nationals had joined the Waffen SS and German Wehrmacht, most received very light sentences and fines, in exceptional cases those found guilty of High Treason were executed or handed life sentences.
After the war, a commission called the Barrett Commission was assembled to look into all South Africans and South West African’s who had joined Nazi German forces during the war. The commissions findings and lists were completed in late 1947, and withheld pending outcome of the 1948 elections. When the National Party won the elections in 1948, two Nationalist MP’s – Frans Erasmus and Blackie Swart removed all copies of the Barrett report and intelligence files on German collaboration and embargoed them (some of these files have only recently been re-opened). They then issued a general amnesty for all South Africans tried for treason or awaiting sentence, and in 1948 they all walked free.
The North African campaign was regarded as the ‘gentlemen’s war’ by all forces fighting it, primarily because it was fought according to the conventions. Whether Heinz would have been simply regarded defeated Wehrmacht officer at the end of the war holding a dual nationality, had no recored of war crime and had not violated his South African citizenship rights. And then subsequently allowed to get on with his life in South Africa as a simple veteran is a matter of conjecture – we will never know as it was never challenged.
The issue of treason aside, his book is however a sentinel work on Field Marshal Erwin Rommel – the ‘Desert Fox’ and it gives a unique and valuable historic insight into someone who is arguably regarded as one of the best military commanders of the war. Heinz Schmidt lived with and went to war with Rommel, his story is both very interesting and very unique.
To give an idea of the value his book from an insight perspective, the famous Rommel quotable quote as to using captured ‘booty’ (enemy equipment) for personal use is thanks to Schmidt’s work. Rommel, whose signature British issue goggles often worn above his visor on his cap said “Booty is permissible I assume; even for a general“. A quote which now finds itself in use in military outfits the world over when reasoning over the use of ‘booty’.
With that, as South Africans we find ourselves contributing again to a rich military heritage with our own very unique history highlighting of our lessor known past of ‘Nazi’ collaborators and World War 2 Wehrmacht veterans.
FAA pilot standing on the wing of a Seafire (adapted Spitfire with arrest capability). Note the “beard” and his wings on his sleeve above his rank.
The Fleet Air Arm (FAA) is a lessor known service in the bigger picture of World War 2, but no less important. In essence the Fleet Air Arm is the Royal Navy’s own Air Force, designed solely to be launched either at sea from aircraft carriers and ships or from shore bases on maritime based operations and in defence of the Royal Navy specifically.
The Royal Air Force was an independent arm of service from the Navy, it worked in conjunction with the Navy and the Army in joint commands, however it also worked in conjunction with the Navy’s own Air Force – the Fleet Air Arm.
The Fleet Air Arm is interesting as it flew a wide variety of very unique fixed wing aircraft in World War 2, and rotary wing aircraft post war (helicopters). The FAA aircraft in World War 2 were usually a little different to the ‘landed’ cousins as they to be specially adapted for operating at sea, they also had to be a lot more robust and made to ‘fold-up’ to store them on deck. They were even given different names, for the same equivalent Royal Air Force and US Air Force aircraft, an example is the famous ‘Spitfire’ had its named changed to ‘Seafire’ when serving with the FAA along with its special additions (like assesting or catapult hooks).
Even lessor known is the fact that the Fleet Arm has had a number of South Africans serve in it, and it all ties back to the strong Naval ties Britain – and the Royal Navy specifically – had with South Africa, especially as the Naval Base at Simonstown is near Cape Town, South Africa, and it was British sovereign territory during the war (a status that existed well in the 1960’s).
Like the South African Naval Forces personnel (SANF) finding themselves seconded to the Royal Navy or South Africans joining the Royal Navy directly as Royal Navy volunteer reserve – South African branch (RNVR), so too did many South Africans find themselves in the Royal Navy’s FAA either as SANF personnel or RNVR personnel.
It also unfortunately follows that when tragedy strikes the Royal Navy and its Air Force, there are South African losses. So, lets look at each of the South African men specifically lost serving the Fleet Air Arm, honour them by telling a little about their story, the squadrons they belonged and the unique FAA aircraft they flew. By looking at the sacrifice it will also give us a small insight into this very unique history of the FAA.
A unique book was written and illustrated by Derrick Dickens called ‘Stringbag to Shah’ on the history of the Fleet Air Arm, illustrated because many of the aircraft used by the FAA were not recorded in colour, or at best obscure with no record of paint schemes etc – and he wanted to bring these unique aircraft to living in vivid colour using his artwork. We’ll be using this unique catalog with the permission of the copyright owner.
In all there were 9 men according to current records (this can change as more research has been done on the honour roll) who were South African and died serving in the Fleet Air Arm. So lets start with the first South African man lost.
HMS Ark Royal
BOSTOCK, R S, Lieutenant, Royal Navy Fleet Air Arm 800 Squadron, HMS Ark Royal died 13 June 1940
Blackburn Skua during Norway Operations by Derrick Dickens
At the time of Lt. Robert Bostock’s death, the HMS Ark Royal (a massive aircraft carrier), operated a number of FAA squadrons from its flight deck. In June 1940, FAA 800 Squadron was operating as part of the reaction force to the German invasion of Norway, 800 and 803 had dive-bombed the German Cruiser Königsberg on 10 April 1940 and sank it, flying the ‘Skua’.
800 squadron embarked on Ark Royal later that month, with the carrier providing air cover to the fleet and to Allied troops. 800 Squadron’s Skua’s claimed six Heinkel He 111 bombers shot down. On 13 June 1940, Ark Royal launched a dive bomber attack against the German Battleship Scharnhorst with 800 Squadron losing four Skuas out of six, along with Lt Bostock (our South African) and the Squadron’s Commanding Officer, Captain R.T. Partridge.
FAA Blackburn Skua B-24 by Derrick Dickens
“Too big too slow. too late, this was the Blackburn Skua and the reputation that followed it. Slow and big it certainly was by the standards of the day, It towered above the ground on a spindly under carriage, and was indeed a large piece of ironmongery to expect the under powered Perseus engine to hoist into the air. But considering the radical nature of its design by British standards at the time of its conception the Skua was competent enough, maintaining Blackburn’s name for rugged naval aircraft, and adequately fulfilling the demands of the specifications that had given it birth, but as a combat aircraft it was not very successful” (Stringbag to Shah by Derrick Dickens).
The next South African man lost was not a FAA pilot or navigator, he was a FAA aircraft mechanic;
HMS Hermes
RILEY, H, Air Mechanic, Fleet Air Arm, HMS Hermes, died 9 April 1942
At the time of Air Mechanics Riley’s death the HMS Hermes (also an aircraft carrier) was searching for the Japanese Imperial Fleet off Ceylon (now Sri Lanka) during the infamous Japanese ‘Easter Sunday Raid’ on Colombo – the Royal Navy’s own ‘Pearl Harbour’ and the South African Navy’s ‘Darkest Hour’ because of all the ships were lost with large South African Naval personnel on board – see this Observation Post link for the full story by clicking this link; The South African Navy’s ‘darkest hour’ is not recognised and not commemorated).
While sailing south off Batticaloa on the East Coast of Ceylon, HMS Hermes and its accompanying flotilla was by Japanese Carrier-Borne dive-bombers from the Imperial Japanese Task Force in the process of attacking the Naval Base at Trincomalee.
Approximately 70 Japanese aircraft were despatched to bomb the HMS Hermes which became an inferno and sank within ten minutes of being hit by numerous aircraft bombs.
At the time of her sinking the HMS Hermes was the home to No. 814 Squadron of the Fleet Air Arm flying the famous ‘Fairey Swordfish’ torpedo bomber, and these were the aircraft that Air Mechanic Harry Riley son of Alfred and Mary Ellen Riley, of Springs, Transvaal, South Africa, would have worked on.
FAA Fairey Swordfish ‘Stringbags’ by Derrick Dickens
“Stringbag’ so named because of all the wires and stays. Archaic in appearance even when it first flew, the venerable Swordfish was the Fleet Air Arm’s premier torpedo-bomber at the outbreak of World War II and was destined to become a naval legend.
Having arrived at a stage of World War II when a biplane, was a very rare sight, despite appearances, this beautifully ugly aircraft was no anachronism, for the Fairey Swordfish, as it was named, had then a still vital role to play in World War II. The Swordfish had the distinction in fighting the Axis from the very first days of the war until victory for the Allies in Europe had been assured.
Swordfish first saw action in the Norwegian campaign, and went on to see service in the Mediterranean, the Western desert, Iraq, the Battle of the Atlantic, and in support of convoys bound for Russia, attacks on the French fleet at Oran in July 1940 following the D-Day evacuation, and attacks on the Italian fleet at Taranto, and the German battleship Bismarck. The Swordfish is credited with the destruction of a greater tonnage of enemy shipping than any other allied aircraft during World War II. In so doing, the Swordfish outlived and outfought aircraft which had been designed to replace it in service, and during this period created a record of the machine achievement in association with human courage that makes pages of the Fleet Air Arm’s history a veritable saga.” (Stringbag to Shah by Derrick Dickens).
The next South African man lost with FAA was lost from HMS Formidable.
HMS Formidable
CHRISTELIS, C, Sub/Lieutenant, Royal Navy Reserve FAA 803 Squadron, HMS Formidable, died 1 August 1942
FAA 803 squadron at the time of Sub/Lt. Christelis’ death was equipped with the Fairey Fulmar II and operated from Ceylon (now Sri Lanka) against the Japanese (also participating in the infamous sea battles surrounding Japanese Imperial Navy’s Easter Sunday raid against the Royal Navy), joining the HMS Formidable from April 1942. Sub/Lt. Cornelius Christelis was the son of Christos and Eleni Christelis, of Germiston, Transvaal, South Africa.
FAA Fairey Fulmar Mark II
“The first eight-gun fighter to enter service with the Fleet Air Arm, the Fulmar two-seat shipboard general-purpose fighter was designed at a time when the Admiralty held the view that navigational aids were inadequate to ensure the safe return of a single-seat fighter to its carrier in inclement weather, and that a navigator was, therefore, indispensable”.(Stringbag to Shah by Derrick Dickens).
The next South African man lost with FAA was also lost from HMS Formidable from FAA No. 888 Squadron around the same time as Sub/Lt. Christelis.
HMS Formidable
BROKENSHA, G W, Lieutenant, Royal Navy Fleet Air Arm 888 Squadron, HMS Formidable, died 11 August 1942
Lt Brokensha had an extensive career with the Fleet Air Arm, he flew Skua II with FAA 803 Squadron, taking part in Operation “Duck” on 17th April 1940 in defence of HMS Suffolk returning from Norway and from HMS Glorious he took part in numerous operations over Norway were he was even Mentioned in Despatches. From HMS Ark Royal he took part in numerous operations including attack on Scharnhorst in Trondheim Harbour on the 13 June 1940, for which he earned DSC. By 1942 he was posted to 888 Squadron flying Martlets as Senior Pilot, joining HMS Formidable on 1st February 1942. His death is a little mysterious, he is recorded as missing overboard from HMS Formidable, at night on the 11th August 1942.
FAA 888 squadron’s Marlet Mk II aircraft are an interesting addition to the Fleet Air Arms rich history, as they are essentially American Grumman Wildcats with a Royal Navy spin.
FAA Martlet Mk II by Derrick Dickens
“The Royal Navy’s effect upon the F4F Wildcat was considerable. The Fleet Air Arm introduced it to combat a year before Pearl Harbor, and exerted influence in its armament fit which ran contrary to opinion in US Navy squadrons. The Wildcat was the first truly modern fighter flown from British carriers, and represented an enormous leap forward in Royal Naval aviation” (Stringbag to Shah by Derrick Dickens).
The next South African man lost with the FAA was a very senior officer, a Lieutenant Commander on the HMS Indomitable.
HMS Indomitable
JUDD, F E C, Lieutenant Cmdr, Royal Navy Fleet Air Arm 880 Squadron, HMS Indomitable, died 12 August 1942
At the time of Lt Cmdr Judd’s death, the HMS Indomitable and its fleet of 880 Sea Hurricanes was involved with Operation Pedestal which revolved around securing supplies to Malta in the central Mediterranean. In early August the Royal Navy were engaged in heavy combat with German and Italian aircraft bombing their ships securing these vital supplies to the besieged island of Malta. The date Lt. Cmdr Judd died was a particularly heavy day of combat when 4 waves of German and Italian aircraft attacked the British Fleet, on 12th August the HMS Indomitable’s 880 Squadron FAA Sea Hurricane fighters had been in heavy aerial combat with Axis forces, with crew losses and in the evening the HMS Indomitable’s defensive screen was breached and she was hit by two 500 kg bombs; a 500 kg bomb penetrated the un-armoured portion of the flight deck, killing 50 and wounding 59 men causing damage that required her to withdraw from the fight.
Sea Hurricane Mk II by Derrick Dickens
“That the Hawker Hurricane occupied a vital place in Britain’s history cannot be denied. Put simply, the Hurricane saved Great Britain in 1940; it was the right aircraft, at the right time, and flown by the right pilots. No one can deny the excellence of the Spitfire, nor that it one of the great fighting aircraft of World War II. Yet, outdated though the Hurricane may have appeared by comparison, its simplicity of concept and operation was such that it could be — and was – dispatched to any of the danger spots that spread like cancer during those first three years of the war when events threatened to engulf the Allied nations with disaster.
Overshadowed by the Spitfire, the Hurricane was slower, less manoeuvrable and half a generation older in terms of technology. What mattered was that it was available in numbers and could be adapted to a variety of roles. One of which was a carrier-based fighter version which the Navy dubbed the ‘Sea Hurricane’ (Stringbag to Shah by Derrick Dickens).
The next South African man lost was from the Fleet Air Arm’s No. 762 Squadron on the HMS Heron
HMS Heron
O’BRYEN, W S, Sub/Lt Royal Navy Fleet Air Arm 762 Squadron, HMS Heron, died 26 November 1942
At the time of S/Lt O’ Bryen’s death the HMS Heron and 762 Squadron were raining units. The HMS Heron is not a ship or carrier, it’s a shore base and one of the last of the Fleet Air Arm’s bases still in Operation now re-named Royal Naval Air Station Yeovilton in Somerset, England. It was used primarily during World War 2 as the home of No1. Naval Air Fighter School and later the Aircraft Direction Centre. The 700-series squadrons are generally experimental or training squadrons, which produce trained aircrew for the operational 800-series squadrons.
S/Lt William Stanislaus O’Bryen, the son of John and Ivy O’Breyen of Fynnland, Natal, South Africa is buried at the Fleet Air Arm’s Church in Yeovilton which contains a small number of FAA members killed in aviation accidents whilst training at HMS Heron.
It is unclear from records what aircraft S/Lt O’Bryen was involved with, however one of the more famous aircraft flown at HMS Heron used to train young pilots by the middle of the war was the famous Seafire, a naval adaption of the iconic Spitfire.
FAA Seafire MK 1B by Derrick Dickens
“The Seafire which in fact was little more than a “navalised” Spitfire, it was without any doubt the most effective British built naval fighter of World War 2, even though it had the reputation of not being suitable for the rigours of carrier operations. To some degree, this reputation was deserved for the Spitfire was of lightweight design, never intended for naval service, but it filled a gap till the specialist naval types in the shape of the Corsair and Hellcat arrived, in the mean time serving in major campaigns in the Far East, Africa and Europe” (Stringbag to Shah by Derrick Dickens).
The next South African man lost was from the Fleet Air Arm’s No. 851 Squadron on the HMS Shah, and he in fact was a member of the South African Navy, having been seconded to the FAA.
HMS Shah
MACWHIRTER, Cecil J, Ty/Sub Lieutenant (A), Fleet Air Arm (Royal Navy) 851 Squadron HMS Shah, air crash, SANF, MPK 14 April 1944
At the time of S/Lt Macwhirter’s death the HMS Shah had just completed an operation to the United States to collect equipment and airframes for twelve Avenger aircraft allocated to 851 Naval Air Squadron (FAA) on the 14th. The Shah sailed for Melbourne, departing Australia on 8th February 1944 for Cochin. On the 23rd February she disembarked her ferry load of American fighters; this included the Avenger airframes earmarked for 851 squadron.
851 squadron was to remain ashore until 6th March before rejoining the ship. The next two weeks would be spent working up her air department and flight deck parties; this was the first opportunity for flying operations to be carried out. HMS Shah arrived in Colombo on February 19th and 851 was flown off to RNAS Colombo Racecourse. Aircraft were embarked as required when further training; it was on such training that 851 suffered its first operational loss when Avenger FN813 stalled and ditched in the sea off the West coast of Ceylon while conducting a night anti submarine exercise on April 14th killing all three crew members, including S/Lt Cecil John Macwhirter, our South African son of Samuel and Elizabeth MacWhirter.
FAA Tarpon (Avenger) Mk 1 by Derrick Dickens
“When the Grumman Avenger first joined the Fleet Air Arm in 1943 it was very aptly named after a big ugly bird, the Tarpon. No 832 was the first Tarpon squadron to be formed and in December 1942 they sailed on HMS Victorious to America to commence training on the new torpedo bomber at the US Naval Air Station, Norfolk, Virginia They were equipped with US navy aircraft as the British machines were not ready Their first embarkation was on USS Saratoga and they landed up in the Pacific theater in April 1943. A month later they re-embarked on HMS Victorious for a period of operations in the Solomons. The FAA retained the name Tarpon until January 1944, when the name was changed back to the original American Avenger and became known as Avenger 1s” (Stringbag to Shah by Derrick Dickens).
The second last South African to be lost fighting in Fleet Air Arm was with 1772 Squadron (FAA) on the HMS Indefatigable, he was also a member of the South African Navy and seconded to the Fleet Air Arm.
HMS Indefatigable
LA GRANGE, Antony M, Sub Lieutenant (A), SANF, Fleet Air Arm (Royal Navy)1772 Sqn HMS Indefatigable, air operations, MPK 28 July 1945
FAA Firefly Mk 1 by Derrick Dickens
In July 1945 1772 Naval Air Squadron, flying Fireflies, boarded HMS Indefatigable and joined the British Task Force 37 which then joined the US Task Force 38 in the northern Pacific for the final assault on the Japanese Mainland. The combined Task force comprised 14 Fleet Carriers, 25 Cruisers , at least five battleships, 75 Destroyers, and many other craft…. and 1300 aircraft. This was the largest naval force ever gathered in one area in history. The American Fleet comprised at least three-quarters of that combined fleet.
Many raids and bombardments took place in these last days of the war and losses were considerable despite the fact that the Japanese forces were very depleted by this time. The previous engagement had been largely American again and of course the European war had ended. This was the final massive battle against the remaining island possession occupied by the Japanese, Okinawa. Noteworthy in this engagement, which cost many American lives, was the Kamikaze and the Indefatigable received one Kamiikaze strike on its deck, killing several personnel.
The HMS Indefatigable went on to join the Americans in Tokyo Bay for the Peace Treaty signing. S/Lt. Antony Michael La Grange, the son of Mrs. I. B. La Grange, of Albertinia, Cape Province, South Africa is remembered on the Plymouth Memorial.
FAA Firefly Mk IV by Derrick Dickens
“The Fairy was conceived in the late “thirties”, blooded on the mid “Forties” withdrawn from production in the mid “Fifties” and finally retired in the mid sixties such was the 25 year lifespan of one of the most versatile aircraft to lift off a carrier deck. Combining performance, handling, maneuverability, and firepower never before displayed by a previous ship board aircraft, it wrote its own history due to its adaptability for roles and weapon loads unforeseen at the time of the creation of this handsome fighter – reconnaissance aircraft. The Firefly saw relatively limited action during World War Two, never the less it earned for itself a place in naval aviation history, for although the longevity of the Firefly was to be superceded, and its remarkable versatility was to remain peerless. 1,702 Fireflies were built over a period of 14 years, the most of them in post world war two guise which differed greatly in role and different in appearance from the original aircraft which made its operational debut on HMS Indefatigable, taking part on the attacks on the German battleship Tirpitz” (Stringbag to Shah by Derrick Dickens).
The final South African to be lost in World War 2 flying for the Fleet Air Arm was also a member of the South African Navy seconded to the FAA on HMS Landrail.
HMS Landrail
WAKE, Vivian H, Ty/Lieutenant (A), FAA Fleet Air Arm (Royal Navy) 815 Squadron HMS Landrail, air crash, SANF, MPK 28 March 1945
By the time of Ty/Lt. Wake’s death, 815 Squadron had been reformatted in November 1944 at HMS Landrail, a shore base now called RNAS Machrihanish located 5 km west of Campbeltown on the western side of the Kintyre Peninsula in Scotland.
FAA 815 Squadron by this stage was flying Barracudas on anti-submarine operations, and doing DLT (deck landing training) on HMS Campania in preparation for the final operations in the Far East against Imperial Japan.
FAA Barracuda Mk V
“The Barracuda was a large ugly beast of an aeroplane, when its wings were folded it looked like some prehistoric bird straight out of Jurassic Park. Un-pretty, big bulky, solid and generally disliked by the aircrew, they were used to good effect in 1944 during attacks on the Tirpitz, which was lying crippled in Kaafjord, North Norway, after being damaged in an attack by midget submarines. From April 1944 Nos. 810 and 847 began operations in the pacific theatre on board HMS Illustrious. Barracudas were also heavily involved in dive bombing attacks on Japanese land and maritime targets, as well as raids against Japanese targets in Sumatra. They continued to support the Allies advance until the end of the war
Towards the end of the war a major redesign of the Barracuda was undertaken to provide an interim aircraft for use in the war against Japan, until the Fairey Spearfish became available. This development resulted in the Barracuda TR Mk V”. (Stringbag to Shah by Derrick Dickens).
In Conclusion
The best way to summarise the Fleet Air Arm, its commitment and sacrifice is in fact found in the forward of Derrick Dickens’ Stringbag to Shar’ written by none other than the Admiral of the Fleet, HRH Prince Philip, Duke of Edinburgh K.G., K.T., O.M., G.B.E.
“When you look at the difficulties experienced by the pioneers of aviation Lord Cayley, the Wright brothers, Hiram Maxim and Colonel ‘Buffalo’ Bill; Cody – to get a machine to take off from mother earth and to fly through the air, it is not surprising that many people considered them to be extremely foolhardy, if not actually insane. To the far-sighted, the use of aircraft in war may have seemed obvious, it really needed the conviction of a saint to visualise the practical use of aircraft in a war at sea.
This splendid book traces the chequered history of naval aviation, and the extraordinary vision and determination of the designers, builders and pilots of naval aircraft against every sort of discouragement. It also illustrates the remarkable imagination of those who helped to develop all the ancillary equipment, such as aircraft carriers, catapults, arrestor wires, angled decks, ‘ski-jumps’, and all other gimmicks that enabled naval aviation to make a solid impact on the war at sea.
Looking through the illustrations in this book, it seems almost unbelievable that men could be found, not just to fly them, but to inflict damage on the enemy, and return to tell the tale.
The contribution of naval aviation to the war at sea during WW1 and WW2, may not have made the headlines in quite the same way as land-based aircraft, but, as the final days of the war against Japan demonstrated, the participation of naval aircraft was crucial to the ultimate allied victory”.
Related Work and Links
Related work of South Africans serving in the Royal Navy’s Fleet Air Arm
Written and Researched by Peter Dickens, references from Wikipedia, The Commonwealth War Graves Commissioned, SAAF and RAF Honour Roll compiled by Graham du Toit, BBC People’s War, Fly Navy – HMS Shah, Fleet Air Arm Officers Association, CASUALTIES BY DATE and SHIP Compiled by Don Kindell sourced on the Royal Naval History Homepage.
Here’s a question for many, in what action did the South African Navy (SAN) experience its greatest single loss of personnel, the largest sacrifice of South African life in a single sea battle – in essence when and what was the South African Navy’s ‘darkest hour’?
I’ve asked this question of senior South African military personnel, including the South African Navy as well as the South African Naval fraternity, the veterans – and the bottom line is … nobody knows.
Some immediately say it was the Mendi, as the remembrance of the Mendi is now the South African Navy’s key responsibility, but the loss of the SS Mendi in World War 1 was not a loss of South African Navy personnel (the South African Navy did not exist in WW1 and the Royal Navy was in charge of this particular troop ship full of South African ‘Army personnel’) and the loss of the Mendi was an accident at sea and not a combat action.
Most (actually the majority) of SAN officers and veterans would say it was the loss of the SAS President Kruger (16 souls) but that would also be very wrong, both in terms of scale and action, the SAS President Kruger loss was also an accident at sea and not a combat action.
A tiny handful of SAN officers and vets who have a little knowledge of World War 2 might venture to answer the question by stating the loss of any one of the four South African minesweepers sunk during the war as the ‘darkest hour’ of the war.
These are the HMSAS Southern Floe (24 souls) or the HMSAS Parktown (5 souls), or the HMSAS Bever (17 souls) or the HMSAS Treen (23 souls) – getting warm but that too would be wrong, as these did not happen over a defined period of the war that would warrant a ‘darkest hour’ in Churchill’s definition of the phrase (Churchill coined the term).
Nope, the largest loss of South Africans in a single sea battle, its ‘Darkest Hour’ took place fighting against Imperial Japan from the 5th to the 9th April 1942 … yup, the Japanese – believe it, and by the end of this particular naval engagement at sea a grand total of 65 South African souls were lost. Now how many people know that!
The reason to ‘forget’!
So why does nobody know about this, why is this incident not ‘recognised,’ why is nobody ‘commemorating’ it and what exactly happened?
Simply put, it’s because they all died fighting whilst seconded to four British war ships in an action in the Pacific called ‘The Easter Sunday Raid’ – and it involved the sinking of the HMS Cornwall and HMS Dorsetshire in a single day – and later the sinking of HMS Hermes and HMS Hollyhock a few days later by the Japanese Imperial Navy. But why should that be an issue and a reason to ‘forget’?
Japanese Imperial Fleet Ensign from World War 2
Again the simple answer is because just three short years after World War 2 the National Party in a stunning and unexpected election win over Jan Smuts’ United Party, came into power with their proposal of ‘Apartheid’ and making South Africa a ‘Republic’ independent of Britain – and they hated the British or anything to do with Britain. The Nationalists had grounded an entire Afrikaner identity and a country’s ‘nationalism’ on two events – The Great Trek and The 2nd Anglo-Boer war, both of which carried a history of either British betrayal or British atrocity.
During the Second World war these nationalists either openly sided with Nazi Germany and in many cases (by their tens of thousands in fact) even joined Neo-nazi South African parties and/or adopted national socialist movement (Nazism) ideology publicly, some (including a future Nationalist South African President) embarked on sedition and terrorism to undermine the war effort (see “Mein Kampf shows the way to greatness for South Africa” – The Ossewabrandwag).
Bottom line, to the Nationalists thinking anyone who took part in Smuts’ campaign for South Africa to fight in the Second World War was a traitor to their ‘Volk’ (peoples). In their minds they went to fight ‘Britain’s war’ alongside the hated British – traitors all (even though an unprecedented 1 in 4 white South African males volunteered to fight in WW2 – half of them Afrikaners).
For the Nationalists commemorating the sinking of South African ships fighting alongside British ones in World War 2 was bad enough. However, commemorating and remembering the South African loss whilst fighting on His Majesty’s British ships themselves would be, for the nationalist government at least, an unforgivable betrayal.
Members of the South African Royal Naval Volunteer Reserve serving on board HMS Nelson. The group is sat on one of the 16 inch gun barrels.
For this reason, the sinking of South African ships lost in World War 2 was not really extensively commemorated by the ‘old’ South African Defence Force (SADF). The SADF came into existence once the Nationalists declared South Africa a ‘Republic’ and replaced Smuts’ old ‘South African Union Defence Force (UDF) with a reformed military entity. The sinking of HMSAS ships are only ‘remembered’ in small pockets of veteran South African Legion branches and MOTH shell-holes.
It is also for this reason that the SADF and the South African Navy did not ever commemorate the South African losses on British Ships, it is the reason why this particular ‘darkest hour’ in the South African Navy’s history is not recognised or remembered at all, which is utterly unforgivable as this is the very institution who supplied the men to The Royal Navy in the first place.
It is made worse in the modern epoch, by the newly reformatted South African National Defence Force’s Navy after 1994, which has not only lost the link thanks to the Nationalists, but also does not attempt to re-kindle it, party because of lack of knowledge, but also because it suits the African National Congress’ political agenda not to remember this association (commemorating or remembering a time when South Africans went to war for the ‘Colonials’ does not suit their current narrative).
So, let’s start addressing this betrayal of our armed forces personnel and understand what happened to qualify this as the South African Navy’s ‘darkest hour’, who is on this honour roll and what’s been done about in now?
What happened?
Simonstown Dry Docks, when next there look out for the ships emblems of the Dorsetshire, Cornwall, Hermes and Hollyhock
As Simon’s Town was a Royal Navy base during World War 2 (British soil in the middle of South Africa), men volunteering for the “South African Naval Forces” (SANF) to fight in World War 2 where either allocated to Royal Navy ships (titled HMS – His Majesty’s Ship) or on South African Navy ships (tilted HMSAS – His Majesty’s South African Ship), therefore whenever a large Royal Navy ship was lost during the war it is almost guaranteed that a number of South African Naval Personnel (SANF) were lost with it.
When large HMS ships are lost in an action on the same action the number of South African naval personnel lost just rockets – and this is the case with the sinking of the HMS Cornwall, HMS Dorsetshire, HMS Hermes and HMS Hollyhock.
The Japanese Easter Raid of 1942
A Mitsubishi A6M Zero fighter plane takes off from the deck of the Japanese aircraft carrier Akagi, part of the Japanese Naval force in the Indian Ocean
With Japan’s entry into the war, and especially after the fall of Singapore, Ceylon (now Sri Lanka) became a front-line British base. The Royal Navy’s East Indies Station and Eastern Fleet was moved to Colombo and Trincomalee.
Admiral Sir James Somerville was appointed as the commander of the British Eastern Fleet, and he decided to withdraw main component the fleet to Addu Atoll in the Maldives, leaving a small force to defend Ceylon (now Shri Lanka) consisting of an aircraft carrier, the HMS Hermes, two heavy cruisers – the HMS Cornwall and HMS Dorsetshire, one Australian Destroyer the HMSAS Vampire and the flower class HMS Hollyhock.
The Imperial Japanese Navy, in much the same way and with the same objectives that were used at Pearl Harbour planned a decisive attack of the British Eastern Fleet to end their presence in the North Indian and Pacific oceans. Unaware that the main body of the British fleet had moved to the Maldives, they focused their plan on Colombo.
Admiral Nagumo’s fleet unleashed the Mitsubishi A6M Zero fighters and bombers on the attack on Colombo on 5 April 1942.
The planned Japanese attack was to become collectively known as the Easter Sunday Raid and the Japanese fleet comprised five aircraft carriers plus supporting ships under the command of Admiral Chuichi Nagumo.
In an almost exact copy of the raid on the American fleet at Peal Harbour (as if no learnings were made by the Allies), on 4 April 1942, the Japanese fleet was located by a Canadian PBY Calatina aircraft, the Catalina radioed the position of the Japanese Fleet to The British Eastern Fleet which alerted the British to the impending attack before it was shot down by six Japanese Zero fighters from the carrier Hiryu, However, despite the warning Nagumo’s air strike on Colombo the next day, Easter Sunday – 5th April – achieved near-complete surprise (Pearl Harbour was also attacked on a weekend). The British Radar installations were not operating, they were shut down for routine maintenance.
The Japanese high command had planned the bombing of Colombo very much like the Pearl Harbor operation (many of the same planes and pilots participated in both strikes); but most of the British Eastern Fleet was at Addu Atholl in the Maldives, so when the Japanese attacked at Colombo there were only three ships there.
The sinking of the HMS Cornwall and HMS Dorsetshire.
The day before, 4 April, when the Japanese carrier fleet was spotted, the two heavy cruisers the HMS Cornwall and HMS Dorsetshire set out for Addu Atoll in pursuit of the Japanese. On 5 April 1942, the two cruisers were sighted by a spotter plane from the Japanese cruiser Tone about 200 miles (370 km) southwest of Ceylon.
As part of the engagement known as the Easter Sunday Raid, a wave of dive bombers led by Lieutenant Commander Egusa took off from Japanese carriers to attack Cornwall and Dorsetshire, 320 km (170 nmi; 200 mi) southwest of Ceylon, and sank the two ships. Both the Dorsetshire and the Cornwall had long associations with South Africa and had large contingent of South African Naval Personnel on board.
Japanese combat photograph showing the Royal Navy heavy cruisers HMS Dorsetshire and HMS Cornwall on fire and sinking
In the attack, the Japanese airman flying Japanese D3A-1 ‘VAL’ dive bombers, a total of 53 dive bombers in the attack wave, dropped 10 bombs on the HMS Dorsetshire itself (250- and 550-pound bombs) and 8 near misses, all in the span of 8 minutes. One of the bombs detonated an ammunition magazine and contributed to her rapid sinking. Of the two British cruisers, the HMS Dorsetshire sank first, with her stern going first at about 13:50, the HMS Cornwall was hit eight times and sank bow first about ten minutes later.
British and Allied losses were 424 men killed; 1,122 survivors spent thirty hours in the water before being rescued by HMS Enterprise and two British destroyers.
The sinking of the HMS Hermes and HMS Hollyhock
If the above losses qualify a dark day for the South African Navy it then becomes the SAN’s ‘darkest hour’, when in the same Japanese Operation, only a couple of short days later, on 9 April 1942, the Japanese focussed their attack on the harbour at Trincomalee and the British ships off Batticaloa. The HMS Hermes left the Royal Naval Base of Trincomalee, Ceylon escorted by the Australian Destroyer HMAS Vampire and HMS Hollyhock looking to engage the Imperial Japanese fleet which had attacked Colombo.
While sailing south off Batticaloa on the East Coast of Ceylon, this British flotilla was also attacked by the Japanese Carrier-Borne dive-bombers from the Imperial Japanese Task Force now in the process of attacking the Naval Base at Trincomalee.
Approximately 70 Japanese aircraft were despatched to bomb the HMS Hermes which sank within ten minutes of being hit by numerous aircraft bombs. HMAS Vampire was also sunk by bombs a short while later.
HMS Hermes ablaze and sinking
The HMS Hollyhock was about 7 nautical miles from the HMS Hermes escorting a tanker, the RFA Athelstane when the Hermes came under attack. The Hollyhock came under attack by the same Japanese aircraft and it too was bombed and sunk.
Once again, the HMS Hermes also had a very large South African Naval Forces contingent seconded to it on board, and the same applied to the HMS Hollyhock, and therefore once again there is a large of loss of South African life in this action against the Imperial Japanese fleet.
Total South African Naval Force (SANF) losses on the HMS Cornwall and HMS Dorsetshire in the single day of action were as follows (MPK means “missing presumed killed”):
HMS Cornwall
BESWETHERICK, Hedley C, Ordinary Seaman RNVR, 86671 (SANF), MPK
BOTES, John S, Stoker 2c RNVR, 68924 (SANF), MPK
COMMERFORD, Noel P, Able Seaman RNVR, 66493 (SANF), MPK
CRAWFORD, Cecil E, Act/Engine Room Artificer 4c RNVR, 67922 (SANF), MPK
DU PREEZ, Charles P H, Able Seaman, 68175 (SANF), MPK
DUTTON, Charles C, Stoker 2c RNVR, 68949 (SANF), MPK
HANSLO, Raymond F, Able Seaman RNVR, 68295 (SANF), MPK
KEITH, Kenneth I B, Able Seaman RNVR, 66742 (SANF), MPK
KENYON, Graeme A B, Able Seaman RNVR, 68002 (SANF), MPK
KIRSTEN, Monty G W, Able Seaman RNVR, 68917 (SANF), MPK
LAW, Edward, Act/Engine Room Artificer 4c RNVR, 66760 (SANF), MPK
MCDAVID, William K, Stoker 2c RNVR, 69138 (SANF), MPK
MITCHELL, William A, Stoker 1c RNVR, 68796 (SANF), MPK
PALMER, Walter A, Able Seaman RNVR, 68344 (SANF), (rescued, aboard HMS Enterprise), Died of Wounds
SPENCE, Noel W, Ordinary Seaman RNVR, 68732 (SANF), MPK
SQUIRES, John E, Ordinary Seaman RNVR, 68728 (SANF), MPK
STEPHEN, Eric B, Ordinary Seaman RNVR, 68861 (SANF), MPK
SWANN, Lawrence T, Stoker 1c RNVR, 68710 (SANF), MPK
THORPE, Maurice, Stoker 2c RNVR, 69140 (SANF), MPK
VERSFELD, Peter H S, Able Seaman RNVR, 68859 (SANF), MPK
VINK, Benjamin F, Ordinary Seaman RNVR, 68860 (SANF), MPK
WILLSON, Gerald F, Stoker 2c RNVR, 69006 (SANF), MPK
WRIGHT, Thomas H, Able Seaman RNVR, 68039 (SANF), MPK
HMS Dorsetshire
BELL, Douglas S, Ty/Act/Leading Stoker, 67243 (SANF), MPK
BRUCE, Alexander M, Stoker 2c, 67907 (SANF), MPK
CONCANON, Harold Bernard, Surgeon Lieutenant (Doctor)
EVENPOEL, Albert, Stoker 2c, 67909 (SANF), MPK
GEFFEN, Sender, Stoker 1c, 68035 (SANF), MPK
HOWE, Horace G, Ordinary Seaman RNVR, 68680 (SANF), MPK
KENDRICK, George, Stoker 2c, 67910 (SANF), MPK
MCINTYRE, Norman G, Able Seaman, 67446 (SANF), MPK
MCLELLAN, Robert, Ordinary Telegraphist, 67897 (SANF), MPK
MILNE, Lawrence Victor, Able Seaman
MORROW, Douglas E, Able Seaman, 67989 (SANF), MPK
ORTON, Charles P, Able Seaman, 68009 (SANF), MPK
REDMAN, Roland A, Leading Stoker, 67406 (SANF), MPK
SCOTT, William J, Able Seaman, 68007 (SANF), MPK
SEVEL, Harry, Stoker 1c, 68100 (SANF), MPK
VAN ZYL, David Isak Stephanus, Stoker 1st Class
WILLETT, Amos A S, Stoker 1c, 67240 (SANF), MPK
WILLIAMSON, Walter N, Able Seaman, 67803 (SANF), MPK
But, unfortunately there is more. As in the same Japanese Operation, just a couple of days later saw the loss of the HMS Hermes and HMS Hollyhock (also lost in a single day), the honour roll of South Africans on board these two fighting ships who were lost is as follows:
HMS Hermes
BRIGGS, Anthony Herbert Lindsay Sub-Lieutenant (Engineer) Royal Navy (South African national), MPK
BRYSON, Neil W, Ordinary Telegraphist, 69147 (SANF), MPK
BURNIE, Ian A, Able Seaman, 67786 (SANF), MPK
CLAYTON, Frederick H, Act/Engine Room Artificer 4c, 68102 (SANF), MPK
DE CASTRO, Alfred T, Stoker 1c, 67914 (SANF), MPK
KEENEY, Frederick W, Able Seaman, 67748 (SANF), MPK
KEYTEL, Roy, Able Seaman, 67296 (SANF), MPK
KIMBLE, Dennis C, Act/Engine Room Artificer 4c, 67600 (SANF), MPK
KRAUSE, Frederick E, Able Seaman, 68321 (SANF), MPK
RAPHAEL, Philip R, Able Seaman, 67841 (SANF), MPK
RICHARDSON, Ronald P, Able Seaman, 67494 (SANF), MPK
RILEY. Harry Air Mechanic 2nd Class, Fleet Air Arm, Royal Navy (South African national), MPK
TOMS, Ivanhoe S, Able Seaman, 67709 (SANF), MPK
VICKERS, Colin P, Able Seaman, 68296 (SANF), MPK
VORSTER, Jack P, Able Seaman, 67755 (SANF), MPK
WHITE, Edward G, Stoker, 68026 (SANF), MPK
WIBLIN, Eric R, Able Seaman, 67717 (SANF), MPK
YATES, Philip R, Supply Assistant, 67570 (SANF), MPK
Included in this Honour Roll is also a South African serving with the Royal Navy’s Fleet Air Arm on the HMS Hermes.
RILEY, H, Air Mechanic, Fleet Air Arm, HMS Hermes, died 9 April 1942
HMS Hollyhock
ANDERSON, Henry G, Able Seaman, 67501 (SANF), MPK
BASTON, Douglas T, Act/Engine Room Artificer 4c, 68600 (SANF), MPK
BUITENDACH, James M, Stoker 2c, 69223 (SANF), MPK
JUBY, Kenneth J, Ordinary Seaman, 69211 (SANF), MPK
LEACH, Peter A D H, Stoker 2c, 69225 (SANF), MPK
Lest we forget the tremendous sacrifice of our countrymen in this world war for the liberation of human kind.
Why is it important we get this history right?
So there we have it, the South African Navy’s biggest single loss in a single day – 41 souls, a ‘black day’ and added together with the HMS Hermes and HMS Hollyhock , we see a complete total of 65 South African souls lost in one single engagement at sea – qualifying a very ‘black week’ – The Easter Sunday Raid and this then marks the Easter period as the South African Navy’s ‘Darkest Hour’.
But is this correct – is this the full complement of South Africans lost in the incident? The answer unfortunately is – probably not.
Whilst the honour rolls distinguish the South African Naval Forces personnel seconded to British ships, they do not distinguish the South Africans who joined the Royal Navy directly in either Simonstown or in the United Kingdom – of which there were thousands and those who lost their lives are now listed under the Royal Navy’s honour roll.
The ‘old’ South African Defence Force (SADF) did not maintain these records, nor was a honour roll tracked by the South African Navy and simply put, when the Nationalists broke the formal ties with the United Kingdom and the Commonwealth, and after the resultant four decades in the ‘wilderness’ during the Apartheid epoch – many of these names are now ‘lost’.to all of us as South Africans.
To find out which of these are South Africans requires research into each and every case on the Royal Navy’s record – a momentous task which some dedicated people looking into this are only now beginning to get their heads around. Here we must thank the likes of Glenn Knox, David Bennet, Allan du Toit, Cameron Kinnear and Graham Du Toit and a handful of others for sterling work recovering this history.
So, in all likelihood more than just ’64’ South Africans died in this action, and why is this important for us to know who they were? Read this letter I received when I published this honour roll and action in a previous article on the HMS Dorsetshire it says everything as to the importance of this work:
Letter from Chris Crossley
Hi Peter, Just another story for you! This post you put up on the Legions page has some amazing history which you wouldn’t know about but I am happy to share with you to show my gratitude for these “nuggets” of info you share with us.
My wife, Tracy, was an adopted child who after 35 years found her birth parents. Wonderful people they turned out to be and we are building a relationship with them that is priceless. As things go, curiosity led us to find out about family history and Tracy’s birth Dad told us about an uncle of his that was lost during the war. He was in the SAN and went down with “some” ship somewhere. He was married at the time and his wife, on hearing the news that her husband was lost at sea (MIA) never gave up on the hope of his return to Durban because he was never seen and not confirmed deceased. Because of this, she never remarried and passed away many years later, remaining faithful to her husband. Her husband was Roland Redman who served with the SA Navy volunteers on the HMS Dorsetshire that your story includes. His name is included in the Role of Honour for the Dorsetshire.
None of the wider family have ever known what happened to him and the facts and details of his service were not known by the surviving family members either. This last Saturday evening, I was talking to my wife’s birth Dad when he recounted the scant details he had of his uncle. I went on line and found your article and shared it with him on fb. Well he was overcome by this information as well as other members of his family and now for the first time in seventy odd years the facts of Uncle Roland, his service and his sacrifice are now known and cherished by his family left behind.
As an historian, I am sure this story will be something that you can cherish as your post has made a huge difference to some wonderful people! Thank you.
Now, with this letter in mind, I cannot think of a better reason to get this history right and establish the correct commemorations and full honour roll. We owe it to our countrymen whose sacrifice brought us international freedom and liberty – it is our duty to carry this flame of remembrance and rid ourselves of the divisive and petty politics of one-upmanship played out by politicians with agendas (nationalists and the ANC) – this politicisation shrouds our most honourable history and only serves to dishonour the sacrifice of our South African servicemen and women – which is by its very nature is as ‘unforgivable’ as it is ‘dishonourable’.
Related work and Links:
For related work in the Observation Post on the above story, click on the following links:
Written and Researched by Peter Dickens. References Wikipedia. CASUALTIES BY DATE and SHIP Compiled by Don Kindell sourced on the Royal Naval History Homepage. Image copyright of Royal Navy, SA Naval Reserve, Imperial War Museum. Japanese Imperial Ensign object, Imperial War Museum copyright.
This is an image of the HMS Dorsetshire listing and burning just prior to her sinking, it was attacked by the Imperial Japanese Navy using carrier borne dive bombing aircraft. A large number of South African Navy personnel were involved in the battle and were lost with this ship whilst seconded to the Royal Navy during World War 2.
As Simonstown in South Africa was a British Naval base thousands of South Africans in WW2 served in the Royal Navy as well as in the South African Naval Forces (SANF). The loss of a heavy Cruiser the size of the HMS Dorsetshire is bound to include a South African honour roll and unfortunately this one does – a very long one at that, especially given this particular Battle Cruiser’s long association with South Africa.
The sinking of both the HMS Cornwall and the HMS Dorsetshire in the Indian Ocean by the Japanese on 5th April 1942 is linked. Not only that they were sunk within range of one another on the same day, but also in terms of the relationship of these two ships had with South Africa and the number of South Africans on board. This is further linked to the sinking of the HMS Hermes and HMS Hollyhock later in the same engagement with the Japanese, with similar relations and consequences to the South African Navy.
So, let’s focus on the HMS Dorsetshire today, a hero in the sinking of the German Battleship Bismarck and the extraordinary link between this ship and South Africa.
HMS Dorsetshire Short History
The HMS Dorsetshire was a heavy cruiser and after commissioning in 1930 became the flagship of the 2nd Cruiser Squadron Atlantic Home Fleet. Before the war, from 1933 until 1936, HMS Dorsetshire served on the Africa Station. Her first recorded docking in the Selborne dry dock at Simonstown, South Africa was on 5 January 1934.
When the Second World War broke out HMS Dorestshire had joined the China station and in October 1939 she was joined into the hunt for the German pocket battleship Admiral Graf Spee along with the HMS Cornwall. Both were withdrawn from the China station and despatched to Ceylon to form Force I.
In December 1939 the HMS Dorsetshire and HMS Cornwall arrived in South Africa where they embarked many South African volunteers, drawn mainly from Royal Navy Volunteer Reserves (RNVR – South African Division) and South African Naval Reserve Force.
The HMS Dorsetshire was called into pursuit of the German ‘pocket battleship’ Admiral Graf Spee, which having left Wilhemshaven on 21 August 1939 had reached the eastern part of the South Atlantic in early October 1939. In this region she managed to sink three British ships, Newton Beach, Ashlea and Huntsman on 5, 7 and 10 October respectively some 1,000 nautical miles north west of Cape Frio in Namibia, and then the Trevanion 630 miles north west of Walvis Bay on 22 October.
Admiral Graf Spee then continued on south and rounded the Cape passing some 400 miles south of Cape Agulhas. On 15 November she sank the small tanker Africa Shell a mere 10 miles off the coast of Mozambique before moving once again around the Cape keeping at least 300 miles off shore passing Cape Agulhas once more on 3 December 1939.
When the German Battleship ‘Admiral Graf Spee’ was discovered and pursued by the British Royal Navy, the Graf Spee was sent to the River Plate estuary in South America and because of the potential fall-out should it be sunk or captured the Captain was ordered by the German High Command to scuttle his vessel after leaving the Montevideo harbour – without encountering the Royal Navy.
In February 1940 while in the Atlantic, the German supply freighter Wakama was stopped by Dorsetshire in the area off Cabo Frio and her crew scuttled also her . On 2 March 1940 she left the Falklands with wounded from the cruiser HMS Exeter en-route to Cape Town, South Africa. On the 11th , the wounded and the prisoners from the German freighter were all put ashore.
She was then docked again at Simonstown’s Selborne dry dock, prior to sailing back to United Kingdom. This short movie Pathé news reel captures the HMS Dorsetshire in South Africa and its well worth a quick look:
On May 25th, the cruiser arrived in Plymouth in the UK, and at the end of the month sailed for Freetown to commence operations around Dakar in pursuit of the Vichy French Battleship Richelieu. She sailed on again to South Africa and was dry docked in Durban on the 4th September, on the 20th September she arrived back in Simonstown, where a day later she sailed for Sierra Leone.
November saw her in the Indian Ocean where she bombarded Zante in Italian Somaliland. In December Dorsetshire docked once again in the Selborne dry dock in South Africa and later that month she was ordered to search for the German pocket Battleship Admiral Scheer.
On 18 January 1941, HMS Dorsetshire captured the Vichy French freighter Mendoza and escorted the ship to Takaradi. In March 1941, Dorsetshire was once again docked in the Selborne dry dock in South Africa. Late in May 1941, whilst in the North Atlantic on convoy covering duties, HMS Dorsetshire together with the cruiser HMS London were tasked to search for the German Battleship ‘Bismarck’.
The sinking of the Bismarck
The Bismarck
At the time she was ordered to search for the Bismarck on 26th May 1941 the HMS Dorsetshire was some 360 nautical miles (670 km) south of the Bismarck’s actual location. HMS Dorsetshire steamed at top speed, though heavy seas until she encountered the destroyer HMS Cossack, which had been engaging the Bismarck during the night, the German battleship’s gun flashes could be seen six miles away by early morning.
The HMS Dorsetshire then took part in the Bismarck’s final battle, The battleships HMS Rodney and HMS King George V neutralised Bismarck‘s main battery early in the engagement, the HMS Dorsetshire and other warships closed in to join the attack. The HMS Dorsetshire opened fire at a range of 18,00 meters. In the course of the engagement, she fired 254 shells from her main battery. In the final moments of the battle, she was ordered to move closer and torpedo the Bismarck and fired three torpedoes, two of which hit the crippled battleship.
Survivors from Bismarck are pulled aboard Dorsetshire on 27 May 1941
The Germans had by this time also detonated scuttling charges, which also with the damage inflicted by the British Royal Navy, caused the Bismarck to rapidly sink just before midday on the 27th May 1941.
The HMS Dorsetshire and the destroyer HMS Maori were tasked to pick up survivors. A reported U-boat sighting forced the two ships to break off the rescue effort, after picking up only 110 men: 85 aboard Dorsetshire and 25 aboard Maori.
African Duties and Raiders
In late August, HMS Dorsetshire left Freetown and participated in the unsuccessful search for the German heavy cruiser Admiral Hipper, On the 4th November HMS Dorsetshire sent to investigate reports of a German surface raider in the South Atlantic with no result.
After arriving again in Cape Town on 9 December 1941, having sunk a German U Boat supply ship the ‘Python’ whilst she was refuelling a pair of German U-boats.
Beginning 1942, HMS Dorsetshire, under the command of Augustus Agar was assigned to the Eastern Fleet in the Indian Ocean.
The Easter Sunday Raid
With Japan’s entry into the war, and especially after the fall of Singapore, Ceylon (now Sri Lanka) became a front-line British base. The Royal Navy’s East Indies Station and Eastern Fleet was moved to Colombo and Trincomalee.
Admiral Sir James Somerville was appointed as the commander of the British Eastern Fleet, and he decided to withdraw main component the fleet to Addu Atoll in the Maldives, leaving a small force to defend Ceylon (Sri Lanka) consisting of an aircraft carrier, the HMS Hermes, two heavy cruisers – the HMS Cornwall and HMS Dorsetshire, one Australian Destroyer the HMSAS Vampire and the flower class corvette, the HMS Hollyhock.
The Royal Navy’s own ‘Pearl Harbour’
The Imperial Japanese Navy, in much the same way and with the same objectives that were used at Pearl Harbour against the American fleet planned a decisive attack of the British Eastern Fleet to end their presence in the North Indian and Pacific oceans. Unaware that the main body of the British fleet had moved to the Maldives, they focused their plan on Colombo (the commercial capital of modern-day Sri Lanka).
The planned Japanese attack was to become collectively known as the Easter Sunday Raid and the Japanese fleet comprised five aircraft carriers plus supporting ships under the command of Admiral Chuichi Nagumo.
In an almost exact copy of the raid on the American fleet at Peal Harbour (as if no learnings were made by the Allies), on 4 April 1942, the Japanese fleet was located by a Canadian PBY Calatina aircraft, the Catalina radioed the position of the Japanese Fleet to The British Eastern Fleet which alerted the British to the impending attack before it was shot down by six Japanese Zero fighters from the carrier Hiryu.
A Mitsubishi A6M Zero fighter plane takes off from the deck of the Japanese aircraft carrier Akagi, part of the Japanese Naval force in the Indian Ocean
However, despite the warning Nagumo’s air strike on Colombo the next day, Easter Sunday 5th April 1942 they did manage to achieved near-complete surprise (Pearl Harbour was also attacked on a weekend). The British Radar installations were not operating, they were shut down for routine maintenance (another parallel with the attack on Peal Harbour).
Captain Mitsuo Fuchida
The first attack wave of Japanese planes took off in pre-dawn darkness (30 minutes before sunrise) from the aircraft carriers Akagi, Hiryu and Soryu, moving about 200 miles south of Sri Lanka. The first attack wave of 36 fighters, 54 dive bombers, and 90 level bombers was led by Captain Mitsuo Fuchida the same officer who led the air attack on Pearl Harbour.
The Heavy Cruisers, HMS Cornwall and HMS Dorsetshire set out in pursuit of the Japanese. On 5 April 1942, the two cruisers were sighted by a spotter plane from the Japanese cruiser Tone about 200 miles (370 km) southwest of Ceylon. A wave of Japanese dive bombers led by Lieutenant Commander Egusa took off from Japanese carriers to attack Cornwall and Dorsetshire, 320 km (170 nmi; 200 mi) southwest of Ceylon, to sink the two ships.
In the attack, the Japanese airman flying Japanese D3A-1 ‘VAL’ dive bombers, a total of 53 dive bombers in the attack wave, dropped 10 bombs on the HMS Dorsetshire itself (250- and 550-pound bombs) and 8 near misses, all in the span of 8 minutes. One of the bombs detonated an ammunition magazine and contributed to her rapid sinking. Of the two British cruisers, the HMS Dorsetshire sank first, with her stern going first at about 13:50, the HMS Cornwall was hit eight times and sank bow first about ten minutes later.
An eye-witness account from a South African Seaman on board the HMS Dorsetshire recounts the ferocity and nature of the Japanese attack:
Seaman WJ Spickett of Cape Town South Africa who was on lookout duty on Dorsetshire saw the whole action from start to finish.
“We were steaming to keep a rendezvous and when about 400 miles off land, a seaplane which we could not identify, started shadowing us. This was about 10 o’clock in the morning. Dorsetshire and Cornwall were steaming fast, keeping about four miles apart. At 20 minutes to two we spotted a large formation of between 40 and 60 aircraft coming towards us. Within a few minutes they were overhead — so high they were mere specks. Then they came straight for us in formations of three, diving at such a steep angle that it was impossible for our guns to get at them.
I saw the first bomb, a silvery flash in the sunlight, come straight for us. It was a direct hit, blasting our aircraft platform to pieces. In that first attack, I think 10 bombs were dropped. We were steaming at high-speed but eight of those 10 were direct hits. The other two were near misses. The ship listed badly and within 10 minutes of the first bomb being dropped we got orders to abandon ship.
We got away two whalers and a skiff and several rafts. There were hundreds of us in the water and then three planes came over and added to the horror of these moments ‘. Many were killed and wounded in this attack but apparently it was just a gesture of victory for it was not repeated.”
This witness account of machine gunning the survivors in the water is verified by a number of survivors including the Engineering Officer Lieutenant E. A. Drew, who said that whilst in the water they were “subjected to machine gun fire from the large number of Japanese planes that hung around until the ship sank”.
Japanese combat photograph showing the Royal Navy heavy cruisers HMS Dorsetshire and HMS Cornwall on fire and sinking
Survival and Sacrifice
In all the survivors of the sinking of both the Cornwall and Dorsetshire spent over 30 hours in the water clinging to debris or huddled in life rafts. Many seriously injured and burned and during the night ‘space’ was made available on the tiny rafts and flotsam for many clinging onto them as many of their colleagues succumbed to their wounds. Being the Indian ocean there are also tales of sharks circling the men and even taking them. Harrowing would be an understatement.
Between the two ships, 1,122 men out of a total of 1,546 were picked up by the cruiser HMS Enterprise and the destroyers HMS Paladin and HMS Panther the next day. In this action, of the 424 members of the ships’ companies of the two cruisers who lost their lives, over 42 were South Africans.
Survivors from the HMS Dorsetshire and HMS Cornwall in the water
Because of his ship’s long association with South Africa, a very high proportion of the losses were from the South African Naval Forces. Here is the South African Naval Forces honour roll (MPK means ‘Missing Presumed Killed’) from the sinking;
HMS Dorsetshire – South African Navy Personnel Lost, Honour Roll
BELL, Douglas S, Ty/Act/Leading Stoker, 67243 (SANF), MPK
BRUCE, Alexander M, Stoker 2c, 67907 (SANF), MPK
EVENPOEL, Albert, Stoker 2c, 67909 (SANF), MPK
GEFFEN, Sender, Stoker 1c, 68035 (SANF), MPK
HOWE, Horace G, Ordinary Seaman RNVR, 68680 (SANF), MPK
KENDRICK, George, Stoker 2c, 67910 (SANF), MPK
MCINTYRE, Norman G, Able Seaman, 67446 (SANF), MPK
MCLELLAN, Robert, Ordinary Telegraphist, 67897 (SANF), MPK
MORROW, Douglas E, Able Seaman, 67989 (SANF), MPK
ORTON, Charles P, Able Seaman, 68009 (SANF), MPK
REDMAN, Roland A, Leading Stoker, 67406 (SANF), MPK
SCOTT, William J, Able Seaman, 68007 (SANF), MPK
SEVEL, Harry, Stoker 1c, 68100 (SANF), MPK
WILLETT, Amos A S, Stoker 1c, 67240 (SANF), MPK
WILLIAMSON, Walter N, Able Seaman, 67803 (SANF), MPK
HMS Dorsetshire – South African’s lost serving in the Royal Navy, Honour Roll
CONCANON, Harold Bernard, Surgeon Lieutenant (Doctor)
MILNE, Lawrence Victor, Able Seaman
VAN ZYL, David Isak Stephanus, Stoker 1st Class
WILLETT, Amos Alfred Sidney ,Stoker 1st Class
Note: Some more South Africans may not accounted in the above list as they may have been Royal Navy personnel having volunteered to serve in the Royal Navy, there is a long list of South Africans not accounted on the Navy’s honour rolls because of the complication of citizenship, the position of the South African Union in supporting the war and the nature of Simonstown near Cape Town as ‘British territory’ and not South African.
Related work
The Japanese Easter raid was to bring a terrible toll on not only the Royal Navy, but also on the South African Navy whose personnel were involved. It remains the South African Navy’s darkest days, as not only were the HMS Cornwall and HMS Dorsetshire full of SANF personnel. For a full article on the HMS Cornwall, click on this link (“A terrific explosion lifted the ship out of the water”; Recounting South African sacrifice on the HMS Cornwall).
This history is lost to most South Africans, however good work is now been done by a handful of individuals to try and correct and up-date these honour rolls and recount the full depth of South Africa’s involvement in warfare at sea during World War 2.
That the history is lost is due to the political expediency of the National Party, who on acent to power after WW2, effectively wiped it clean of the national consciousness – branding our World War 2 veterans as ‘traitors’ instead of ‘heroes’ for serving a British cause in their estimation. It is further lost to the new generations due to the slow up-take in recognition if this history by the African National Congress (ANC) government, again for their own political expediency.
That the darkest days of the South African Navy – The Easter Raid of 1942, is not even officially acknowledged or even remembered by The South African Navy in our modern day is testament to this and the subject of a future Observation Post article.
We, as South Africans, do however have an excellent tradition at the Selborne Graving Dock, the dry docks in Simonstown, allowing visiting crews to paint their ships emblems on the docks walls, it is an excellent record of many of the proud Royal Navy fighting ships who visited our shores in World War 2 and on whom many South Africans served. Next time you are there look out them, including the HMS Dorsetshire.
Their names have not been forgotten.
Researched by Peter Dickens. Background on HMS Dorsetshire extracted from U Boat.net. Wikipedia. News reel copyright British Pathé. British Broadcast Corporation account on the war (BBC) WW2 The Peoples War. Casualty Lists of the Royal Navy and Dominion Navies, World War 2 by Don Kindell. Extracts fro ‘Day to Day SA Naval History’ by Chris Bennett. Thanks also to Graham Du Toit for his excellent research into the Honour Roll including South Africans serving in the Royal Navy.
Recounting South African sacrifice on the HMS Cornwall
This is an image of the HMS Cornwall under attack just prior to her sinking, it was taken by the Japanese attack aircraft. A number of South African Navy personnel were lost with this ship whilst seconded to the Royal Navy during World War 2.
As Simonstown in South Africa was a British Naval base thousands of South Africans in WW2 served in the Royal Navy as well as in the South African Naval Forces (SANF). The loss of a heavy Cruiser the size of the HMS Cornwall is bound to include a South African honour roll and unfortunately this one does. Read on for their story.
HMS Cornwall Short History
HMS Cornwall was a heavy cruiser of the Kent-subclass of the County-class. When World War 2 began in September 1939, Cornwall was transferred from her pre-war China Seas operations to the Indian Ocean and joined Force I at Ceylon.
On 5th October 1939, she was involved in the search for the German pocket battleship Admiral Graf Spee. Between the 8th and 14th February 1940, she was docked at the Selborne dry dock at Simonstown, South Africa. Its was here that she would have taken onboard a large contingent of South Africans either volunteering for the Royal Navy or seconded to the Royal Navy as members of The South African Naval Forces stationed there.
In September 1940, together with HMS Delhi, she intercepted Vichy-French light cruiser Primauguet and tanker Tarn, forcing them to return to Casablanca, Morocco. By January 1941, HMS Cornwall returned to the Selborne dry dock in South Africa for refitting, at the same time taking on more South African personnel.
Sinking of the German Auxiliary Ship Pinguin
The HMS Cornwall was on patrol in the Indian Ocean of Seychelles when she engaged and sank the German ship ‘Pinguin’ on the 8th May 1941, Pinguin was known to the German Navy as Schiff 33, and designated HSK 5. The most successful commerce raider of the war, she was known to the British Royal Navy as Raider F.
Unfortunately, without the knowledge of Cornwall’s crew, Pinguin sank along with 200 Allied prisoners of war in addition to 232 Germans lost (60 German crew members and 22 Allied prisoners were rescued). She returned to Durban, South Africa to repair her stern, which was damaged during the battle against Pinguin; the repairs lasted until 10th June 1941.
HK Pinguin
On the 25th November 1941, Cornwall intercepted the Vichy-French merchant vessel Surcouf in the Indian Ocean off the east coast of Somalia. Surcouf was originally en route to Djibouti with food, but was forced to sail to Djibouti instead.
Between January and March 1942, Cornwall escorted convoys between Ceylon and the Sunda Strait in the Dutch East Indies. In March 1942, she was sent to Colombo, Ceylon in preparation for a possible Japanese attack into the Indian Ocean.
The Easter Sunday Raid
With Japan’s entry into the war, and especially after the fall of Singapore, Ceylon (now Sri Lanka) became a front-line British base. The Royal Navy’s East Indies Station and Eastern Fleet was moved to Colombo and Trincomalee.
Admiral Sir James Somerville was appointed as the commander of the British Eastern Fleet, and he decided to withdraw main component the fleet to Addu Atoll in the Maldives, leaving a small force to defend Ceylon (Sri Lanka) consisting of an aircraft carrier, the HMS Hermes, two heavy cruisers – the HMS Cornwall and HMS Dorsetshire, one Australian Destroyer the HMSAS Vampire and the flower class corvette, the HMS Hollyhock.
The Royal Navy’s own ‘Pearl Harbour’
The Imperial Japanese Navy, in much the same way and with the same objectives that were used at Pearl Harbour against the American fleet planned a decisive attack of the British Eastern Fleet to end their presence in the North Indian and Pacific oceans. Unaware that the main body of the British fleet had moved to the Maldives, they focused their plan on Colombo (the commercial capital of modern-day Sri Lanka).
The planned Japanese attack was to become collectively known as the Easter Sunday Raid and the Japanese fleet comprised five aircraft carriers plus supporting ships under the command of Admiral Chuichi Nagumo.
In an almost exact copy of the raid on the American fleet at Peal Harbour (as if no learnings were made by the Allies), on 4 April 1942, the Japanese fleet was located by a Canadian PBY Calatina aircraft, the Catalina radioed the position of the Japanese Fleet to The British Eastern Fleet which alerted the British to the impending attack before it was shot down by six Japanese Zero fighters from the carrier Hiryu,
However, despite the warning Nagumo’s air strike on Colombo the next day, Easter Sunday 5th April 1942 they did manage to achieved near-complete surprise (Pearl Harbour was also attacked on a weekend). The British Radar installations were not operating, they were shut down for routine maintenance (another parallel with the attack on Peal Harbour).
Captain Mitsuo Fuchida
The first attack wave of Japanese planes took off in pre-dawn darkness (30 minutes before sunrise) from the aircraft carriers Akagi, Hiryu and Soryu, moving about 200 miles south of Sri Lanka. The first attack wave of 36 fighters, 54 dive bombers, and 90 level bombers was led by Captain Mitsuo Fuchida the same officer who led the air attack on Pearl Harbour.
The Heavy Cruisers, HMS Cornwall and HMS Dorsetshire set out in pursuit of the Japanese. On 5 April 1942, the two cruisers were sighted by a spotter plane from the Japanese cruiser Tone about 200 miles (370 km) southwest of Ceylon. A wave of Japanese dive bombers led by Lieutenant Commander Egusa took off from Japanese carriers to attack Cornwall and Dorsetshire, 320 km (170 nmi; 200 mi) southwest of Ceylon, to sink the two ships.
In the attack, the Japanese airman flying Japanese D3A-1 ‘VAL’ dive bombers, then dropped 9 bombs on the HMS Cornwall itself ( 250- and 550-pound bombs) and six near misses, the HMS Cornwall becoming dead in the water within minutes, the HMS Cornwall sank in about 12 minutes after the first hit (and Dorsetshire suffered the same fate).
An eye-witness account from a South African officer on board the Cornwall recounts the ferocity and speed of the attack:
Sub-Lieutenant R. Ellis Brown, son of the mayor of Durban, said he was down below in the control room of the high angle guns when the warning was flashed that aircraft were attacking.
“Almost immediately afterwards there was a terrific explosion and the ship lifted out of the water and listed to port, “ he said. “This was followed almost immediately by another hit. The lights went out and I continued on to the sick bay. I went forward from there to contact the control officer and shortly after I left, a bomb dropped on the sick bay, killing most of the men there. I could not get through on account of the flames, so went to the aft deck. Here we managed to get a whaler and also five or six floats. We got the men off and I looked up and saw a dive-bomber coming down at me. I saw the bomb released at about 700 feet and it appeared to be coming straight at me. Although I knew that if a bomb appeared to be coming straight at you it would actually fall far beyond. I must say I did not like it one bit. The men jumped into the water and finally the two other officers and myself left on this deck followed them.”
Sub-Lieutenant Ellis Brown said that the men were in the water for about 30 hours. The wounded were placed in a motor boat which had floated off when Cornwall sank. The remainder stayed in the water, hanging on to debris and floats. To the discomforts the men suffered in the water was added the horror of knowing they were in shark-infested waters. He recalls, “We saw several fins cutting the water but as soon as they came near, the men would kick and shout and they would make off.”
Japanese combat photograph showing the Royal Navy heavy cruisers HMS Dorsetshire and HMS Cornwall on fire and sinking
HMS Cornwall was sunk in position 01º54’N, 77º45’E. All boiler and engine rooms were out of action within minutes, thereby resulting in a lack of power to the pumps and fire fighting equipment. In all the men spent 30 hours in the water, before a combined rescue of the HMS Dorsetshire men (also in the water) and HMS Cornwall’s men by the HMS Enterprise, HMS Paladin and HMS Panther. In total 192 of Cornwall’s men were lost, of a very high proportion – 23, were South African. Here is the South African Naval Forces honour roll (MPK means ‘Missing Presumed Killed’) from the sinking;.
HMS Cornwall – South African Navy Personnel Lost, Honour Roll
BESWETHERICK, Hedley C, Ordinary Seaman RNVR, 86671 (SANF), MPK
BOTES, John S, Stoker 2c RNVR, 68924 (SANF), MPK
COMMERFORD, Noel P, Able Seaman RNVR, 66493 (SANF), MPK
CRAWFORD, Cecil E, Act/Engine Room Artificer 4c RNVR, 67922 (SANF), MPK
DU PREEZ, Charles P H, Able Seaman, 68175 (SANF), MPK
DUTTON, Charles C, Stoker 2c RNVR, 68949 (SANF), MPK
HANSLO, Raymond F, Able Seaman RNVR, 68295 (SANF), MPK
KEITH, Kenneth I B, Able Seaman RNVR, 66742 (SANF), MPK
KENYON, Graeme A B, Able Seaman RNVR, 68002 (SANF), MPK
KIRSTEN, Monty G W, Able Seaman RNVR, 68917 (SANF), MPK
LAW, Edward, Act/Engine Room Artificer 4c RNVR, 66760 (SANF), MPK
MCDAVID, William K, Stoker 2c RNVR, 69138 (SANF), MPK
MITCHELL, William A, Stoker 1c RNVR, 68796 (SANF), MPK
PALMER, Walter A, Able Seaman RNVR, 68344 (SANF), (rescued, aboard HMS Enterprise), Died of Wounds
SPENCE, Noel W, Ordinary Seaman RNVR, 68732 (SANF), MPK
SQUIRES, John E, Ordinary Seaman RNVR, 68728 (SANF), MPK
STEPHEN, Eric B, Ordinary Seaman RNVR, 68861 (SANF), MPK
SWANN, Lawrence T, Stoker 1c RNVR, 68710 (SANF), MPK
THORPE, Maurice, Stoker 2c RNVR, 69140 (SANF), MPK
VERSFELD, Peter H S, Able Seaman RNVR, 68859 (SANF), MPK
VINK, Benjamin F, Ordinary Seaman RNVR, 68860 (SANF), MPK
WILLSON, Gerald F, Stoker 2c RNVR, 69006 (SANF), MPK
WRIGHT, Thomas H, Able Seaman RNVR, 68039 (SANF), MPK
In earlier incidents on HMS Cornwall two South Africans lost their lives they are also remembered here:
AINSLIE, Roy, Petty Officer, 66382 (SANF), died on 5 September 1940
HAWKINS, Reginald D, Able Seaman, 66700 (SANF), died of illness 4 March 1942
Some South Africans may not accounted in the above list as they may have been Royal Navy personnel having volunteered to serve in the Royal Navy, there is a long list of South Africans not accounted on the Navy’s honour rolls because of the complication of citizenship, the position of the South African Union in supporting the war and the nature of Simonstown as British territory.
Related work
The Japanese Easter raid was to bring a terrible toll on not only the Royal Navy, but also on the South African Navy whose personnel were involved. It remains the South African Navy’s darkest days, as not only were the HMS Cornwall and HMS Dorsetshire full of SANF personnel, so too were the other two ships sunk later in this engagement on the 9th April 1942 by the same Japanese raiders – the HMS Hermes, see related article by clicking this link (“Dante’s Inferno”; Recounting South African sacrifice on the HMS Hermes) and HMS Hollyhock, see related article by clicking this link ( “She immediately blew up”; Recounting South African sacrifice on the HMS Hollyhock).
This history is lost to most South Africans, however good work is now been done to try and correct and up-date these honour rolls and recount the full depth of South Africa’s involvement in warfare at sea during World War 2. We, as South Africans, do however have an excellent tradition at the Selborne Graving Dock, the dry docks in Simonstown, allowing visiting crews to paint their ships emblems on the docks walls, it is an excellent record of many of the proud Royal Navy fighting ships who visited our shores in World War 2 and on whom many South Africans served. Next time you are there look out them, including the HMS Cornwall.
Their names have not been forgotten.
Written and researched by Peter Dickens, with extracts taken from Wikipedia, Force-z survivors official webpage, the British Broadcast Corporation account on the war (BBC) WW2 The Peoples War. Casualty Lists of the Royal Navy and Dominion Navies, World War 2 by Don Kindell.
It is not known now to many modern South Africans, but the South African Navy lost four ships in total during WW2, all of them minesweepers. Hardly recognised today all these ships carried with them tales of great bravery,
The third ship to be lost was the HMSAS Parktown’s sister ship, the HMSAS Bever which went down later in the war during the liberation of Greece when it struck a mine, and carries with its story a tale of miraculous survivors (see “Under a hail of shells”; Recounting the bravery and loss of HMSAS Bever).
The final minesweeper to be lost was the HMSAS Treern, it was tragically lost right at the end of the war, and it remains the last South African vessel to be lost in action, even to this day, yet hardly anyone is aware of her history.
So lets examine this last combat loss, and why it is that we tend to overlook all this sacrifice at sea in the South African Navy’s vessels during the Second World War.
The second minesweeping flotilla prepares for the Mediterranean
HMSAS Treern
On the 12 May 1941, the HMSAS Treern (under the command of Lt. H H Cook) is commissioned, she is a whaler now converted for wartime service. Now a magnetic minesweeper she is given her number T451 and allocated the pennant number 94.
By the beginning of November 1941, there is a small flotilla of South African minesweepers ready for deployment in the Mediterranean in support of Allied combat operations there. The HMSA Ships, Bever, Gribb, Seksern, Imhoff, Treern, Parktown and Langlaagte, all are former whale catchers of about 260 tons and built between 1926 and 1930, and all are ready to go as part of the 166th Minesweeping Group in the Mediterranean. Each minesweeper is fitted with one 3 inch gun plus smaller QF guns, depth charges and LL sweeps. They are the second group of South African minesweepers to sail from Durban for the Mediterranean.
The liberation of Greece
The Treern has a long record of service conducting duties alongside Allied shipping, she spends almost the entire war in the combat zone, towards the end of the war she finds herself under the command of Lt. P Byrne assisting in the liberation of Greece sailing in the Aegean Sea – the end of the war in Europe and surrender of Germany is a tantalising four months away.
HMSAS Treern
By January 1945 the situation in the Greek Islands was somewhat confused. Initially the task of the Allies appeared to be a straightforward one; simply the supply and distribution of food and other essentials and the opening up of communications which, from the nature of the country, was largely by sea. However, internal dissension (which the retreating German forces had done their best to promote) considerably complicated and delayed the Allied take over.
The Greek People’s Liberation Army or ELAS was the military arm of the left-wing National Liberation Front (EAM) during the period of the Greek Resistance until February 1945, then during the Greek Civil War.
HMSAS Treern, with orders to relieve HMSAS Seksern at Volo, arrived there at noon on 27 December 1944 only to find the harbour deserted and therefore anchored in the bay whilst radioing for instructions. Soon afterwards an emissary from ELAS (Greek People’s Liberation Army) arrived, ELAS was one of the factions in the internal dissension in Greece caused by the vacuum created by the German occupiers retreating from Greece.
The ELAS emissary informed the HMSAS Treern that Volo was under ELAS control and then asked the Captain what his intentions were.
The ELAS emissary eventually agreed to let the ship remain there for the night. Next morning Treern left for Skiathos where she met up with the British destroyer, HMS Musketeer, considerably to the relief of both captains, and came under the orders of the Musketeer.
In the town of Volo a somewhat lukewarm ELAS control prevailed – political fervour being influenced by the presence of the destroyer and her 4.7-inch guns, under cover of which all local craft, arriving and leaving, were interrogated and searched for arms.
Treern assisted in this duty for the next few days before being attached to a small naval force then operating against the ELAS in the Gulf of Volo and along the north-east coast of Euboea.
The loss of the HMSAS Treern
On the morning of 12 January whilst off the northern shore of the Trikiri Channel and towing a caique laden with fuel for motor launches then lying off Volo. At about 08:30 there is a huge explosion, presumably caused by a mine, which destroys Treern almost immediately with a very heavy loss of life.
Only one man survives
The only survivor, Stoker J.J. Bosch, later states that he was in the port waist, while most of the other men off duty were watching a pig being slaughtered on the boat-deck above him. Suddenly he felt a tremendous concussion and found himself somersaulting through the air into the water. On coming to the surface he found a life buoy floating near him and saw the last few feet of the ship’s bows disappear below the surface.
At the same time another mine exploded about 100 yards away, presumably a sympathetic detonation caused by the first explosion. One of his legs had been injured, but the caique picked him up and about an hour later transferred him to HMS Musketeer.
Honour Roll
MPK means ‘Missing Presumed Killed’. SANF stands for ‘South African Naval Forces’.
ANDERSON, Robert D, Engine Room Artificer 2c, 71067 V (SANF), MPK
BARKER, Ronald E, Sub Lieutenant, SANF, MPK
BLAKE, Robert E, Petty Officer, P 6572 (SANF), MPK
BROWN, Ian H, Able Seaman, 71719 V (SANF), MPK
BYRNE, Patrick, Lieutenant, SANF, MPK
DAVIE, William, Stoker 1c, 70681 V (SANF), MPK
ENGELBEEN, Leslie C, Able Seaman, 562235 V (SANF), MPK
JACOBZ, Frank H, Stoker 1c, 70374 V (SANF), MPK
MATTHEWS, George A, Stoker 1c, 70728 V (SANF), MPK
MCINTYRE, William G, Cook (S), 585360 (SANF), MPK
MCLARTY, William D, Leading Stoker, 562246 V (SANF), MPK
MCLEAN, Godfrey, Able Seaman, 562455 V (SANF), MPK
NILAND, St John E, Able Seaman, 209905 (SANF), MPK
PERRY, Desmond A, Petty Officer, 71211 (SANF), MPK
REID, Kenneth H, Signalman, 562143 V (SANF), MPK
SALCOMBE, Francis R, Stoker 1c, 58589 V (SANF), MPK
STAPELBERG, Willem J, Steward, 562221 V (SANF), MPK
SUTTON, Donald A, Able Seaman, 70426 (SANF), MPK
SUTTON, George A M, Leading Seaman, 586403 V (SANF), MPK
TRAFFORD, William O, Able Seaman, 71222 V (SANF), MPK
VILJOEN, Dennis A, Telegraphist, 70984 V (SANF), MPK
WHITE, Charles W, Petty Officer, 562200 V (SANF), MPK
WULFF, Emil F, Leading Seaman, 562466 V (SANF), MPK
In Conclusion
Successive generations of South Africans have not been exposed to the gallantry of South African servicemen at sea, many remain blissfully unaware of all the heroic actions of South African fighting ships during World War 2.
Little remains of this history, and it now has to ‘dug up’ from recent research conducted by Chris Bennet and Allan du Toit, very little to nothing is available in public on-line records such as Wikipedia, such is the degree to which it has been wiped from the South African national consciousness.
The reason for this is political, the incoming Nationalist government after the war in 1948 regarded all of South Africa’s and Smuts’ exploits during World War 2 as one of treachery (siding with the ‘hated’ British), so no large-scale Naval commemorations or recognition ceremonies were ever undertaken by the South African Navy to maintain this memory.
Researched by Peter Dickens. Reference: Large extracts taken from Day by Day SA Naval History by Chris Bennett. Casualty Lists of the Royal Navy and Dominion Navies, World War 2 by Don Kindell. Images of South African vessels courtesy Allan du Toit and reference from his book ‘South African Fighting Ships’.
Here’s something on the SADF/SANDF’s John Chard Decoration and Medal series for long service in the Citizen Force, many who even hold the medal may not even know. But did you know, the John Chard Decoration and John Chard Medal Series was instituted by Queen Elizabeth II in 1952 (just two short months after she became Queen) and it is the last medal to issued by a British monarch and worn by members in all four South African military formations – Army, Navy, Air Force and Medical Service.
The John Chard Medal was instituted by Queen Elizabeth II on 6 April 1952, during the Tercentenary Jan van Riebeeck Festival, to replace the South African Union Defence Force’s Efficiency Medal and the Air Efficiency Award which had been awarded to members of the Citizen Force between 1939 and 1952. The John Chard medal series is a ‘service medal’ awarded for pre-determined tenure of service to the statuate South African defence forces.
So why ‘Rorke’s Drift’?
The John Chard medal and decoration was named after John Chard VC, the lieutenant who found his way to Rorke’s Drift supply depot on the 22nd January 1879 with his engineers, after earlier in the day observing from afar, the Zulu attack on the British at Isandlwana. As the most senior officer he was left in temporary command of the supply depot at Rorke’s Drift expecting no action and a rear guard requirement only, when suddenly it was also unexpectedly attacked by Zulu forces later on the same day.
For anyone whose seen the landmark movie ‘Zulu’, Lt. John Chard is played by Stanley Baker. Baker stars alongside Michael Caine who plays Lt. Gonville Bromhead.
The two officers, John Chard and Gonville Bromhead both earned Victoria Crosses’ along with nine others in defending Rorke’s Drift against a Zulu army attack. This is the largest tally of Victoria Crosses (the ultimate British award for Valour) from one single engagement for a single Regiment, in all 11 Victoria Crosses, one VC Mentioned in Dispatches and 4 Distinguished Conduct Medals were awarded. There were only just over 150 British and colonial troops who successfully defended the missionary and crossing at Rorke’s Drift against an intense assault by 3,000 to 4,000 Zulu warriors. It is an act that has never been repeated, and likely never to happen again in future.
So why so many Victoria Crosses for so few defenders? Well, simply put , a significant part of the British expeditionary force had been annihilated at the Battle of Isandlwana on the same day 22 January 1879, and the little missionary and crossing at Rorke’s Drift was the last line of defence should the Zulu Army have built on its victory at Isandlwana and invaded the British colony. The Natal Colony would have been for the most part left defenceless whilst Lord Chemsford and the remaining bulk of British forces searched for the Zulu army in the Zulu Kingdom itself. The action of these ‘few’ at Rorke’s Drift literally saved an entire British colony.
The Battle of Isandlwana was an embarrassing defeat for the British. The British Empire suffered its worst defeat against an indigenous foe with vastly inferior military technology. The site today is most interesting, because of the hard ground the British were unable to bury their dead, so they built stone cairns where they fell to cover them instead. These cairns, painted white – are a grizzly reminder of the calamity which took place there and literally map and bring the battlefield into perspective.
So why is John Chard singled out?
John Chard VC
John Chard was a lieutenant in the Royal Engineers who was busy building a pontoon bridge across the river, when he received the news that Isandlwana was under fierce attack.
Leaving his work, Chard rushed to the mission station at Rorke’s Drift, here he calmly set about building up a defensive strategy. Chard took up overall Command to defend the missionary buildings and it was his strategy and tactics during the battle that literally saved the day and helped to avoid complete annihilation of his small force of wounded and sick men, and a sprinkling of some very scared and bewildered Natal Native Continent soldiers. The redoubt he ordered be built was key to the British success on the day.
For his role in the heroic defence of Rorke’s Drift, Queen Victoria awarded the Victoria Cross to him, he also received a promotion to captain (he would retire a Colonel). To get a modern perspective on this in living image, this compilation from the movie ‘Zulu’ captures the destruction at Isandlwana and the fierce fighting in defending Rorke’s Drift, take the short time to watch it – look out for the concentrated volley fire and the use of the redoubt – a tactic missing from the Battle of Isaldlwana but used to absolute effect at Rorke’s Drift.
Citation
The citation for Chard’s and Bromhead’s Victoria Crosses says everything:
THE Queen has been graciously pleased to signify Her intention to confer the decoration of the Victoria Cross on the undermentioned Officers and Soldiers of Her Majesty’s Army, whose claims have been submitted for Her Majesty’s approval, for their gallant conduct in the defence of Rorke’s Drift, on the occasion of the attack by the Zulus, as recorded against their names, viz.:—
For their gallant conduct at the defence of Rorke’s Drift, on the occasion of the attack by the Zulus on the 22nd and 23rd January, 1879.
Royal Engineers Lieutenant (now Captain and Brevet Major) J. R. M. Chard
2nd Battalion 24th Regiment Lieutenant (now Captain and Brevet Major) G. Bromhead
The Lieutenant-General commanding the troops reports that, had it not been for the fine example and excellent behaviour of these two Officers under the most trying circumstances, the defence of Rorke’s Drift post would not have been conducted with that intelligence and tenacity which so essentially characterised it.
The Lieutenant-General adds, that its success must, in a great degree, be attributable to the two young Officers who exercised the Chief Command on the occasion in question.
Painting by Alphonse de Neuville – The defence of Rorke’s Drift
The John Chard Medal set
Even we learn something new everyday, what makes this surprising is that a medal issued by a British Monarch remained in the service of The South African Defence Force for so long, especially after it was reformatted after the National Party took South Africa out of the British Commonwealth and they embarked on a campaign to change the South African military emblems, insignia and medals and rid the SADF of anything “British” (especially the Queen’s crown which now had to go).
In many instances these changes where resisted and a number of civilian force “Regiments” where able to hold onto some of their British heritage – however the medal sets where all changed and new medals instituted, except the John Chard Service medal series which survived the changes.
John Chard 10 year service medal
The medal was awarded to all ranks of the Citizen Force for twelve years efficient service, not necessarily continuous. After a further eight years a recipient could qualify for the award of the John Chard Decoration (JCD).
This was later changed in 1986 to allow Citizen Force members to earn the John Chard Medal after ten years service, not necessarily continuous and the John Chard Decoration after twenty years.
The John Chard medal comes in heavy brass and the John Chard Decoration comes in heavy silver, and is not only beautiful to handle, but also fairly valuable. The early medals and awards bore the royal cypher on the rear, while the later ones bore the coat of arms of the Republic of South Africa.
The ribbon also carries the arm of service, crossed swords for the South African Army, a spread eagle for the South African Air Force, an anchor for the South African Navy and a Rod of Asclepius for the South African Medical Service. A ‘bar’ also existed for The John Chard Decoration, which signified 30 years service.
John Chard Decoration for 20 years service
The John Chard decoration/medal series continued in the SANDF from 1994, but was finally discontinued in 2003 and replaced by the SANDF’s new long service medals. This was done when the new African National Congress (ANC) political dispensation did a sweeping change to all military emblems and insignia to rid it of anything the ‘nationalists’ or ‘colonialists’ instituted (and lets not pull any politically correct punches – to the Zulu nation Rorke’s Drift is symbolic of British imperialist aggression, land grabbing and expansion into an independent Zulu Kingdom).
The John Chard medal is now superseded by the SANDF’s Medaljie sir Troue Diens and the Emblem for Reserve Force Service. The John Chard medal (and decoration) is still recognised as an ‘official’ medal issued for a statutory force member, and is still worn very proudly in the South African Reserve by those who have received it.
We can’t but think that each time a new political dispensation brings in its particular sweeping changes into the defence force, something by way of tradition gets lost.
Photo of General Roy Andersen, the head of The South African Reserve by Cornelius Bezuidenhout, notice the John Chard decoration (with bar) and John Chard medal at the far right hand end of his medal set when looking left to right.
Written and Researched by Peter Dickens. Clip of Zulu taken from YouTube, original movie copyright Paramount Pictures, released 1964 Directed by Cy Enfield and Produced by Stanley Baker.
World War 1 and Jackie the Baboon is seen here on top of a carriage … here’s another famous South African mascot. Jackie cut an odd figure amongst the British and Empire troops in Wold War 1, for only the South Africans could conjure up an African Baboon as a Regimental mascot, but this was no ordinary Baboon, intelligent and intuitive Jackie would achieve fame and become an iconic war hero in both South Africa and England, here is his story.
An odd choice of Mascot
Commemorative Postcard with Pvt Marr and Jackie
The story starts in August 1915, just over 100 years ago, at the Marr’s family farm ‘Cheshire’ in Villeria just on the outskirts of Pretoria. Albert Marr found a Chacma baboon (Papio ursinus) on the farm, named him Jackie and adopted his as a beloved family pet.
World War I broke out and along with many other young South African men Albert Marr volunteered for military service. He was mobilised on the 25th August 1915 at Potchefstroom, allocated the rank of Private (Pte), his service number was 4927 and he was allocated to the 3rd (Transvaal) Regiment of the 1st South African Infantry Brigade, a Brigade which was earmarked to fight in France.
The 3rd South African Infantry Regiment, was under the Command of Lt Col E.F. Thackeray and raised mainly from the Transvaal (now Gauging) and Rhodesia (now Zimbabwe). The Regiment was generally known as “The Transvaal Regiment.” B Company were mostly from the Witwatersrand Rifles while C Company were men from the Rand Light Infantry.
Distraught a leaving Jackie behind Pte. Marr figured it would be a great idea if his pet Baboon could come along with him, so he approached his superiors and (rather surprisingly) got their permission. At first Jackie’s presence was generally ignored, but he was so well-behaved and had such an impressive bearing that he was soon stuck out and the troops took notice of him. In a short time Jackie was officially adopted by all as the mascot of the 3rd South African Infantry (Transvaal) Regiment.
Jackie, seen here in the Lord Mayor’s Show, London, 9 November 1918, IWM image.
Once officially enlisted Jackie was given the rank of ‘Private’ and a special uniform was made for him complete with buttons, a cap and regimental badges. As with any enlisted soldier he also received a pay book and his own rations. He also drilled and marched with his company and would generally entertain the men – and such entertainment would prove invaluable in the months to come as a morale booster, especially to relieve the boredom caused by the stalemate of trench warfare once the 1st South African Infantry Brigade (and the Transvaal Regiment) reached France.
Jackie wore his uniform with some panache, he was also known to light up a cigarette or pipe for his ‘pals’. He also had a sharp salute for any officer passing him. He would stand at ease when commanded to do so, placing his feet apart and hands behind his back in the military style. At the mess table he used a knife and fork as well as a tea-cup in the proper manner.
At War
Albert Marr and Jackie became and odd pairing, absolutely inseparable and for all intents and purposes they became friends. The two of them first saw action during the Senussi Campaign.
The Senussi were a religious sect resident in Libya and Egypt, who were allied to the Ottoman and German Empire. In the summer of 1915, the Ottomans persuaded the Grand Senussi, Ahmed Sharif es Senussi to declare jihad and attack British-occupied Egypt.
The 1st South African Infantry Brigade along with other British forces was dispatched to Egypt to put an end to the Senussi Jihadi uprising. At the battle of Agagia, on 26 February 1916, whist fighting the Senussi, Pte. Albert Marr was shot and wounded in the shoulder.
Whilst waiting for the stretcher bearers to arrive, a distraught Jackie became desperate to do something to comfort Pte. Marr as he lay on the ground, so he went about licking the wound. By this simple action of trying to comfort a fallen comrade, Jackie became more than just an animal mascot and pet in the eyes of the men in the Regiment, he had now become a fellow comrade.
Albert Marr recovered his wound and rejoined his Regiment. Both Albert and Jackie then spent three years, on and off, in the front line that was the ‘western front’ in Europe fighting in the mud and blood of the trenches in France and Flanders. Jackie was even reported to go “over the top” (advancing by breaking cover from the trenches) with the rest of the 3rd South African Infantry (Transvaal) Regiment during the heavy fighting in which they were engaged.
His sharper animal instincts proved highly valuable at night when on guard duty with Albert, he was particularly useful because of his keen eyesight and acute hearing. He would give an early warning of enemy movement or an impending attack by barking and tugging on Pte. Marr’s tunic.
Wounded in Action
Up to now he and Albert had come through the war in Europe relatively unscathed but in April 1918 that all changed, nearing the end of the war the 1st South African Infantry Brigade found itself been heavily shelled as they withdrew to Reninghelst in Belgium during the Battle of Passchendale.
To protect himself, Jackie was seen to be frantically trying to build a wall of stones about himself, as a rudimentary cover from shell fragments and shrapnel which were bursting all around him.
He never properly completed his protective wall and a jagged piece of shrapnel wounded him in the arm and another nearly severed his leg. At first Jackie refused to be evacuated by the stretcher-bearers; instead he tried vainly to continue building his protective wall, hobbling around in excruciating pain on what had once been his leg held in place by just sinew.
What happens next is best described in the words of Lt-Col R N Woodsend of the Royal Medical Corps who was the attending Doctor:
It was a pathetic sight; the little fellow, carried by his keeper, lay moaning in pain, the man crying his eyes out in sympathy, “You must do something for him, he saved my life in Egypt. He nursed me through dysentery”. The baboon was badly wounded, the left leg hanging with shreds of muscle, another jagged wound in the right arm.
We decided to give the patient chloroform and dress his wounds. If he died under the anaesthetic perhaps it would be the best thing; as I had never given an anaesthetic to such a patient before, I thought it would be the most likely result. However, he lapped up the chloroform as if it had been whiskey, and was well under in a remarkably short time. It was a simple matter to amputate the leg with scissors and I cleaned the wounds and dressed them as well as I could”.
He came around as quickly as he went under. The problem then was what to do with him. This was soon settled by his keeper: “He is on army strength”. So, duly labelled, number, name, ATS injection, nature of injuries, etc. he was taken to the road and sent by a passing ambulance to the Casualty Clearing Station.
It was unsure if the chloroform and the operation would kill Jackie, but funnily it was reported that when the Officer Commanding the Regiment went to check up on him at the Casualty Clearing Station, Jackie sat up in bed and saluted him.
Jackie and Lt. Col R N Woodsend after his amputation.
Demobilised
It was the end of active service for both Pte. Marr and Pte. Jackie, the war ended shortly afterward on the 11th November 1918. They were both shipped to England, where Jackie immediately became a media celebrity in the English newspapers.
Jackie’s proudest moment in London was to participate in the Lord Mayor’s Day Procession (the featured image at the top shows Jackie and Albert Marr in this parade). From early September to 14 February 1919, Jackie and Private Marr were lent to the Red Cross by the War Office and the South African Government for the purpose of collecting money for sick and wounded soldiers.
They managed to collect a huge amount of money for the Widows and Orphans Fund by allowing the public to pay half a crown to shake Jackie by the hand and five shillings to kiss the baboon.
Back in South Africa, Jackie was officially discharged at Maitland Dispersal Camp in Cape Town on 26 April 1919. A proper war veteran now, on his sleeve Jackie wore one gold ‘wound’ stripe and three blue service chevrons, indicating three years of frontline service.
At Maitland Jackie received his official discharge papers, a military pension, plus a Civil Employment Form for discharged soldiers. By the 5th May 1919, both Jackie and Albert were on their last leg of their journey home to their cherished family farm near Pretoria.
After their arrival home, Jackie was again feted over and became the centre of attention. He was front and forward on his official welcome home parade, and again lead the homecoming victory parade of the 1st South African Infantry Brigade, and again he was present at the Peace Parade in Church Square, Pretoria on 31 July 1920, where he proudly received the Pretoria Citizen’s Service Medal.
Albert Marr and Jackie returned to their family farm to recover from ‘shell shock’ (Post Traumatic Stress Syndrome PTSD), but the fragile state Jackie was in from the terrors of war tragically killed him on the 22nd May 1921. During an unusually intense highveld thunderstorm, he suffered a heart attack when an intense thunder-clap went off close by.
A sad end to one of South Africa’s most remarkable mascots. He was mourned and much missed, especially by his friend, comrade and close companion, Albert Marr, who went on to live a long life and passed away at the age of 84 in Pretoria in August 1973.
Large extracts and sources: Jackie: The South African baboon soldier by Wildlife TV, August 19th 2013 Military History Journal Vol 16, 2nd December 2013 JACKIE, THE BABOON MASCOT OF 3 SAI DURING THE GREAT WAR, 1914 – 1918 By Sarel Rossouw.
Recently military institutions and veteran organisations have been marking a landmark in world history, the 75th anniversary of the Battle of El Alamein, as usual there has been much fanfare to celebrate this in the United Kingdom – it’s a definitive battle which for the first time gave the British and Commonwealth a glimmer of hope – this battle was to the British and Commonwealth forces what the Battle of Kursk was to the Russians. It’s a big deal.
South Africa played a key role in the Battle of El Alamein, in fact it was a battle on which much South African life was sacrificed on the crucible of war, after the fall of Tobruk South African honour was at stake and this battle went a long way to redeem it. However, as usual, there was a low-key reaction in South Africa marking this anniversary – it was very much contained to the odd South African Legion of military veterans branch and MOTH shell-hole to remember it.
Original colour photo taken of a South African position in the North African theatre of operations in 1942 – note the bleak and hard landscape
To the older generation in South Africa, terms such as the ‘Knightsbridge Box’, the ‘Desert Fox’, the ‘Cauldron’ and the ‘Gazala Gallop’ were common knowledge, as were these words by General Montgomery “General Pienaar, tell your South African Division they have done well”, in fact these words were a sensation at the time and seen as a national redemption. But they are now lost completely to the new generation of South Africans.
So, lets give a little recognition to South African sacrifice in this tide turning battle, understand why it is so important and understand why this understated signal sent from General Bernard Montgomery to General Dan Pienaar meant so very much to the generation which came before us.
Prelude to The Battle of El Alamein
For the South Africans the 2nd battle of El Alamein needs to be looked in context of these events – The Battle of Sidi Rezegh, the Battle of Gazala, the Surrender of Tobruk and the 1st Battle of El Alamein.
The Battle of Sidi Rezegh; (see Sidi Rezegh – South African blood helps turn the tide in North Africa), in November 1941 saw the 1st South African Division’s 5th Brigade fight themselves down, literally to the last man in an outstanding degree of bravery, their sacrifice – to lessen the impact of Rommel’s drive and help save the day for the British to fight another day.
For the 1st South African Division this outstanding action in the field was added to by The Battle of Gazala; By March 1942 the 1st South African Division was deployed along the Gazala line (they made up the Northern sector). The Gazala line was to the west of Tobruk, the task of defending Tobruk was also left up the South Africans, this time the 2nd South African Infantry Division under General Klopper.
Energised and re-armed General Erwin Rommel – the ‘Desert Fox’, advanced on Egypt (and Tobruk) in May 1942, their mission was to take the Suez Canal and cut Britain from her vast empire (and resources) in the Middle East, India and the Far East.
General Erwin Rommel (centre) with his staff
Rommel’s armoured advance with at least 10,000 vehicles hit the Allied’s ‘Gazala line’ and then headed south, to make a long sweeping right-hook around the southern end of the line. They swept past the British 7th Armoured Division in the south and headed back north behind the Gazala line. The Allied forces reeled and re-deployed catching up with Rommel’s forces in an area known as “The Cauldron” situated between Bir Hakeim and Tobruk. Three days of armoured fighting ensued in the area of ‘the Cauldron’ and Rommel applied pressure in ‘the Cauldron’ ultimately destroying the Allied defenders.
Rommel’s Axis forces then continued to push east to Egypt and forced the British Guards Brigade to withdraw from the Knightsbridge Box on the Gazala Line back to the Tobruk perimeter. Now on the back-foot, on the 14th June, the British command authorised the withdraw of all units from the Gazala line, and thus began the ‘Gazala Gallop,’ a very hasty retreat.
The Gazala Gallop; The 1st South African Division was ordered by British Command to withdraw along the coastal road back towards Tobruk. They withdrew to series of defensive boxes and actions at Williams Post, Best Post, “Point 187,” Commonwealth Keep and then Acroma. The 21st and 15th Panzer attacks forced the 1st SA Division to fight a rearguard action and to withdraw through each of the respective boxes. Chased by Rommel’s tanks and driving east, the 1st South African division was now spread out between the original Gazala defences and Tobruk trying to make their way east.
By 15 June 1942, the British and Commonwealth forces had started the ‘Gazala Gallop’ in earnest (sarcastically referred because of the rapid nature of the retreat) and withdrew to a new defensive line – set up further east on the Egyptian border at an insignificant railway siding called El Alamein. This was to be the ‘Last Stand’ by the British and Commonwealth Forces, behind El Alamein lay Rommel’s prize – Egypt. However this left Tobruk, and the 2nd South African Division defending it isolated and highly vulnerable to Rommel’s advance.
The Fall of Tobruk; It should have come as no surprise that the South African 2nd Division defending Tobruk would eventually be overtaken by Rommel’s rapid advance, the defences were in a poor state when the South Africans were tasked with defending it and they were ‘on their own’ without air support given the rapid withdrawal of British and Commonwealth forces from the Gazala line. But this did not stop searing criticism from the British Command and especially Churchill who would go on to refer as South Africa’s capitulation at Tobruk as a ‘disgrace’ and his ‘lowest moment’ in the war. See “Defeat is one thing; Disgrace is another!” South Africa’s biggest capitulation of arms – Tobruk
General Erwin Rommel inspects South African and British POW after the fall of Tobruk
In a nutshell, Tobruk was the largest loss of arms in South African military history, Rommel ‘bagged’ 32,000 British and South African defenders, using a Axis force half the size of the defenders’ force and he took just one day to do it. The Fall of Tobruk opened Rommel to the Suez and therefore left Britain’s war and her entire empire in the balance. It also left the proud South African military command and fighting reputation in absolute shreds.
It would now be up to South Africa’s remaining division, the 1st SA Division, to recover South Africa’s pride – the opportunity would come in the Battle of El Alamein.
The 1st Battle of El Alamein
Having arrived back from the Gazala Line, the 1st South African division spent two weeks improving their defences at El Alamein in what was known as the “Alamein Box”.
The Battle of El Alamein would be fought over a simple railway siding on the Egyptian border, in the middle of ‘nowhere’. But it was more than a railway siding, it was the gateway to the Axis forces invasion of Egypt and of significant strategic importance, a loss at El Alamein for the British and Commonwealth forces would mean the loss of what Churchill referred to as the ‘second front’ – in effect it would have been the end of the British and commonwealth forces in the war – the outcome and future of the war (with future American involvement) would have looked very different should El Alamein have been lost – a lot depended on winning it.
A rare wartime original colour photo of El Alamein railway station, taken October1942. It looks somewhat dilapidated now.
For Hitler the invasion of Russia, now in full swing was more important, and the action in North Africa for the German ‘Afrika Korps’ had been to appease and assist their key ally – Italy and Mussolini’s African colonial ambitions and conquests. Although of lessor importance the North African campaign drew key resources, equipment – planes, tanks and personnel as well as critical leadership away from the Russian campaign to deal with an ambition to take Egypt and the Suez Canal, knock Britain out the war completely and support Italy’s ambitions. It was to a degree the ‘second front’ Hitler had wanted to avoid.
General Auchenlik – the British Commander of the 8th Army at the time then issued an order instructing all surplus personnel to be sent back to the Egyptian Delta for rest, re-supply and training, a moved which greatly displeased General Dan Pienaar.
General Dan Pienaar
The 1st South African Division, under General Dan Pienaar had been deployed with two brigades of infantry, each accompanied by a battery of artillery to protect the areas west and south of the El Alamein defensive box. Auchinlecks order effectively meant that Pienaar could only hold the box with one under-strength brigade.
It did not take long for Rommel to advance on the El Alamein ‘Box’, At 06:05am on the 30 June 1942 Axis transports were seen advancing to within 2,000 yards of the South African 3rd Brigade positions and they were engaged with machine and anti-tank gun fire by British units.
The South Africans were soon in the fight alongside their British and Commonwealth counter-parts and the Rand Light Infantry drove off German towed artillery, whilst the South African Air Force bombed Rommel’s supply columns. An hour later, by 07:30am the Germans had been halted and were pinned down by the South Africans, determined to avenge Gazala and the surrender of Tobruk.
For three days, 30 June to 3 July Brigadier Bobby Palmer’s 3 SA Brigade Group courageously and successfully halted the Afrika Korps’ continuous attacks on the parts of the El-Alamein Box held by the South Africans. He held a line some 10 km long with only 1 000 infantrymen.
Counter-attacks by the South Africans found them stretched into untenable positions and the British command resolved to remove the South Africans to the rear to rest them citing they had been under too much combat stress and should they capitulate, as had been the case with the 2nd SA Div at Tobruk, it would be a political nightmare. Both South African Divisions in the war would have been captured and it would surely spell the end of South Africa’s war effort and the Smuts government.
The intension was to replace them with an Australian division, however General Pienaar would have none of it, he famously stated to an American war correspondent “Here I stop, I’ve retreated far enough, whether we hold the damn thing or not!”
Mussolini had flown to a nearby enemy held airfield so as not to miss out on a triumphal Roman entry into Cairo. He had not anticipated a very defiant thin line of red-tabbed Springboks and other British and Commonwealth soldiers literally stopping him in his tracks.
The Axis advance had been stopped all along the Allied line of defence at El Alamein by the 27th July and a stalemate ensued giving the British time to make changes and prepare to go on the counter-attack, this was to be the upcoming decisive battle – the 2nd Battle of El Alamein.
A Change in British Command
Outraged by the conduct of the war in the Middle East, especially the loss on the Gazala line, the surrender of the Tobruk and the hasty ‘Gallop’ retreat, Churchill headed off to Egypt in August 1942 to make some sweeping changes to British Command. When adding the surrender of Singapore to the mix just previously to Tobruk, it was clear to Churchill that the British Empire needed to be saved and his direct intervention in command inevitable.
South Africa played a role in advising Churchill on changes to be made to Command and the entire strategy of the war going forward, in August 1942 General Smuts was requested to meet Churchill in Cairo, here they decided on a new war strategy.
Winston Churchill with Jan Smuts at the British Embassy in Cairo, 5 August 1942.
On the 5th August 1942, Winston Churchill even paid a surprise and informal visit to the South African Division. He remarked: ‘It is a long time since I was in South Africa.’ to a group of South Africans and one of the men humorously replied: ‘Yes Sir, you were in the bag then, weren’t you?’ (referring to Winston Churchill’s time spent as a Prisoner of War during the 2nd Anglo Boer War courtesy of the Boers).
General Auchenlik and his Eighth Army staff, were all given the boot (a little unfairly as Auchenlik had stabilised the Allied position after the First Battle of El Alamein). Churchill’s preferred replacement was initially not General Bernard Montgomery, he was Churchill’s second choice, General William Gott was appointed to head up the 8th Army. Unfortunately General Gott was killed in action on 7 August 1942 when his aircraft was shot down.
General Montgomery was duly appointed to lead the 8th Army, and a decisive and very popular decision that proved to be (despite a terse relationship between Montgomery and Churchill – and notwithstanding that the two of them were polar opposite in character).
The 2nd Battle of El Alamein
General ‘Monty’ Montgomery then set about on a massive troop and equipment build-up and extensive training and moral boosting speeches had the British forces ready. He knew the first part of the offensive would require breaching a massive German/Italian mine-field which separated the two forces, he also knew that the headlong offensive was 1st World War in thinking, only with the use of an incredible amount of armour – as such ‘attrition’ (a battle of casualties by numbers) would play a major factor and Monty needed a vast force to overcome it.
South African engineers training with mine detection equipment in North Africa. British and Commonwealth forces trained intensively in minefield clearance in preparation for the Second Battle of El Alamein.
In the interim South African engineers and sappers set themselves up training for the very large and very important mine clearing job to come.
Operation Lightfoot – Break-in
Start Line Deployments for the 2nd Battle of El Alamein
The 1st South African Division played a spearhead role on the opening of the 2nd Battle of El Alamein. It had to breach the German minefield which had been sown with more than half a million mines – with a dab of military humour this part of the 2nd Battle of El Alamein was called ‘Operation Lightfoot’. South African sappers were to play a significant role opening up the minefield to allow the Allied and South African forces to push through.
General Montgomery’s basic idea was that the Australians and Highlanders were to force a northern corridor through the Axis (German/Italian) minefields while the New Zealanders and South Africans were to do the same in the southern sector.
The 1st Infantry Division (South Africa), was tasked to attack on a two-brigade front to secure the southern end of Mieiriya Ridge. The Indian 4th and Northumbrian 50th Divisions were deployed to their south and to the north was the 2nd New Zealand Division.
A 25-pdr gun firing during the British night artillery barrage which opened Second Battle of El Alamein, 23 October 1942.
The South Africans were to attack towards the south-west with 2nd SA Infantry Brigade (under the command of Brig. W.H.E. Poole) on the right and the 3rd SA Infantry Brigade (under the Command of Brig. R. Palmer) on the left. The 1st SA Infantry Brigade was deployed further south and was responsible for creating an anti-tank screen to protect the left flank of the South African attack.
Operation Lightfoot started at 2140 on 23rd October 1942 with a five-hour artillery barrage fire plan, the start of which signified H-Hour for the infantry assault. General Pienaar had deployed each of the lead brigades, with on battalion leading for the first phase to the “red line” – after a pause of an hour and a quarter, the two trailing battalions would pass though to the final objective on Miteiriya Ridge.
Lucas Majozi DCM
The South African 1st and 2nd Field Force Brigades (FFB), as soon after the battle began, became pinned down in the German Axis forces minefield by intense German machine gun and artillery fire. The South African infantrymen suffered very severe casualties.
Throughout the night of 23 October, the stretcher-bearers worked under heavy enemy fire, tending to the wounded and evacuating them from the battlefield. Amongst these Black Native Military Corps (NMC) non-combatant medics rescuing their White combatant counterparts was Lucas Majozi who went on to win a DCM for gallantry. See “With bullets in his body he returned … into a veritable hell of machine gun fire”; Lucas Majozi DCM
By 08:00, the following morning on 24th October the South African objective, Miteiriya Ridge was finally secured, after a very long night of fighting and a very high rate of attrition by way of casualties.
The South African sacrifice in taking Miteiriya Ridge, spurred General Montgomery to send his now famous congratulatory signal on the 24th October 1942 to General Dan Pienaar acknowledging that the 1 SA Division had met all its objectives set for the Battle of Alamein.
Crumbling Operations
By the 25th October the Battle of El Alamein moved into the ‘crumbling actions/operations’ phase. British Command on the 26th October ordered the South African 1st Division to “side-step” north and occupy the area initially held by the New Zealand Division and the 9th Armoured Brigade.
The South Africans were now stretched on a wider front, between the Australians and 51st Division in the north and the Indian 4th Division on Ruweisat Ridge, with 5th SA Brigade on the right, 3rd SA Brigade on its left and 1st SA Brigade being pulled back as the divisional reserve.
El Alamein 1942: British infantry advances through the dust and smoke of the battle.
All in by the evening of 26 October (as from the H-Hour on the 23rd), the South Africans had suffered 600 casualties (the British had 2000 casualties as well as 1,000 Australians and 1000 New Zealanders).
Operation Supercharge – Break Out
By the 2nd November 1942, contrary to Hitler’s instructions – Rommel had started to withdraw. The final plan to destroy the Axis forces, code-named “Supercharge” was put into action. The 1st SA Division played no role in this phase of the operation – but the South African armoured cars attached to XXX Corps were actively involved in the attempted destruction and subsequent pursuit.
On the 4 November, after repeated attempts at breaking through the Axis lines – Lt-Col Reeves-Moore lead the South African armoured cars into the rear of the Axis positions, “….the eager children of any mechanized pursuit… scampered at dawn into the open desert beyond the mines and trenches and guns, to make their exuberant mischief amid the disintegrating enemy”.
They soon started causing the havoc for which they had been intended – A Sqn capturing two German 88 mm guns, two 105 mm guns, two 110mm guns, a Breda portee, six trucks and 130 prisoners; while B Sqn captured five trucks, a staff car, one 105 mm and one 150 mm gun and 100 prisoners within a matter of hours.
A German Panzer III tank crewman surrenders to an advancing Allied soldier during the Battle of El Alamein, 1942
While the South African armoured cars were dashing west, the remaining elements of 1st South African Division had moved further north and over the previous two nights had relieved the 51st Highland Division 51st Highland Division. During the night of 3/4 November, the last unit to move into its new position was the 1st Cape Town Highlanders who moved during a major artillery barrage in support of an attack by the 5th Indian Infantry Brigade. The regiment awoke on the 4th November to silence and the absence of gunfire, save for the sound of Allied vehicles advancing west in pursuit of the retreating enemy.
For the 1st South African Division, the war in North Africa had ended.
The loss of General Dan Pienaar
The Division returned to South Africa and General Pienaar and eleven other officers boarded a South African Air Force (SAAF) Lockheed Lodestar on 17 December to fly the final command structure back to South Africa.
The SAAF aircraft stopped to re-fuel at Kisumu on the shores of Lake Victoria. It was reputed that General Pienaar was in a hurry to get going and this may have pushed the pilot into taking risks, on takeoff on 19 December, the aircraft plunged into the lake, killing all on board.
With that came the sad ending of the very popular General Dan Pienaar, he was described in an obituary in the Chicago Tribune as being acknowledged by all military authorities as “one of the best fighting leaders the British have found in this war”.
The End of the Beginning
After the 1st South African Infantry Division’s job was done in North Africa it was disbanded and the 6th South African Armoured Division was formed to continue with South Africa’s World War 2 contribution. The British Command, still relatively unhappy with the Tobruk incident initially wanted to side-line the 6th South African Armoured Division and allocated it just to go to Palestine – in what was really a side-show – for the rest of the war.
Memorial to South Africans at El Alamein Commonwealth Cemetery
At this point it is actually Churchill who comes around to bat for the South Africans, despite his anger and lambasting of the South Africa military establishment as a ‘disgrace’ over Tobruk, it is Churchill (influenced by Jan Smuts) who insisted that the South African 6th Armoured Division join the main thrust of the war in Italy and not sit it out in Palestine.
The 6th South African Armoured Division then went on to serve in Italy with great gallantry and distinction – taking with it the recovered country pride so hard for by the 1st South African Division at Tobruk, to an even higher accolade.
The Battle of El Alamein plays such a significant in the outcome of World War 2, Winston Churchill once remarked; “before Alamein, we never had a victory – after Alamein we never had a defeat” and more famously that Alamein marked the ‘end of the beginning‘ of World War 2.
In Conclusion
That South Africa played such a critical part in this pivot moment of history is often overlooked, it’s not something most South Africans are even aware of and it really is something which needs to be redressed by the time the centenary of this battle comes around. Hopefully by this time it’s not confined to a couple of South African Legion branches and few MOTH shell-holes dotted around South Africa to remember it.
Lest we forget this Battle and path of sacrifice taken by some of the finest South Africans we have ever known, people to whom we as a nation owe a massive debt of gratitude. Also, it really is not for politicians to remember the war dead, it really isn’t their job and given the nature of politics to ask them to do so is to dishonour both the sacrifice and the dead. Let’s face it, the African National Congress (ANC) government are not up for it nor are they the proper people to do it in the first place (and to be honest nor were the old National Party government the right people either).
It is up to the veterans fraternity and each and every person that has served in a South African military uniform to carry this flame of remembrance on behalf of those who have come before them – as is the generally accepted practice in the UK, USA, Canada, Australia and New Zealand. When we as South Africans veterans snap out of our collective apathy and get that part together, sharing in our most honoured history and stand in a unified cause in our thousands, only then will we get our remembrance occasions aligned and honour these men and women properly.
Written and Researched by Peter Dickens. Extracts and references taken from The Military History Journal, Vol 9 No 2 – December 1992 ‘GENERAL PIENAAR, TELL YOUR SOUTH AFRICAN DIVISION THEY HAVE DONE WELL’ – General Montgomery; 24 October 1942. By A B Theunissen. Other references include The Imperial War Museum (with photo copyrights were shown), Wikipedia and a Biography of Jan Christian Smuts (1870-1950) By Beat Lenel.
To really understand who and what ‘The Torch Commando’ military veterans movement was and its anti-apartheid stance, we need to profile the military veteran organisations in South Africa as they stood in 1950, and how they contributed to The Torch Commando and what the ramifications were for each them in the future.
In the South African Legion’s official history ‘not for ourselves’, there is a period described as the “fateful 50’s”, that is because it is in this period South Africa’s World War 1 and World War 2 veterans and their respective veteran associations were drawn into a headlong confrontation with the then newly elected National Party government and it’s policies of Apartheid.
This period, the early 1950’s saw the first mass protests and the first open resistance against Apartheid – and ironically, it did not come from Black, Indian and Cape Coloured communities – it came from the mainly “White” military veterans community.
In a sense it was the South African veterans who spearheaded the protesting to come, and it made the government sit up and take notice as it came from a sector that the government really feared and wanted reformed – the military and its associated veteran associations.
This part of South Africa’s community in 1950 was strong with tens of thousands of freshly demobilised trained combatants. Men and women, who in the main, where ardent supporters of General Jan Smuts and who had just been victorious in the “war for freedom” (as World War 2 was known) – fighting against the very policies and ideologies the new Nationalist government was now proposing for South Africa.
Their actions in the 1950’s against the National Party win of 1948 still shapes the politics of the veterans associations in South Africa even to this day, as the net result was not only the first radical changes in the make-up of the military, it also resulted in the marginalisation of South Africa’s Veteran Associations and community to a large degree and a strained relationship with the Nationalist government down the years.
The Veterans Community in South Africa post WW2
Central to this story were the three primary War Veterans associations in South Africa at the end of World War 2 – The Memorable Order of Tin Hats (MOTH), The South African Legion of the British Empire Services League BESL (The South African Legion as we know it today) and The Springbok Legion.
Politically speaking the MOTH and South African Legion were “apolitical”, the MOTH taking the position of a “order” (along masonic styled rituals) outlining a ‘brotherhood’ for veterans who had seen combat only. The South African Legion was the “primo” (first) veterans association of South Africa which worked very closely with government as a charity – The South African Legion was open to all veterans whether they had seen combat or not and was by far the largest veterans association in South Africa with 52000 veterans and 224 branches.
The South African Legion, Springbok Legion and General van der Spuy
The South African Legion (BESL), founded by Jan Smuts in 1921 as part of the Royal Commonwealth Ex-Services League (RCEL) was the ‘official’ national body for all South African veterans, and it took a formal approach when dealing with the now ‘new’ Nationalist government and its policies as they impacted Black, Indian and Cape Coloured veterans – choosing to try and negotiate with the government via the formal and non-confrontational channels made available to it as the national body for veterans.
Gen. van der Spuy
However it was the smallest veterans association of the three – The “Springbok Legion” which took a direct “political” role against the Nationalists – this body was founded in part by a very senior South African Legion national executive member – General van der Spuy (a pioneer of the SAAF), and he used The Springbok Legion to go where the South African Legion could not – into direct confrontational politics.
General van der Spuy, a South African Legion national executive member, became increasingly frustrated with The South African Legion position of ‘quietly’ supporting the anti-apartheid causes in the veterans community simply by opening their branches up to them, and of trying to ‘negotiate’ with the Nationalists as to South Africa’s Black, Indian and Cape Coloured veterans rights via formal channels.
So, in addition to his position in The South African Legion he also took over The Springbok Legion. He then took the Springbok Legion from what he referred to as the South African Legion’s “painfully correct whisper of polite protest” to become a “shout” of protest instead.
The Springbok Legion
The history of the Springbok Legion as a political entity is fascinating – initially formed in 1941 by members of the 9th Recce Battalion of the South African Tank Corps, along with the Soldiers Interests Committee formed by members of the First South African Brigade in Addis Ababa, and the Union of Soldiers formed by the same brigade in Egypt.
The aims and objectives of the Springbok Legion were enunciated in its ‘Soldiers Manifesto’. The Springbok Legion was open to all servicemen regardless of race or gender and was avowedly anti-fascist and anti-racist.
The Springbok Legion was mainly led by a group of both white and black war veterans, many of whom embraced Communism and it was already very actively campaigning against Apartheid legislation and highly politically motivated.
The Springbok Legion decided to very vocally take the fight against Apartheid legislation into the mainstream media and then into the streets in mass protests, and it became the main driving force behind a new and more strident organisation called “The Torch Commando”, headed up by the famous war hero “Sailor” Malan.
Sailor Malan addressing a Springbok Legion Rally
The Torch Commando
In reality, the Torch Commando constituted the first real mass “anti-Apartheid” protests and Adolph ‘Sailor’ Malan can be counted as one of the very first anti-apartheid ‘struggle’ heroes. Sailor Malan, a Battle of Britain hero and flying ace (one of the best pilots the Royal Air Force had during the war) returned to his homeland – South Africa in 1946.
Sailor Malan was surprised by the unexpected win of the National Party over Smuts’ United Party in the General Election of 1948 on their proposal of ‘Apartheid’ as this was in direct opposition to the freedom values he and nearly all the South African veterans in World War 2 had been fighting for. This new political disposition in South Africa was also rammed full of Afrikaner Nationalists who had declared themselves as either in support of Nazi Germany during the war or even having joined robust pro-Nazi organisations during the war years and declaring themselves as full-blown Nazi styled National Socialists. This was simply unacceptable to just about every returning war veteran.
To get a full sense of Sailor Malan and his motivations behind the Torch please follow this link to a previous Observation. Post Article Sailor Malan; Fighter Ace & Freedom Fighter!
The Torch Commando can best be described as a ‘pro-democracy’ movement and in its manifesto it called for Liberty, Freedom of Speech, Liberty from Tyranny and Freedom of Religion. Sailor Malan’s personal politics (which he brought into the Torch) revolved around universal franchise and addressing poverty in the black community and economic empowerment as a priority to political reform. Ironically, Sailor Malan was years ahead of time in this regard, as it is only now that politics in South Africa is focusing on economic emancipation ahead of political emancipation.
The Torch Commando strategy was to bring the considerable mass of “moderate’ South African war veterans from apolitical organisations such as the Memorable Order of Tin Hats (MOTH) and South African Legion (BESL) into allegiance with the more ‘leftist’ politicised veterans of The Springbok Legion.
The Torch Commando held out that it was NOT a radical leftist organisation but rather a centre line ‘Pro Democracy” movement. This moderate ‘democratic’ centre had high appeal across the entire veteran’s community, as a result the members of the MOTH, The South African Legion (BESL) and the Springbok Legion joined them in their tens of thousands.
Nearly one in four South African white males took up Smuts’ call to volunteer to fight for Britain and her Commonwealth in World War 2 against Nazi German ideology and aggression. As a result after the war this veterans community made up 200,000 votes of the white voting community in a voting base of about 1,000,000 white voters.
This portion of voters could significantly impact the next General Elections if spurred into stronger political representation, and the Torch Commando targeted it with a pledge to remove the nationalists by demanding an early election due to unconstitutional and illegal breaches by the National Party of South Africa’s constitution.
To further position itself as ‘pro-democracy’ movement and appeal to the ‘ex-service’ vote The Torch Commando aligned itself with the United Party (Smuts’ party which was now in opposition) which in 1948 had still commanded a majority support (the Nationalist win had been a constitutional one and not a popular one) and after Smuts’ death the United Party was headed up by Koos Strauss (who was eventually replaced by the more popular war veteran – Sir David Pieter de Villiers Graaf). The United Party was hoping that the Torch would be the catalyst for them to take back the narrow margins that brought the National Party into power earlier in 1948.
Kmdt. de la Rey at the Cape Town Torch
The Torch Commando, armed with broader appeal to the majority of moderate veterans and under the leadership of very dynamic duo consisting of both Sailor Malan and Kmdt. Dolf de la Rey, now reached out to the wider veteran diaspora.
Kmdt. de la Rey is also interesting – he was himself an Anglo-Boer War Burger Commando veteran and he famously captured Winston Churchill during the Boer War – another one of the rich tapestry of Afrikaner war heroes in conflict with National Party politics and philosophy.
The Torch Commando almost immediately drew massive support – and it saw anti-Apartheid and anti-government protests on a scale previously unseen in South Africa (with all due respect to the African Miners Strike in 1946) . It all began with torchlight protest marches at night. In all The Torch Commando boasted 250,000 members. Its torch-light rallies and protests in Durban and Cape Town attracted tens of thousands of veterans – mainly white, and mainly from the middle class and professional strata of white South African society.
In a speech at a massive Torch Commando rally outside City Hall in Johannesburg – to 75,000 people on protest, “Sailor” Malan made reference to the ideals for which the Second World War was fought:
“The strength of this gathering is evidence that the men and women who fought in the war for freedom still cherish what they fought for. We are determined not to be denied the fruits of that victory.”
During the Cape Town “Torch” 50,000 civilians joined the 10,000 veterans when the protest moved to hand over a petition at the Parliament buildings in Cape Town. The police barred the way and a scuffle broke out. 160 Protesters where injured along with 15 Policemen. At this Torch demonstration Sailor Malan famously accused the national party government of:
“depriving us of our freedom, with a fascist arrogance that we have not experienced since Hitler and Mussolini met their fate”.
As tensions grew over the protest the National Party MP Johannes Streydom finally warned The Torch Commando that he would use the South African security forces against “those who are playing with fire and speaking of civil war and rebellion”.
The Decline of The Torch Commando
DF Malan’s government was so alarmed by the number of judges, public servants and military officers joining The Torch Commando that those within the public service or military were prohibited from enlisting, lest they lose their jobs – this pressure quickly led to the erosion of the organisation’s “moderate” members, many of whom still had association to the armed forces, with reputations and livelihoods to keep.
The newly governing National Party at that time also could not afford to have the white voter base split over its narrow hold on power and the idea that the country’s armed forces community was standing in direct opposition to their policies of Apartheid posed a real and significant problem – not only as a significant ‘block’ of ‘white’ voters, but also because many of these anti-government veterans were battle hardened with extensive military training, and as such posed a real threat should they decide to overthrow the government by force of arms.
Also the National Party government was extremely concerned about the influence this movement might generate over Afrikaner youth, especially under the leadership of the war heroes, and they acted ‘decisively’ (as was its usual modus operandi) and went about discrediting the Torch Commando and its leaders through means of constant negative propaganda.
For the rest of his life, Sailor Malan would be completely ridiculed by the Nationalist government. The National Party press caricatured him ‘a flying poodle’, dressed in his leathers and flying goggles, in the service of Jan Smuts and the Jewish mine-bosses, who were referred to as the “Hochenheimers”. The National Party openly branded him as an Afrikaner of a ‘different’ and ‘unpatriotic’ kind, a traitor to his country and ‘Volk’ (people).
In addition to the National Party’s efforts, the Torch Commando also ultimately failed because it could not distance itself as a political arm of the United Party and establish itself as independent mass action movement. It found itself severely curtailed by mainstream party politics of the United Party (especially on issues such as Natal’s possible cessation from the Union, manifesto freedoms, positions on franchise and addressing Black poverty, actions of the ‘steel commando’ (which was a more militant sect within the Torch Commando) etc. One political cartoon of the time lampoons The Torch Commando as a hindrance to the United Party.
There was also the issue of the Torch Commando’s “Achilles Heel” – The Springbok Legion and its firebrand, highly political and militant anti-apartheid veterans. The National government took to destroying this veterans association completely and here’s how that happened.
The Springbok Legion’s Rise and Decline
The Springbok Legion, buoyed by the political actions of The Torch Commando gradually became a fully blown political entity in its own right, and the inevitable happened, as with any political party, The Springbok Legion gradually became politically radicalised. This was spearheaded by veterans who were also members of the Communist Party of South Africa (CPSA) and who joined The Springbok Legion and served in its upper and lower structures.
The targeting of the Springbok Legion by the Communist Party was the result of the South African Communist Party believing that it could use the veterans to re-order “white” political thinking in South Africa along communist lines.
This eventually resulted in the fracturing of the Springbok Legion as a whole as moderate “white” members, who made up the majority of its supporters became disenchanted with its increasingly militant leftist rhetoric.
Notable South African Communist Party (SACP) veterans to join the Springbok Legion in a leading capacity where none other than ex-servicemen such as Joe Slovo, Lionel Bernstein, Wolfie Kodesh, Jock Isacowitz, Jack Hodgson and Fred Carneso.
Joe Slovo (right of picture) in WW2
Aside from the Communists, Key members included future political and anti-apartheid leaders, such as Peter Kaya Selepe, an organiser of the African National Congress (ANC) in Orlando (he also served in WW2). Harry Heinz Schwarz, also a WW2 veteran eventually became a statesman and long-time political opposition leader against apartheid in South Africa and served as the South African ambassador to the United States during South Africa’s “transition” in the 90’s.
The National Party – which even as part of it’s pre-war make up had a fierce anti-communist stance was becoming increasingly alarmed by the rise of veterans against their policies and began seeking was of suppressing it. One of the mechanisms was to pass the Suppression of Communism Act.
The combined effect of the ‘Suppression of Communism Act’, and the broadening and deepening of the Communist rhetoric and politics was alienating the majority of Springbok Legion members rang a death knell for the Springbok Legion and the inevitable happened, the organisation folded as thousands of its “moderate” members left, returning to the either the apolitical MOTH movement or the South African Legion (or both).
Rica and Jack Hodgson wearing Springbok Legion badges in the 1940s
The Communist Party members of The Springbok Legion who had played a pivot in its rise and its demise i.e. Joe Slovo, Lionel Bernstein, Wolfie Kodesh, Jack Hodgson and Fred Carneso all then joined the African National Congress and, given their experience as combat veterans, they also all joined its military wing Umkhonto we Sizwe under the command of Nelson Mandela.
Once clear that Springbok Legion was at an end as an organisation – part of its branch infrastructure and a great many of their “moderate” members where then absorbed into the South African Legion (BESL).
It was however very clear that the veterans community had shown their colours – and the relationship between the Nationalist government and the ‘apolitical’ national body i.e. South African Legion was to remain strained for some time come.
Sailor Malan returns to his ‘shell-hole’
Sailor Malan’s political career was effectively ended and the “Torch” effectively suppressed by the National Party, so he returned to his hometown of Kimberley. Sailor then joined his local Memorable Order of Tin Hats (MOTH) shell-hole (branch) in Kimberley and withdrew from politics, choosing instead the social and camaraderie of his like-minded colleagues in his ‘shell-hole’ and the ‘good life’ (he had a reputation as the ‘life of a party’).
Sadly, Sailor Malan succumbed on 17 September 1963 aged 53 to Parkinson’s Disease about which little was known at the time. Some research now supports the notion that Post Traumatic Stress Disorder (PTSD) can bring on an early onset of Parkinson’s Disease, and it is now thought that Sailor Malan’s high exposure to combat stress may have played a part in his death at such a relatively young age.
It is to the embarrassment now as to his treatment as a South African WW2 military hero that all enlisted South African military personnel who attended his funeral where instructed not to wear their uniforms by the newly formatted SADF. The government did not want a Afrikaner, as Malan was, idealised as a military hero in death in the fear that he would become a role model to future Afrikaner youth.
The “official” obituary issued for Sailor Malan published in all national newspapers made no mention of his role as National President of The Torch Commando or referenced his political career. The idea was that The Torch Commando would die with Sailor Malan.
All requests to give him a full military funeral were turned down and even the South African Air Force were instructed not to give him any tribute. Ironically this action now stands as testimony to just how fearful the government had become of him as a political fighter.
The campaign to purge the national consciousness of The Torch Commando, The Springbok Legion and Sailor Malan was highly effective as by the 1970’s and 1980’s the emergent generation of South Africans have little to no knowledge of The Torch or The Springbok Legion, it is highly unlikely that anyone today remembers Sailor Malan’s speech to 75,000 Torch Commando protesters in the centre of Johannesburg. The veterans community today, albeit very small, have kept his memory alive, Sailor’s MOTH shell-hole in Kimberley still remember this outstanding war hero very fondly to this day,
The marginalising of The South African Legion
Many older people will remember a time in the 50’s, 60’s and early 70’s, when on “Poppy Day” thousands of South African Legion members with their supporters would ‘sell’ paper red poppies raising funds for veterans in need in just about every major shopping centre all over South Africa. Some may even remember the South African Legion visiting their schools and explaining the meaning of the Poppy.
However, by the 1980’s the South African Legion and its Poppy legacy was all but gone from the national consciousness – so what happened?
Simply put, even though the South African Legion (BESL) had taken an apolitical stance and chosen a cordial approach in dealing with the Nationalists, it still found itself coming into headlong confrontation with the National Party government, both in terms of its individual members’ politics but also in terms of the mandate given to it as the national body to look after Cape Coloured, Indian and Black South African veterans in need.
To a degree the MOTH were spared this confrontation as their joining criteria in the 1950’s and 1960’s specified the MOTH order for “combat veterans only” – and as ‘combat’ veterans were defined by race politics in South Africa as ‘whites and cape coloureds only’ during World War 2 the MOTH by default did not attract many Black members of The Native Military Corps who were deemed ‘non-combative’ by the definitions of the time. The South African Legion on the other hand was a viable veterans association for Black veterans during these years – and to this very day The South African Legion still has many of these old veterans on its books.
From the beginning of 1948 the South African Legion’s relations with the Nationalists were starting to strain via the actions of The Torch Commando and South African Legion (BESL) members joining it, but a major clash was to come when the South African Legion reacted strongly in 1956 to the Government’s move to ban Black and Coloured veterans from Remembrance Day Services.
Another confrontation occurred when the South African Legion requested the Nationalist government to waive pass laws for Black military veterans who had served South Africa (not some ‘Bantustan’) and therefore should be treated differently, however this request unfortunately worked for a limited time and the juggernaut of Apartheid law and policy implementation eventually simply over-ran it.
The South African Legion was again at loggerheads with the National Party government over the lack of parity with regard to pensions paid out to Black and Coloured veterans. The fight to obtain parity of pensions for all – white, coloured and black veterans was finally won in 1986/87. It had been a very long battle for the South African Legion.
The old World War 2 veterans sitting in their MOTH Shell-Holes and South African Legion branches (and even those still serving) were again at serious loggerheads with the newly formatted SADF and the Nationalists – when in a very sinister move the government decreed that all their highest bravery decorations (military cross, DSO etc) along with campaign medals and Stars – all won in the Second World War were for a ‘foreign’ country in their estimation (Britain – and not South Africa) and therefore these decorations and medals had to take the junior position after even the most lowly SADF service medal on their medal racks.
WW2 South African veterans rack – note the very senior WW2 campaign stars and campaign medals in secondary position (left to right) to more junior SADF Service medals
To add insult to injury, amongst many other changes to remove ‘British’ and ‘English’ heritage, they also went about introducing German styled NCO rank insignia and reformatting many of their infantry and regiment formations which resulted in new insignia and hard-earned Battle honours laid up and new colours initiated instead.
The net result of all of this was a ‘them and us’ mentality, where the old veterans in the South African Legion branches and MOTH shell-holes looked at the SADF in disdain – some refusing to alter their medal orders and The Nationalists (and many Afrikaners in the SADF officer class) also began to brand The South African Legion (BESL) and The Memorable Order of Tin Hats (MOTH), as ‘British’ and ‘unpatriotic ‘ whilst they maintained their ‘British’ links, insignia and heritage.
The government also started to gradually turn off the taps of the supply of veterans to the South African Legion and the MOTH from the newly formatted ‘South African Defence Force’ (SADF), when SADF personnel completed their service. Whereas under the old South African Union’ Defence Force (UDF) such a transition when demobilising was the norm.
Certificate granting Life Membership of the SA Legion given to Union Defence Force members demobilising after WW2
By the mid 1980’s the SADF simply would not actively promote the South African Legion (or the MOTH) to the thousands of SADF permanent force members and conscripts as a veterans association option and ‘home’ available to them post service.
The National Party also took South Africa out of the British Commonwealth of Nations in 1961, and along with sanctions and International isolation, the South African Legion – as a Commonwealth inspired and linked association, found itself floundering in a country whose government had no time for the British and the Commonwealth and its affiliations at all.
Faced with an ageing membership, a divergent view to that of the Apartheid government of the day, and no ‘new blood’ from the Alma Mater – the South African Defence Force (SADF) – for nearly four decades on end, the South African Legion (and the MOTH) gradually started to slip into long-term decline.
A major casualty of all of this was the gradual removal of the ‘Poppy’ as an icon of Remembrance from the general population’s mass consciousness. Embroiled in race politics where black servicemen were marginalised and events as to Apartheid took greater national precedence, the Poppy took a back seat to the seismic events of the day – and where the movement flourished in other countries, it declined in South Africa.
1994
1994 was a significant year in many respects, South Africa re-joined the Commonwealth of Nations and was invited back into the International world. Almost instantly Queen Elizabeth II visited South Africa to re-kindle the links and in a landmark move, The Royal Commonwealth Ex-Service League (RCEL) decreed that its 75th international convention would again take place in Cape Town (the city where it was founded). Nelson Mandela even opened the RCEL’s Cape Town convention on the 26th February 1996 with an upbeat message to re-kindle the purpose of South Africa’s primo veterans association – The South African Legion (a founding member of the RCEL) and re-establish South Africa’s place in the international veterans community (for more of this history see Observation Post Legions and Poppies … and their South African root).
Nelson Mandela opening the 75th Convention of The Royal Commonwealth Ex-Services League in Cape Town – 1996
Not so fast!
So, in the mid 90’s – the surviving veteran’s bodies reconciling and extending olive branches, the SADF now reformatted into the SANDF and the legacy of the Torch Commando and its political influence to split the surviving veterans associations (The South African Legion and MOTH) away from their ‘Alma Mater‘ – the South African Defence Force, long-buried and a thing of past … right?
Wrong! Typical to a South Africa personality – put two of us in the same the room and we’ll come up with three political parties.
Where are we now?
The fracturing nature of South African politics which played such a significant role in forming The Torch Commando in the first place, still plays out in South Africa. Still not unified in a singular mission the veterans community remains as fractious as ever. Race politics, party politics and political one-upmanship has dictated that the ‘non statutory forces’ veterans associations (APLA, MK etc) have a separate umbrella association to the ‘statutory forces’ veterans associations.
The ‘statutory’ associations i.e. the Infantry Association, Armour Association, Naval Officers Association, Gunners Association, Caledonian Regiments Association etc. etc. are combined and lumped with more newly sprung ‘broader’ veterans associations – the SADF Veterans Association, the South African Military Veterans Organisation ‘International’ (a spin-off from a Australia based SA veterans association) and more, each targeting the same veteran – all of whom exist under their own umbrella organisation – The Council of Military Veterans Organisations (CMVO).
If you’re confused now – there’s more! They all fall under another reformatted umbrella body – The South African National Military Veterans Association (SANMVA), which is designed to bring about reconciliation and common value.
This all in turn falls under the ‘Department of Military Veterans’ (DMV) a government department under the Minister of Defence which toes a very African National Congress (ANC) party political line in its media either shaming or ignoring the statutory veterans (especially the old ‘SADF’ members who make up the majority of the Department’s mandate and membership) and highlighting the deeds of the non statutory political party veterans, primarily ANC Umkhonto we Sizwe (MK) veterans as noble ones instead (and these veterans are contentious at best).
So, there are no surprises here then – the government of the day, behaving exactly like the old Apartheid nationalists, now dictate who they regard as military heroes whilst ignoring or vanquishing others for political expediency – same, same approach, new epoch – the nobility of Nelson Mandela’s reconciliations, honour, respect, remembrance and understanding of all of South Africa’s veterans from all the ethnic groupings of South Africa … now a long lost and conveniently ignored memory.
Add to this the advent of social media which has seen a raft of pseudo South African veteran organisations, clubs, orders, charities etc spring up on various on-line social media platforms (Facebook, Whats-app etc.) over the past ten years. All purposefully not aligned to any official veterans body or department (citing the political climate and separation from having to deal with ‘ex-terrorists’).
These digital groupings and their spin-offs are not recognised by the law of the land or their peers in the properly constituted veterans associations – but they are promising the world to some disillusioned South African military veterans, and in many instances these veterans are preyed upon by opportunists trying to make a fast buck and false Messiah’s promising things that can never be delivered on, as they are simply not ‘recognised’ as legitimate associations. They cannot draw benefits for their members and have no formal representation of their members needs or ‘voice’ when dealing with government, non-government organisations, the public at large and international veterans federations – like the Royal Commonwealth Ex-Services League (RCEL) and UN’s World Veterans Federation (WVF).
What this shows up is the continued divisiveness of South African race politics and instead of consolidating as veterans many of these digital gatherings have headed off to ‘do their own thing’ (usually by way of their political convictions) and create more division (more often than not). Generally they are ignored by the DMV and the CMVO and without official recognition they really are on a highway to nowhere. What they do manage to do however is divert much-needed Human Resources from South Africa’s long-standing veterans bodies like The South African Legion and MOTH, and that’s not helpful to anyone.
So where do surviving organisations like The Memorable Order of Tin Hats (MOTH) and especially – The South African Legion – as the country’s primo veterans organisation sit now?
Safe to say they are just cracking on and hoping everyone will come round to their senses, stop re-imaging themselves after this or that dying political epoch, stop politicising what is essentially a charitable cause and join their infrastructures – which for decades have been in place to serve South African veterans only (In the case of the South African Legion – for nearly 100 years), not only in terms of physical buildings but also in terms of Camaraderie and Remembrance – and infrastructures which are now badly in need of new blood (and money) to see them into the future.
In some respects they wait until the usual political course becomes its calamitous self and the inevitable implosions start to happen (as they have been doing in South Africa for decades now, starting with veterans groups like the Springbok Legion and the Torch Commando politicising themselves) – and they just bide their time and focus on the real life issues at hand and championing the one relevant person in all of this – the person who signed up to serve his or her country in uniform – the veteran!
Written and Researched by Peter Dickens.
References Lazerson, Whites in the Struggle Against Apartheid. Neil Roos. Ordinary Springboks: White Servicemen and Social Justice in South Africa, 1939-1961. Wikipedia and “Not for ourselves” – a history of the South African Legion by Arthur Blake. South African History On-Line – a History of the Springbok Legion. Image copyrights – Imperial War Museum and Associated Press.

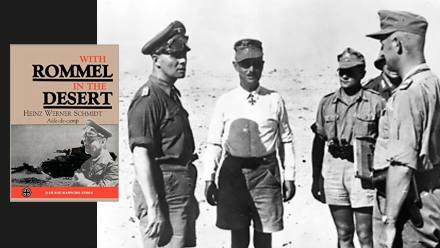
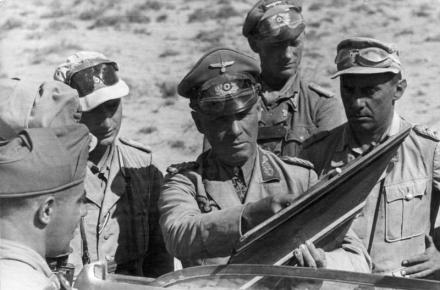
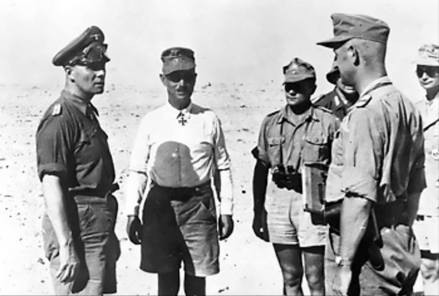
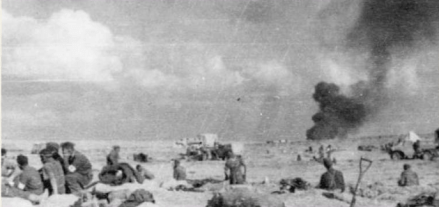
 He moved to a small German community in Natal called ‘New Germany’, located just inland from Durban. ‘New Germany’ was established well before World War 2 in 1848 by a party of 183 German immigrants. With the strong cultural ties to Germany, German social clubs and many German compatriots, this island of German heritage in South Africa proved ideal for Heinz Schmidt to start again, and he did so with great success.
 To give an idea of the value his book from an insight perspective, the famous Rommel quotable quote as to using captured ‘booty’ (enemy equipment) for personal use is thanks to Schmidt’s work. Rommel, whose signature British issue goggles often worn above his visor on his cap said “Booty is permissible I assume; even for a general“. A quote which now finds itself in use in military outfits the world over when reasoning over the use of ‘booty’.
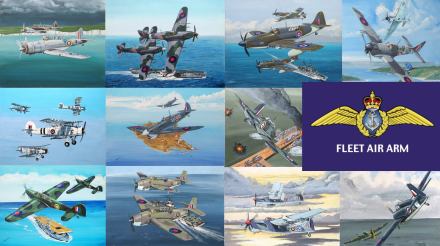

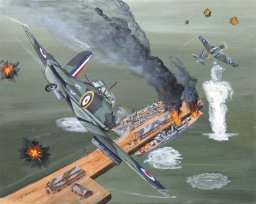
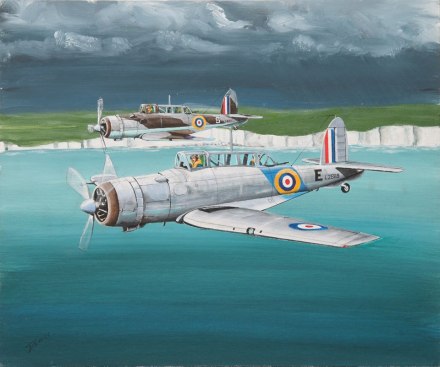
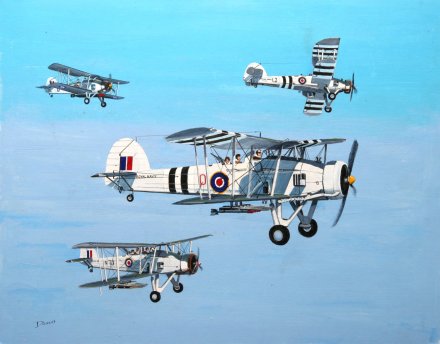
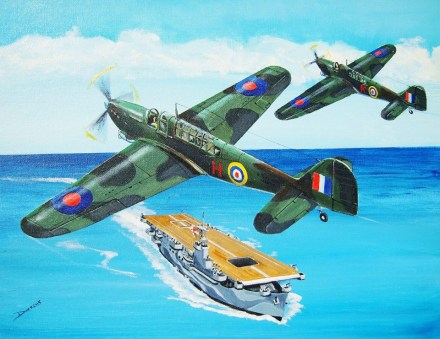
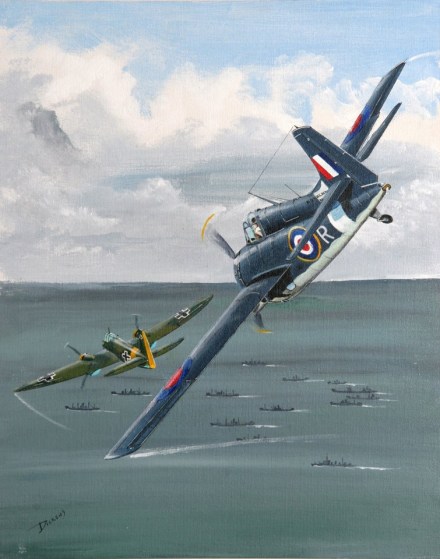
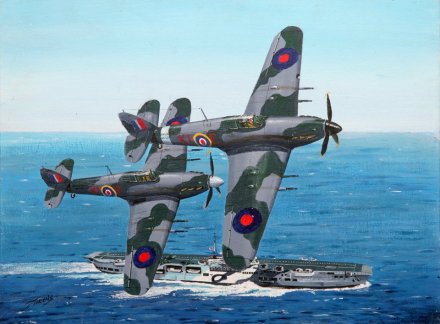
 MACWHIRTER, Cecil J, Ty/Sub Lieutenant (A), Fleet Air Arm (Royal Navy) 851 Squadron HMS Shah, air crash, SANF, MPK 14 April 1944
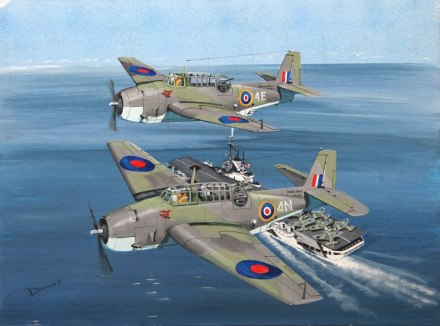
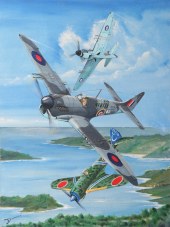
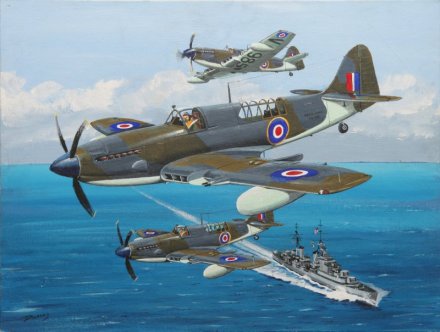
 WAKE, Vivian H, Ty/Lieutenant (A), FAA Fleet Air Arm (Royal Navy) 815 Squadron HMS Landrail, air crash, SANF, MPK 28 March 1945
 The best way to summarise the Fleet Air Arm, its commitment and sacrifice is in fact found in the forward of Derrick Dickens’ Stringbag to Shar’ written by none other than the Admiral of the Fleet, HRH Prince Philip, Duke of Edinburgh K.G., K.T., O.M., G.B.E.
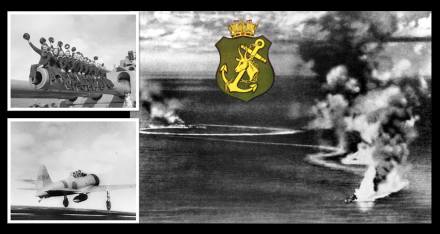
 Here’s a question for many, in what action did the South African Navy (SAN) experience its greatest single loss of personnel, the largest sacrifice of South African life in a single sea battle – in essence when and what was the South African Navy’s ‘darkest hour’?
 Most (actually the majority) of SAN officers and veterans would say it was the loss of the SAS President Kruger (16 souls) but that would also be very wrong, both in terms of scale and action, the SAS President Kruger loss was also an accident at sea and not a combat action.
 These are the HMSAS Southern Floe (24 souls) or the HMSAS Parktown (5 souls), or the HMSAS Bever (17 souls) or the HMSAS Treen (23 souls) – getting warm but that too would be wrong, as these did not happen over a defined period of the war that would warrant a ‘darkest hour’ in Churchill’s definition of the phrase (Churchill coined the term).
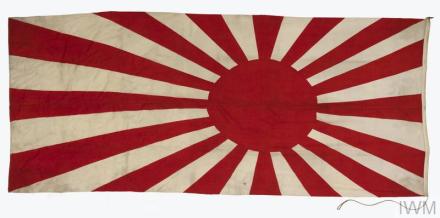
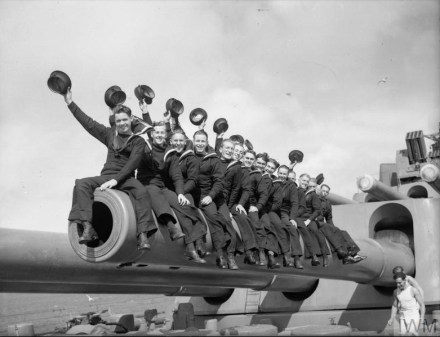
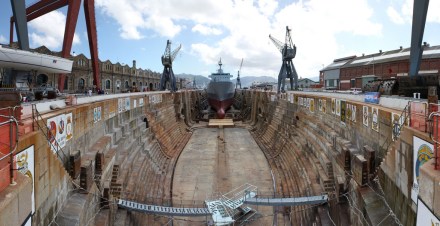
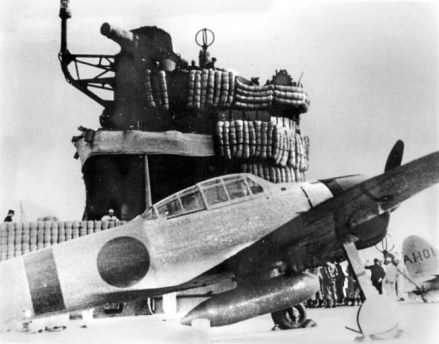


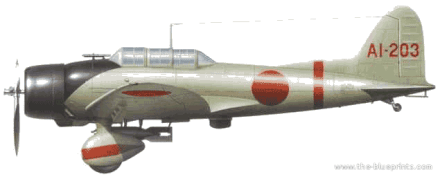
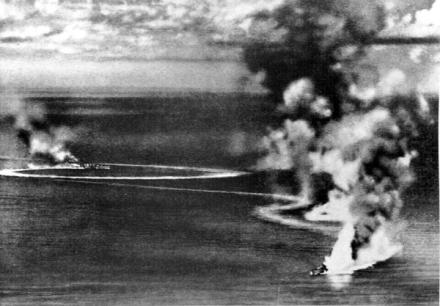
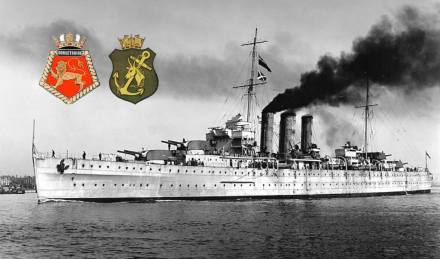
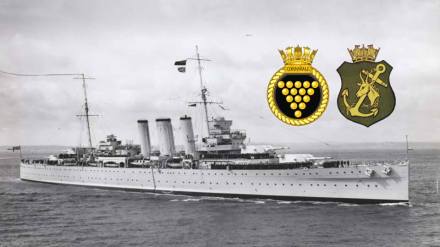
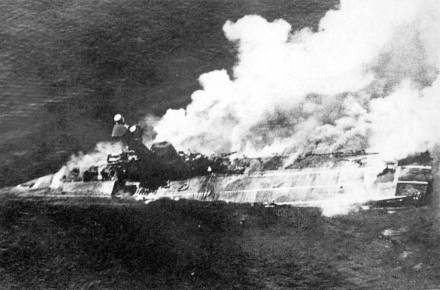
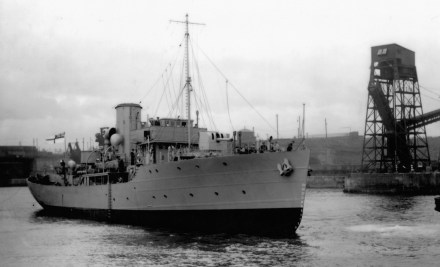
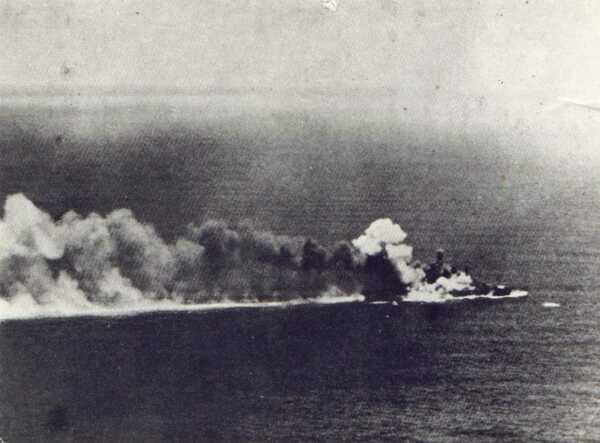
 The HMS Dorsetshire was a heavy cruiser and after commissioning in 1930 became the flagship of the 2nd Cruiser Squadron Atlantic Home Fleet. Before the war, from 1933 until 1936, HMS Dorsetshire served on the Africa Station. Her first recorded docking in the Selborne dry dock at Simonstown, South Africa was on 5 January 1934.
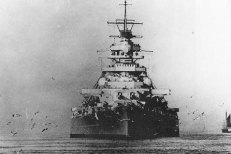
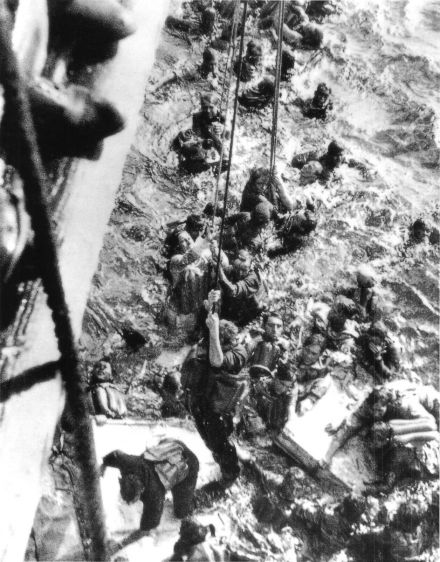

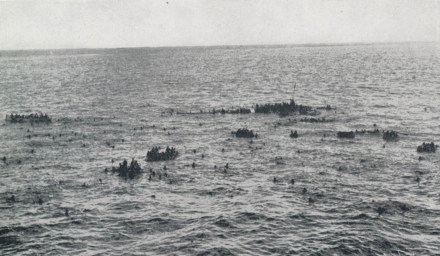
 BELL, Douglas S, Ty/Act/Leading Stoker, 67243 (SANF), MPK
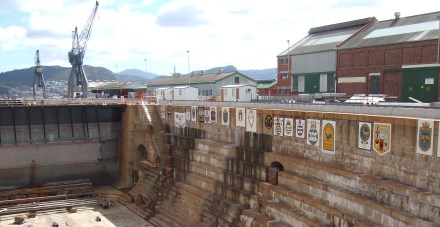 Their names have not been forgotten.
 HMS Cornwall was a heavy cruiser of the Kent-subclass of the County-class. When World War 2 began in September 1939, Cornwall was transferred from her pre-war China Seas operations to the Indian Ocean and joined Force I at Ceylon.
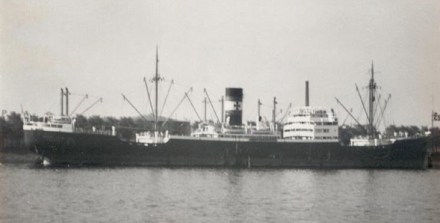

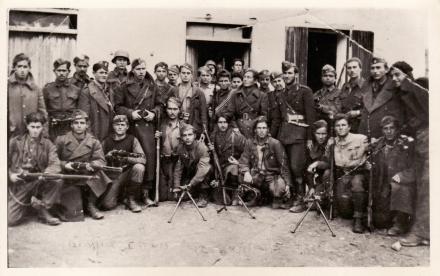
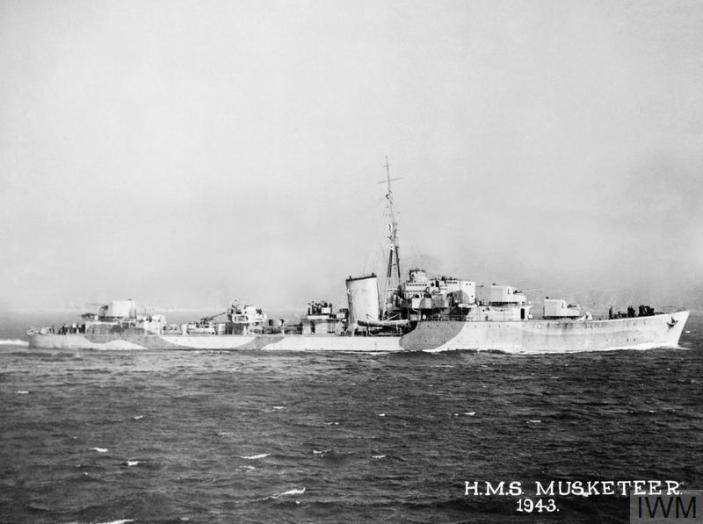
 ANDERSON, Robert D, Engine Room Artificer 2c, 71067 V (SANF), MPK


 The citation for Chard’s and Bromhead’s Victoria Crosses says everything:
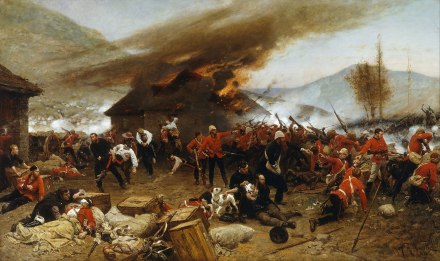


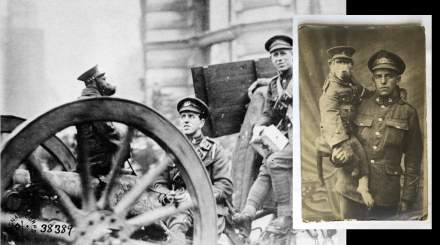

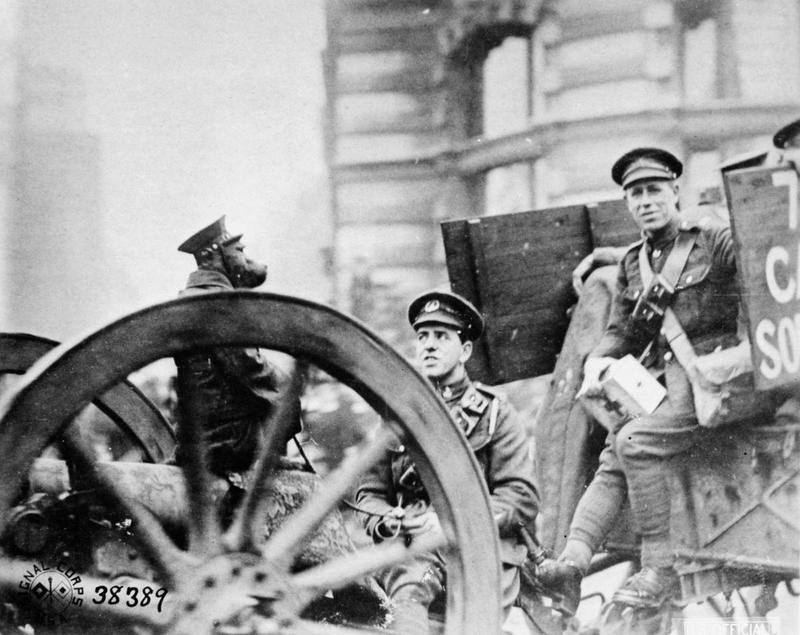
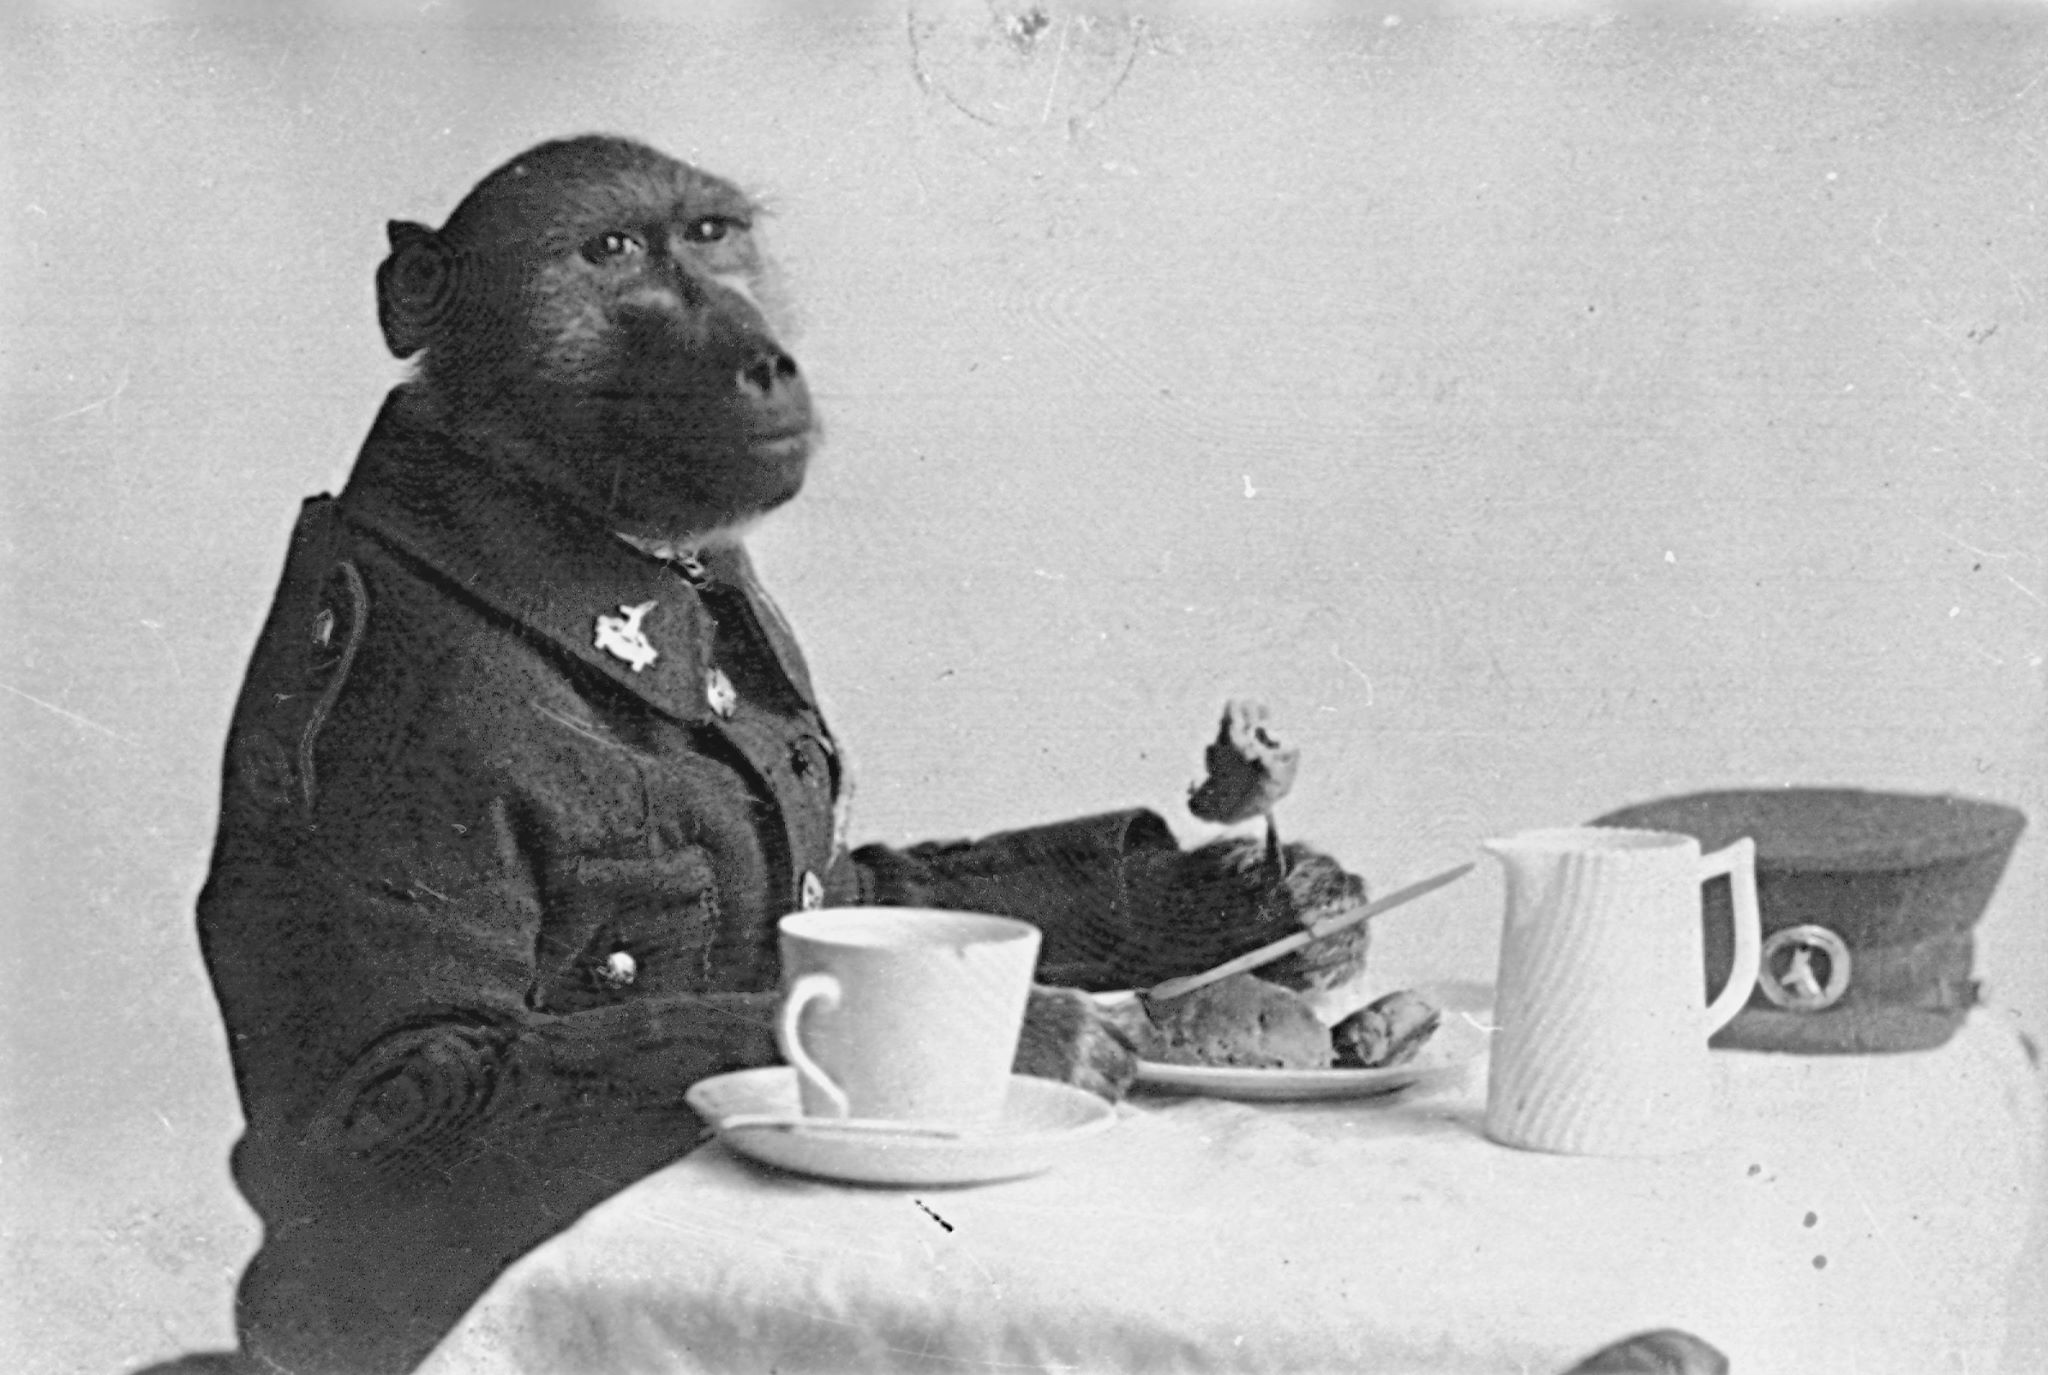
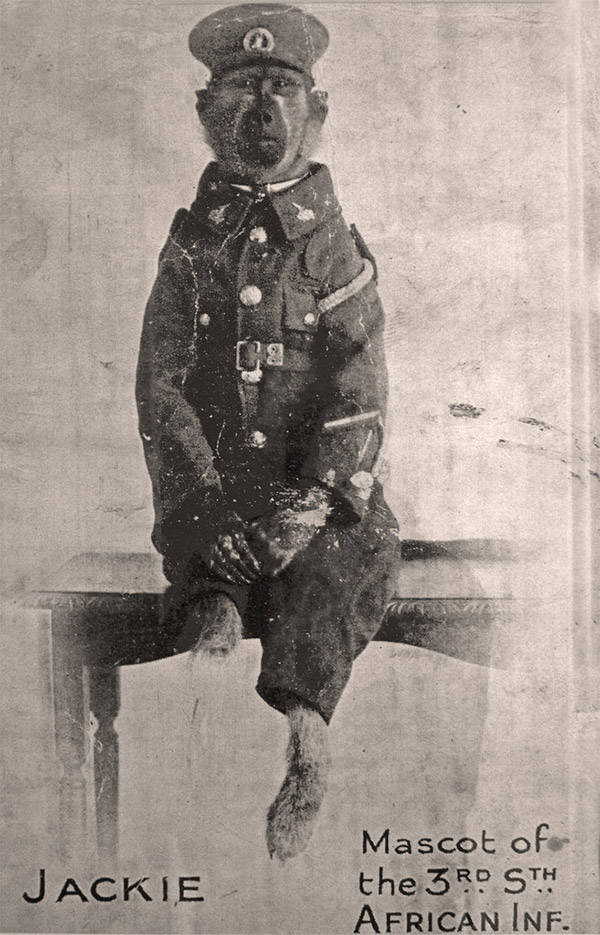
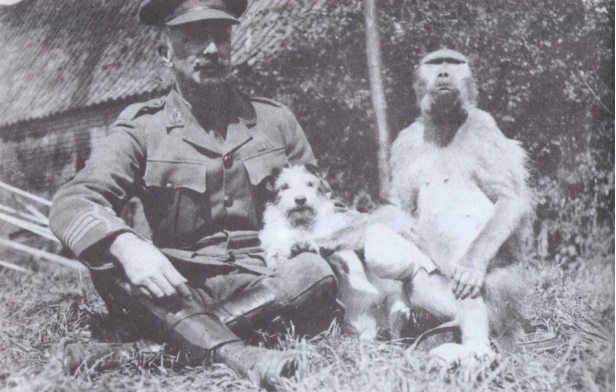
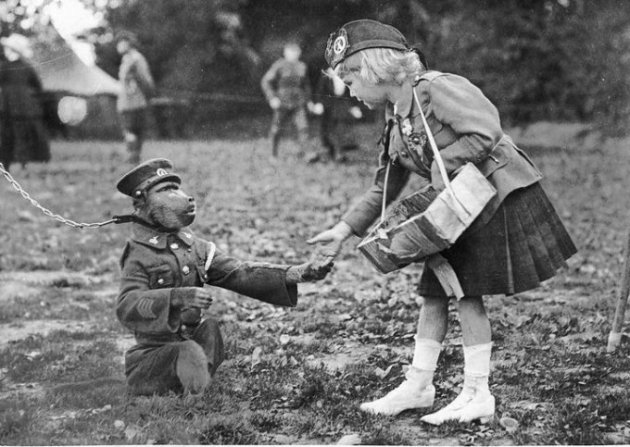
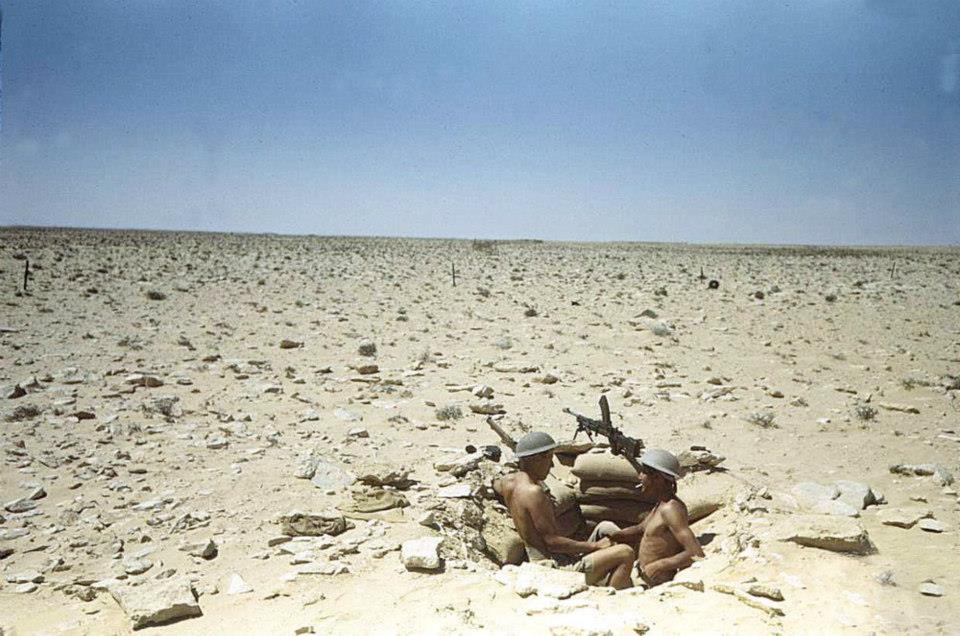


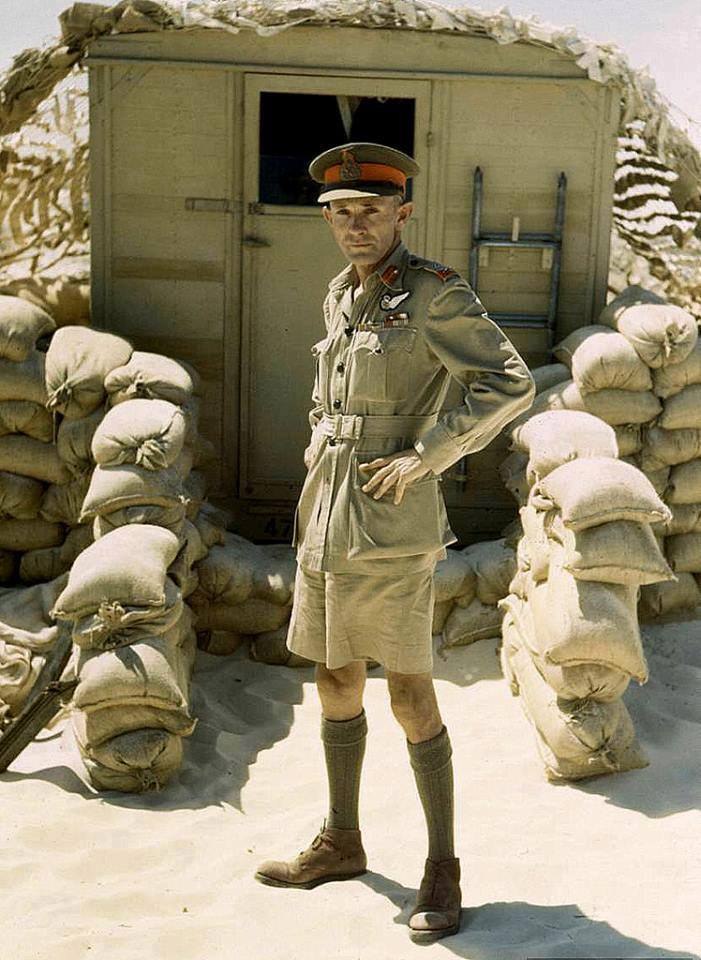

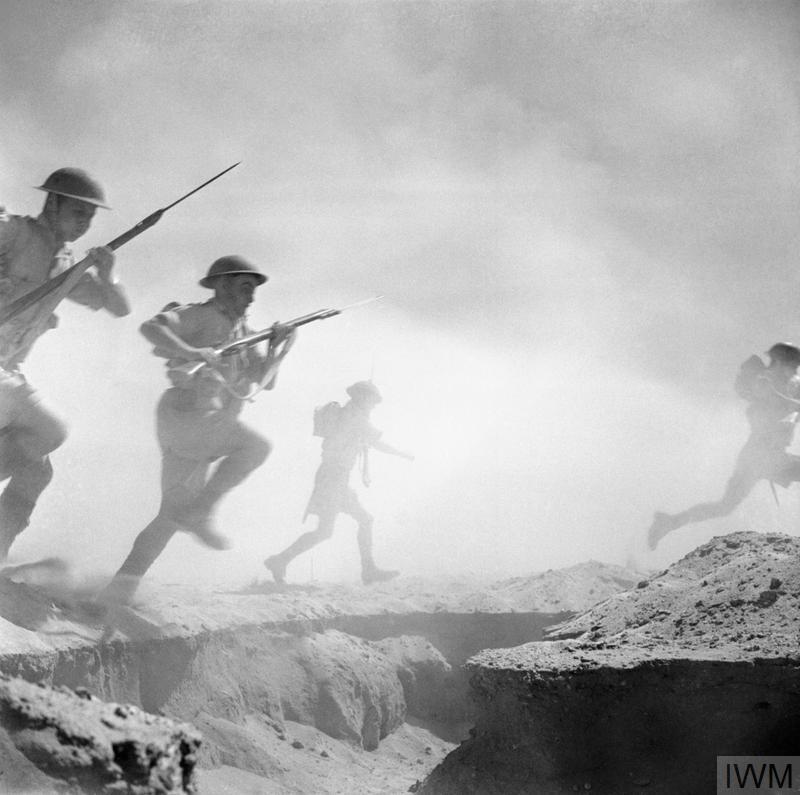
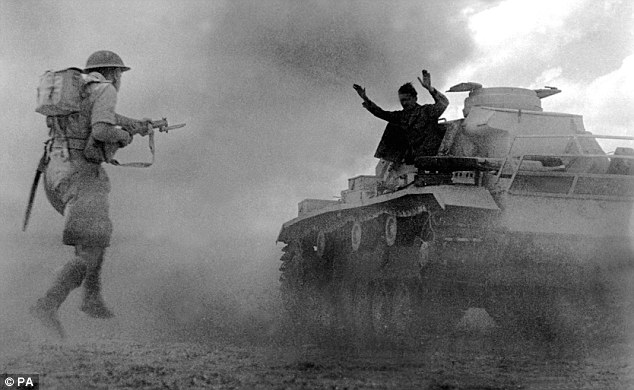
 The Division returned to South Africa and General Pienaar and eleven other officers boarded a South African Air Force (SAAF) Lockheed Lodestar on 17 December to fly the final command structure back to South Africa.
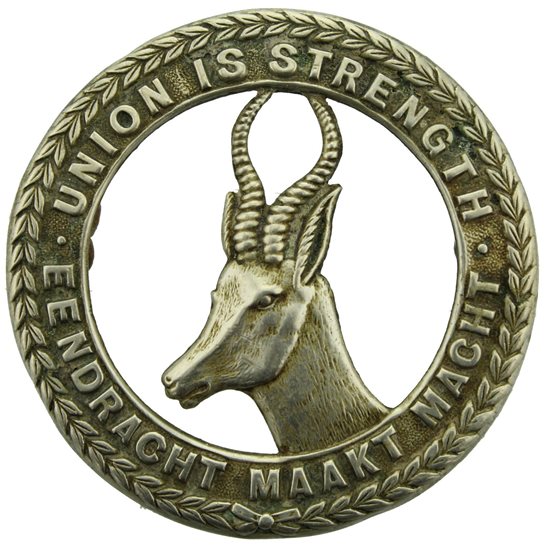


 The history of the Springbok Legion as a political entity is fascinating – initially formed in 1941 by members of the 9th Recce Battalion of the South African Tank Corps, along with the Soldiers Interests Committee formed by members of the First South African Brigade in Addis Ababa, and the Union of Soldiers formed by the same brigade in Egypt.

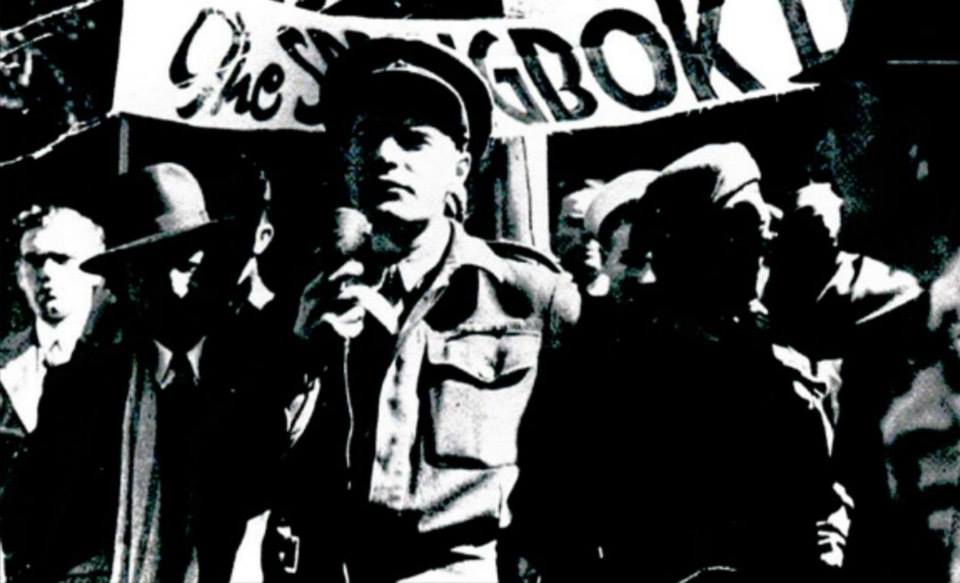
 In reality, the Torch Commando constituted the first real mass “anti-Apartheid” protests and Adolph ‘Sailor’ Malan can be counted as one of the very first anti-apartheid ‘struggle’ heroes. Sailor Malan, a Battle of Britain hero and flying ace (one of the best pilots the Royal Air Force had during the war) returned to his homeland – South Africa in 1946.


 This eventually resulted in the fracturing of the Springbok Legion as a whole as moderate “white” members, who made up the majority of its supporters became disenchanted with its increasingly militant leftist rhetoric.

 Sailor Malan’s political career was effectively ended and the “Torch” effectively suppressed by the National Party, so he returned to his hometown of Kimberley. Sailor then joined his local Memorable Order of Tin Hats (MOTH) shell-hole (branch) in Kimberley and withdrew from politics, choosing instead the social and camaraderie of his like-minded colleagues in his ‘shell-hole’ and the ‘good life’ (he had a reputation as the ‘life of a party’).

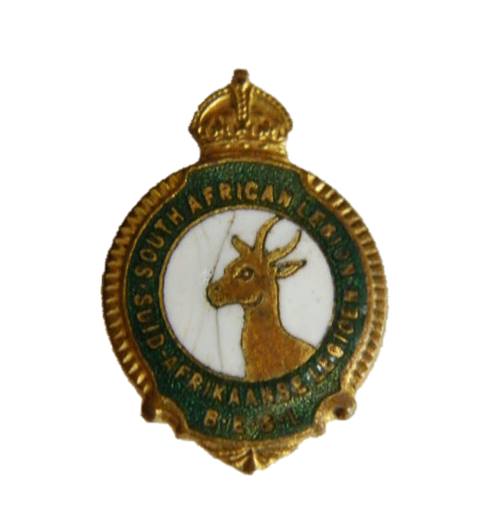 Many older people will remember a time in the 50’s, 60’s and early 70’s, when on “Poppy Day” thousands of South African Legion members with their supporters would ‘sell’ paper red poppies raising funds for veterans in need in just about every major shopping centre all over South Africa. Some may even remember the South African Legion visiting their schools and explaining the meaning of the Poppy.
 Simply put, even though the South African Legion (BESL) had taken an apolitical stance and chosen a cordial approach in dealing with the Nationalists, it still found itself coming into headlong confrontation with the National Party government, both in terms of its individual members’ politics but also in terms of the mandate given to it as the national body to look after Cape Coloured, Indian and Black South African veterans in need.
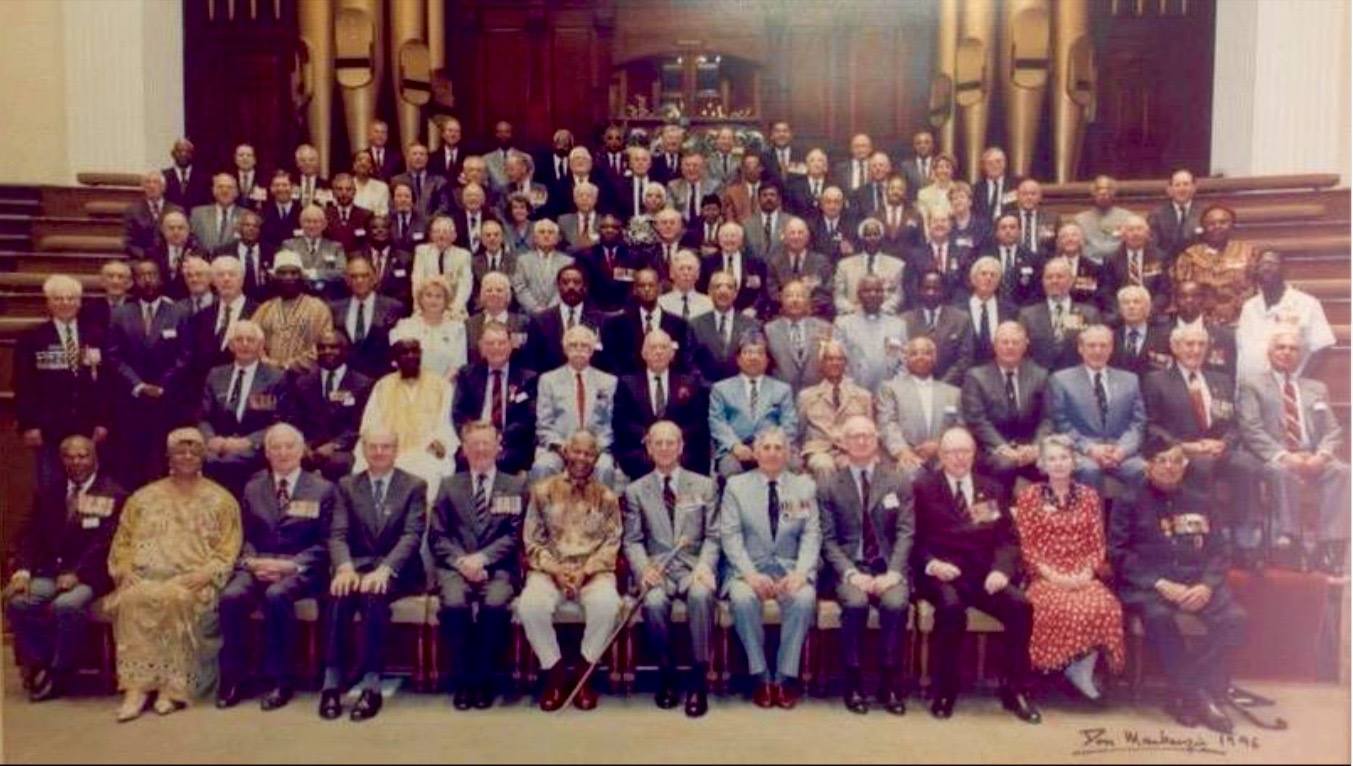
 The ‘statutory’ associations i.e. the Infantry Association, Armour Association, Naval Officers Association, Gunners Association, Caledonian Regiments Association etc. etc. are combined and lumped with more newly sprung ‘broader’ veterans associations – the SADF Veterans Association, the South African Military Veterans Organisation ‘International’ (a spin-off from a Australia based SA veterans association) and more, each targeting the same veteran – all of whom exist under their own umbrella organisation – The Council of Military Veterans Organisations (CMVO).
 This all in turn falls under the ‘Department of Military Veterans’ (DMV) a government department under the Minister of Defence which toes a very African National Congress (ANC) party political line in its media either shaming or ignoring the statutory veterans (especially the old ‘SADF’ members who make up the majority of the Department’s mandate and membership) and highlighting the deeds of the non statutory political party veterans, primarily ANC Umkhonto we Sizwe (MK) veterans as noble ones instead (and these veterans are contentious at best).