Here’s a question for many, in what action did the South African Navy (SAN) experience its greatest single loss of personnel, the largest sacrifice of South African life in a single sea battle – in essence when and what was the South African Navy’s ‘darkest hour’?
I’ve asked this question of senior South African military personnel, including the South African Navy as well as the South African Naval fraternity, the veterans – and the bottom line is … nobody knows.
Some immediately say it was the Mendi, as the remembrance of the Mendi is now the South African Navy’s key responsibility, but the loss of the SS Mendi in World War 1 was not a loss of South African Navy personnel (the South African Navy did not exist in WW1 and the Royal Navy was in charge of this particular troop ship full of South African ‘Army personnel’) and the loss of the Mendi was an accident at sea and not a combat action.
 Most (actually the majority) of SAN officers and veterans would say it was the loss of the SAS President Kruger (16 souls) but that would also be very wrong, both in terms of scale and action, the SAS President Kruger loss was also an accident at sea and not a combat action.
A tiny handful of SAN officers and vets who have a little knowledge of World War 2 might venture to answer the question by stating the loss of any one of the four South African minesweepers sunk during the war as the ‘darkest hour’ of the war.
 These are the HMSAS Southern Floe (24 souls) or the HMSAS Parktown (5 souls), or the HMSAS Bever (17 souls) or the HMSAS Treen (23 souls) – getting warm but that too would be wrong, as these did not happen over a defined period of the war that would warrant a ‘darkest hour’ in Churchill’s definition of the phrase (Churchill coined the term).
Nope, the largest loss of South Africans in a single sea battle, its ‘Darkest Hour’ took place fighting against Imperial Japan from the 5th to the 9th April 1942 … yup, the Japanese – believe it, and by the end of this particular naval engagement at sea a grand total of 65 South African souls were lost. Now how many people know that!
The reason to ‘forget’!
So why does nobody know about this, why is this incident not ‘recognised,’ why is nobody ‘commemorating’ it and what exactly happened?
Simply put, it’s because they all died fighting whilst seconded to four British war ships in an action in the Pacific called ‘The Easter Sunday Raid’ – and it involved the sinking of the HMS Cornwall and HMS Dorsetshire in a single day – and later the sinking of HMS Hermes and HMS Hollyhock a few days later by the Japanese Imperial Navy. But why should that be an issue and a reason to ‘forget’?
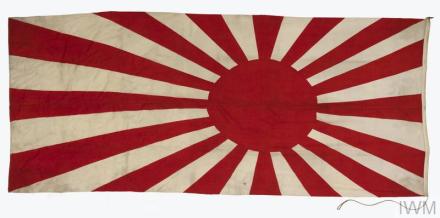
Japanese Imperial Fleet Ensign from World War 2
Again the simple answer is because just three short years after World War 2 the National Party in a stunning and unexpected election win over Jan Smuts’ United Party, came into power with their proposal of ‘Apartheid’ and making South Africa a ‘Republic’ independent of Britain – and they hated the British or anything to do with Britain. The Nationalists had grounded an entire Afrikaner identity and a country’s ‘nationalism’ on two events – The Great Trek and The 2nd Anglo-Boer war, both of which carried a history of either British betrayal or British atrocity.
During the Second World war these nationalists either openly sided with Nazi Germany and in many cases (by their tens of thousands in fact) even joined Neo-nazi South African parties and/or adopted national socialist movement (Nazism) ideology publicly, some (including a future Nationalist South African President) embarked on sedition and terrorism to undermine the war effort (see “Mein Kampf shows the way to greatness for South Africa” – The Ossewabrandwag).
Bottom line, to the Nationalists thinking anyone who took part in Smuts’ campaign for South Africa to fight in the Second World War was a traitor to their ‘Volk’ (peoples). In their minds they went to fight ‘Britain’s war’ alongside the hated British – traitors all (even though an unprecedented 1 in 4 white South African males volunteered to fight in WW2 – half of them Afrikaners).
For the Nationalists commemorating the sinking of South African ships fighting alongside British ones in World War 2 was bad enough. However, commemorating and remembering the South African loss whilst fighting on His Majesty’s British ships themselves would be, for the nationalist government at least, an unforgivable betrayal.
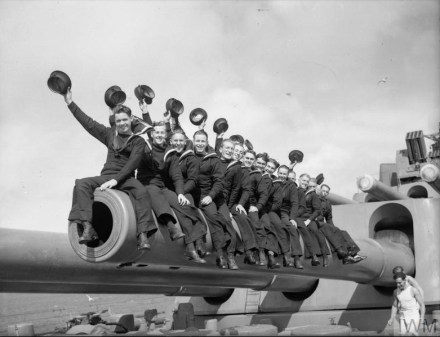
Members of the South African Royal Naval Volunteer Reserve serving on board HMS Nelson. The group is sat on one of the 16 inch gun barrels.
For this reason, the sinking of South African ships lost in World War 2 was not really extensively commemorated by the ‘old’ South African Defence Force (SADF). The SADF came into existence once the Nationalists declared South Africa a ‘Republic’ and replaced Smuts’ old ‘South African Union Defence Force (UDF) with a reformed military entity. The sinking of HMSAS ships are only ‘remembered’ in small pockets of veteran South African Legion branches and MOTH shell-holes.
It is also for this reason that the SADF and the South African Navy did not ever commemorate the South African losses on British Ships, it is the reason why this particular ‘darkest hour’ in the South African Navy’s history is not recognised or remembered at all, which is utterly unforgivable as this is the very institution who supplied the men to The Royal Navy in the first place.
It is made worse in the modern epoch, by the newly reformatted South African National Defence Force’s Navy after 1994, which has not only lost the link thanks to the Nationalists, but also does not attempt to re-kindle it, party because of lack of knowledge, but also because it suits the African National Congress’ political agenda not to remember this association (commemorating or remembering a time when South Africans went to war for the ‘Colonials’ does not suit their current narrative).
So, let’s start addressing this betrayal of our armed forces personnel and understand what happened to qualify this as the South African Navy’s ‘darkest hour’, who is on this honour roll and what’s been done about in now?
What happened?
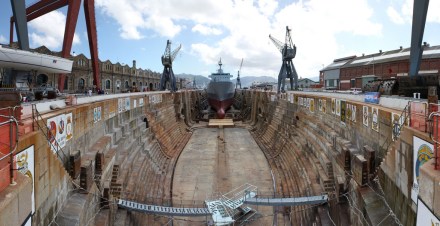
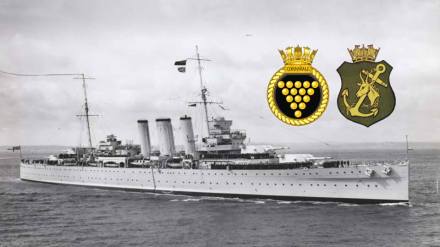
Simonstown Dry Docks, when next there look out for the ships emblems of the Dorsetshire, Cornwall, Hermes and Hollyhock
As Simon’s Town was a Royal Navy base during World War 2 (British soil in the middle of South Africa), men volunteering for the “South African Naval Forces” (SANF) to fight in World War 2 where either allocated to Royal Navy ships (titled HMS – His Majesty’s Ship) or on South African Navy ships (tilted HMSAS – His Majesty’s South African Ship), therefore whenever a large Royal Navy ship was lost during the war it is almost guaranteed that a number of South African Naval Personnel (SANF) were lost with it.
When large HMS ships are lost in an action on the same action the number of South African naval personnel lost just rockets – and this is the case with the sinking of the HMS Cornwall, HMS Dorsetshire, HMS Hermes and HMS Hollyhock.
The Japanese Easter Raid of 1942
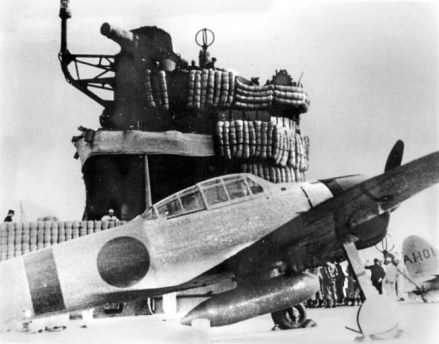
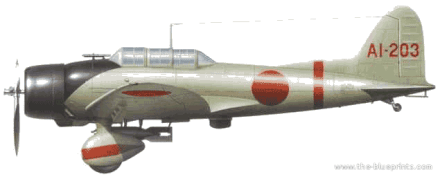
A Mitsubishi A6M Zero fighter plane takes off from the deck of the Japanese aircraft carrier Akagi, part of the Japanese Naval force in the Indian Ocean
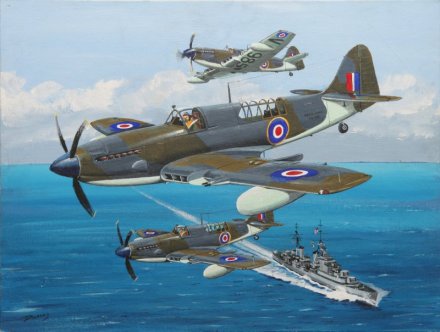
With Japan’s entry into the war, and especially after the fall of Singapore, Ceylon (now Sri Lanka) became a front-line British base. The Royal Navy’s East Indies Station and Eastern Fleet was moved to Colombo and Trincomalee.
Admiral Sir James Somerville was appointed as the commander of the British Eastern Fleet, and he decided to withdraw main component the fleet to Addu Atoll in the Maldives, leaving a small force to defend Ceylon (now Shri Lanka) consisting of an aircraft carrier, the HMS Hermes, two heavy cruisers – the HMS Cornwall and HMS Dorsetshire, one Australian Destroyer the HMSAS Vampire and the flower class HMS Hollyhock.
The Imperial Japanese Navy, in much the same way and with the same objectives that were used at Pearl Harbour planned a decisive attack of the British Eastern Fleet to end their presence in the North Indian and Pacific oceans. Unaware that the main body of the British fleet had moved to the Maldives, they focused their plan on Colombo.

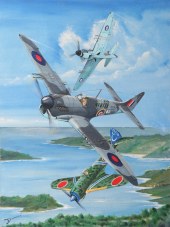
Admiral Nagumo’s fleet unleashed the Mitsubishi A6M Zero fighters and bombers on the attack on Colombo on 5 April 1942.
The planned Japanese attack was to become collectively known as the Easter Sunday Raid and the Japanese fleet comprised five aircraft carriers plus supporting ships under the command of Admiral Chuichi Nagumo.
In an almost exact copy of the raid on the American fleet at Peal Harbour (as if no learnings were made by the Allies), on 4 April 1942, the Japanese fleet was located by a Canadian PBY Calatina aircraft, the Catalina radioed the position of the Japanese Fleet to The British Eastern Fleet which alerted the British to the impending attack before it was shot down by six Japanese Zero fighters from the carrier Hiryu, However, despite the warning Nagumo’s air strike on Colombo the next day, Easter Sunday – 5th April – achieved near-complete surprise (Pearl Harbour was also attacked on a weekend). The British Radar installations were not operating, they were shut down for routine maintenance.
The Japanese high command had planned the bombing of Colombo very much like the Pearl Harbor operation (many of the same planes and pilots participated in both strikes); but most of the British Eastern Fleet was at Addu Atholl in the Maldives, so when the Japanese attacked at Colombo there were only three ships there.
The sinking of the HMS Cornwall and HMS Dorsetshire.
The day before, 4 April, when the Japanese carrier fleet was spotted, the two heavy cruisers the HMS Cornwall and HMS Dorsetshire set out for Addu Atoll in pursuit of the Japanese. On 5 April 1942, the two cruisers were sighted by a spotter plane from the Japanese cruiser Tone about 200 miles (370 km) southwest of Ceylon.
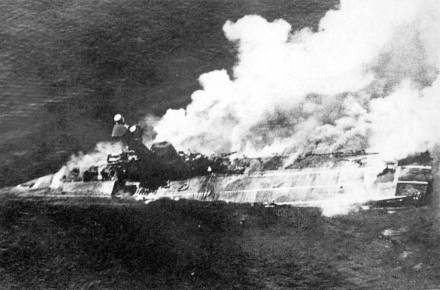
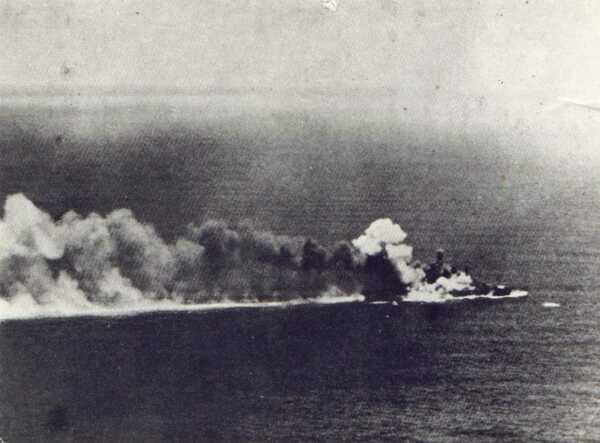
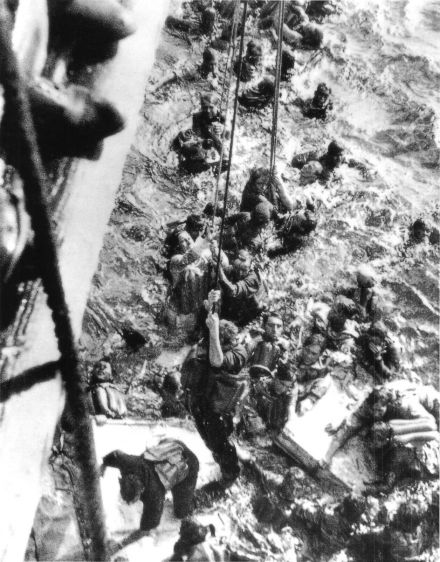
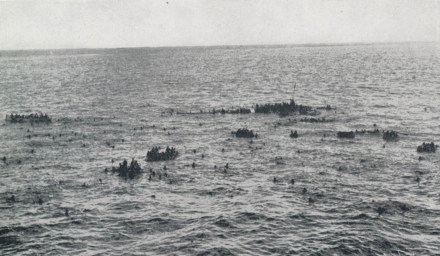
As part of the engagement known as the Easter Sunday Raid, a wave of dive bombers led by Lieutenant Commander Egusa took off from Japanese carriers to attack Cornwall and Dorsetshire, 320 km (170 nmi; 200 mi) southwest of Ceylon, and sank the two ships. Both the Dorsetshire and the Cornwall had long associations with South Africa and had large contingent of South African Naval Personnel on board.
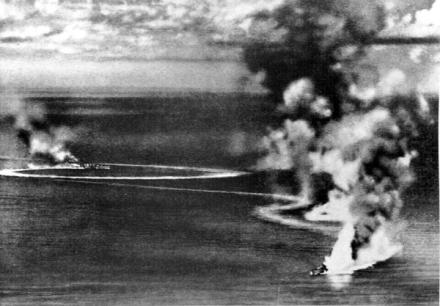
Japanese combat photograph showing the Royal Navy heavy cruisers HMS Dorsetshire and HMS Cornwall on fire and sinking
In the attack, the Japanese airman flying Japanese D3A-1 ‘VAL’ dive bombers, a total of 53 dive bombers in the attack wave, dropped 10 bombs on the HMS Dorsetshire itself (250- and 550-pound bombs) and 8 near misses, all in the span of 8 minutes. One of the bombs detonated an ammunition magazine and contributed to her rapid sinking. Of the two British cruisers, the HMS Dorsetshire sank first, with her stern going first at about 13:50, the HMS Cornwall was hit eight times and sank bow first about ten minutes later.
For a full story on the HMS Dorsetshire and her long association with South Africa, see this Observation Post by clicking this link: “They machine gunned us in the water”; Recounting South African Sacrifice on the HMS Dorsetshire
For a full story on the HMS Cornwall and her long association with South Africa, see this Observation Post by clicking this link: “A terrific explosion lifted the ship out of the water”; Recounting South African sacrifice on the HMS Cornwall
British and Allied losses were 424 men killed; 1,122 survivors spent thirty hours in the water before being rescued by HMS Enterprise and two British destroyers.
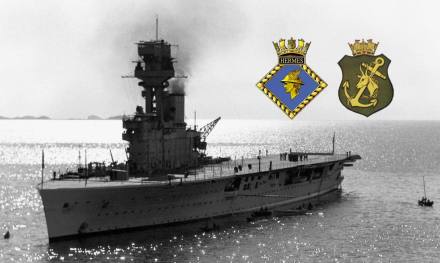
The sinking of the HMS Hermes and HMS Hollyhock
If the above losses qualify a dark day for the South African Navy it then becomes the SAN’s ‘darkest hour’, when in the same Japanese Operation, only a couple of short days later, on 9 April 1942, the Japanese focussed their attack on the harbour at Trincomalee and the British ships off Batticaloa. The HMS Hermes left the Royal Naval Base of Trincomalee, Ceylon escorted by the Australian Destroyer HMAS Vampire and HMS Hollyhock looking to engage the Imperial Japanese fleet which had attacked Colombo.
While sailing south off Batticaloa on the East Coast of Ceylon, this British flotilla was also attacked by the Japanese Carrier-Borne dive-bombers from the Imperial Japanese Task Force now in the process of attacking the Naval Base at Trincomalee.
Approximately 70 Japanese aircraft were despatched to bomb the HMS Hermes which sank within ten minutes of being hit by numerous aircraft bombs. HMAS Vampire was also sunk by bombs a short while later.
HMS Hermes ablaze and sinking
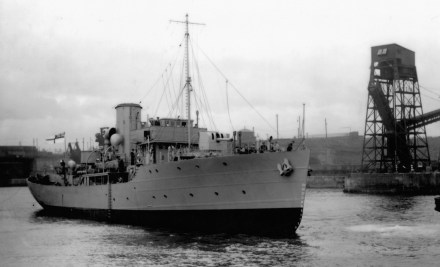
The HMS Hollyhock was about 7 nautical miles from the HMS Hermes escorting a tanker, the RFA Athelstane when the Hermes came under attack. The Hollyhock came under attack by the same Japanese aircraft and it too was bombed and sunk.
Once again, the HMS Hermes also had a very large South African Naval Forces contingent seconded to it on board, and the same applied to the HMS Hollyhock, and therefore once again there is a large of loss of South African life in this action against the Imperial Japanese fleet.
For a full story on the HMS Hermes and her long association with South Africa, see this Observation Post by clicking this link “Dante’s Inferno”; Recounting South African sacrifice on the HMS Hermes
For a full story on the HMS Hollyhock and her long association with South Africa, see this Observation Post by clicking this link “She immediately blew up”; Recounting South African sacrifice on the HMS Hollyhock
HMS Hollyhock
The Honour Roll
Total South African Naval Force (SANF) losses on the HMS Cornwall and HMS Dorsetshire in the single day of action were as follows (MPK means “missing presumed killed”):
HMS Cornwall
BESWETHERICK, Hedley C, Ordinary Seaman RNVR, 86671 (SANF), MPK
BOTES, John S, Stoker 2c RNVR, 68924 (SANF), MPK
COMMERFORD, Noel P, Able Seaman RNVR, 66493 (SANF), MPK
CRAWFORD, Cecil E, Act/Engine Room Artificer 4c RNVR, 67922 (SANF), MPK
DU PREEZ, Charles P H, Able Seaman, 68175 (SANF), MPK
DUTTON, Charles C, Stoker 2c RNVR, 68949 (SANF), MPK
HANSLO, Raymond F, Able Seaman RNVR, 68295 (SANF), MPK
KEITH, Kenneth I B, Able Seaman RNVR, 66742 (SANF), MPK
KENYON, Graeme A B, Able Seaman RNVR, 68002 (SANF), MPK
KIRSTEN, Monty G W, Able Seaman RNVR, 68917 (SANF), MPK
LAW, Edward, Act/Engine Room Artificer 4c RNVR, 66760 (SANF), MPK
MCDAVID, William K, Stoker 2c RNVR, 69138 (SANF), MPK
MITCHELL, William A, Stoker 1c RNVR, 68796 (SANF), MPK
PALMER, Walter A, Able Seaman RNVR, 68344 (SANF), (rescued, aboard HMS Enterprise), Died of Wounds
SPENCE, Noel W, Ordinary Seaman RNVR, 68732 (SANF), MPK
SQUIRES, John E, Ordinary Seaman RNVR, 68728 (SANF), MPK
STEPHEN, Eric B, Ordinary Seaman RNVR, 68861 (SANF), MPK
SWANN, Lawrence T, Stoker 1c RNVR, 68710 (SANF), MPK
THORPE, Maurice, Stoker 2c RNVR, 69140 (SANF), MPK
VERSFELD, Peter H S, Able Seaman RNVR, 68859 (SANF), MPK
VINK, Benjamin F, Ordinary Seaman RNVR, 68860 (SANF), MPK
WILLSON, Gerald F, Stoker 2c RNVR, 69006 (SANF), MPK
WRIGHT, Thomas H, Able Seaman RNVR, 68039 (SANF), MPK
HMS Dorsetshire
BELL, Douglas S, Ty/Act/Leading Stoker, 67243 (SANF), MPK
BRUCE, Alexander M, Stoker 2c, 67907 (SANF), MPK
CONCANON, Harold Bernard, Surgeon Lieutenant (Doctor)
EVENPOEL, Albert, Stoker 2c, 67909 (SANF), MPK
GEFFEN, Sender, Stoker 1c, 68035 (SANF), MPK
HOWE, Horace G, Ordinary Seaman RNVR, 68680 (SANF), MPK
KENDRICK, George, Stoker 2c, 67910 (SANF), MPK
MCINTYRE, Norman G, Able Seaman, 67446 (SANF), MPK
MCLELLAN, Robert, Ordinary Telegraphist, 67897 (SANF), MPK
MILNE, Lawrence Victor, Able Seaman
MORROW, Douglas E, Able Seaman, 67989 (SANF), MPK
ORTON, Charles P, Able Seaman, 68009 (SANF), MPK
REDMAN, Roland A, Leading Stoker, 67406 (SANF), MPK
SCOTT, William J, Able Seaman, 68007 (SANF), MPK
SEVEL, Harry, Stoker 1c, 68100 (SANF), MPK
VAN ZYL, David Isak Stephanus, Stoker 1st Class
WILLETT, Amos A S, Stoker 1c, 67240 (SANF), MPK
WILLIAMSON, Walter N, Able Seaman, 67803 (SANF), MPK
But, unfortunately there is more. As in the same Japanese Operation, just a couple of days later saw the loss of the HMS Hermes and HMS Hollyhock (also lost in a single day), the honour roll of South Africans on board these two fighting ships who were lost is as follows:
HMS Hermes
BRIGGS, Anthony Herbert Lindsay Sub-Lieutenant (Engineer) Royal Navy (South African national), MPK
BRYSON, Neil W, Ordinary Telegraphist, 69147 (SANF), MPK
BURNIE, Ian A, Able Seaman, 67786 (SANF), MPK
CLAYTON, Frederick H, Act/Engine Room Artificer 4c, 68102 (SANF), MPK
DE CASTRO, Alfred T, Stoker 1c, 67914 (SANF), MPK
KEENEY, Frederick W, Able Seaman, 67748 (SANF), MPK
KEYTEL, Roy, Able Seaman, 67296 (SANF), MPK
KIMBLE, Dennis C, Act/Engine Room Artificer 4c, 67600 (SANF), MPK
KRAUSE, Frederick E, Able Seaman, 68321 (SANF), MPK
RAPHAEL, Philip R, Able Seaman, 67841 (SANF), MPK
RICHARDSON, Ronald P, Able Seaman, 67494 (SANF), MPK
RILEY. Harry Air Mechanic 2nd Class, Fleet Air Arm, Royal Navy (South African national), MPK
TOMS, Ivanhoe S, Able Seaman, 67709 (SANF), MPK
VICKERS, Colin P, Able Seaman, 68296 (SANF), MPK
VORSTER, Jack P, Able Seaman, 67755 (SANF), MPK
WHITE, Edward G, Stoker, 68026 (SANF), MPK
WIBLIN, Eric R, Able Seaman, 67717 (SANF), MPK
YATES, Philip R, Supply Assistant, 67570 (SANF), MPK
Included in this Honour Roll is also a South African serving with the Royal Navy’s Fleet Air Arm on the HMS Hermes.
RILEY, H, Air Mechanic, Fleet Air Arm, HMS Hermes, died 9 April 1942
HMS Hollyhock
ANDERSON, Henry G, Able Seaman, 67501 (SANF), MPK
BASTON, Douglas T, Act/Engine Room Artificer 4c, 68600 (SANF), MPK
BUITENDACH, James M, Stoker 2c, 69223 (SANF), MPK
JUBY, Kenneth J, Ordinary Seaman, 69211 (SANF), MPK
LEACH, Peter A D H, Stoker 2c, 69225 (SANF), MPK
Lest we forget the tremendous sacrifice of our countrymen in this world war for the liberation of human kind.
Why is it important we get this history right?
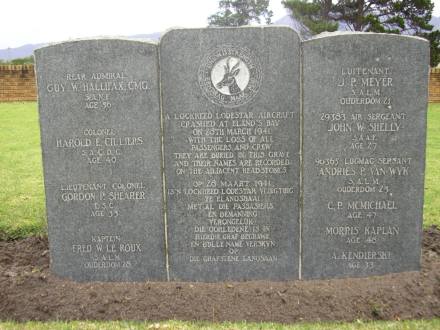
 So there we have it, the South African Navy’s biggest single loss in a single day – 41 souls, a ‘black day’ and added together with the HMS Hermes and HMS Hollyhock , we see a complete total of 65 South African souls lost in one single engagement at sea – qualifying a very ‘black week’ – The Easter Sunday Raid and this then marks the Easter period as the South African Navy’s ‘Darkest Hour’.
But is this correct – is this the full complement of South Africans lost in the incident? The answer unfortunately is – probably not.
Whilst the honour rolls distinguish the South African Naval Forces personnel seconded to British ships, they do not distinguish the South Africans who joined the Royal Navy directly in either Simonstown or in the United Kingdom – of which there were thousands and those who lost their lives are now listed under the Royal Navy’s honour roll.
The ‘old’ South African Defence Force (SADF) did not maintain these records, nor was a honour roll tracked by the South African Navy and simply put, when the Nationalists broke the formal ties with the United Kingdom and the Commonwealth, and after the resultant four decades in the ‘wilderness’ during the Apartheid epoch – many of these names are now ‘lost’.to all of us as South Africans.
To find out which of these are South Africans requires research into each and every case on the Royal Navy’s record – a momentous task which some dedicated people looking into this are only now beginning to get their heads around. Here we must thank the likes of Glenn Knox, David Bennet, Allan du Toit, Cameron Kinnear and Graham Du Toit and a handful of others for sterling work recovering this history.
So, in all likelihood more than just ’64’ South Africans died in this action, and why is this important for us to know who they were? Read this letter I received when I published this honour roll and action in a previous article on the HMS Dorsetshire it says everything as to the importance of this work:
Letter from Chris Crossley
Hi Peter,
Just another story for you! This post you put up on the Legions page has some amazing history which you wouldn’t know about but I am happy to share with you to show my gratitude for these “nuggets” of info you share with us.
My wife, Tracy, was an adopted child who after 35 years found her birth parents. Wonderful people they turned out to be and we are building a relationship with them that is priceless. As things go, curiosity led us to find out about family history and Tracy’s birth Dad told us about an uncle of his that was lost during the war. He was in the SAN and went down with “some” ship somewhere. He was married at the time and his wife, on hearing the news that her husband was lost at sea (MIA) never gave up on the hope of his return to Durban because he was never seen and not confirmed deceased. Because of this, she never remarried and passed away many years later, remaining faithful to her husband. Her husband was Roland Redman who served with the SA Navy volunteers on the HMS Dorsetshire that your story includes. His name is included in the Role of Honour for the Dorsetshire.
None of the wider family have ever known what happened to him and the facts and details of his service were not known by the surviving family members either. This last Saturday evening, I was talking to my wife’s birth Dad when he recounted the scant details he had of his uncle. I went on line and found your article and shared it with him on fb. Well he was overcome by this information as well as other members of his family and now for the first time in seventy odd years the facts of Uncle Roland, his service and his sacrifice are now known and cherished by his family left behind.
As an historian, I am sure this story will be something that you can cherish as your post has made a huge difference to some wonderful people! Thank you.
Chris Crossley
See When “nuggets” of history make a BIG difference
In Conclusion
Now, with this letter in mind, I cannot think of a better reason to get this history right and establish the correct commemorations and full honour roll. We owe it to our countrymen whose sacrifice brought us international freedom and liberty – it is our duty to carry this flame of remembrance and rid ourselves of the divisive and petty politics of one-upmanship played out by politicians with agendas (nationalists and the ANC) – this politicisation shrouds our most honourable history and only serves to dishonour the sacrifice of our South African servicemen and women – which is by its very nature is as ‘unforgivable’ as it is ‘dishonourable’.
Related work and Links:
For related work in the Observation Post on the above story, click on the following links:
SS Mendi: Let us die like brothers … the silent voices of the SS Mendi finally heard
HMSAS Southern Floe: ‘A sole survivor and a ship’s crest’; the South African Navy’s first loss – HMSAS Southern Floe
HMSAS Parktown: The feisty South African minesweeper that went down fighting – HMSAS Parktown)
HMSAS Bever “Under a hail of shells”; Recounting the bravery and loss of HMSAS Bever
HMSAS Treern: The last South African Navy ship to be lost in action; HMSAS Treern
SAS President Kruger: “Out of the Storm came Courage” … the tragedy of the PK
South Africans lost on other Royal Navy ships:
HMS Barham: “She blew sky high”; Recounting South African sacrifice on the HMS Barham!
HMS Edinburgh: “Gold may shine; but it has no true light” South African sacrifice on the HMS Edinburgh
HMS Gloucester: A “grievous error”; Recounting South African Sacrifice on the HMS Gloucester
HMS Helca: “Every man for himself” … South African sacrifice and the sinking of HMS Hecla
HMS Neptune: South African sacrifice on the HMS Neptune
Written and Researched by Peter Dickens. References Wikipedia. CASUALTIES BY DATE and SHIP Compiled by Don Kindell sourced on the Royal Naval History Homepage. Image copyright of Royal Navy, SA Naval Reserve, Imperial War Museum. Japanese Imperial Ensign object, Imperial War Museum copyright.


 He moved to a small German community in Natal called ‘New Germany’, located just inland from Durban. ‘New Germany’ was established well before World War 2 in 1848 by a party of 183 German immigrants. With the strong cultural ties to Germany, German social clubs and many German compatriots, this island of German heritage in South Africa proved ideal for Heinz Schmidt to start again, and he did so with great success.
 To give an idea of the value his book from an insight perspective, the famous Rommel quotable quote as to using captured ‘booty’ (enemy equipment) for personal use is thanks to Schmidt’s work. Rommel, whose signature British issue goggles often worn above his visor on his cap said “Booty is permissible I assume; even for a general“. A quote which now finds itself in use in military outfits the world over when reasoning over the use of ‘booty’.
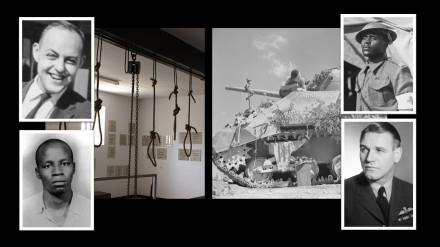
 Once again the media is alive on the anniversary of Solomon Mahlangu’s hanging, no mention of course as to why he was hanged, other than the ‘Apartheid Regime’ did it and he’s a struggle hero, and so much attention is given his hanging anniversary that it is attended by the Vice President with a message to remind every-one again as to the brutality of Apartheid and white oppression.
 In 1976 Mahlangu joined an African National Congress (ANC) MK military training camp called “Engineering” in Angola – one of the thousands of disenchanted youth from the Soweto uprising known in MK as the 76’s which fundamentally swelled MK numbers (up to then MK was a very small group).
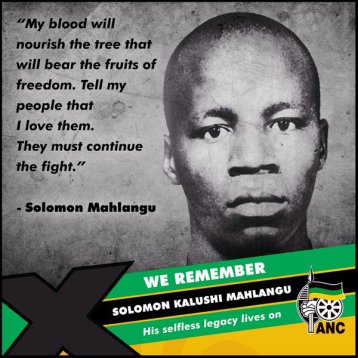
 So let’s examine John Harris and why he went to the gallows and not into political confinement.
 Much has been written on Sailor Malan as a Fighter Ace, his rules for combat and his command of 74 Squadron during the Battle of Britain which played such a pivot role in winning the Battle. His combat record, promotions and decorations alone are simply astonishing.
 Now consider this real military hero, Lucas Majozi. Here’s a very notable South African military hero. The highest decoration awarded to a Black South African soldier during the Second World War was the DCM (Distinguished Conduct Medal) and it was awarded to Lucas Majozi.

 MACWHIRTER, Cecil J, Ty/Sub Lieutenant (A), Fleet Air Arm (Royal Navy) 851 Squadron HMS Shah, air crash, SANF, MPK 14 April 1944
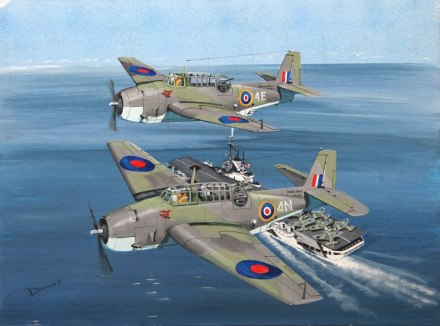
 WAKE, Vivian H, Ty/Lieutenant (A), FAA Fleet Air Arm (Royal Navy) 815 Squadron HMS Landrail, air crash, SANF, MPK 28 March 1945
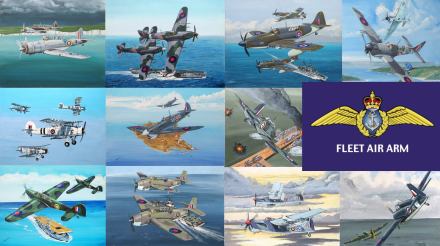
 The best way to summarise the Fleet Air Arm, its commitment and sacrifice is in fact found in the forward of Derrick Dickens’ Stringbag to Shar’ written by none other than the Admiral of the Fleet, HRH Prince Philip, Duke of Edinburgh K.G., K.T., O.M., G.B.E.
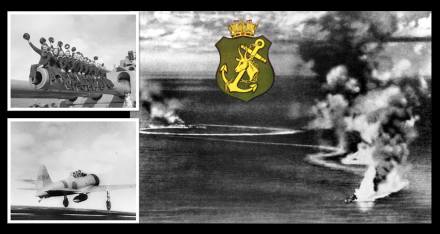


 The RAF came together on the 1st April 1918, a date recognised as the RAF’s officially recognised birthdate. On its creation the RAF, in the final year of World War 1, it was the most powerful air force in the world with over 20,000 aircraft and over 300,000 personnel.
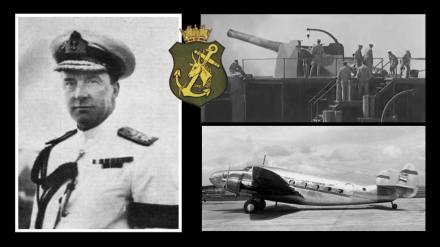
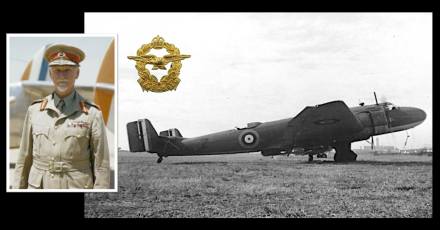
 This Easter we also remember Rear Admiral Guy Hallifax, the most senior South African Naval officer to lose his life during World War 2. His contribution to the Navy is significant as he literally is one of the founding fathers of the modern South African Navy as we know it.

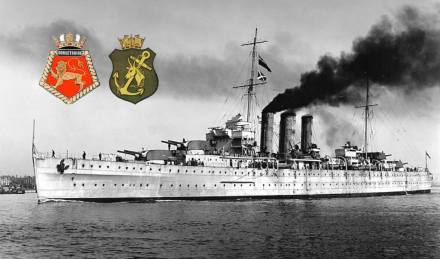
 The HMS Dorsetshire was a heavy cruiser and after commissioning in 1930 became the flagship of the 2nd Cruiser Squadron Atlantic Home Fleet. Before the war, from 1933 until 1936, HMS Dorsetshire served on the Africa Station. Her first recorded docking in the Selborne dry dock at Simonstown, South Africa was on 5 January 1934.
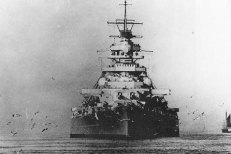

 BELL, Douglas S, Ty/Act/Leading Stoker, 67243 (SANF), MPK
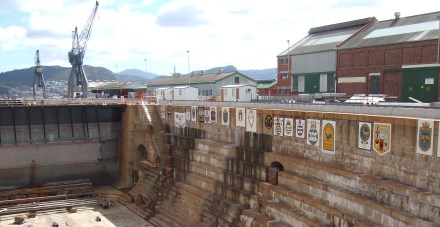 Their names have not been forgotten.
 HMS Cornwall was a heavy cruiser of the Kent-subclass of the County-class. When World War 2 began in September 1939, Cornwall was transferred from her pre-war China Seas operations to the Indian Ocean and joined Force I at Ceylon.
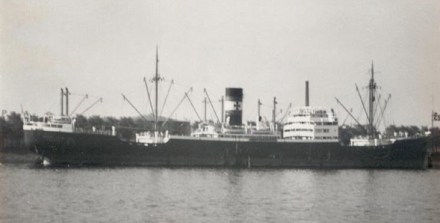

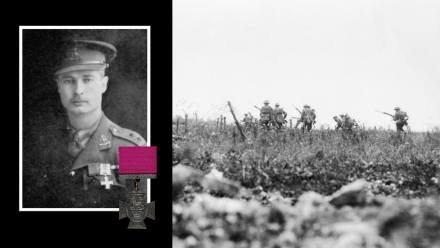
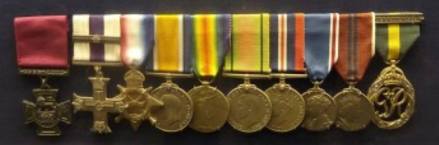
 This South African’s Victoria Cross turns 100 on the 21/22 March 2018, so today we honour another true South African hero and Victoria Cross recipient, and this man, Captain Reginald Frederick Johnson Hayward VC MC & Bar is one very extraordinary South African.
 CITATION
 Reginald worked at the British Broadcasting Corporations (BBC) Publications Department from 1947 to 1952 and as games manager of the Hurlingham Club from 1952 to 1967.